


Rockstar
Administrators
-
Joined
-
Last visited
Everything posted by Rockstar
-
 So, you've started Pokémon Legends: Z-A, you've picked your partner Pokémon (and it was an agonizing decision), but now you're doubting yourself. All three are irresistible, after all! Fear not, you're can still get all three starters in-game regardless of your first choice. Still, here's our guide on what the best Starter is in Legends: Z-A and how to get Chikorita, Tepig, and Totodile all in one playthrough, without relying on friends and trading. What's the best Starter Pokémon in Legends: Z-A?Here's the age-old question, then: who should you pick? Honestly, it doesn't really matter. Pick your favorite, or pick something different. Legends: Z-A is certainly tougher than other Pokémon games, but not by much, and there are enough options and type coverage that it really doesn't matter. Statistically, though? It's Tepig. It's the only one of the three whose final evolution is dual-typed, and it has the highest base attack stat of all three. it has a few weaknesses and its defense stat isn't amazing, plus that Mega Evolution doesn't change the game, but in terms of strength, it's the best easily. Totodile and Chikorita are no slouches, though. Chikorita is statistically the weakest of the three, but its Mega Evolution adds the Fairy-type to its arsenal. That's pretty good. It's the fastest of the trio and has the best special defense to boot. Plus Chikorita is adorable, right? Totodile was our pick (it's this author's favourite starter out of every Gen), and as well as having the highest base stat total, it's also extremely balanced. It's being a Water-type physical attacker limits its damage output a little, but its Mega Evolution also adds Dragon-type to the mix, making those Outrage swipes very dangerous. Ultimately, however, it's down to how you build your team: vary your types, movesets, and build a balance set of six, and you'll be a champ regardless. How to get all three Lumiose City starters Obviously you'll get to pick your starter Pokémon at the start; Urbain or Taunie will offer up one of Chikorita, Tepig, or Totodile to help get your luggage back from the thieving Pancham. This will be your companion for the entire game. But what about the other two? Well, if you want to get the others, you'll actually have to wait until the end of the game. The trio only become available in a brand new Wild Zone that opens up once you've rolled credits. A little annoying, but hey, at least they're available. Where to catch Chikorita, Tepig, and Totodile All three Pokémon are catchable in the game's final Wild Zone, Wild Zone 20, which appears in the centre of the map. As we said above, this only unlocks once you've beaten the main game; after that, you'll need to progress the post game story a tiny bit by speaking to your friends in Hotel Z then heading to Centrico Plaza to speak to Vinnie. Then, Wild Zone 20 is yours to explore. Totodile is found near the water, Chikorita in the grassy areas, and Tepig in the more brick-like area. Where to get Mega Stones for Chikorita, Tepig, and Totodile You'll get one of these three during the main story, right after you defeat Mega Absol and obtain the Absolite. The next day, AZ will hand you the Mega Stone that corresponds with the starter you picked at the start of the game. As for the other two, like with the absent starters, you won't be able to get them until the post game. Luckily, you don't need to hunt them down — they're sold at the Stone Emporium on Vernal Avenue. They're pricey, though: 100,000 Poké Dollars each. Make sure you save up your pennies for those! View full article
 -
Open world exploration game Outbound was previously announced for PS5, and now we know roughly when it's due to arrive. A new trailer for Square Glade Games' cozy camper van title has been released, confirming a release window of Q2 2026: In the game, you have a cute little camper van that you're free to drive around a colorful open world, and while you do that, you're able to craft yourself a lovely base on top of it. You'll need to fuel the van with natural resources like sunlight or wind, then go out and gather resources to craft your perfect mobile home. On top of that are elements like cooking, harvesting, and adopting a pet, which is probably optional but also definitely mandatory. You can play alone or with buddies in online co-op, and either way, it looks like a lovely, stress-free experience. We're looking forward to taking this one for a spin, but what are your thoughts on Outbound? Tell us in the comments section below.
-
.jpg.4f8c08e8c6597208d8a2f58a71853ee1.jpg) Hamster Corporation's Arcade Archives series is back with another cabinet classic on Switch 2. I got to check out Jet Ski racer Aqua Jet back in August, which was a lovingly crafted port. This time I'm revisiting the destructive tank combat of Namco's Tokyo Wars, which served as inspiration for The 3DO Company's N64 classic Battle Tanx: Global Assault. Aqua Jet was notable for having a cabinet containing a replica Jet Ski, something which can’t really be recreated on Switch (without some serious hardware modding). Tokyo Wars had a similar hardware quirk that provided a satisfying kickback to simulate your tank firing its payload. A feature that is, bafflingly, not emulated with the Switch 2 controllers' haptics. Aside from the complete lack of feedback when unleashing shells on enemy tanks, this port is as clean and generously featured as I've come to expect from Hamster Corp. The premise couldn't be simpler: Rival factions battle it out in the streets of Tokyo. You choose from White Force or Green Force and roll around the map, shelling any opposing tank you find, while avoiding your team’s armor. This was a great game back in the day and it's worth experiencing now, even if there isn't much to do in its two arenas. This 1996 title looks as polished as it possibly could be, outside of being remastered. Visuals and audio are crisp and suit docked and undocked modes equally, with many format options to tweak the experience to your liking. Special mention goes to crisp presentation of Akihiko Ishikawa's insane music, which makes you feel like you're at a sweaty Japanese rave instead of a warzone. Both English and Japanese versions of the game are playable in all available modes. Caravan time attack makes a return and can be played in split screen. Other modes can also be played in up to four-player local split screen. Much like other games in the Arcade Archives, all the content in Tokyo Wars has to offer can be experienced in minutes. An additional Multiplayer mode is the only thing that would extend the lifespan of this slight experience. Enjoyment comes from improving on your own performance and competing with others, as is usual with an arcade title. That said, the more of these Arcade Archives titles that Hamster Corp puts out, the more it becomes evident that an 'Arcade Archives 2 Collection' would be much more value for money than individual releases.
Hamster Corporation's Arcade Archives series is back with another cabinet classic on Switch 2. I got to check out Jet Ski racer Aqua Jet back in August, which was a lovingly crafted port. This time I'm revisiting the destructive tank combat of Namco's Tokyo Wars, which served as inspiration for The 3DO Company's N64 classic Battle Tanx: Global Assault. Aqua Jet was notable for having a cabinet containing a replica Jet Ski, something which can’t really be recreated on Switch (without some serious hardware modding). Tokyo Wars had a similar hardware quirk that provided a satisfying kickback to simulate your tank firing its payload. A feature that is, bafflingly, not emulated with the Switch 2 controllers' haptics. Aside from the complete lack of feedback when unleashing shells on enemy tanks, this port is as clean and generously featured as I've come to expect from Hamster Corp. The premise couldn't be simpler: Rival factions battle it out in the streets of Tokyo. You choose from White Force or Green Force and roll around the map, shelling any opposing tank you find, while avoiding your team’s armor. This was a great game back in the day and it's worth experiencing now, even if there isn't much to do in its two arenas. This 1996 title looks as polished as it possibly could be, outside of being remastered. Visuals and audio are crisp and suit docked and undocked modes equally, with many format options to tweak the experience to your liking. Special mention goes to crisp presentation of Akihiko Ishikawa's insane music, which makes you feel like you're at a sweaty Japanese rave instead of a warzone. Both English and Japanese versions of the game are playable in all available modes. Caravan time attack makes a return and can be played in split screen. Other modes can also be played in up to four-player local split screen. Much like other games in the Arcade Archives, all the content in Tokyo Wars has to offer can be experienced in minutes. An additional Multiplayer mode is the only thing that would extend the lifespan of this slight experience. Enjoyment comes from improving on your own performance and competing with others, as is usual with an arcade title. That said, the more of these Arcade Archives titles that Hamster Corp puts out, the more it becomes evident that an 'Arcade Archives 2 Collection' would be much more value for money than individual releases. -
Bandai Namco has confirmed that Tales of Berseria will be the next entry in the Tales RPG franchise to get the remaster treatment. Tales of Berseria Remastered will release for PS5 on 27th February 2026, priced at £34.99 / $39.99. You can watch the reveal trailer above. The new version features "enhanced graphics and optimized gameplay", which shall include a 4K resolution at 60 frames-per-second on PS5. There's also going to be a physical version alongside the digital option. Described as a "modern, high-quality retelling", the remaster also comes with quality of life updates like destination icons, enemy encounter toggles, early grade shop access, and more. "Enjoy the immersion with the DLC, which was launched alongside the original release, including costumes, useful items, and other fun extras." Here's the setup from the developer: Standard and Deluxe Editions are available to pre-order now on the PS Store, with the latter offering additional music, a digital artbook, and the Super Growth Support Herb Set for an extra £15 / $20. Today's news comes less than a month after the release of Tales of Xillia Remastered, and Bandai Namco has already confirmed it's remastering the sequel to that as well. So far, it's modernised Tales of Symphonia, Tales of Graces F, and Tales of Vesperia for PS5, PS4 systems. First released for PS4 in January 2017, we awarded the original version of Tales of Berseria an 8/10 and concluded: "Tales of Berseria takes a positive turn with a much darker theme, a great cast of characters, and perhaps the best storyline that the series has seen for quite some time."
-
As confirmed a few days ago, Microsoft will host its latest Xbox Partner Preview showcase this week - featuring a bunch of third-party titles with a focus on Xbox Play Anywhere and Xbox Game Pass. So, we're going to detail exactly when you can tune in, what you can expect to see, and where you'll be able to watch the Xbox Partner Preview November 2025 showcase! Without further ado... Xbox Partner Preview November 2025 DateThis upcoming Xbox Partner Preview showcase for 2025 takes place on Thursday, November 20th. Xbox Partner Preview Start Times November 2025The November 2025 Xbox Partner Preview showcase kicks off this Thursday at 10am PT / 1pm ET / 6pm GMT. How Long Is The Xbox Partner Preview Showcase?Microsoft hasn't confirmed the length of the November 2025 Xbox Partner Preview showcase, but looking at past versions of the event, you can expect the livestream to run for about 30 minutes in total. What Games Will Be At The Xbox Partner Preview Event?So far, Microsoft has confirmed three games that will be present at this Xbox Partner Preview: 007 First Light, Reanimal and Tides of Annihilation. Outside of those titles, Microsoft says we can expect "other great games heading to Xbox consoles, Xbox on PC, and Xbox Game Pass" - and finally, the team has confirmed that "all the games featured during Xbox Partner Preview are Xbox Play Anywhere" compatible. We're also hoping that the Silent Hill 2 Remake will show up following its recent release date leak - but that hasn't been confirmed ahead of the show! Where To Watch The Xbox Partner Preview ShowcaseYou can watch November 2025's Xbox Partner Preview event here at Pure Xbox on Thursday, where we'll be hosting the livestream complete with a chatroom to discuss it with other PX members! Alternatively, it'll be on YouTube and Twitch: YouTube Twitch We're sure you're aware by now that we round up all the news from these events once they're over, so if you miss the show (or you don't care to watch it live!), you'll be able to catch up on everything that happened here at PX following its conclusion.
-
The full release of Kirby Air Riders is right around the corner, and to make sure that everything is in tip-top condition on launch day (tomorrow), Nintendo has released a day one patch to up the game to ver. 1.1.1. The patch actually encompasses ver. 1.1.0 and 1.1.1, the former of which adds in the game's online modes, and the latter sets about fixing any unwanted bugs that might pop up along the way. There are a bunch of features included in this one too, such as the addition of a Team Battle to City Trial, the ability to share replays, and amiibo support for the upcoming Air Riders figures. The full patch notes were shared on the Japanese Nintendo Support website, and we've included the Google translation of them below: Kirby Air Riders Ver. 1.1.1 (19th November 2025)GeneralAn online mode has been added. - You can play online mode from the menu screen of "Connected Play" or each mode. - "Online" has been added to "Clear Checker." Local and LAN play are now available. - You can play by selecting "Connected Play" → "Nearby Play." A new competitive format called "Transfer Relay" has been added to "Air Ride." A new "Team Battle" battle format has been added to "City Trial." You can now convert "Replays" into video files. - You can convert them into video files by selecting "Record" on the playback settings screen for "Temporary Saved Data" or "Replay with Data" in "Replay." - A microSD Express card is required to use this function. You can now post "replays" and share them with other players. - You can post them from "Details" that appears after selecting each replay data in "Replay" -> "Data Replay" or "Video Replay". - You can watch replays from "Connected Play" -> "Watch". You can now train your FP (figure player) by holding up an amiibo from the "Kirby Air Rider" series. - You can read amiibo from "Miscellaneous Play" → "amiibo" or on the machine/rider selection screen in each mode. "Daily Air Ride" and "Limited Time Events" have been added. - You can participate in these events by selecting "Daily" or "Events" from the main menu. You can now set your "My Machine" to "Private." - If you set it to "Private," you will not be able to use that "My Machine" in online mode and it will not be visible to other players. - You can set this all at once by going to "Connected Play" → "Options" → "Make My Machine Public." - You can also set it individually from the list screen for each "My Machine." Road Trip has been balanced. OnlineIf your connection is very unstable, we've added restrictions that prevent you from hosting paddocks and creating races within the paddock. - You can still participate in paddocks and races hosted by other players. - You can check the status of your connection by going to "Connected Play" → "Options." Bug FixesFixed some issues to improve online play stability. Fixed an issue where online matchmaking would sometimes take a long time to complete. Fixed an issue where a match would not start properly after matching for online matches. Fixed an issue in "Paddock" where the game would not progress after performing certain operations. Fixed an issue in "City Trial," "Quick Race," and "Team Battle" where performing certain operations when joining a friend would cause the game to stop progressing. Fixed an issue where performing certain operations during multiplayer Air Ride Relay on a single console would cause the game to freeze. Fixed an issue where performing certain operations while using "FP (Figure Player)" in "Nearby Communication" would cause the game to stop progressing. Fixed a rare issue that could cause the game to become stuck while playing Road Trip. Fixed an issue where certain tasks in "Clear Checker" would not be completed even if the conditions were met. Additionally, we have fixed some issues to make the game more enjoyable. Those with the game pre-loaded will see this update available to download right now. Otherwise, it'll get encompassed with your downloads when you pick it up from tomorrow. We had a great time with Kirby Air Riders, calling it "a cracking sequel that gives solo players much more to dig into with its story campaign, whilst also bringing all-new levels of shiny graphics, bells and whistles to its returning City Trial, Air Ride, and Top Down Racing modes" in our review.
-
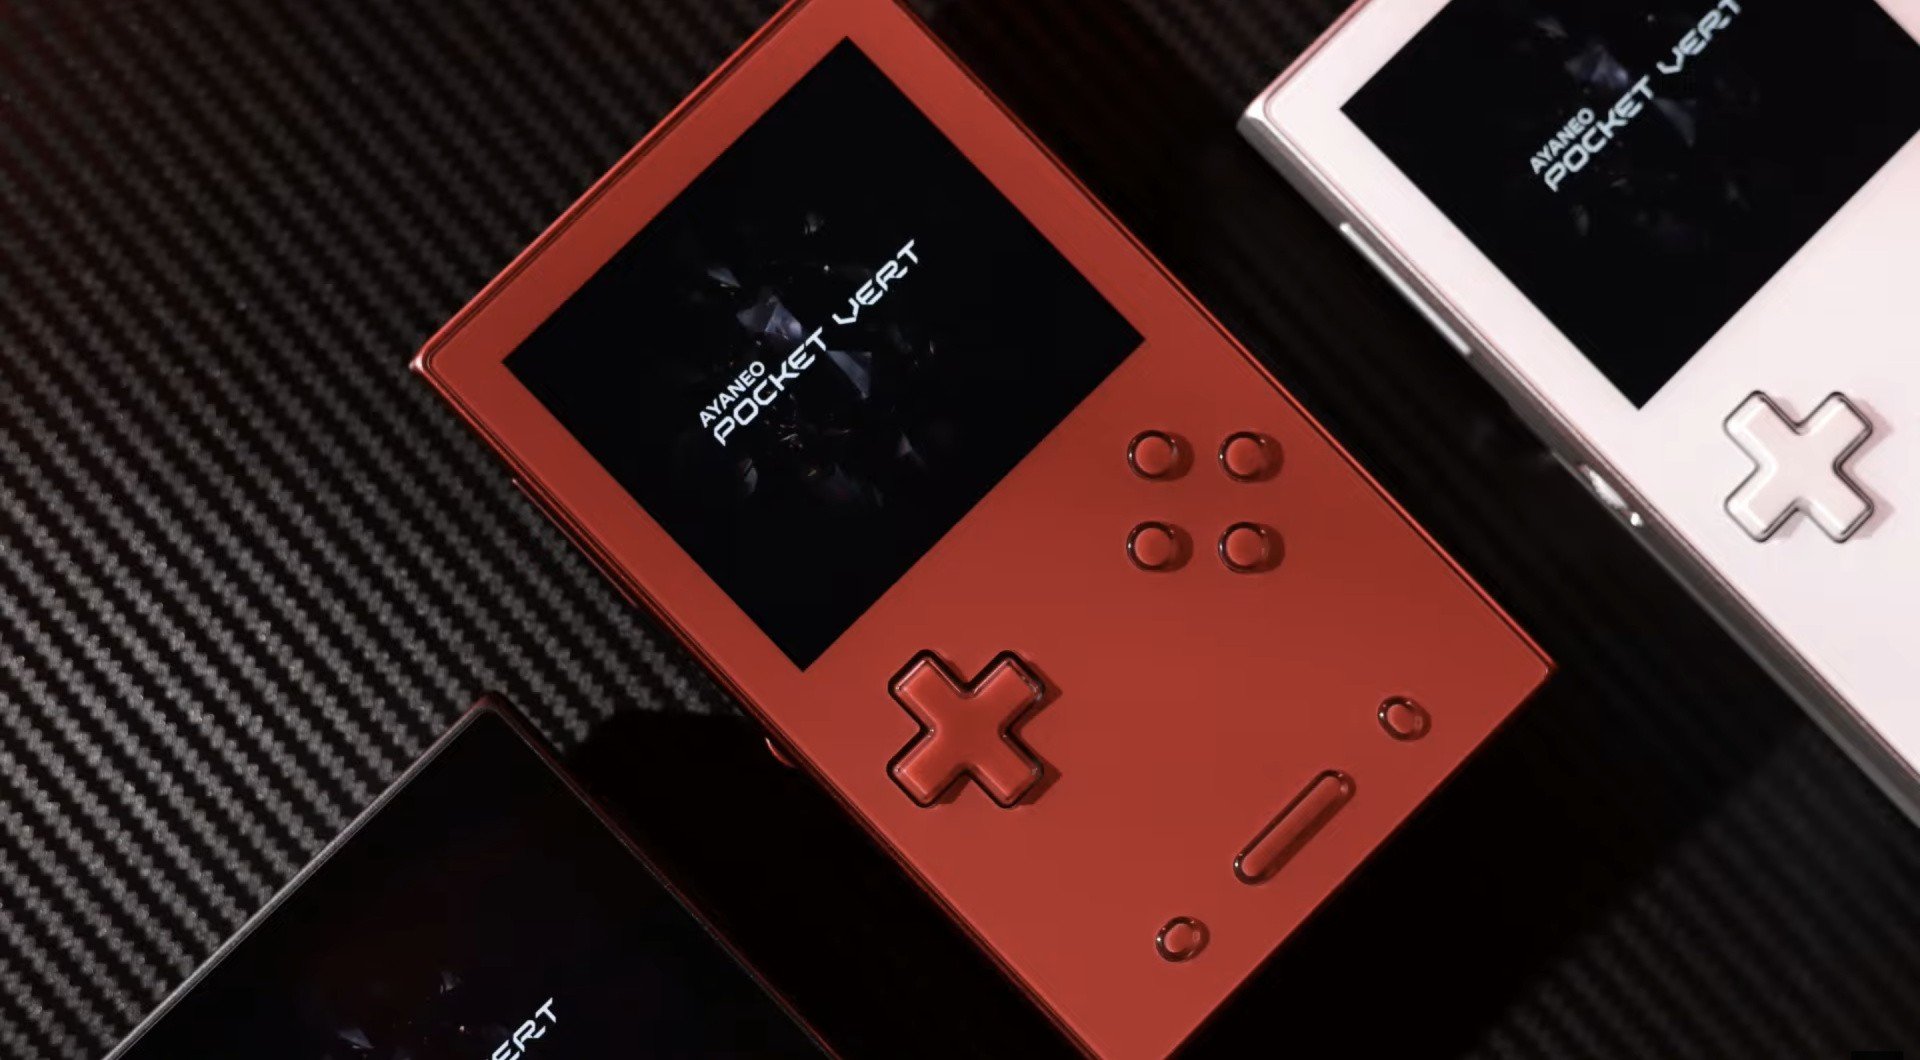 Yesterday, AYANEO held a special "Sharing Session" for its upcoming "premium" handheld, the AYANEO Pocket VERT, going over some of the features that will be included with the Game Boy-style device. Many of these features we'd already heard about in the past, such as the fact that it will include diamond-cut shoulder buttons, a 3.5" 1600×1440 LCD screen, and will offer "10× pixel-perfect Game Boy scaling". But there was also another surprise announcement from AYANEO's CEO, Arthur Zhang, which we can safely say we didn't expect. That announcement was that the device will actually include a large hidden dual-mode trackpad located beneath its glass front, which will be situated beneath the D-Pad and buttons. This touchpad is being described as suitable for "diverse use cases" and will reportedly be programmable to act as a stand-in for both joysticks, if you decide to try and load up any games featuring analog movement. Of course, this isn't the first time AYANEO has added a touch-screen to a Game Boy-inspired device. If you cast your mind back to last year, you may remember that AYANEO previously included a trackpad on its Pocket DMG device, with the option there being a stand-in for its missing right analog stick. Reviewing that machine, Hookshot's editorial director Damien McFerran called that solution "surprisingly decent" despite his initial "misgivings". So, it will be interesting to see how its implementation here will compare. Other than the hidden trackpad, AYANEO also shared that AYANEO Pocket VERT will feature a high-density 6000mAh battery and active air cooling, and has stated it will also include the MagicSwitch key, previously introduced on the Pocket DMG, to control the volume. Three colourways are also expected to be available at launch. These include Midnight Black, Moon White, and Lava Red. Right now, it's currently unknown exactly when the AYANEO Pocket VERT will go on sale or what chipset will be powering it, but we'll keep our eyes peeled for any more news as it emerges.
 -
Yesterday, AYANEO held a special "Sharing Session" for its upcoming "premium" handheld, the AYANEO Pocket VERT, going over some of the features that will be included with the Game Boy-style device. Many of these features we'd already heard about in the past, such as the fact that it will include diamond-cut shoulder buttons, a 3.5" 1600×1440 LCD screen, and will offer "10× pixel-perfect Game Boy scaling". But there was also another surprise announcement from AYANEO's CEO, Arthur Zhang, which we can safely say we didn't expect. That announcement was that the device will actually include a large hidden dual-mode trackpad located beneath its glass front, which will be situated beneath the D-Pad and buttons. This touchpad is being described as suitable for "diverse use cases" and will reportedly be programmable to act as a stand-in for both joysticks, if you decide to try and load up any games featuring analog movement. Of course, this isn't the first time AYANEO has added a touch-screen to a Game Boy-inspired device. If you cast your mind back to last year, you may remember that AYANEO previously included a trackpad on its Pocket DMG device, with the option there being a stand-in for its missing right analog stick. Reviewing that machine, Hookshot's editorial director Damien McFerran called that solution "surprisingly decent" despite his initial "misgivings". So, it will be interesting to see how its implementation here will compare. Other than the hidden trackpad, AYANEO also shared that AYANEO Pocket VERT will feature a high-density 6000mAh battery and active air cooling, and has stated it will also include the MagicSwitch key, previously introduced on the Pocket DMG, to control the volume. Three colourways are also expected to be available at launch. These include Midnight Black, Moon White, and Lava Red. Right now, it's currently unknown exactly when the AYANEO Pocket VERT will go on sale or what chipset will be powering it, but we'll keep our eyes peeled for any more news as it emerges. View full article
-
 Canari is a name you'll become all too familiar with in Pokémon Legends: Z-A, but you won't actually meet her for a few hours. Instead, you'll get acquainted with her rather adorable plush dolls. This guide will explain everything you need to know about the Canari Plush Dolls, what they do, where to get them, and just how to get them. Canari Plush Dolls explained - Pokémon Legends: Z-ACanari Plush dolls are key items that sit in your inventory and provide a handful of boosts to you throughout the game. You don't need to equip them — as long as you've bought the doll, it'll provide you with the little boost. There are five different types of Canari Plush: Red, Gold, Pink, Green, and Blue. You'll get your first one, a Red Canari Plush, from Tarragon after reaching Rank Y in the Z-A Royale. Afterwards, you'll be able to buy more dolls and upgrades for existing dolls wby spending Colorful Screws. Where to buy Canari Dolls You can buy Canari Dolls at the Racine Construction building, which is on South Boulevard in the Vert Sector. You'll know you're in the right spot when you see a construction worker standing outside. Make sure you head inside the building to unlock it as a fast travel spot! How to get Colorful Screws Colorful Screws will be available to collect as soon as you get your first Canari Plush. These can be found all across Lumiose City on the rooftops and in many scaffolding platforming puzzles. You'll see them as they emit a purple glow; don't worry, you can't get every single one immediately, so just pick them up as and when you can. All Canari Plush effectsEvery plush brings with it a different benefit, so they're all worth getting eventually. Here's what all five dolls do, and all the upgrades, including screw cost. Many thanks to Serebii for recording the exact effects of these dolls! Canari Plush Effect Level 1 (3 Screws) Level 2 (5 Screws) Level 3 (8 Screws) Red Canari Plush Increases Exp. points +5% Exp earned +10% Exp earned +15% Exp earned Gold Canari Plush Increases prize money from beating trainers in Z-A Royale Increases your prize medal conversion by *1.15 Increases your prize medal conversion by *1.299 Increases your prize medal conversion by *1.5 Pink Canari Plush Increases the amount of Mega Shards dropped by Mega Crystals Small Crystals drop 2-4 Shards Large Crystals drop 8-12 Small Crystals drop 3-5 Shards Large Crystals drop 10-14 Small Crystals drop 5-7 Shards Large Crystals drop 14-18 Green Canari Plush Increases your (the trainer's) health HP increases to 150 HP increases to 200 HP increases to 250 Blue Canari Plush Makes it easier to catch Pokémon Catch rate increases by 10% Catch rate increases by 20% Catch rate increases by 35% What's Canari Plush should I get first? For our money — or should that be Colorful Screws? — we think the Blue Canari Plush should be the first one you grab. This will help make some of those tougher Pokémon much easier to catch. Take that Dratini! It'll just be less of a headache building teams with rarer Pokémon as you progress through the story. As for the rest, Pink, Gold, then Red are probably the next three you should focus on: you'll need Mega Shards to trade for Mega Stones later down the line, while Gold will help you make money nice and quickly. Red is always worth grabbing if you need an Exp. boost and are training 'mons up. Green should be your last pick — perhaps if you're struggling with a Rogue Mega Evolution fight.
 -
Canari is a name you'll become all too familiar with in Pokémon Legends: Z-A, but you won't actually meet her for a few hours. Instead, you'll get acquainted with her rather adorable plush dolls. This guide will explain everything you need to know about the Canari Plush Dolls, what they do, where to get them, and just how to get them. Canari Plush Dolls explained - Pokémon Legends: Z-ACanari Plush dolls are key items that sit in your inventory and provide a handful of boosts to you throughout the game. You don't need to equip them — as long as you've bought the doll, it'll provide you with the little boost. There are five different types of Canari Plush: Red, Gold, Pink, Green, and Blue. You'll get your first one, a Red Canari Plush, from Tarragon after reaching Rank Y in the Z-A Royale. Afterwards, you'll be able to buy more dolls and upgrades for existing dolls wby spending Colorful Screws. Where to buy Canari Dolls You can buy Canari Dolls at the Racine Construction building, which is on South Boulevard in the Vert Sector. You'll know you're in the right spot when you see a construction worker standing outside. Make sure you head inside the building to unlock it as a fast travel spot! How to get Colorful Screws Colorful Screws will be available to collect as soon as you get your first Canari Plush. These can be found all across Lumiose City on the rooftops and in many scaffolding platforming puzzles. You'll see them as they emit a purple glow; don't worry, you can't get every single one immediately, so just pick them up as and when you can. All Canari Plush effectsEvery plush brings with it a different benefit, so they're all worth getting eventually. Here's what all five dolls do, and all the upgrades, including screw cost. Many thanks to Serebii for recording the exact effects of these dolls! Canari Plush Effect Level 1 (3 Screws) Level 2 (5 Screws) Level 3 (8 Screws) Red Canari Plush Increases Exp. points +5% Exp earned +10% Exp earned +15% Exp earned Gold Canari Plush Increases prize money from beating trainers in Z-A Royale Increases your prize medal conversion by *1.15 Increases your prize medal conversion by *1.299 Increases your prize medal conversion by *1.5 Pink Canari Plush Increases the amount of Mega Shards dropped by Mega Crystals Small Crystals drop 2-4 Shards Large Crystals drop 8-12 Small Crystals drop 3-5 Shards Large Crystals drop 10-14 Small Crystals drop 5-7 Shards Large Crystals drop 14-18 Green Canari Plush Increases your (the trainer's) health HP increases to 150 HP increases to 200 HP increases to 250 Blue Canari Plush Makes it easier to catch Pokémon Catch rate increases by 10% Catch rate increases by 20% Catch rate increases by 35% What's Canari Plush should I get first? For our money — or should that be Colorful Screws? — we think the Blue Canari Plush should be the first one you grab. This will help make some of those tougher Pokémon much easier to catch. Take that Dratini! It'll just be less of a headache building teams with rarer Pokémon as you progress through the story. As for the rest, Pink, Gold, then Red are probably the next three you should focus on: you'll need Mega Shards to trade for Mega Stones later down the line, while Gold will help you make money nice and quickly. Red is always worth grabbing if you need an Exp. boost and are training 'mons up. Green should be your last pick — perhaps if you're struggling with a Rogue Mega Evolution fight. View full article
-
 With a new real-time battle system, Pokémon Legends: Z-A has upgraded Pokémon battles to a whole new level, and with it comes a bit of a learning curve. If you want to get to grips with the basics, or become a pro, then this guide will help you understand everything you need in order to get through the game. Pokémon Legends: Z-A: Battle System - Beginner TipsMoving to real-time doesn't just change things from turn-based to action-based, it's a bit deeper than that! You can now fully move around the battle arena, as can your Pokémon! That adds a whole layer of strategy already, but there's a lot going on. So here's some basic tips we suggest focusing on — some of these are similar to previous Pokémon games, but others are a little more unique. Yes, you can avoid attacksWho needs an accuracy stat? Not Legends: Z-A it seems. Almost every single attack in the game is now reliant on a number of factors, not just whether they'll hit or not. Some attacks, like Quick Attack, and guaranteed to hit, so there's no need to run around like crazy trying to dodge that. But the Hydro Pumps, Solar Beams, Shadow Balls of the world, watch out. Keep an eye on your opponent to see what attack they're going to use. Watch their animation, and move. Don't command your Pokémon to attack while they're getting ready. And, if they get close, lure them in, then move at the last second. No Headbuts allowed! Oh, and attacks like Pin Missile, that used to hit between 3-5 times? Those are dodgeable now too. Stay out of traps This should go without saying, but considering the way traps work in Z-A, it's a little bit new here. Spikes, Poison Spikes, Stealth Rock, Fire Spin, Future Sight, and a bunch of other moves no longer just sit on the field for guaranteed damage each turn — or prep a power boost on the next attack. Instead, these sit in a specific spot and will stay there until they expire. You don't have to step in them, and you shouldn't! Type advantage is still very importantAnother fairly obvious one, but with all the changes here, it's worth reiterating — pay attention to Pokémon types. Don't take a Grass-type into a fight with a Fire-type; avoid using Dragons against Fairies. You get the idea. Mix up your attack types, too, as you would a normal Pokémon game: don't just give Floette Fairy-type moves; give it some Grass, some Normal, some Poison. TMs are reusable so don't be shy about using them. Keep close(ish) to your PokémonThis is maybe the most important thing we learned while playing Pokémon Legends: Z-A — don't stand far, far away from your active Pokémon. Sure, it puts you in a bit of danger, but the crucial thing is that it stops your Pokémon from running back and forth between you and the enemy. Keeping close to your 'mon means not only can you see what's going on a little better, but it also means you can lead your buddy away from danger. You can't control them directly, but they will follow your movements, and the close you are, the better you know that you'll be able to avoid damage. Lock on - but not all the time Holding ZL will lock onto the enemy, allowing your Pokémon to use one of its moves. But it also makes you move slower and means you can't dodge roll. So, if you see your opponent readying a move, let go! And run! You really only want to lock on to keep an eye on the opposing Pokémon (if you end up far away) and to ready an attack of your own. Stat boosts (and debuffs) are worth itOutside of competitive battling, buffs and debuffs didn't always feel worth it in the mainline games — they waste a turn and more often than not the gain didn't outweigh the damage we took. That changes in Legends: Z-A. Now, because you can prep as you sneak up on an enemy, or even just move out of the way, buffing is absolutely worth it. Debuffing, too, particularly in the early game. Fight Mega with Mega This won't apply until your a few hours into the game, but we figured it was worth saying here — if your opponent Mega Evolves, or you're up against a Rogue Mega Evolution, you ideally want to fight fire with fire and do the same. Mega Evolutions have hugely improved stats over their base forms, and that means that, more often than not, they're more defensive and have higher HP. Super effective attacks are great and all, but they'll make less of a dent. If you have the power to Mega Evolve when your opponent does, then just do it. it's not worth the hassle, and you'll get the energy back easily as you continue. Pokémon Legends: Z-A: Battle System - Advanced TipsAlright, so you're getting pretty good at this now. But there are some extremely useful and very unique situations to react to throughout Z-A, so for those of you who want to become the A-Ranked trainer of Lumiose, read on. These tips will be very helpful for when you take on the later Z-A Royale challenges or try to catch some difficult Pokémon in the post-game. Put your Pokémon away! Yes, you heard — put your 'mon back in its ball! You don't always need to be doing damage, and because you can't really control your Pokémon's movements, in situations where it's hard to get them to avoid damage (particularly in Rogue Mega Evolution fights), stick 'em back in your pocket. Many fights have wide area-of-effect attacks that are pretty tough to avoid without worrying about your Pokémon Pal too. So save yourself some potions and just put them away for a few seconds. Wait for the attack to stop, and send them out again. If your Pokémon is Mega Evolved, then don't worry, they won't revert back inside the ball. They're raring to go once you send them out again. Stack up effectsSo you can't stack tons of status effects on top of each other, but you can stack say, Poison with a lovely-placed Fire Spin. Not only will both of these chip away at damage, but they're easy to reapply and overtime can take out a significant chunk of health. Add in some of your own attacks and, well, it's damage city over here. Don't be afraid to double up move types Something that's a little bit of a no-no in mainline Pokémon — doubling up moves of the same type. Not always the case, but variety is the spice of life and all that. That's less of an issue now thanks to attacks being on cooldown. You can just rotate between two Water-type moves against a Rock-type opponent and absolutely destroy them, for instance. One isn't going to run out of PP anymore, after all. Plus Moves are A+Plus Moves become available around the same time you get your first Mega Stone. They consume part of the Mega Gauge, meaning it'll take longer to Mega Evolve, so you might be worried about using them. Don't be. Plus Moves make 'mons who can't Mega Evolve pretty darn powerful. Don't just save them for the Florges' and Pangoros of the world, though — they're great for every Pokémon. Pressing + before using an eligible Plus Move gives your attack a Mega-style boost to its power. Attacks get stronger and have a wider area-of-effect, for instance. In situations where you're struggling, or when you're just not building up the energy to Mega Evolve, use Plus Moves.
 -
With a new real-time battle system, Pokémon Legends: Z-A has upgraded Pokémon battles to a whole new level, and with it comes a bit of a learning curve. If you want to get to grips with the basics, or become a pro, then this guide will help you understand everything you need in order to get through the game. Pokémon Legends: Z-A: Battle System - Beginner TipsMoving to real-time doesn't just change things from turn-based to action-based, it's a bit deeper than that! You can now fully move around the battle arena, as can your Pokémon! That adds a whole layer of strategy already, but there's a lot going on. So here's some basic tips we suggest focusing on — some of these are similar to previous Pokémon games, but others are a little more unique. Yes, you can avoid attacksWho needs an accuracy stat? Not Legends: Z-A it seems. Almost every single attack in the game is now reliant on a number of factors, not just whether they'll hit or not. Some attacks, like Quick Attack, and guaranteed to hit, so there's no need to run around like crazy trying to dodge that. But the Hydro Pumps, Solar Beams, Shadow Balls of the world, watch out. Keep an eye on your opponent to see what attack they're going to use. Watch their animation, and move. Don't command your Pokémon to attack while they're getting ready. And, if they get close, lure them in, then move at the last second. No Headbuts allowed! Oh, and attacks like Pin Missile, that used to hit between 3-5 times? Those are dodgeable now too. Stay out of traps This should go without saying, but considering the way traps work in Z-A, it's a little bit new here. Spikes, Poison Spikes, Stealth Rock, Fire Spin, Future Sight, and a bunch of other moves no longer just sit on the field for guaranteed damage each turn — or prep a power boost on the next attack. Instead, these sit in a specific spot and will stay there until they expire. You don't have to step in them, and you shouldn't! Type advantage is still very importantAnother fairly obvious one, but with all the changes here, it's worth reiterating — pay attention to Pokémon types. Don't take a Grass-type into a fight with a Fire-type; avoid using Dragons against Fairies. You get the idea. Mix up your attack types, too, as you would a normal Pokémon game: don't just give Floette Fairy-type moves; give it some Grass, some Normal, some Poison. TMs are reusable so don't be shy about using them. Keep close(ish) to your PokémonThis is maybe the most important thing we learned while playing Pokémon Legends: Z-A — don't stand far, far away from your active Pokémon. Sure, it puts you in a bit of danger, but the crucial thing is that it stops your Pokémon from running back and forth between you and the enemy. Keeping close to your 'mon means not only can you see what's going on a little better, but it also means you can lead your buddy away from danger. You can't control them directly, but they will follow your movements, and the close you are, the better you know that you'll be able to avoid damage. Lock on - but not all the time Holding ZL will lock onto the enemy, allowing your Pokémon to use one of its moves. But it also makes you move slower and means you can't dodge roll. So, if you see your opponent readying a move, let go! And run! You really only want to lock on to keep an eye on the opposing Pokémon (if you end up far away) and to ready an attack of your own. Stat boosts (and debuffs) are worth itOutside of competitive battling, buffs and debuffs didn't always feel worth it in the mainline games — they waste a turn and more often than not the gain didn't outweigh the damage we took. That changes in Legends: Z-A. Now, because you can prep as you sneak up on an enemy, or even just move out of the way, buffing is absolutely worth it. Debuffing, too, particularly in the early game. Fight Mega with Mega This won't apply until your a few hours into the game, but we figured it was worth saying here — if your opponent Mega Evolves, or you're up against a Rogue Mega Evolution, you ideally want to fight fire with fire and do the same. Mega Evolutions have hugely improved stats over their base forms, and that means that, more often than not, they're more defensive and have higher HP. Super effective attacks are great and all, but they'll make less of a dent. If you have the power to Mega Evolve when your opponent does, then just do it. it's not worth the hassle, and you'll get the energy back easily as you continue. Pokémon Legends: Z-A: Battle System - Advanced TipsAlright, so you're getting pretty good at this now. But there are some extremely useful and very unique situations to react to throughout Z-A, so for those of you who want to become the A-Ranked trainer of Lumiose, read on. These tips will be very helpful for when you take on the later Z-A Royale challenges or try to catch some difficult Pokémon in the post-game. Put your Pokémon away! Yes, you heard — put your 'mon back in its ball! You don't always need to be doing damage, and because you can't really control your Pokémon's movements, in situations where it's hard to get them to avoid damage (particularly in Rogue Mega Evolution fights), stick 'em back in your pocket. Many fights have wide area-of-effect attacks that are pretty tough to avoid without worrying about your Pokémon Pal too. So save yourself some potions and just put them away for a few seconds. Wait for the attack to stop, and send them out again. If your Pokémon is Mega Evolved, then don't worry, they won't revert back inside the ball. They're raring to go once you send them out again. Stack up effectsSo you can't stack tons of status effects on top of each other, but you can stack say, Poison with a lovely-placed Fire Spin. Not only will both of these chip away at damage, but they're easy to reapply and overtime can take out a significant chunk of health. Add in some of your own attacks and, well, it's damage city over here. Don't be afraid to double up move types Something that's a little bit of a no-no in mainline Pokémon — doubling up moves of the same type. Not always the case, but variety is the spice of life and all that. That's less of an issue now thanks to attacks being on cooldown. You can just rotate between two Water-type moves against a Rock-type opponent and absolutely destroy them, for instance. One isn't going to run out of PP anymore, after all. Plus Moves are A+Plus Moves become available around the same time you get your first Mega Stone. They consume part of the Mega Gauge, meaning it'll take longer to Mega Evolve, so you might be worried about using them. Don't be. Plus Moves make 'mons who can't Mega Evolve pretty darn powerful. Don't just save them for the Florges' and Pangoros of the world, though — they're great for every Pokémon. Pressing + before using an eligible Plus Move gives your attack a Mega-style boost to its power. Attacks get stronger and have a wider area-of-effect, for instance. In situations where you're struggling, or when you're just not building up the energy to Mega Evolve, use Plus Moves. View full article
-
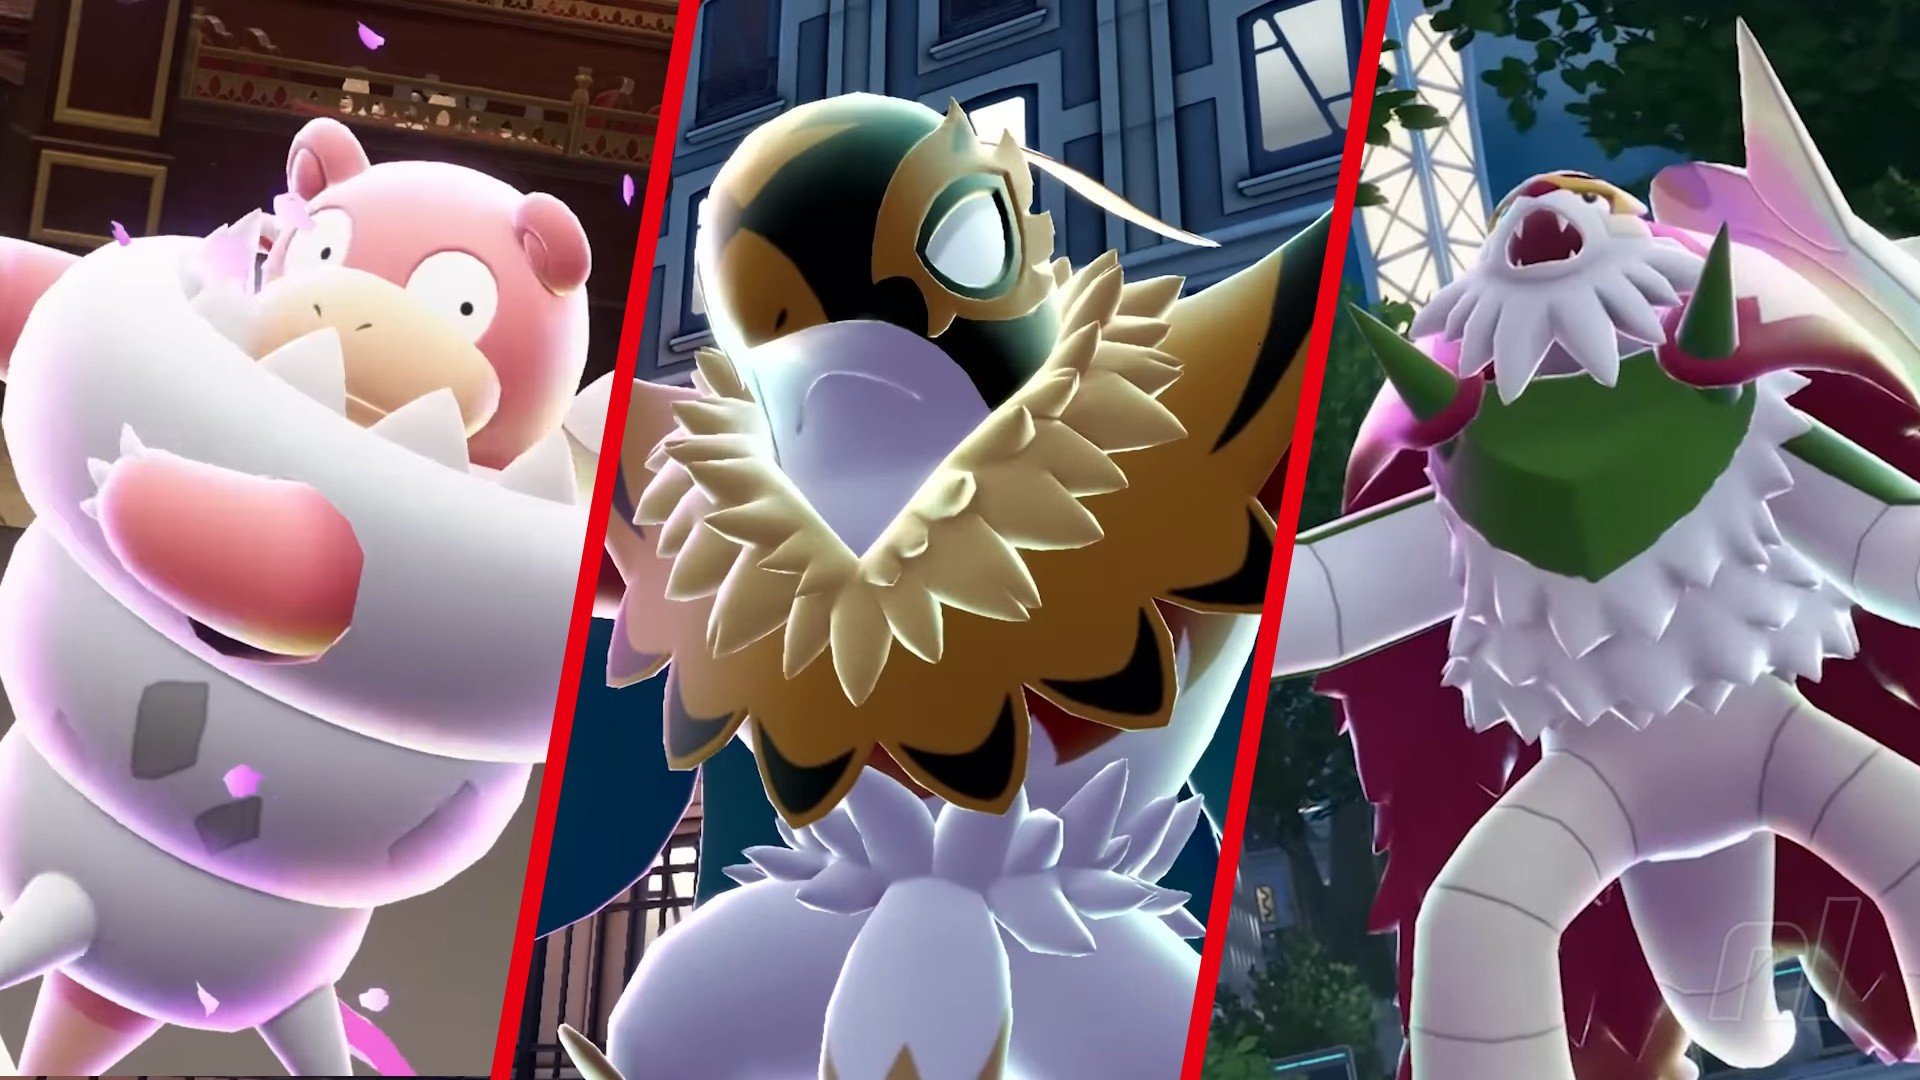 Mega Evolutions return! Pokémon Legends: Z-A brings this fan-favourite mechanic back; not seen since Omega Ruby & Alpha Sapphire, this ability allows your favourite 'mons to get an extra power boost and a snazzy new look to boot. All previous Mega Evolutions have returned in Z-A, but we've also got some brand new ones to sink our teeth into. But before you jump in, you'll also want to know how to get that 'mon's Mega Stone. So we've got every single Mega Evolution in Pokémon Legends: Z-A and the location of the relevant Mega Stone, including for the upcoming Mega Dimension DLC. Note: This guide will contain spoilers for the entire game, so please read at your own risk! All Mega Evolutions & Mega Stone Locations in Pokémon Legends: Z-A There are currently 65 Mega Evolutions in Pokémon Legends: Z-A, many of which are brand new to the franchise. At least four more will be added to the game via the Mega Dimension DLC. We've listed all of them below, along with the Mega Stone you'll need to Mega Evolve them, and how to get the stone. MEGA EVOLUTION MEGA STONE LOCATION Mega Meganium* Meganiumite After defeating Rogue Absol (Chikorita starter), or from the Stone Emporium in Post Game (100,000 Poké Dollars) Mega Emboarite* Emboarite After defeating Rogue Absol (Tepig starter), or from the Stone Emporium in Post Game (100,000 Poké Dollars) Mega Feraligatr* Feraligite After defeating Rogue Absol (Totodile starter), or from the Stone Emporium in Post Game (100,000 Poké Dollars) Mega Beedrill Beedrillite Defeat Rogue Mega Beedrill Mega Pidgeot Pidgeotite Quasartico Inc,, Mega Shard Exchange, 180 Mega Shards (Reach Rank F) Mega Ampharos Ampharosite Defeat Rogue Mega Ampharos Mega Gyarados Gyaradosite Quasartico Inc,, Mega Shard Exchange, 240 Mega Shards (Reach Rank F) Mega Barbaracle* Barbaracite Defeat Rogue Mega Barbaracle Mega Starmie* Staminite Defeat Rogue Mega Starmie Mega Eternal Floette* Floetite Get Eternal Flower Floette (post game) Mega Pyroar* Pyroarite Quasartico Inc,, Mega Shard Exchange, 240 Mega Shards (Reach Rank A) Mega Clefable* Clefablite Quasartico Inc,, Mega Shard Exchange, 240 Mega Shards (Reach Rank B) Mega Alakazam Alakazite Quasartico Inc,, Mega Shard Exchange, 360 Mega Shards (Reach Rank F) Mega Gengar Gengarite Stone Emporium on Vernal Avenue, 50,000 Poké Dollars Mega Scolipede* Scolipedite Quasartico Inc,, Mega Shard Exchange, 240 Mega Shards (Reach Rank C) Mega Victreebel* Victreebelite Defeat Rogue Mega Victreebel Mega Medicham Meditchamite Stone Emporium on Vernal Avenue, 50,000 Poké Dollars Mega Manectric Manectite Quasartico Inc,, Mega Shard Exchange, 180 Mega Shards (Reach Rank F) Mega Gardevoir Gardevoirite Quasartico Inc,, Mega Shard Exchange, 240 Mega Shards (Reach Rank C) Mega Gallade Galladite Quasartico Inc,, Mega Shard Exchange, 240 Mega Shards (Reach Rank C) Mega Houndoom Houndoominite Quasartico Inc,, Mega Shard Exchange, 180 Mega Shards (Reach Rank E) Mega Altaria Altarianite Defeat Rogue Mega Altaria Mega Audino Audinite Quasartico Inc,, Mega Shard Exchange, 180 Mega Shards (Reach Rank C) Mega Lopunny Lopunnite Quasartico Inc,, Mega Shard Exchange, 180 Mega Shards (Reach Rank C) Mega Banette Banettite Defeat Rogue Mega Banette Mega Camerupt Cameruptite Defeat Rogue Mega Camerupt Mega Excadrill* Excadrite Quasartico Inc,, Mega Shard Exchange, 360 Mega Shards (Reach Rank E) Mega Garchomp Garchompite Stone Emporium on Vernal Avenue, 70,000 Poké Dollars Mega Sableye Sablenite Quasartico Inc,, Mega Shard Exchange, 180 Mega Shards (Reach Rank F) Mega Mawile Mawilite Defeat Rogue Mega Mawile Mega Absol Absolite Defeat Rogue Mega Absol Mega Lucario Lucarionite Quasartico Inc,, Mega Shard Exchange, 240 Mega Shards (Reach Rank F) Mega Slowbro Slowbronite Defeat Rogue Mega Slowbro Mega Sharpedo Sharpedonite Quasartico Inc,, Mega Shard Exchange, 180 Mega Shards (Reach Rank E) Mega Eelektross* Eelektrossite Quasartico Inc,, Mega Shard Exchange, 240 Mega Shards (Reach Rank E) Mega Dragonite* Dragonininte Defeat Rogue Mega Dragonite Mega Venasaur Venusaurite Defeat Rogue Mega Venasaur Mega Charizard X Charizardite X Stone Emporium on Vernal Avenue, 100,000 Poké Dollars Mega Charizard Y Charizardite Y Stone Emporium on Vernal Avenue, 100,000 Poké Dollars Mega Blastoise Blastoisinite Stone Emporium on Vernal Avenue, 100,000 Poké Dollars Mega Malamar* Malamarite Quasartico Inc,, Mega Shard Exchange, 240 Mega Shards (Reach Rank A) Mega Dragalge* Dragalgite Quasartico Inc,, Mega Shard Exchange, 240 Mega Shards (Reach Rank B) Mega Glalie Glalitite Quasartico Inc,, Mega Shard Exchange, 240 Mega Shards (Reach Rank E) Mega Froslass* Froslassite Defeat Rogue Mega Froslass Mega Abomasnow Abomasite Stone Emporium on Vernal Avenue, 50,000 Poké Dollars Mega Scizor Scizorite Stone Emporium on Vernal Avenue, 50,000 Poké Dollars Mega Pinsir Pinsirite Quasartico Inc,, Mega Shard Exchange, 240 Mega Shards (Reach Rank E) Mega Heracross Heracronite Quasartico Inc,, Mega Shard Exchange, 180 Mega Shards (Reach Rank F) Mega Hawlucha* Hawluchanite Defeat Rogue Mega Hawlucha Mega Scrafty* Scraftinite Quasartico Inc,, Mega Shard Exchange, 140 Mega Shards (Reach Rank C) Mega Chandelure* Chandelurite Quasartico Inc,, Mega Shard Exchange, 360 Mega Shards (Reach Rank D) Mega Aerodactyl Aerodactylite Quasartico Inc,, Mega Shard Exchange, 240 Mega Shards (Reach Rank F) Mega Steelix Steelixite Stone Emporium on Vernal Avenue, 70,000 Poké Dollars Mega Aggron Aggronite Quasartico Inc,, Mega Shard Exchange, 360 Mega Shards (Reach Rank D) Mega Tyranitar Tyranitarite Defeat Rogue Mega Tyranitar Mega Falinks* Falinksite Quasartico Inc,, Mega Shard Exchange, 360 Mega Shards (Reach Rank D) Mega Skarmory* Skarmorite Quasartico Inc,, Mega Shard Exchange, 240 Mega Shards (Reach Rank C) Mega Salamence Salamencite Quasartico Inc,, Mega Shard Exchange, 360 Mega Shards (Reach Rank A) Mega Kangaskhan Kangaskhanite Stone Emporium on Vernal Avenue, 70,000 Poké Dollars Mega Drampa* Drampanite Quasartico Inc,, Mega Shard Exchange, 360 Mega Shards (Reach Rank F) Mega Metagross Metagrossite Quasartico Inc,, Mega Shard Exchange, 360 Mega Shards (Reach Rank A) Mega Zygarde* Zygardite Receive at the end of the game Mega Chesnaught* Chesnaughtite Reward from Z-A Battle Club's Ranked Battles Season 3 Mega Delphox* Delphoxite Reward from Z-A Battle Club's Ranked Battles Season 2 Mega Greninja* Greninjite Reward from Z-A Battle Club's Ranked Battles Season 1 Mega Diancie Diancite Mysery Gift (as of 6th Nov 2025) Mega Raichu X* ??? Mega Dimension DLC Mega Raichu Y* ??? Mega Dimension DLC Mega Chimecho ??? Mega Dimension DLC Mega Baxcalibur ??? Reward from Z-A Battle Club's Ranked Battles Season 4 How many new Mega Evolutions are there? We're pleasantly surprised that Z-A has added so many new Mega Evolutions to the game — right now, we've counted 29 (though not all of them are immediately available), which includes Mega Diancie, revealed on 6th November 2025. The DLC will be adding at least four new Mega Evolutions too, so this list is bound to grow. What are Rogue Mega Evolutions? You'll see in the list above that lots of the Mega Stones are only available once you defeat a Rogue Mega Evolution. Don't worry, these are all related to the mainline story, so no need to worry about seeking them out. Rogue Mega Evolutions are similar to Frenzied Pokémon from Legends: Arceus — they're big boss battles where you need to whittle down your opponent's health. Once you defeat them, you'll get their Mega Stone as a reward.
 -
Mega Evolutions return! Pokémon Legends: Z-A brings this fan-favourite mechanic back; not seen since Omega Ruby & Alpha Sapphire, this ability allows your favourite 'mons to get an extra power boost and a snazzy new look to boot. All previous Mega Evolutions have returned in Z-A, but we've also got some brand new ones to sink our teeth into. But before you jump in, you'll also want to know how to get that 'mon's Mega Stone. So we've got every single Mega Evolution in Pokémon Legends: Z-A and the location of the relevant Mega Stone, including for the upcoming Mega Dimension DLC. Note: This guide will contain spoilers for the entire game, so please read at your own risk! All Mega Evolutions & Mega Stone Locations in Pokémon Legends: Z-A There are currently 65 Mega Evolutions in Pokémon Legends: Z-A, many of which are brand new to the franchise. At least four more will be added to the game via the Mega Dimension DLC. We've listed all of them below, along with the Mega Stone you'll need to Mega Evolve them, and how to get the stone. MEGA EVOLUTION MEGA STONE LOCATION Mega Meganium* Meganiumite After defeating Rogue Absol (Chikorita starter), or from the Stone Emporium in Post Game (100,000 Poké Dollars) Mega Emboarite* Emboarite After defeating Rogue Absol (Tepig starter), or from the Stone Emporium in Post Game (100,000 Poké Dollars) Mega Feraligatr* Feraligite After defeating Rogue Absol (Totodile starter), or from the Stone Emporium in Post Game (100,000 Poké Dollars) Mega Beedrill Beedrillite Defeat Rogue Mega Beedrill Mega Pidgeot Pidgeotite Quasartico Inc,, Mega Shard Exchange, 180 Mega Shards (Reach Rank F) Mega Ampharos Ampharosite Defeat Rogue Mega Ampharos Mega Gyarados Gyaradosite Quasartico Inc,, Mega Shard Exchange, 240 Mega Shards (Reach Rank F) Mega Barbaracle* Barbaracite Defeat Rogue Mega Barbaracle Mega Starmie* Staminite Defeat Rogue Mega Starmie Mega Eternal Floette* Floetite Get Eternal Flower Floette (post game) Mega Pyroar* Pyroarite Quasartico Inc,, Mega Shard Exchange, 240 Mega Shards (Reach Rank A) Mega Clefable* Clefablite Quasartico Inc,, Mega Shard Exchange, 240 Mega Shards (Reach Rank B) Mega Alakazam Alakazite Quasartico Inc,, Mega Shard Exchange, 360 Mega Shards (Reach Rank F) Mega Gengar Gengarite Stone Emporium on Vernal Avenue, 50,000 Poké Dollars Mega Scolipede* Scolipedite Quasartico Inc,, Mega Shard Exchange, 240 Mega Shards (Reach Rank C) Mega Victreebel* Victreebelite Defeat Rogue Mega Victreebel Mega Medicham Meditchamite Stone Emporium on Vernal Avenue, 50,000 Poké Dollars Mega Manectric Manectite Quasartico Inc,, Mega Shard Exchange, 180 Mega Shards (Reach Rank F) Mega Gardevoir Gardevoirite Quasartico Inc,, Mega Shard Exchange, 240 Mega Shards (Reach Rank C) Mega Gallade Galladite Quasartico Inc,, Mega Shard Exchange, 240 Mega Shards (Reach Rank C) Mega Houndoom Houndoominite Quasartico Inc,, Mega Shard Exchange, 180 Mega Shards (Reach Rank E) Mega Altaria Altarianite Defeat Rogue Mega Altaria Mega Audino Audinite Quasartico Inc,, Mega Shard Exchange, 180 Mega Shards (Reach Rank C) Mega Lopunny Lopunnite Quasartico Inc,, Mega Shard Exchange, 180 Mega Shards (Reach Rank C) Mega Banette Banettite Defeat Rogue Mega Banette Mega Camerupt Cameruptite Defeat Rogue Mega Camerupt Mega Excadrill* Excadrite Quasartico Inc,, Mega Shard Exchange, 360 Mega Shards (Reach Rank E) Mega Garchomp Garchompite Stone Emporium on Vernal Avenue, 70,000 Poké Dollars Mega Sableye Sablenite Quasartico Inc,, Mega Shard Exchange, 180 Mega Shards (Reach Rank F) Mega Mawile Mawilite Defeat Rogue Mega Mawile Mega Absol Absolite Defeat Rogue Mega Absol Mega Lucario Lucarionite Quasartico Inc,, Mega Shard Exchange, 240 Mega Shards (Reach Rank F) Mega Slowbro Slowbronite Defeat Rogue Mega Slowbro Mega Sharpedo Sharpedonite Quasartico Inc,, Mega Shard Exchange, 180 Mega Shards (Reach Rank E) Mega Eelektross* Eelektrossite Quasartico Inc,, Mega Shard Exchange, 240 Mega Shards (Reach Rank E) Mega Dragonite* Dragonininte Defeat Rogue Mega Dragonite Mega Venasaur Venusaurite Defeat Rogue Mega Venasaur Mega Charizard X Charizardite X Stone Emporium on Vernal Avenue, 100,000 Poké Dollars Mega Charizard Y Charizardite Y Stone Emporium on Vernal Avenue, 100,000 Poké Dollars Mega Blastoise Blastoisinite Stone Emporium on Vernal Avenue, 100,000 Poké Dollars Mega Malamar* Malamarite Quasartico Inc,, Mega Shard Exchange, 240 Mega Shards (Reach Rank A) Mega Dragalge* Dragalgite Quasartico Inc,, Mega Shard Exchange, 240 Mega Shards (Reach Rank B) Mega Glalie Glalitite Quasartico Inc,, Mega Shard Exchange, 240 Mega Shards (Reach Rank E) Mega Froslass* Froslassite Defeat Rogue Mega Froslass Mega Abomasnow Abomasite Stone Emporium on Vernal Avenue, 50,000 Poké Dollars Mega Scizor Scizorite Stone Emporium on Vernal Avenue, 50,000 Poké Dollars Mega Pinsir Pinsirite Quasartico Inc,, Mega Shard Exchange, 240 Mega Shards (Reach Rank E) Mega Heracross Heracronite Quasartico Inc,, Mega Shard Exchange, 180 Mega Shards (Reach Rank F) Mega Hawlucha* Hawluchanite Defeat Rogue Mega Hawlucha Mega Scrafty* Scraftinite Quasartico Inc,, Mega Shard Exchange, 140 Mega Shards (Reach Rank C) Mega Chandelure* Chandelurite Quasartico Inc,, Mega Shard Exchange, 360 Mega Shards (Reach Rank D) Mega Aerodactyl Aerodactylite Quasartico Inc,, Mega Shard Exchange, 240 Mega Shards (Reach Rank F) Mega Steelix Steelixite Stone Emporium on Vernal Avenue, 70,000 Poké Dollars Mega Aggron Aggronite Quasartico Inc,, Mega Shard Exchange, 360 Mega Shards (Reach Rank D) Mega Tyranitar Tyranitarite Defeat Rogue Mega Tyranitar Mega Falinks* Falinksite Quasartico Inc,, Mega Shard Exchange, 360 Mega Shards (Reach Rank D) Mega Skarmory* Skarmorite Quasartico Inc,, Mega Shard Exchange, 240 Mega Shards (Reach Rank C) Mega Salamence Salamencite Quasartico Inc,, Mega Shard Exchange, 360 Mega Shards (Reach Rank A) Mega Kangaskhan Kangaskhanite Stone Emporium on Vernal Avenue, 70,000 Poké Dollars Mega Drampa* Drampanite Quasartico Inc,, Mega Shard Exchange, 360 Mega Shards (Reach Rank F) Mega Metagross Metagrossite Quasartico Inc,, Mega Shard Exchange, 360 Mega Shards (Reach Rank A) Mega Zygarde* Zygardite Receive at the end of the game Mega Chesnaught* Chesnaughtite Reward from Z-A Battle Club's Ranked Battles Season 3 Mega Delphox* Delphoxite Reward from Z-A Battle Club's Ranked Battles Season 2 Mega Greninja* Greninjite Reward from Z-A Battle Club's Ranked Battles Season 1 Mega Diancie Diancite Mysery Gift (as of 6th Nov 2025) Mega Raichu X* ??? Mega Dimension DLC Mega Raichu Y* ??? Mega Dimension DLC Mega Chimecho ??? Mega Dimension DLC Mega Baxcalibur ??? Reward from Z-A Battle Club's Ranked Battles Season 4 How many new Mega Evolutions are there? We're pleasantly surprised that Z-A has added so many new Mega Evolutions to the game — right now, we've counted 29 (though not all of them are immediately available), which includes Mega Diancie, revealed on 6th November 2025. The DLC will be adding at least four new Mega Evolutions too, so this list is bound to grow. What are Rogue Mega Evolutions? You'll see in the list above that lots of the Mega Stones are only available once you defeat a Rogue Mega Evolution. Don't worry, these are all related to the mainline story, so no need to worry about seeking them out. Rogue Mega Evolutions are similar to Frenzied Pokémon from Legends: Arceus — they're big boss battles where you need to whittle down your opponent's health. Once you defeat them, you'll get their Mega Stone as a reward. View full article
-
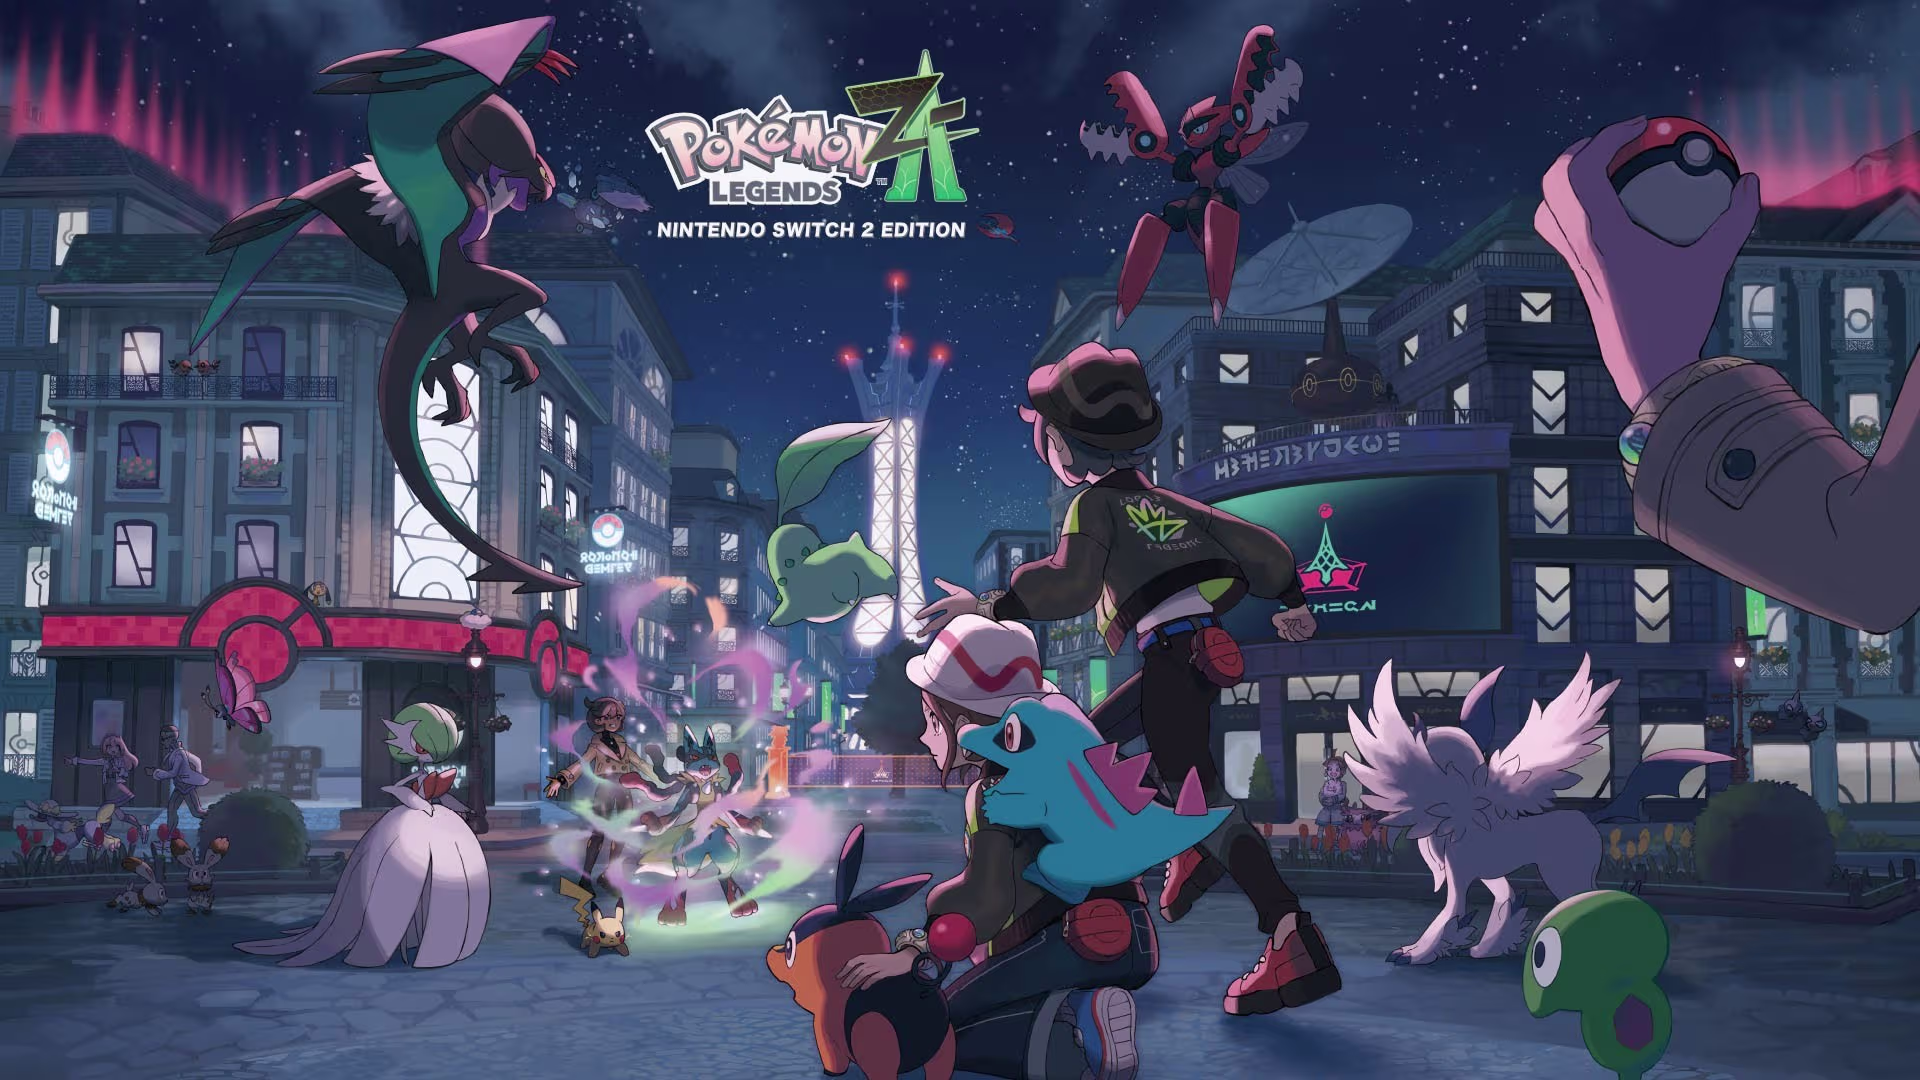 I honestly never thought I’d fall in love with Pokémon battles. That’s not why I play Pokémon – I don’t play competitively either – because I play a ton of RPGs where combat is the draw. I can get my fix elsewhere. But Pokémon Legends: Z-A may have done the impossible; in Kalos, I can’t wait to get into a fight. Taking the basic framework for 2022’s Legends: Arceus, Z-A transplants the frictionless catching and larger environments to the streets of Lumiose City and switches things up by placing battles at the forefront, rather than the exploration. Arceus is one of my favourite Pokémon games ever, so I had concerns, but the shift here mostly works. Captured on Nintendo Switch 2 (Handheld/Undocked) When a Pokémon spots me from a distance or I lock eyes with a trainer, no longer am I simply going for the same attacks, nor am I stressing about PP in a long Elite Four rush. Everything is real time with Xenoblade-style cooldowns and full movement to boot. This is the best Pokémon battles have ever felt. Your Pokémon are no longer just static sprites and polygons with repetitive animations: they move in accordance with your own movements. And you have to use that to your advantage to both attack and avoid opponents. Suddenly, I’m not just thinking about type match-ups (still important, of course) but attack distance, Pokémon speed, the battle space around me, and when to use each move. Totodile’s Bubble Beam can hit from a further distance than, say, Bite, but it has a longer charge-up time and it gives the opponent the chance to run away. Bite, however, might put Totodile in harm’s way. What if this Sandile has Absorb and gets it off as my little croc is running up to attack? I’m even using attacks like Fire Spin and Toxic Spikes to set up traps and lure my opponent. These are all things that I know are used competitively, but I, even casually, feel like I have to utilise status effects and stat boosts and everything else in my Pokémon’s arsenal to win. And things can get particularly dicey when Alpha Pokémon get involved. Captured on Nintendo Switch 2 (Handheld/Undocked) Even Mega Evolution feels like it’s been massively improved, with snappy and dramatic transformations that in many story-focused battles are essentially mandatory. It’s beautiful to see the bones of the series’ combat be fully realised in this new system, and I’ll be sad to lose this system outside of Z-A. Thankfully, as you can probably gather so far, there is a lot of that combat thanks to the Z-A Royale, which makes up one half of the game’s narrative progression. By day, Lumiose is a place for coffee and couture — and I must say, the fashion available is très chic — but by night, a battle zone opens up where trainers lurk and aim to duke it out and gain ranking points to reach the next promotional match. You can pick up Bonus Cards to help boost those rewards by fulfilling certain conditions, such as defeating foes with Plus Moves or putting them to sleep. Captured on Nintendo Switch 2 (Handheld/Undocked) It’s another excuse to get into battle, which is absolutely a good thing. Especially as you progress through the game and higher-levelled trainers join the ranks. I never got bored sneaking into a new battle zone, picking up the nearest Bonus Card that fit my Pokémon team’s skillset, and then destroying a foe five levels above me with a crafty super-effective back attack. It’s extremely satisfying to pull off and frustrating when the trainer turns at the last minute to spot you, in a good way. When you’re not spending time in the Z-A Royale, you’ll be helping Team MZ to quell the Rogue Mega Evolution threat popping up all over the city. These are basically the Frenzied Fights from Arceus, but much better. To me, they’re like MMORPG raid battles – watch the attack patterns, try to dodge, expose the ‘mons’ weaknesses, then Mega Evolve for some big damage numbers. Because I was actually battling the Rogue Mega and not just running and throwing things, I felt engaged in these fights. They weren’t just an obstacle, but they helped me understand the importance of space and movement in combat. There were even times where I had to recall my Pokémon and hide behind an obstacle to avoid taking damage. It’s another layer of strategy that I wasn’t expecting from Pokémon that I really appreciate – even if those fights can get a little too chaotic and hard to track. Captured on Nintendo Switch 2 (Handheld/Undocked) Something I hope Game Freak and The Pokémon Company can keep up on Switch 2 is smooth performance. I wish I wasn’t so shocked here, but they’ve managed it in Legends: Z-A. Running at a very consistent 60fps in both handheld and docked, with only a few slight dips in extremely busy, late-game battles and some fast menu cycling, it’s honestly a relief. Load times are also relatively snappy in both formats. I wasn't able to test out the Switch 1 version for review, so we'll have some thoughts on that post-launch, but on the newer console at least, it's a success. If only the visuals were as consistent. I’ve showered a lot of praise on Legends: Z-A so far; the music is excellent, and I enjoy the abundance of fashion shops and customization you have access to throughout the whole game. But as I said earlier, it mostly works. Unfortunately, there’s a big thing holding the whole game back from being truly brilliant: Lumiose City. I will say, I’m pleasantly surprised at how dense this Kalos staple feels: it’s full of alleyways to get lost in and packed with life. There’s always a cafe or a boutique or even just a few market stalls tucked around the corner, places where people and Pokémon hang out. Scaffolding is stacked along the side of buildings, presenting some finicky platforming challenges and item rewards. Even on the rooftops, you’ll find Bird ‘mons fluttering around and trainers gathering and chatting. Captured on Nintendo Switch 2 (Docked) But while I was wandering around the cobbles of Lumiose, I realised it all felt very compact. The city is essentially one big open zone, with a fair amount of verticality. But that means I’d run through and explored the entire place within about five hours. Sure, more Wild Zones unlock as you progress, bringing more Pokémon to catch. But it left very few surprises for the entire game. I also wish it looked better, too. Lumiose has a few lovely sights here and there, but on the whole, Legends: Z-A appears lifeless. Arceus wasn’t a graphical showcase, but that watercolour-style aesthetic gave it a really unique feel. New Pokémon Snap looks so much better and more vibrant than this. If clothes can swish around and hair flow through the wind, why can’t we have windows that aren’t just flat textures or shadows that don’t look like bleeding ink blotches on the floor? It's a little better docked, but not much. I know this is controversial, too, but voices would help give this game character. I’m not even asking for full voice acting — though monologues and pre-rendered cutscenes feel utterly bizarre as just text on a screen — but I’d love a voice clip or two, along the lines of modern Zelda games. It’d also help give the story a little more oomph, which it needs when focusing on friendship, recovery, and forgiveness. Even with an explosive climax (which I urge you not to spoil yourself on), I felt... nothing. Captured on Nintendo Switch 2 (Docked) Those aforementioned Wild Zones might be my biggest disappointment with Z-A; admittedly, this is less about exploration and catching Pokémon than Legends: Arceus is, but it restricts that sense of discovery and magic that even the mainline ‘Gen’ games have. No longer am I walking out into a field and seeing Magikarp in the rivers and Bellsprout in the grass; instead, they’re constrained to tiny pockets of land, most of which are just little parks, boxed-off little streets, or construction sites. What makes the Wild Zones stick out more is that there are actually plenty of Pokémon that do just wander around Lumiose: I spotted the Unova monkey trio just hanging around in trees at various times; Fletchlings and Pidgeys sit on roofs or lampposts and fly away when you approach; when it was raining, I found a Goomy sitting waiting for the nighttime drizzle to stop underneath a bridge. I still love catching these little creatures, so let’s give them the love they deserve. You can’t reasonably expect Pyroar to just prowl around the city streets, I get that, but sticking various 'pens' across the city doesn’t feel like the right solution. Captured on Nintendo Switch 2 (Handheld/Undocked) The monster-catching aspect of the series does feel like it’s been relegated to the back seat a little; I’m glad Arceus’ catching system is back and still snappy, and you still have to put yourself in danger to “catch ‘em all”, but in revisiting Lumiose, in being restricted to this city and these zones, and in a Pokédex that lacks variety, it all starts to add up. The return of Mega Evolutions does help to alleviate that somewhat, but I really miss the sense of discovery I get from going to a new place or finding Pokémon in unexpected places. Instead of feeling like a fresh new spin on the Legends formula, Legend: Z-A squeezes it into an X & Y-shaped sequel. In many ways, it’s more focused, but Z-A loses a lot of charm and the smaller environs don’t entice me to dig into every nook and cranny of the city. It’s so close to being a great Pokémon game thanks to that combat, which alone makes it worth picking up. But ultimately, it's just a good one. ConclusionPokémon Legends: Z-A should be celebrated for its fabulous real-time combat and its largely smooth jump to the Switch 2, but in condensing things down to one single location, it loses part of the Pokémon magic that Arceus and many other entries managed to amplify. I’ll forever find filling up my Pokédex fun, and for the Switch 2 generation, this is a good starting point for the franchise. But if the Legends series is to continue, it needs to recapture its personality and fuse that real-time system with a bit more freedom.
 -
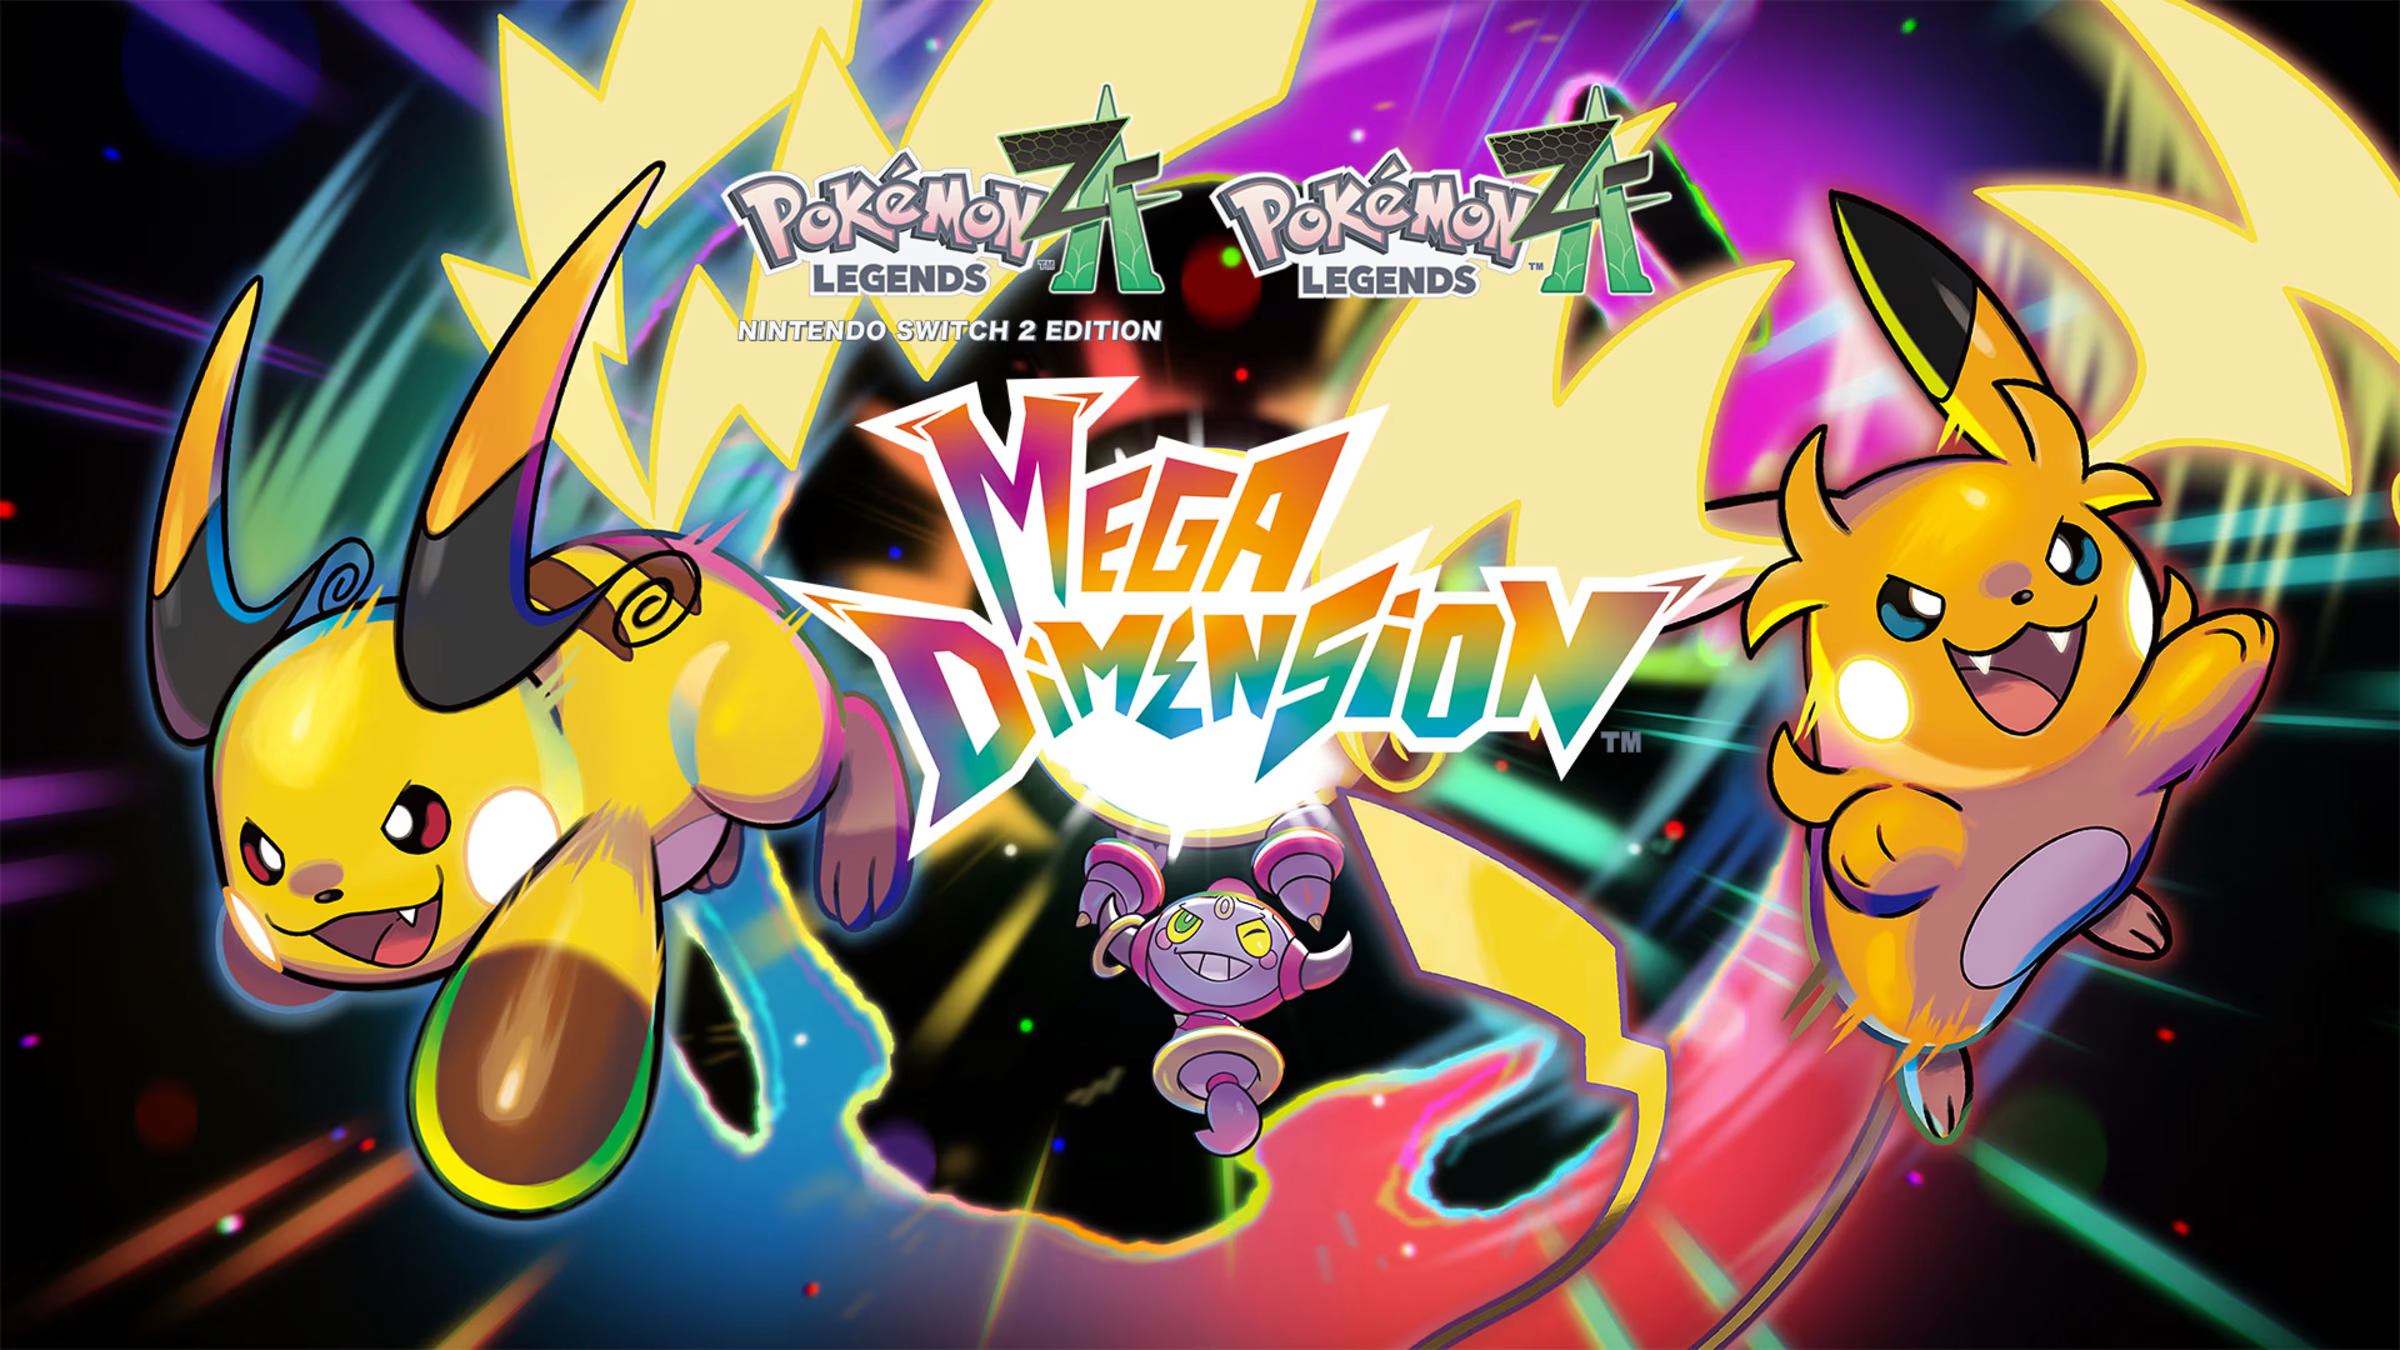 With three weeks to go until the Mega Dimension DLC drops, Pokémon Legends: Z-A has unveiled its next brand new Mega Evolution, and this time it's a Mythical Pokémon getting an upgrade. Zeraora was first introduced in Pokémon Ultra Sun & Ultra Moon, way back in Gen VII, and its Mega form makes a few subtle changes to its original design. Its mostly-yellow fur has turned black, and there's now a lot more blue on its knees, head, and chest. its blue tuft on its head has turned to something resembling a horn, and it has a few blue spikes across its body in general. And, lastly, it now has two ponytail-like features instead of one. It's definitely one of the lighter Mega Evolutions we've seen so far, especially compared to Mega Chimecho, but hey! The Thunderclap Pokémon has its fans. Images: The Pokémon Company According to the Pokédex, "The electric energy it stores in its body is equivalent to ten bolts of lightning. Protrusions on its forehead, chest, back, and the backs of its hands are where the electric energy is particularly concentrated." We'll be getting one more Mega Dimension update in two more weeks (2nd December), which will likely be another Mega Evolution. Stay tuned until then! What do you think of Mega Zeraora? What 'mon do you want to see go Mega? Let us know in the comments.
 -
With three weeks to go until the Mega Dimension DLC drops, Pokémon Legends: Z-A has unveiled its next brand new Mega Evolution, and this time it's a Mythical Pokémon getting an upgrade. Zeraora was first introduced in Pokémon Ultra Sun & Ultra Moon, way back in Gen VII, and its Mega form makes a few subtle changes to its original design. Its mostly-yellow fur has turned black, and there's now a lot more blue on its knees, head, and chest. its blue tuft on its head has turned to something resembling a horn, and it has a few blue spikes across its body in general. And, lastly, it now has two ponytail-like features instead of one. It's definitely one of the lighter Mega Evolutions we've seen so far, especially compared to Mega Chimecho, but hey! The Thunderclap Pokémon has its fans. Images: The Pokémon Company According to the Pokédex, "The electric energy it stores in its body is equivalent to ten bolts of lightning. Protrusions on its forehead, chest, back, and the backs of its hands are where the electric energy is particularly concentrated." We'll be getting one more Mega Dimension update in two more weeks (2nd December), which will likely be another Mega Evolution. Stay tuned until then! What do you think of Mega Zeraora? What 'mon do you want to see go Mega? Let us know in the comments. View full article
-
.jpg.f342a36f48e27e1f44f383565cdc8c6c.jpg) If you're into cozy games with crafting, farming, and the like, but also like driving around in an open world, Dutch studio Square Glade Games has announced that Outbound is coming to Switch 2. Previously announced for the original Switch (don't worry, it's still coming to that console if you're a Switch 1 faithful), the game was a Kickstarter success back in 2024, raising a chunky €265,679 to bring Outbound to PC and consoles in Q2 2026, and that now includes Switch 2. The trailer above will give you a good idea of the gameplay blend the small team is working up, but it looks to be combining elements of open-world exploration (co-op with up to three other players if you want) with campervan decoration, crafting, farming, cooking, patting the dog - all the cozy things you might want wrapped up in a Firewatch-esque art style. The Kickstarter broke every stretch goal going, so you've also got fishing, beekeeping, other minigames, and a character editor. Here's the offical blurb and feature rundown, plus a bunch of screenshots showcasing the breadth of options available, not to mention the incredible breadth of your camper's roof that allows for all that customisation: Images: Square Glade Games "A utopian near future..." Yep, we'll have a drop of that, please. The Kickstarter page still has an estimated delivery date of January 2026, but Q2 2026 is the official word at the moment. Given the ambition (we particularly like the sound of the four-player co-op) of this two-person team indie endeavour, we'll be impressed if it doesn't slip a little. See? Not a single mention of BOTW visual vibes. Let us know below if you like the look of Outbound and plan on getting away from it all sometime in the first half of 2026.
If you're into cozy games with crafting, farming, and the like, but also like driving around in an open world, Dutch studio Square Glade Games has announced that Outbound is coming to Switch 2. Previously announced for the original Switch (don't worry, it's still coming to that console if you're a Switch 1 faithful), the game was a Kickstarter success back in 2024, raising a chunky €265,679 to bring Outbound to PC and consoles in Q2 2026, and that now includes Switch 2. The trailer above will give you a good idea of the gameplay blend the small team is working up, but it looks to be combining elements of open-world exploration (co-op with up to three other players if you want) with campervan decoration, crafting, farming, cooking, patting the dog - all the cozy things you might want wrapped up in a Firewatch-esque art style. The Kickstarter broke every stretch goal going, so you've also got fishing, beekeeping, other minigames, and a character editor. Here's the offical blurb and feature rundown, plus a bunch of screenshots showcasing the breadth of options available, not to mention the incredible breadth of your camper's roof that allows for all that customisation: Images: Square Glade Games "A utopian near future..." Yep, we'll have a drop of that, please. The Kickstarter page still has an estimated delivery date of January 2026, but Q2 2026 is the official word at the moment. Given the ambition (we particularly like the sound of the four-player co-op) of this two-person team indie endeavour, we'll be impressed if it doesn't slip a little. See? Not a single mention of BOTW visual vibes. Let us know below if you like the look of Outbound and plan on getting away from it all sometime in the first half of 2026. -
If you're into cozy games with crafting, farming, and the like, but also like driving around in an open world, Dutch studio Square Glade Games has announced that Outbound is coming to Switch 2. Previously announced for the original Switch (don't worry, it's still coming to that console if you're a Switch 1 faithful), the game was a Kickstarter success back in 2024, raising a chunky €265,679 to bring Outbound to PC and consoles in Q2 2026, and that now includes Switch 2. The trailer above will give you a good idea of the gameplay blend the small team is working up, but it looks to be combining elements of open-world exploration (co-op with up to three other players if you want) with campervan decoration, crafting, farming, cooking, patting the dog - all the cozy things you might want wrapped up in a Firewatch-esque art style. The Kickstarter broke every stretch goal going, so you've also got fishing, beekeeping, other minigames, and a character editor. Here's the offical blurb and feature rundown, plus a bunch of screenshots showcasing the breadth of options available, not to mention the incredible breadth of your camper's roof that allows for all that customisation: Images: Square Glade Games "A utopian near future..." Yep, we'll have a drop of that, please. The Kickstarter page still has an estimated delivery date of January 2026, but Q2 2026 is the official word at the moment. Given the ambition (we particularly like the sound of the four-player co-op) of this two-person team indie endeavour, we'll be impressed if it doesn't slip a little. See? Not a single mention of BOTW visual vibes. Let us know below if you like the look of Outbound and plan on getting away from it all sometime in the first half of 2026. View full article
-
 Genvid CEO Jacob Navok, the former Director of Business at Square Enix, has shared his two cents' worth on the ongoing debate surrounding the use of AI in game development. While it's far from a glowing endorsement of the practice, Navok argues that most players "generally do not care" about it (thanks for the heads up, GamesRadar+). "For all the anti-AI sentiment we're seeing in various articles," Navok wrote in a recent post on X, "it appears consumers generally do not care". Alongside the successful launch of ARC Raiders, the source of Navok's argument is Steal a Brainrot, the Roblox game that racked up 30 million concurrent users ("approximately 80x the ARC Raiders concurrents") earlier this year despite being, quote, "named after/based on AI slop characters". The game tasks players with 'stealing' voxel characters modelled on the AI-generated creature meme, 'Italian Brainrot', and, if those numbers weren't telling enough, has proven immensely popular. "Gen Z loves AI slop, does not care," wrote Navok. "The upcoming generation of gamers are Bane in Dark Knight Rises, saying 'You merely adopted the slop, I was born in it'". This follows a handful of high-profile cases of AI-generated images appearing in the year's biggest releases, with both Call of Duty: Black Ops 7 and ARC Raiders being dragged through the mud at launch, while still putting up huge sales numbers, regardless. And yet, art and voice work are just "the tip of the spear" when it comes to AI being used in the industry, Navok continues. "Many studios I know are using AI generation in the concept phase, and many more are using Claude for code". "It will be hard to find a non-indie title that isn't using Claude for code," he concluded, "and ignoring Claude's AI use because it's code while focusing purely on art shows that a lot of AI sentiment is being driven by emotion rather than logic". Of course, high player counts for the Roblox slop game or ARC Raiders aren't to suggest that everyone is on board with AI implementation. While some studios like EA are diving headfirst into it, we've seen great swathes of studios (big and small) standing opposed to the idea, and our social feeds are constantly awash with disappointed fans after the discovery that their favorite series/franchises/games have hopped on the AI trend.
 -
Genvid CEO Jacob Navok, the former Director of Business at Square Enix, has shared his two cents' worth on the ongoing debate surrounding the use of AI in game development. While it's far from a glowing endorsement of the practice, Navok argues that most players "generally do not care" about it (thanks for the heads up, GamesRadar+). "For all the anti-AI sentiment we're seeing in various articles," Navok wrote in a recent post on X, "it appears consumers generally do not care". Alongside the successful launch of ARC Raiders, the source of Navok's argument is Steal a Brainrot, the Roblox game that racked up 30 million concurrent users ("approximately 80x the ARC Raiders concurrents") earlier this year despite being, quote, "named after/based on AI slop characters". The game tasks players with 'stealing' voxel characters modelled on the AI-generated creature meme, 'Italian Brainrot', and, if those numbers weren't telling enough, has proven immensely popular. "Gen Z loves AI slop, does not care," wrote Navok. "The upcoming generation of gamers are Bane in Dark Knight Rises, saying 'You merely adopted the slop, I was born in it'". This follows a handful of high-profile cases of AI-generated images appearing in the year's biggest releases, with both Call of Duty: Black Ops 7 and ARC Raiders being dragged through the mud at launch, while still putting up huge sales numbers, regardless. And yet, art and voice work are just "the tip of the spear" when it comes to AI being used in the industry, Navok continues. "Many studios I know are using AI generation in the concept phase, and many more are using Claude for code". "It will be hard to find a non-indie title that isn't using Claude for code," he concluded, "and ignoring Claude's AI use because it's code while focusing purely on art shows that a lot of AI sentiment is being driven by emotion rather than logic". Of course, high player counts for the Roblox slop game or ARC Raiders aren't to suggest that everyone is on board with AI implementation. While some studios like EA are diving headfirst into it, we've seen great swathes of studios (big and small) standing opposed to the idea, and our social feeds are constantly awash with disappointed fans after the discovery that their favorite series/franchises/games have hopped on the AI trend. View full article
-
 It was announced a little while back that the Gran Turismo series reached a whopping 100 million copies sold in total, making it comfortably one of Sony's most successful franchises. In celebration of this milestone, developer Polyphony Digital has announced a couple of things for Gran Turismo 7. The first is a major free update named Spec III, due for release in December. Additionally, a premium DLC called the Power Pack is also on the way, arriving at the same time as the update. Now, a less splashy bonus has been unveiled, but rather than rewarding existing fans, it's something only new buyers can enjoy. As announced on the game's socials, both editions of Gran Turismo 7 now come bundled with a bunch of in-game Credits at no additional cost. If you buy the standard edition, you'll receive 750,000 Credits, while the Digital Deluxe edition rewards you with 2 million Credits. In the grand scheme of things, it's not a massive number of Credits, but it's enough to give newbies a little head start in the sim racer. While this is mainly a benefit for new purchases, fans of the series aren't best pleased about it, asking where their free Credits are for supporting the game at launch. Indeed, it would be nice for fans to get some sort of perk, even if it is just a boost to their Credits. Still, it's not a huge issue, really; if you're super into GT, you probably don't need to worry about your Credit count. Are you tempted to pick up GT7 and gain these bonus Credits? Tell us in the comments section below.
 -
It was announced a little while back that the Gran Turismo series reached a whopping 100 million copies sold in total, making it comfortably one of Sony's most successful franchises. In celebration of this milestone, developer Polyphony Digital has announced a couple of things for Gran Turismo 7. The first is a major free update named Spec III, due for release in December. Additionally, a premium DLC called the Power Pack is also on the way, arriving at the same time as the update. Now, a less splashy bonus has been unveiled, but rather than rewarding existing fans, it's something only new buyers can enjoy. As announced on the game's socials, both editions of Gran Turismo 7 now come bundled with a bunch of in-game Credits at no additional cost. If you buy the standard edition, you'll receive 750,000 Credits, while the Digital Deluxe edition rewards you with 2 million Credits. In the grand scheme of things, it's not a massive number of Credits, but it's enough to give newbies a little head start in the sim racer. While this is mainly a benefit for new purchases, fans of the series aren't best pleased about it, asking where their free Credits are for supporting the game at launch. Indeed, it would be nice for fans to get some sort of perk, even if it is just a boost to their Credits. Still, it's not a huge issue, really; if you're super into GT, you probably don't need to worry about your Credit count. Are you tempted to pick up GT7 and gain these bonus Credits? Tell us in the comments section below. View full article
-
 Capcom has announced a new sales milestone for its fan favourite action RPG, Dragon's Dogma 2. As revealed on its official social channels, the cult hit sequel has now surpassed 4 million copies sold: Dragon's Dogma 2 launched in March 2024, meaning it's taken around 20 months for it to reach the milestone. The first 3 million sales were within the game's first few months. While fans are happy to celebrate the news, many responses are asking after some sort of DLC. The original Dragon's Dogma eventually received the Dark Arisen expansion, and players are hopeful that the sequel will get the same treatment. However, it's not clear that any such extra content is coming; Capcom has made no allusions to an expansion for Dragon's Dogma 2, though it's of course still possible. As it stands, though, the game itself received a very positive reception despite some rough edges, and has been getting updates as recently as April of this year.
 -
Capcom has announced a new sales milestone for its fan favourite action RPG, Dragon's Dogma 2. As revealed on its official social channels, the cult hit sequel has now surpassed 4 million copies sold: Dragon's Dogma 2 launched in March 2024, meaning it's taken around 20 months for it to reach the milestone. The first 3 million sales were within the game's first few months. While fans are happy to celebrate the news, many responses are asking after some sort of DLC. The original Dragon's Dogma eventually received the Dark Arisen expansion, and players are hopeful that the sequel will get the same treatment. However, it's not clear that any such extra content is coming; Capcom has made no allusions to an expansion for Dragon's Dogma 2, though it's of course still possible. As it stands, though, the game itself received a very positive reception despite some rough edges, and has been getting updates as recently as April of this year. View full article