




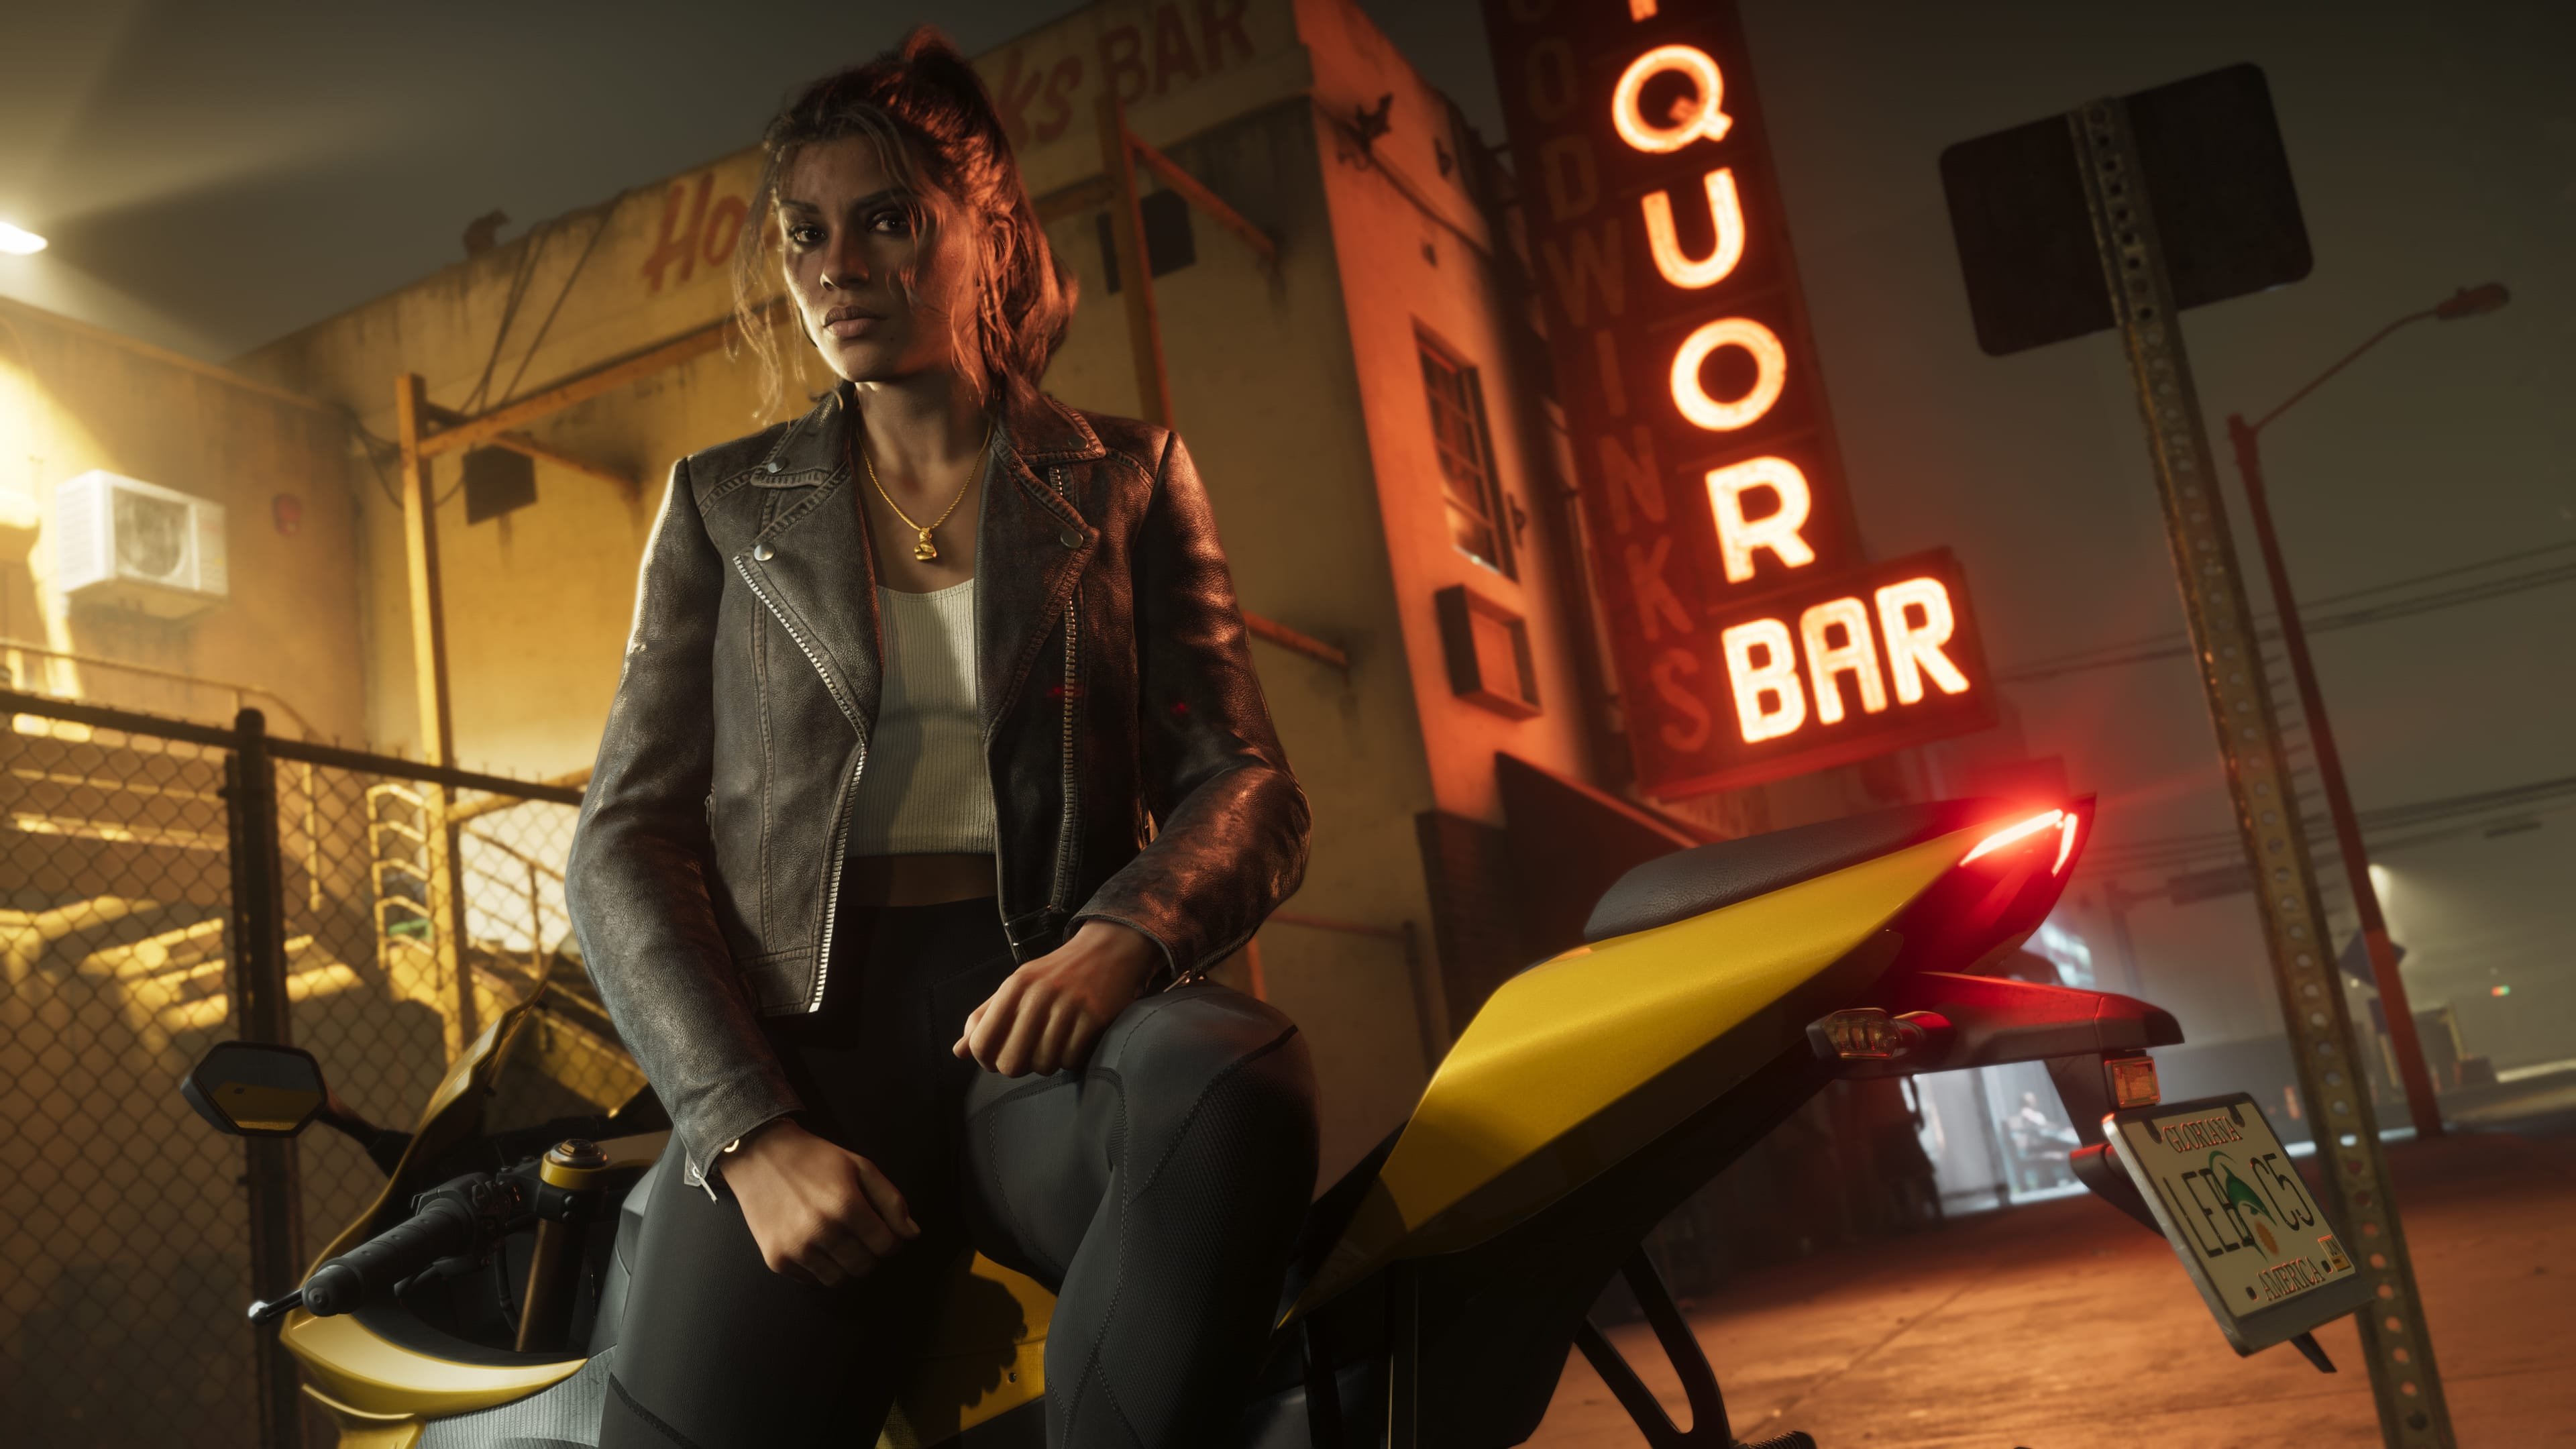

Rockstar
Administrators
-
Joined
-
Last visited
Everything posted by Rockstar
-
 Rockstar Games is keeping the vibes high in Los Santos as the LD Organics Presents: The 420 Event enters its second and final week. Running from Thursday, April 23rd through Wednesday, April 29th, this themed update delivers massive payout multipliers, hefty discounts, and plenty of ways to enjoy the chill side of GTA Online. Peyote Plants remain scattered across the map, letting players transform into a variety of land and water animals for some chaotic fun. Subscribers to the Rockstar Propaganda email list who log in during the event window will also receive the Multicolor 420 Festival Outfit (delivered within 72 hours). Massive Bonuses and Payout Multipliers This week’s highlight is a huge 10x GTA$ and RP on Smoke on the Water Legal Work — perfect for players running the Money Fronts business. Other key bonuses include: 4x GTA$ and RP on the Featured Series: Hunting Pack (Get Lamar), Hunting Pack, and Hunting Pack (Remix) 2x GTA$ and RP on Counterfeit Cash Sell Missions and the Community Race Series 2x GTA$ on Street Dealer Weed Sales Double payouts on the FIB Priority File: The Brute Force File GTA+ members get an extra perk with 2 spins per 24 hours on the Lucky Wheel (instead of the usual 1). Weekly Challenge Complete the simple challenge of winning Hunting Pack (Get Lamar) twice to earn the Güffy Drug Rug Hoodie and GTA$100,000 cash. Discounts Galore Savvy players can take advantage of several sales this week: 50% Off: Vapid Festival Bus Drinks at Nightclub Bars, The Diamond Casino, and The Music Locker Green Space Horror Suit Green Tire Smoke 40% Off: Counterfeit Cash Factories (including upgrades) 30% Off: Annis Hellion Classique Broadway Enus Deity Grotti Cheetah HVY Menacer Kraken Avisa Lampadati Corsita Obey 8F Drafter Progen Itali GTB Vapid GB200 Vapid Peyote Gasser Vehicles and Test Rides Podium Vehicle (Lucky Wheel): Vulcar Warrener HKR Prize Ride Challenge: Place in the Top 2 of LS Car Meet Series races for 3 days in a row to unlock the Truffade Adder. Premium Test Ride (Enhanced versions only): Declasse Vigero ZX Test Track Vehicles: Coil Voltic, Grotti GT500, Vapid Blade Luxury Autos Showroom: Declasse Walton L35 Stock, Grotti LSCM Cheetah Classic Premium Deluxe Motorsport (Simeon’s): Dewbauchee Seven-70, Dundreary Landstalker XL, LCC Avarus, Ocelot Locust, Vapid Retinue Salvage Yard Robberies this week reward: The Gangbanger Robbery → Dewbauchee Vagner The McTony Robbery → Karin Everon The Duggan Robbery → Übermacht Sentinel Classic Races and Time Trials Premium Race: Congestion Charge (Super class locked) Time Trial: Raton Canyon HSW Time Trial (Enhanced only): Terminal Gun Van Inventory The Gun Van is stocked with a mix of weapons and throwables, including the Stun Gun, Battle Rifle, Precision Rifle, Homing Launcher, Pistol .50, Pool Cue, Knife, and Baseball Bat (free this week). Throwables like Pipe Bombs, Tear Gas, and Proximity Mines are also available, along with various Body Armor tiers. Discounts range from 10% to 70%, with even better deals for GTA+ members (including a free Stun Gun for subscribers). Final Thoughts While no brand-new vehicles or major content drops this week, the combination of 10x payouts on Smoke on the Water, 4x on the Hunting Pack series, and solid discounts on businesses and vehicles makes this a strong week for grinding cash and customizing your garage with some green-themed flair. The 420 Event wraps up on April 29th, so make the most of the boosted activities and limited-time rewards while they last. Stay tuned to Rockstar’s Newswire for the next weekly update, and happy grinding in Los Santos! View full article
 -
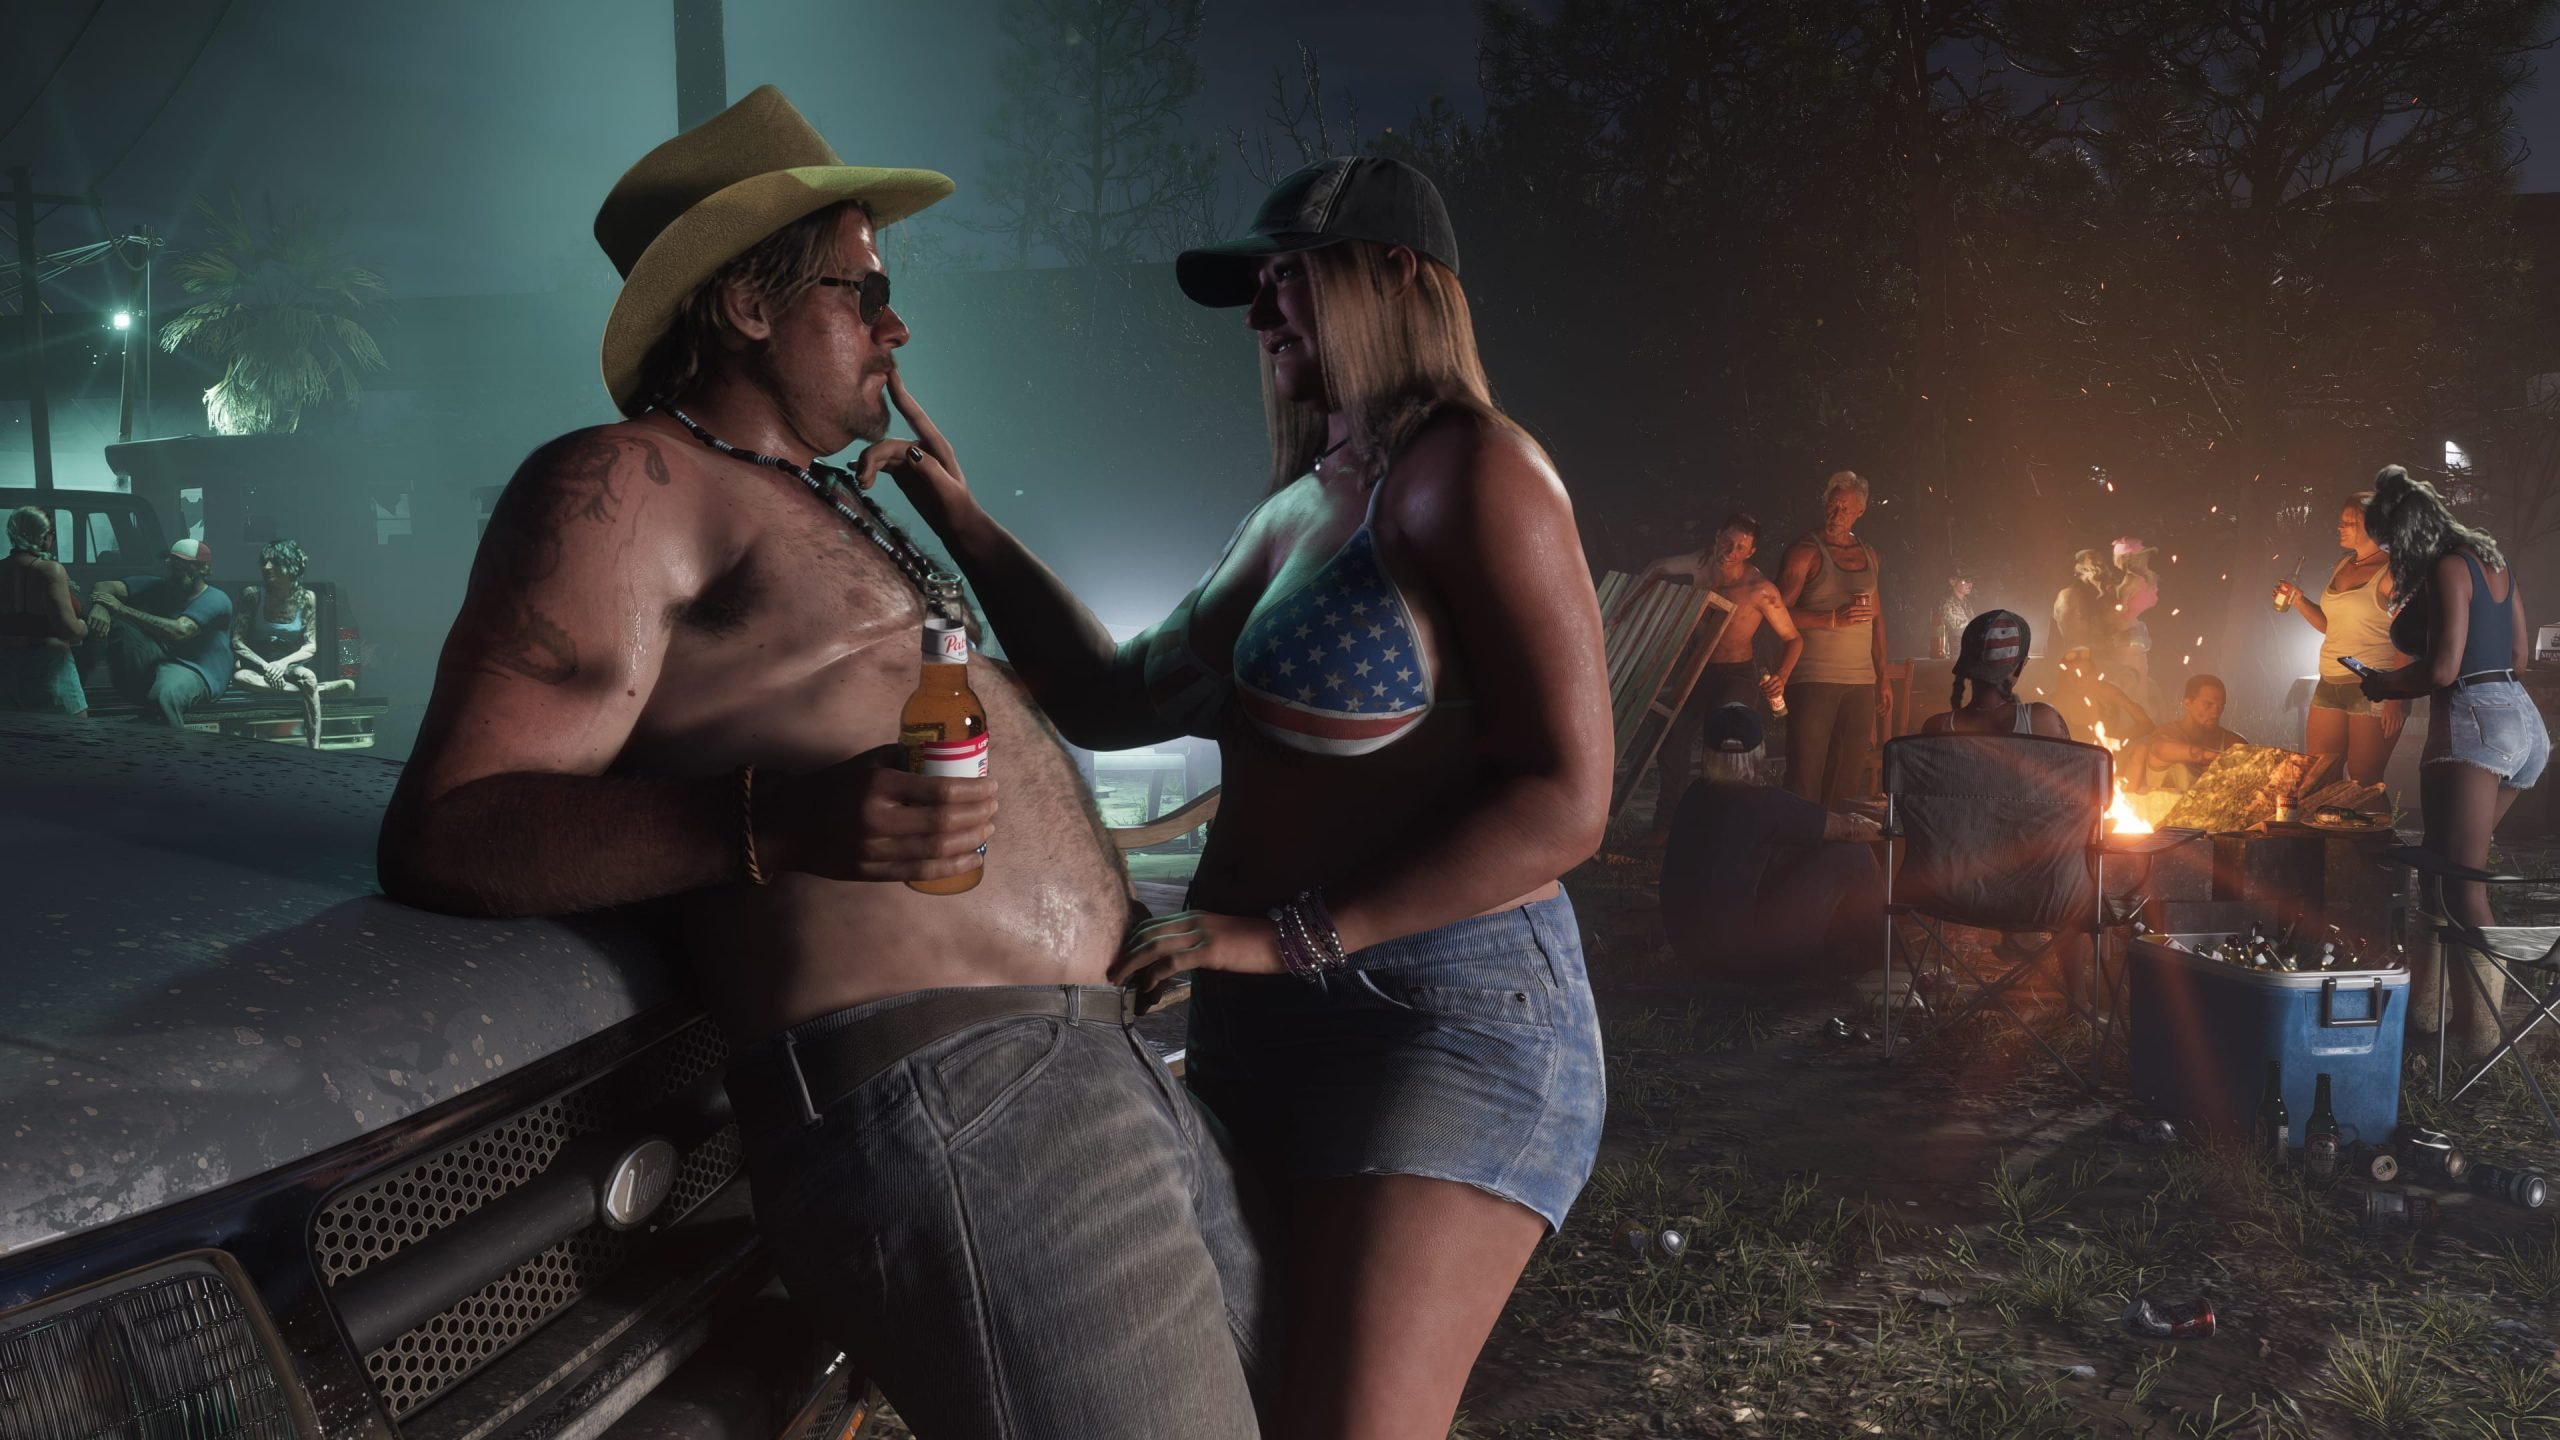 In the ever-heating debate over artificial intelligence’s role in video game development, two of the biggest names in tech and gaming have clashed head-on. Elon Musk, the world’s richest man and CEO of xAI, Tesla, and SpaceX, has suggested that advanced AI could let players generate their own version of Grand Theft Auto VI (GTA 6) in minutes—potentially before Rockstar Games even releases the official title. Strauss Zelnick, CEO of Take-Two Interactive (Rockstar’s parent company), responded sharply this week, essentially asking: If AI is poised to replace creative jobs, why hasn’t it started with Musk himself? The exchange highlights a growing tension in the industry: Can generative AI truly replicate the human creativity, storytelling, and polish that define blockbuster games like GTA 6? Or is it just a flashy tool that falls short of the magic Rockstar is known for? Musk’s Bold Prediction: AI as the Ultimate Game CreatorThe spark came earlier this year, in January 2026. Musk responded “Yeah” to a tweet suggesting there’s a “non-zero chance” that AI could let users “generate your own GTA 6 in a few minutes” before the real game launches. He doubled down, tweeting: “You won’t even have to ask. AI will figure what video game you’d like best.” Musk’s vision aligns with his broader enthusiasm for AI through xAI, which has promised to release a “great AI-generated game” before the end of 2026. He and others in the AI space see a future where text-to-game technology evolves from current text-to-image and text-to-video tools, allowing instant, personalized entertainment on demand. Critics, however, point out Musk’s track record of ambitious predictions that haven’t always materialized—like fully autonomous Tesla summoning by 2018 or a crewed Mars mission within a decade of his 2011 claim. Supporters argue his track record in scaling complex tech still makes his AI optimism worth taking seriously. Zelnick’s Sharp Rebuttal: AI Won’t Replace Rockstar’s Human Touch Speaking at the Semafor World Economy 2026 forum last week, Zelnick directly addressed Musk’s comments while discussing AI’s impact on employment and creativity. He didn’t mince words: Zelnick went further, adding a pointed jab: “I mean, in fairness, if you were going to choose a person who were a simulation, like he (Elon Musk) would be my number one choice.” The Take-Two CEO emphasized that AI is a useful tool—one his company already uses—but not a replacement for the “creative genius” behind hits like GTA. He has previously stated that while AI can generate impressive graphics, it can’t “put it all together and create a massive hit.” Rockstar’s games succeed because of human-driven narrative, world-building, and attention to detail—elements Zelnick believes AI, trained on existing data (sometimes controversially), simply cannot replicate at the same quality. The Bigger Picture: AI’s Role in Gaming and GTA 6’s HorizonGTA 6 remains one of the most anticipated games of the decade, with a reported release window now pointing toward November 19, 2026, following delays. The first trailer in 2023 broke records, and fans have been dissecting every rumor since. Rockstar has a reputation for painstaking, human-led development—think massive open worlds, satirical storytelling, and immersive details that have defined the series for over two decades. The Musk-Zelnick exchange underscores a wider industry conversation. Pro-AI voices see generative tools democratizing game creation, potentially letting indie creators or even players bypass traditional studios. Skeptics, including many developers, worry about job displacement, quality dilution, and ethical issues like training models on “stolen” art and data. Zelnick’s stance aligns with many veteran game leaders who view AI as an enhancer for tasks like asset creation or testing, not a full substitute for the collaborative human process that makes games culturally significant. What This Means Moving ForwardMusk’s optimism reflects the rapid pace of AI advancement—tools like Grok (from his own xAI) are already pushing boundaries in content generation. Yet Zelnick’s response serves as a reality check from the trenches of AAA game publishing: Scale, polish, and emotional resonance still come from people, not prompts. As GTA 6 edges closer to launch, the debate will only intensify. Will AI accelerate development for future titles? Absolutely. Will it “make GTA 6” before Rockstar does? Zelnick—and millions of fans craving Rockstar’s signature touch—seem convinced the answer is no. For now, the ball is in Rockstar’s court. With Take-Two betting big on human creativity, gamers will soon find out whether the wait for GTA 6 was worth every painstaking, non-AI-generated second. One thing’s certain: The conversation about AI’s place in gaming is just getting started—and it’s already more entertaining than most procedurally generated content.
 -
In the ever-heating debate over artificial intelligence’s role in video game development, two of the biggest names in tech and gaming have clashed head-on. Elon Musk, the world’s richest man and CEO of xAI, Tesla, and SpaceX, has suggested that advanced AI could let players generate their own version of Grand Theft Auto VI (GTA 6) in minutes—potentially before Rockstar Games even releases the official title. Strauss Zelnick, CEO of Take-Two Interactive (Rockstar’s parent company), responded sharply this week, essentially asking: If AI is poised to replace creative jobs, why hasn’t it started with Musk himself? The exchange highlights a growing tension in the industry: Can generative AI truly replicate the human creativity, storytelling, and polish that define blockbuster games like GTA 6? Or is it just a flashy tool that falls short of the magic Rockstar is known for? Musk’s Bold Prediction: AI as the Ultimate Game CreatorThe spark came earlier this year, in January 2026. Musk responded “Yeah” to a tweet suggesting there’s a “non-zero chance” that AI could let users “generate your own GTA 6 in a few minutes” before the real game launches. He doubled down, tweeting: “You won’t even have to ask. AI will figure what video game you’d like best.” Musk’s vision aligns with his broader enthusiasm for AI through xAI, which has promised to release a “great AI-generated game” before the end of 2026. He and others in the AI space see a future where text-to-game technology evolves from current text-to-image and text-to-video tools, allowing instant, personalized entertainment on demand. Critics, however, point out Musk’s track record of ambitious predictions that haven’t always materialized—like fully autonomous Tesla summoning by 2018 or a crewed Mars mission within a decade of his 2011 claim. Supporters argue his track record in scaling complex tech still makes his AI optimism worth taking seriously. Zelnick’s Sharp Rebuttal: AI Won’t Replace Rockstar’s Human Touch Speaking at the Semafor World Economy 2026 forum last week, Zelnick directly addressed Musk’s comments while discussing AI’s impact on employment and creativity. He didn’t mince words: Zelnick went further, adding a pointed jab: “I mean, in fairness, if you were going to choose a person who were a simulation, like he (Elon Musk) would be my number one choice.” The Take-Two CEO emphasized that AI is a useful tool—one his company already uses—but not a replacement for the “creative genius” behind hits like GTA. He has previously stated that while AI can generate impressive graphics, it can’t “put it all together and create a massive hit.” Rockstar’s games succeed because of human-driven narrative, world-building, and attention to detail—elements Zelnick believes AI, trained on existing data (sometimes controversially), simply cannot replicate at the same quality. The Bigger Picture: AI’s Role in Gaming and GTA 6’s HorizonGTA 6 remains one of the most anticipated games of the decade, with a reported release window now pointing toward November 19, 2026, following delays. The first trailer in 2023 broke records, and fans have been dissecting every rumor since. Rockstar has a reputation for painstaking, human-led development—think massive open worlds, satirical storytelling, and immersive details that have defined the series for over two decades. The Musk-Zelnick exchange underscores a wider industry conversation. Pro-AI voices see generative tools democratizing game creation, potentially letting indie creators or even players bypass traditional studios. Skeptics, including many developers, worry about job displacement, quality dilution, and ethical issues like training models on “stolen” art and data. Zelnick’s stance aligns with many veteran game leaders who view AI as an enhancer for tasks like asset creation or testing, not a full substitute for the collaborative human process that makes games culturally significant. What This Means Moving ForwardMusk’s optimism reflects the rapid pace of AI advancement—tools like Grok (from his own xAI) are already pushing boundaries in content generation. Yet Zelnick’s response serves as a reality check from the trenches of AAA game publishing: Scale, polish, and emotional resonance still come from people, not prompts. As GTA 6 edges closer to launch, the debate will only intensify. Will AI accelerate development for future titles? Absolutely. Will it “make GTA 6” before Rockstar does? Zelnick—and millions of fans craving Rockstar’s signature touch—seem convinced the answer is no. For now, the ball is in Rockstar’s court. With Take-Two betting big on human creativity, gamers will soon find out whether the wait for GTA 6 was worth every painstaking, non-AI-generated second. One thing’s certain: The conversation about AI’s place in gaming is just getting started—and it’s already more entertaining than most procedurally generated content. View full article
-
.webp.06b236d315b41c405a106bd09c0ca61c.webp) Rockstar Games has quietly rolled out a new background update for GTA Online on April 22, 2026. As with most of these server-side hotfixes, no download is required—changes apply automatically the next time you load into Los Santos. The patch targets lingering issues from last week’s 420 event while cleaning up some long-running exploits that players had been abusing. What Got FixedAccording to community insider Tex2 (who first spotted the update), the patch notes are short and focused: Fixes an issue that resulted in players being unable to jump or climb after leaving Stoner Survival. Patches the “Speedo Custom God Mode” glitch workaround. Patches the “Facility Heist” money glitch workaround. The Stoner Survival fix is particularly timely. The limited-time mode—added last week as part of the 420 celebration—left players stuck without basic movement controls once they exited. That’s now resolved. The other two patches close off exploits that let players become invincible in a customized Speedo van and farm unlimited cash through the Facility Heist setup. Seasonal Spookiness Officially Over Beyond the bug fixes, Rockstar has also disabled several pieces of temporary content that apparently lingered longer than intended: The Halloween weather effect (that dark green/orange haze that blanketed the map from 7 PM to 7:30 AM in-game time) has been turned off. Seasonal events including Possessed Animals, Halloween Slashers, the Yeti, and Gooch encounters are now disabled. The Halloween weather was enabled during the 420 week and quickly became a point of frustration for many players who found the eerie lighting annoying and immersion-breaking. A player-made glitch to disable it had been circulating, but not everyone knew about it—now it’s officially gone for good. It’s unclear whether these seasonal features were left active by mistake or as a test, but Rockstar moved quickly to pull the plug just days later. Player Reactions and What It MeansThe community response has been mostly positive on the glitch fixes—especially the Facility Heist money exploit and the post-Survival movement bug. However, some players are already pointing out that other god-mode and duplication methods still exist, showing Rockstar’s ongoing cat-and-mouse game with exploiters. The removal of the Halloween weather and events has been welcomed by those who just wanted a normal GTA Online experience during the 420 celebration. One fan summed up the general sentiment: the spooky overlay was fun for a day… but not for an entire week. Bottom LineThis is classic Rockstar: a small, silent patch that quietly improves stability and curbs exploits without fanfare. No big title update, no new content—just maintenance to keep the game running smoother after the recent event week. If you’ve been grinding Stoner Survival, running Facility Heists, or cruising around in a haunted Los Santos, hop in and test the changes. Everything should feel cleaner now. What do you think—did Rockstar miss any big glitches that still need patching? Drop your thoughts in the comments, and stay tuned for more GTA Online updates as we head toward the next big event.
Rockstar Games has quietly rolled out a new background update for GTA Online on April 22, 2026. As with most of these server-side hotfixes, no download is required—changes apply automatically the next time you load into Los Santos. The patch targets lingering issues from last week’s 420 event while cleaning up some long-running exploits that players had been abusing. What Got FixedAccording to community insider Tex2 (who first spotted the update), the patch notes are short and focused: Fixes an issue that resulted in players being unable to jump or climb after leaving Stoner Survival. Patches the “Speedo Custom God Mode” glitch workaround. Patches the “Facility Heist” money glitch workaround. The Stoner Survival fix is particularly timely. The limited-time mode—added last week as part of the 420 celebration—left players stuck without basic movement controls once they exited. That’s now resolved. The other two patches close off exploits that let players become invincible in a customized Speedo van and farm unlimited cash through the Facility Heist setup. Seasonal Spookiness Officially Over Beyond the bug fixes, Rockstar has also disabled several pieces of temporary content that apparently lingered longer than intended: The Halloween weather effect (that dark green/orange haze that blanketed the map from 7 PM to 7:30 AM in-game time) has been turned off. Seasonal events including Possessed Animals, Halloween Slashers, the Yeti, and Gooch encounters are now disabled. The Halloween weather was enabled during the 420 week and quickly became a point of frustration for many players who found the eerie lighting annoying and immersion-breaking. A player-made glitch to disable it had been circulating, but not everyone knew about it—now it’s officially gone for good. It’s unclear whether these seasonal features were left active by mistake or as a test, but Rockstar moved quickly to pull the plug just days later. Player Reactions and What It MeansThe community response has been mostly positive on the glitch fixes—especially the Facility Heist money exploit and the post-Survival movement bug. However, some players are already pointing out that other god-mode and duplication methods still exist, showing Rockstar’s ongoing cat-and-mouse game with exploiters. The removal of the Halloween weather and events has been welcomed by those who just wanted a normal GTA Online experience during the 420 celebration. One fan summed up the general sentiment: the spooky overlay was fun for a day… but not for an entire week. Bottom LineThis is classic Rockstar: a small, silent patch that quietly improves stability and curbs exploits without fanfare. No big title update, no new content—just maintenance to keep the game running smoother after the recent event week. If you’ve been grinding Stoner Survival, running Facility Heists, or cruising around in a haunted Los Santos, hop in and test the changes. Everything should feel cleaner now. What do you think—did Rockstar miss any big glitches that still need patching? Drop your thoughts in the comments, and stay tuned for more GTA Online updates as we head toward the next big event. -
Rockstar Games has quietly rolled out a new background update for GTA Online on April 22, 2026. As with most of these server-side hotfixes, no download is required—changes apply automatically the next time you load into Los Santos. The patch targets lingering issues from last week’s 420 event while cleaning up some long-running exploits that players had been abusing. What Got FixedAccording to community insider Tex2 (who first spotted the update), the patch notes are short and focused: Fixes an issue that resulted in players being unable to jump or climb after leaving Stoner Survival. Patches the “Speedo Custom God Mode” glitch workaround. Patches the “Facility Heist” money glitch workaround. The Stoner Survival fix is particularly timely. The limited-time mode—added last week as part of the 420 celebration—left players stuck without basic movement controls once they exited. That’s now resolved. The other two patches close off exploits that let players become invincible in a customized Speedo van and farm unlimited cash through the Facility Heist setup. Seasonal Spookiness Officially Over Beyond the bug fixes, Rockstar has also disabled several pieces of temporary content that apparently lingered longer than intended: The Halloween weather effect (that dark green/orange haze that blanketed the map from 7 PM to 7:30 AM in-game time) has been turned off. Seasonal events including Possessed Animals, Halloween Slashers, the Yeti, and Gooch encounters are now disabled. The Halloween weather was enabled during the 420 week and quickly became a point of frustration for many players who found the eerie lighting annoying and immersion-breaking. A player-made glitch to disable it had been circulating, but not everyone knew about it—now it’s officially gone for good. It’s unclear whether these seasonal features were left active by mistake or as a test, but Rockstar moved quickly to pull the plug just days later. Player Reactions and What It MeansThe community response has been mostly positive on the glitch fixes—especially the Facility Heist money exploit and the post-Survival movement bug. However, some players are already pointing out that other god-mode and duplication methods still exist, showing Rockstar’s ongoing cat-and-mouse game with exploiters. The removal of the Halloween weather and events has been welcomed by those who just wanted a normal GTA Online experience during the 420 celebration. One fan summed up the general sentiment: the spooky overlay was fun for a day… but not for an entire week. Bottom LineThis is classic Rockstar: a small, silent patch that quietly improves stability and curbs exploits without fanfare. No big title update, no new content—just maintenance to keep the game running smoother after the recent event week. If you’ve been grinding Stoner Survival, running Facility Heists, or cruising around in a haunted Los Santos, hop in and test the changes. Everything should feel cleaner now. What do you think—did Rockstar miss any big glitches that still need patching? Drop your thoughts in the comments, and stay tuned for more GTA Online updates as we head toward the next big event. View full article
-
 Rockstar Games is celebrating 4/20 in style with a full week of weed-themed chaos, high payouts, and fresh content dropping in GTA Online starting tomorrow, April 16th, and running through April 22nd, 2026. If you’ve been waiting to fire up your businesses, test your survival skills while baked, or score some exclusive 420 gear, this is the week to log in. Brand-New 420 Modes and MapsThe highlight of the week is the debut of Stoner Survival, a brand-new survival mode where players fight off waves of enemies in a hazy, high-stakes environment. Complete all seven waves and you’ll unlock the High Life 420 Outfit as a permanent reward. There’s also a fresh Hunting Pack (Get Lamar) map joining the rotation, perfect for chaotic co-op chases through the streets of Los Santos. Peyote Plants are back and scattered across the map, letting players transform into animals for some trippy exploration. Massive Multipliers and Cash BonusesRockstar is cranking up the payouts to keep the party rolling: 4x GTA$ and RP on Stoner Survival, Hunting Pack (Get Lamar), and Pizza Delivery 3x GTA$ and RP on First Dose and Last Dose Missions 2x GTA$ and RP on Short Trips and the Community Combat Series 2x GTA$ on Weed Sell Missions and Nightclub Organic Produce sales The FIB Priority File: The Black Box File is also paying double this week. Weekly Challenge and Login RewardsLog in anytime this week and you’ll instantly receive the Black LD Organics Tee. Rockstar Propaganda email list subscribers get the Multicolor 420 Festival Outfit delivered within 72 hours. Complete just five waves of Stoner Survival for the Sasquatch Outfit and a cool GTA$420,000 cash bonus. Talk about a high-value reward. Discounts to Stock Up on 420 VibesRockstar is slashing prices on plenty of green-themed goodies: 50% off Drinks at Nightclub bars, The Diamond Casino, and The Music Locker Green Space Horror Suit Green Tire Smoke Vapid Festival Bus 40% off Weed Farms (including all upgrades) 30% off a long list of vehicles including the Buckingham Tug, Declasse Walton L35, Gallivanter Baller ST and ST-D, Imponte Nightshade, Nagasaki Ultralight, Pfister Neon, Shitzu Hakuchou Drag, and Vapid Caracara 4×4. Other Weekly HighlightsSalvage Yard Robberies: Pegassi Ignus (Podium), Vapid Dominator ASP (McTony), Dinka Kanjo SJ (Cargo Ship) Casino Podium Vehicle: Western Reever (GTA+ members get two spins daily) Prize Ride: BF Club – place top 4 in LS Car Meet Series races for three days straight Premium Test Ride: Coil Cyclone II (next-gen/PC Enhanced) Gun Van has a free Baseball Bat and heavy discounts on weapons and armor (even better for GTA+ members) Time to Get Lit in Los SantosWhether you’re grinding Weed Farms at 40% off, surviving the new Stoner Survival mode for exclusive 420 outfits, or just cruising around as a peyote animal while raking in 4x payouts, this week is packed with reasons to play. The 420 celebrations are in full swing—don’t miss out on the free tees, massive cash, and limited-time content. Log in starting April 16th and let the good times (and green smoke) roll. Rockstar Is Celebrating 4/20 Day In GTA Online With Hunting Pack, Weed Rewards, And A Yeti - GameSpot
 -
Rockstar Games is celebrating 4/20 in style with a full week of weed-themed chaos, high payouts, and fresh content dropping in GTA Online starting tomorrow, April 16th, and running through April 22nd, 2026. If you’ve been waiting to fire up your businesses, test your survival skills while baked, or score some exclusive 420 gear, this is the week to log in. Brand-New 420 Modes and MapsThe highlight of the week is the debut of Stoner Survival, a brand-new survival mode where players fight off waves of enemies in a hazy, high-stakes environment. Complete all seven waves and you’ll unlock the High Life 420 Outfit as a permanent reward. There’s also a fresh Hunting Pack (Get Lamar) map joining the rotation, perfect for chaotic co-op chases through the streets of Los Santos. Peyote Plants are back and scattered across the map, letting players transform into animals for some trippy exploration. Massive Multipliers and Cash BonusesRockstar is cranking up the payouts to keep the party rolling: 4x GTA$ and RP on Stoner Survival, Hunting Pack (Get Lamar), and Pizza Delivery 3x GTA$ and RP on First Dose and Last Dose Missions 2x GTA$ and RP on Short Trips and the Community Combat Series 2x GTA$ on Weed Sell Missions and Nightclub Organic Produce sales The FIB Priority File: The Black Box File is also paying double this week. Weekly Challenge and Login RewardsLog in anytime this week and you’ll instantly receive the Black LD Organics Tee. Rockstar Propaganda email list subscribers get the Multicolor 420 Festival Outfit delivered within 72 hours. Complete just five waves of Stoner Survival for the Sasquatch Outfit and a cool GTA$420,000 cash bonus. Talk about a high-value reward. Discounts to Stock Up on 420 VibesRockstar is slashing prices on plenty of green-themed goodies: 50% off Drinks at Nightclub bars, The Diamond Casino, and The Music Locker Green Space Horror Suit Green Tire Smoke Vapid Festival Bus 40% off Weed Farms (including all upgrades) 30% off a long list of vehicles including the Buckingham Tug, Declasse Walton L35, Gallivanter Baller ST and ST-D, Imponte Nightshade, Nagasaki Ultralight, Pfister Neon, Shitzu Hakuchou Drag, and Vapid Caracara 4×4. Other Weekly HighlightsSalvage Yard Robberies: Pegassi Ignus (Podium), Vapid Dominator ASP (McTony), Dinka Kanjo SJ (Cargo Ship) Casino Podium Vehicle: Western Reever (GTA+ members get two spins daily) Prize Ride: BF Club – place top 4 in LS Car Meet Series races for three days straight Premium Test Ride: Coil Cyclone II (next-gen/PC Enhanced) Gun Van has a free Baseball Bat and heavy discounts on weapons and armor (even better for GTA+ members) Time to Get Lit in Los SantosWhether you’re grinding Weed Farms at 40% off, surviving the new Stoner Survival mode for exclusive 420 outfits, or just cruising around as a peyote animal while raking in 4x payouts, this week is packed with reasons to play. The 420 celebrations are in full swing—don’t miss out on the free tees, massive cash, and limited-time content. Log in starting April 16th and let the good times (and green smoke) roll. Rockstar Is Celebrating 4/20 Day In GTA Online With Hunting Pack, Weed Rewards, And A Yeti - GameSpot View full article
-
.jpg.4a02feed0744811e3f98a60f4ff09552.jpg) Rockstar Games fans who prefer physical copies just got some exciting (and unconfirmed) news. A Spanish retailer has accidentally leaked a full store listing for a native Red Dead Redemption PS5 physical edition, complete with a release date and price. The listing appeared on Wakkap’s website and was first spotted by the Portuguese gaming site Portal Viciados on April 15, 2026. According to the leaked listing, the PS5 physical version of the 2010 classic is scheduled to launch on Thursday, May 7, 2026—just three weeks from now—at a budget-friendly price of €32.90 (roughly $35–36 USD depending on exchange rates). That’s a solid deal for a Game of the Year edition that includes the full original campaign plus the fan-favorite Undead Nightmare zombie expansion. What the Physical PS5 Version Includes (and What It Doesn’t)Full single-player campaign set in the original New Austin and Mexico. Undead Nightmare DLC included on-disc. Native PS5 enhancements: Runs at up to 4K resolution and 60 FPS with HDR support, matching the graphical fidelity of the recent digital re-release. No multiplayer – This is strictly a single-player experience, just like the digital PS5 port. No physical map included in the case (consistent with previous PS4 and Switch physical releases). Collectors have been waiting for this. Until now, the only way to own a physical disc that plays natively on PS5 was to buy the older PS4 version and download the free digital upgrade—an option that has caused licensing headaches for some players. A dedicated PS5 disc eliminates those issues entirely: pop it in and play with all the modern upgrades already baked in. Background: The Recent PS5 Re-ReleaseThis physical leak follows Rockstar’s digital re-release of Red Dead Redemption on PS5 (and other modern platforms) in late 2025. That version brought the 15-year-old title up to current-gen standards with smoother performance and sharper visuals, developed in partnership with Double Eleven and Rockstar Australia. The physical edition appears to be the exact same enhanced build, just on disc. Rockstar has not yet officially acknowledged the leak. Retailer slip-ups like this have proven accurate in the past for other titles, so it’s very likely we’ll see an official announcement soon—possibly even in the next few days. Why This Matters for FansPhysical collectors have been vocal about wanting a proper PS5 disc ever since the digital re-release dropped. At under €33, this edition makes it easy to add the game to your shelf alongside Red Dead Redemption 2. It also gives players who skipped the digital version a no-hassle way to experience the definitive console version without relying on downloads or backward-compatibility workarounds. Whether you’re a longtime fan revisiting John Marston’s story or someone who missed the original back in 2010, this leak suggests the wait for a physical PS5 copy is almost over. Keep an eye on Rockstar’s official channels for confirmation, pre-order details, and any potential box-art reveals. In the meantime, the game remains available digitally on PS5, Xbox Series X|S, Nintendo Switch 2, and even mobile via Netflix. But for many, nothing beats sliding a fresh disc into your console. Stay tuned—RockstarINTEL and other outlets will update as soon as Rockstar breaks silence on this one. The Old West is calling… and this time it might come in a shiny new PS5 case.
Rockstar Games fans who prefer physical copies just got some exciting (and unconfirmed) news. A Spanish retailer has accidentally leaked a full store listing for a native Red Dead Redemption PS5 physical edition, complete with a release date and price. The listing appeared on Wakkap’s website and was first spotted by the Portuguese gaming site Portal Viciados on April 15, 2026. According to the leaked listing, the PS5 physical version of the 2010 classic is scheduled to launch on Thursday, May 7, 2026—just three weeks from now—at a budget-friendly price of €32.90 (roughly $35–36 USD depending on exchange rates). That’s a solid deal for a Game of the Year edition that includes the full original campaign plus the fan-favorite Undead Nightmare zombie expansion. What the Physical PS5 Version Includes (and What It Doesn’t)Full single-player campaign set in the original New Austin and Mexico. Undead Nightmare DLC included on-disc. Native PS5 enhancements: Runs at up to 4K resolution and 60 FPS with HDR support, matching the graphical fidelity of the recent digital re-release. No multiplayer – This is strictly a single-player experience, just like the digital PS5 port. No physical map included in the case (consistent with previous PS4 and Switch physical releases). Collectors have been waiting for this. Until now, the only way to own a physical disc that plays natively on PS5 was to buy the older PS4 version and download the free digital upgrade—an option that has caused licensing headaches for some players. A dedicated PS5 disc eliminates those issues entirely: pop it in and play with all the modern upgrades already baked in. Background: The Recent PS5 Re-ReleaseThis physical leak follows Rockstar’s digital re-release of Red Dead Redemption on PS5 (and other modern platforms) in late 2025. That version brought the 15-year-old title up to current-gen standards with smoother performance and sharper visuals, developed in partnership with Double Eleven and Rockstar Australia. The physical edition appears to be the exact same enhanced build, just on disc. Rockstar has not yet officially acknowledged the leak. Retailer slip-ups like this have proven accurate in the past for other titles, so it’s very likely we’ll see an official announcement soon—possibly even in the next few days. Why This Matters for FansPhysical collectors have been vocal about wanting a proper PS5 disc ever since the digital re-release dropped. At under €33, this edition makes it easy to add the game to your shelf alongside Red Dead Redemption 2. It also gives players who skipped the digital version a no-hassle way to experience the definitive console version without relying on downloads or backward-compatibility workarounds. Whether you’re a longtime fan revisiting John Marston’s story or someone who missed the original back in 2010, this leak suggests the wait for a physical PS5 copy is almost over. Keep an eye on Rockstar’s official channels for confirmation, pre-order details, and any potential box-art reveals. In the meantime, the game remains available digitally on PS5, Xbox Series X|S, Nintendo Switch 2, and even mobile via Netflix. But for many, nothing beats sliding a fresh disc into your console. Stay tuned—RockstarINTEL and other outlets will update as soon as Rockstar breaks silence on this one. The Old West is calling… and this time it might come in a shiny new PS5 case. -
Rockstar Games fans who prefer physical copies just got some exciting (and unconfirmed) news. A Spanish retailer has accidentally leaked a full store listing for a native Red Dead Redemption PS5 physical edition, complete with a release date and price. The listing appeared on Wakkap’s website and was first spotted by the Portuguese gaming site Portal Viciados on April 15, 2026. According to the leaked listing, the PS5 physical version of the 2010 classic is scheduled to launch on Thursday, May 7, 2026—just three weeks from now—at a budget-friendly price of €32.90 (roughly $35–36 USD depending on exchange rates). That’s a solid deal for a Game of the Year edition that includes the full original campaign plus the fan-favorite Undead Nightmare zombie expansion. What the Physical PS5 Version Includes (and What It Doesn’t)Full single-player campaign set in the original New Austin and Mexico. Undead Nightmare DLC included on-disc. Native PS5 enhancements: Runs at up to 4K resolution and 60 FPS with HDR support, matching the graphical fidelity of the recent digital re-release. No multiplayer – This is strictly a single-player experience, just like the digital PS5 port. No physical map included in the case (consistent with previous PS4 and Switch physical releases). Collectors have been waiting for this. Until now, the only way to own a physical disc that plays natively on PS5 was to buy the older PS4 version and download the free digital upgrade—an option that has caused licensing headaches for some players. A dedicated PS5 disc eliminates those issues entirely: pop it in and play with all the modern upgrades already baked in. Background: The Recent PS5 Re-ReleaseThis physical leak follows Rockstar’s digital re-release of Red Dead Redemption on PS5 (and other modern platforms) in late 2025. That version brought the 15-year-old title up to current-gen standards with smoother performance and sharper visuals, developed in partnership with Double Eleven and Rockstar Australia. The physical edition appears to be the exact same enhanced build, just on disc. Rockstar has not yet officially acknowledged the leak. Retailer slip-ups like this have proven accurate in the past for other titles, so it’s very likely we’ll see an official announcement soon—possibly even in the next few days. Why This Matters for FansPhysical collectors have been vocal about wanting a proper PS5 disc ever since the digital re-release dropped. At under €33, this edition makes it easy to add the game to your shelf alongside Red Dead Redemption 2. It also gives players who skipped the digital version a no-hassle way to experience the definitive console version without relying on downloads or backward-compatibility workarounds. Whether you’re a longtime fan revisiting John Marston’s story or someone who missed the original back in 2010, this leak suggests the wait for a physical PS5 copy is almost over. Keep an eye on Rockstar’s official channels for confirmation, pre-order details, and any potential box-art reveals. In the meantime, the game remains available digitally on PS5, Xbox Series X|S, Nintendo Switch 2, and even mobile via Netflix. But for many, nothing beats sliding a fresh disc into your console. Stay tuned—RockstarINTEL and other outlets will update as soon as Rockstar breaks silence on this one. The Old West is calling… and this time it might come in a shiny new PS5 case. View full article
-
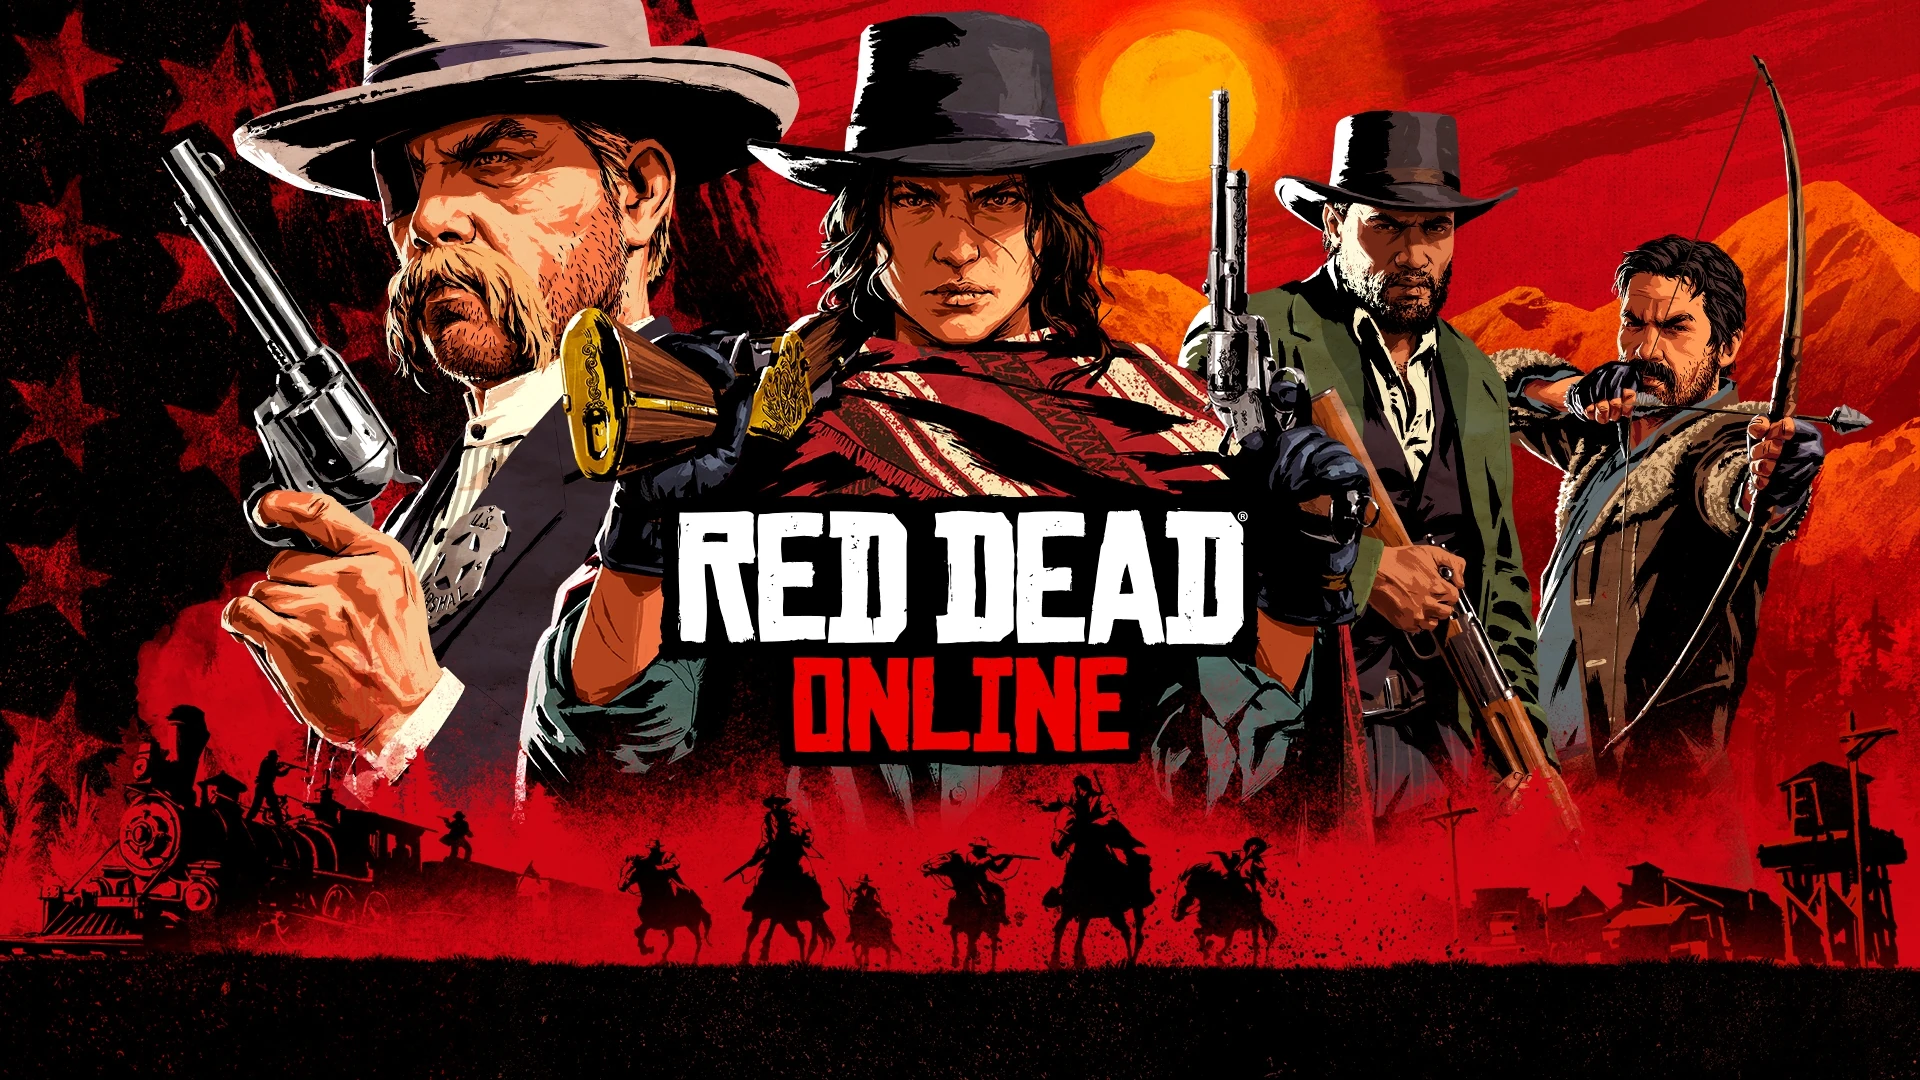 In a surprising twist for one of Rockstar Games' most beloved yet neglected live-service titles, a fresh data leak has pulled back the curtain on Red Dead Online's hidden financial muscle. Even though the multiplayer mode of Red Dead Redemption 2 hasn't seen a major content update in years, the game continues to generate tens of millions in revenue and draw hundreds of thousands of players every week. The revelations come courtesy of a hack by the teenage group ShinyHunters, who dumped gigabytes of internal Rockstar documents online just yesterday. The leaked figures paint a clear picture: Red Dead Online is far from dead. Between June 4, 2024, and the start of April 2026, the game raked in nearly $50 million purely from in-game purchases — mostly gold bars. Here's the breakdown: 2024 (June 4 – December 31): $17,121,648.48 2025: $24,871,160.14 2026 (January 1 – April): $6,190,538.00 That averages out to roughly $507,193 per week, with a peak of $868,068 during Christmas week 2024. Annualized, that's an estimated $26.4 million in revenue — all from a game Rockstar has largely stopped supporting in favor of GTA 6 development. Player engagement tells a similar story. Over the same period, Red Dead Online averaged around 1 million active users per week, with 123,748 new players jumping in weekly. Peak weeks saw as many as 1,295,690 players logging on — and these numbers are for the online mode alone, not counting the single-player story campaign. To put that into perspective, the leak also highlights just how dominant GTA Online remains. In a shorter timeframe, Rockstar's other live-service behemoth pulled in $500 million from microtransactions, and the franchise as a whole has surpassed $5 billion since launch. Still, Red Dead Online's numbers are impressive for a title many fans consider "abandoned." Why does this matter? Red Dead Online launched in 2018 with massive hype as Rockstar's answer to the GTA Online formula in the Wild West. It delivered stunning visuals, immersive role-play, and a deep progression system built around gold bars and trader/moonshiner roles. But content droughts began early, and by 2022–2023, updates had slowed to a trickle. The community has long speculated that Rockstar shifted every available developer to Grand Theft Auto VI, leaving Red Dead Online on life support. Yet the leak shows the gamble paid off in pure dollars. Even without new missions, roles, or maps, loyal players — and a steady stream of newcomers — keep spending. Gold bars still fly off the virtual shelves, proving the game's timeless appeal and the power of its microtransaction economy. Community reactions are pouring in fast. On forums and social media, fans are torn between celebration and frustration. Some point out that $26 million a year is more than many AA titles make in their entire lifecycle — proof that Red Dead Online could have thrived with even minimal support. Others see the data as confirmation of why Rockstar walked away: why pour resources into a $26M earner when GTA Online prints half a billion in the same window? One thing is certain: the leak has reignited calls for Rockstar to revisit the frontier. With GTA 6 still months (or years) away and Red Dead Redemption 2 continuing to sell like hotcakes on PlayStation and Xbox, many wonder if a small team couldn't breathe new life into the online mode — or at least keep the servers humming with occasional quality-of-life fixes. The bigger picture for Rockstar This isn't the first time internal data has surfaced, but it is one of the most revealing windows into the company's live-service strategy. Red Dead Online proves that a "forgotten" Rockstar project can still print money on autopilot. Whether that encourages more investment in the franchise or simply validates the decision to double down on GTA remains to be seen. For now, the outlaws of the American West keep riding — and keep paying — long after the updates stopped rolling in. If nothing else, the leak reminds us that in the world of live-service games, sometimes the quietest titles are the ones quietly stacking gold.
 -
In a surprising twist for one of Rockstar Games' most beloved yet neglected live-service titles, a fresh data leak has pulled back the curtain on Red Dead Online's hidden financial muscle. Even though the multiplayer mode of Red Dead Redemption 2 hasn't seen a major content update in years, the game continues to generate tens of millions in revenue and draw hundreds of thousands of players every week. The revelations come courtesy of a hack by the teenage group ShinyHunters, who dumped gigabytes of internal Rockstar documents online just yesterday. The leaked figures paint a clear picture: Red Dead Online is far from dead. Between June 4, 2024, and the start of April 2026, the game raked in nearly $50 million purely from in-game purchases — mostly gold bars. Here's the breakdown: 2024 (June 4 – December 31): $17,121,648.48 2025: $24,871,160.14 2026 (January 1 – April): $6,190,538.00 That averages out to roughly $507,193 per week, with a peak of $868,068 during Christmas week 2024. Annualized, that's an estimated $26.4 million in revenue — all from a game Rockstar has largely stopped supporting in favor of GTA 6 development. Player engagement tells a similar story. Over the same period, Red Dead Online averaged around 1 million active users per week, with 123,748 new players jumping in weekly. Peak weeks saw as many as 1,295,690 players logging on — and these numbers are for the online mode alone, not counting the single-player story campaign. To put that into perspective, the leak also highlights just how dominant GTA Online remains. In a shorter timeframe, Rockstar's other live-service behemoth pulled in $500 million from microtransactions, and the franchise as a whole has surpassed $5 billion since launch. Still, Red Dead Online's numbers are impressive for a title many fans consider "abandoned." Why does this matter? Red Dead Online launched in 2018 with massive hype as Rockstar's answer to the GTA Online formula in the Wild West. It delivered stunning visuals, immersive role-play, and a deep progression system built around gold bars and trader/moonshiner roles. But content droughts began early, and by 2022–2023, updates had slowed to a trickle. The community has long speculated that Rockstar shifted every available developer to Grand Theft Auto VI, leaving Red Dead Online on life support. Yet the leak shows the gamble paid off in pure dollars. Even without new missions, roles, or maps, loyal players — and a steady stream of newcomers — keep spending. Gold bars still fly off the virtual shelves, proving the game's timeless appeal and the power of its microtransaction economy. Community reactions are pouring in fast. On forums and social media, fans are torn between celebration and frustration. Some point out that $26 million a year is more than many AA titles make in their entire lifecycle — proof that Red Dead Online could have thrived with even minimal support. Others see the data as confirmation of why Rockstar walked away: why pour resources into a $26M earner when GTA Online prints half a billion in the same window? One thing is certain: the leak has reignited calls for Rockstar to revisit the frontier. With GTA 6 still months (or years) away and Red Dead Redemption 2 continuing to sell like hotcakes on PlayStation and Xbox, many wonder if a small team couldn't breathe new life into the online mode — or at least keep the servers humming with occasional quality-of-life fixes. The bigger picture for Rockstar This isn't the first time internal data has surfaced, but it is one of the most revealing windows into the company's live-service strategy. Red Dead Online proves that a "forgotten" Rockstar project can still print money on autopilot. Whether that encourages more investment in the franchise or simply validates the decision to double down on GTA remains to be seen. For now, the outlaws of the American West keep riding — and keep paying — long after the updates stopped rolling in. If nothing else, the leak reminds us that in the world of live-service games, sometimes the quietest titles are the ones quietly stacking gold. View full article
-
.webp.11e89a92dda55b3b2ec2cd92febf4f3a.webp) A major data breach tied to Rockstar Games has spilled the beans on just how much cash GTA Online has raked in since launching in 2013 — and the numbers are staggering. According to freshly leaked financial documents, the multiplayer behemoth has generated over $5 billion in revenue, almost entirely from in-game purchases like Shark Cards and the GTA+ subscription service. The leak, which surfaced on April 14, 2026, stems from a hack by the group ShinyHunters. The hackers reportedly demanded a modest $200,000 ransom that Rockstar refused to pay, prompting the release of sensitive files. What emerged paints a clear picture: GTA Online isn’t just surviving — it’s a profit machine that’s still printing money more than a decade after launch. The Numbers Don’t Lie: Year-by-Year Revenue BreakdownLeaked records show the game’s earnings have been remarkably consistent, with a massive spike during the 2020 COVID lockdowns when players flocked to Los Santos in record numbers. Here’s the full annual haul (in USD): Year Revenue 2014 $21.5 million 2015 $184.8 million 2016 $313.8 million 2017 $504.1 million 2018 $414.3 million 2019 $470.8 million 2020 $744.0 million 2021 $653.9 million 2022 $450.7 million 2023 $411.1 million 2024 $404.0 million 2025 $400.5 million 2026 (Jan–Apr) $109.7 million Even in 2026 — while the world waits for GTA 6 — the game has already pulled in over $100 million in just four months. That works out to an average of more than $1 million per day, with some weeks hitting as high as $28 million. The “Whale” Effect: Only 4% of Players Are Paying the BillsPerhaps the most shocking revelation? The vast majority of the revenue comes from a tiny slice of the player base. Between September 2025 and March 2026, just 4% of players accounted for 100% of the spending during that period — and that 4% even includes brand-new players who joined in the same window. Shark Cards dominate the revenue stream, making up 74% of all income, with the rest coming from GTA+ subscriptions. Peak spending moments are predictable: Christmas Day 2020 saw the single biggest haul of the year — $8.485 million in one day — thanks to the Cayo Perico Heist update. Average revenue per paying user hit $60.68 during the 2025 holiday season, and the game’s all-time peak daily active users reached 9.34 million back in May 2020. Where the Money Comes From: Top Spending CountriesThe leak also breaks down spending by country (September 2025 – March 2026 period): United States: $153 million (by far the biggest contributor) United Kingdom: $25 million Germany: $16 million Australia, Canada, Netherlands, Switzerland, Italy, and Spain each under $10 million What It All Means for the GTA CommunityThis data confirms what many longtime players have suspected: GTA Online is a self-sustaining cash cow that requires minimal new content to keep the lights on — and the servers humming. Despite the long wait for GTA 6, the game continues to deliver steady revenue with relatively little investment. Of course, the leak has already sparked plenty of debate online. Some players are calling the microtransaction model “predatory,” while others point out that the game has delivered thousands of hours of free entertainment to millions. Debunked rumors (like a single player dropping $1 million on Shark Cards in one go) have also been circulating, but the real story is the sheer scale of the operation. Bottom line: GTA Online isn’t just one of the most successful multiplayer games ever — it’s a billion-dollar empire built on a surprisingly small group of dedicated (and generous) players. Whether you’re a free-to-play grinder or a Shark Card whale, this leak shows exactly why Rockstar can afford to take its time with the next big thing. The full leaked documents are still making the rounds across GTA forums and social media. If you’re curious about the charts and raw data, the original breakdown is available on RockstarINTEL. What do you think — impressive longevity or proof that the Shark Card system is too good at emptying wallets? Drop your thoughts below.
A major data breach tied to Rockstar Games has spilled the beans on just how much cash GTA Online has raked in since launching in 2013 — and the numbers are staggering. According to freshly leaked financial documents, the multiplayer behemoth has generated over $5 billion in revenue, almost entirely from in-game purchases like Shark Cards and the GTA+ subscription service. The leak, which surfaced on April 14, 2026, stems from a hack by the group ShinyHunters. The hackers reportedly demanded a modest $200,000 ransom that Rockstar refused to pay, prompting the release of sensitive files. What emerged paints a clear picture: GTA Online isn’t just surviving — it’s a profit machine that’s still printing money more than a decade after launch. The Numbers Don’t Lie: Year-by-Year Revenue BreakdownLeaked records show the game’s earnings have been remarkably consistent, with a massive spike during the 2020 COVID lockdowns when players flocked to Los Santos in record numbers. Here’s the full annual haul (in USD): Year Revenue 2014 $21.5 million 2015 $184.8 million 2016 $313.8 million 2017 $504.1 million 2018 $414.3 million 2019 $470.8 million 2020 $744.0 million 2021 $653.9 million 2022 $450.7 million 2023 $411.1 million 2024 $404.0 million 2025 $400.5 million 2026 (Jan–Apr) $109.7 million Even in 2026 — while the world waits for GTA 6 — the game has already pulled in over $100 million in just four months. That works out to an average of more than $1 million per day, with some weeks hitting as high as $28 million. The “Whale” Effect: Only 4% of Players Are Paying the BillsPerhaps the most shocking revelation? The vast majority of the revenue comes from a tiny slice of the player base. Between September 2025 and March 2026, just 4% of players accounted for 100% of the spending during that period — and that 4% even includes brand-new players who joined in the same window. Shark Cards dominate the revenue stream, making up 74% of all income, with the rest coming from GTA+ subscriptions. Peak spending moments are predictable: Christmas Day 2020 saw the single biggest haul of the year — $8.485 million in one day — thanks to the Cayo Perico Heist update. Average revenue per paying user hit $60.68 during the 2025 holiday season, and the game’s all-time peak daily active users reached 9.34 million back in May 2020. Where the Money Comes From: Top Spending CountriesThe leak also breaks down spending by country (September 2025 – March 2026 period): United States: $153 million (by far the biggest contributor) United Kingdom: $25 million Germany: $16 million Australia, Canada, Netherlands, Switzerland, Italy, and Spain each under $10 million What It All Means for the GTA CommunityThis data confirms what many longtime players have suspected: GTA Online is a self-sustaining cash cow that requires minimal new content to keep the lights on — and the servers humming. Despite the long wait for GTA 6, the game continues to deliver steady revenue with relatively little investment. Of course, the leak has already sparked plenty of debate online. Some players are calling the microtransaction model “predatory,” while others point out that the game has delivered thousands of hours of free entertainment to millions. Debunked rumors (like a single player dropping $1 million on Shark Cards in one go) have also been circulating, but the real story is the sheer scale of the operation. Bottom line: GTA Online isn’t just one of the most successful multiplayer games ever — it’s a billion-dollar empire built on a surprisingly small group of dedicated (and generous) players. Whether you’re a free-to-play grinder or a Shark Card whale, this leak shows exactly why Rockstar can afford to take its time with the next big thing. The full leaked documents are still making the rounds across GTA forums and social media. If you’re curious about the charts and raw data, the original breakdown is available on RockstarINTEL. What do you think — impressive longevity or proof that the Shark Card system is too good at emptying wallets? Drop your thoughts below. -
A major data breach tied to Rockstar Games has spilled the beans on just how much cash GTA Online has raked in since launching in 2013 — and the numbers are staggering. According to freshly leaked financial documents, the multiplayer behemoth has generated over $5 billion in revenue, almost entirely from in-game purchases like Shark Cards and the GTA+ subscription service. The leak, which surfaced on April 14, 2026, stems from a hack by the group ShinyHunters. The hackers reportedly demanded a modest $200,000 ransom that Rockstar refused to pay, prompting the release of sensitive files. What emerged paints a clear picture: GTA Online isn’t just surviving — it’s a profit machine that’s still printing money more than a decade after launch. The Numbers Don’t Lie: Year-by-Year Revenue BreakdownLeaked records show the game’s earnings have been remarkably consistent, with a massive spike during the 2020 COVID lockdowns when players flocked to Los Santos in record numbers. Here’s the full annual haul (in USD): Year Revenue 2014 $21.5 million 2015 $184.8 million 2016 $313.8 million 2017 $504.1 million 2018 $414.3 million 2019 $470.8 million 2020 $744.0 million 2021 $653.9 million 2022 $450.7 million 2023 $411.1 million 2024 $404.0 million 2025 $400.5 million 2026 (Jan–Apr) $109.7 million Even in 2026 — while the world waits for GTA 6 — the game has already pulled in over $100 million in just four months. That works out to an average of more than $1 million per day, with some weeks hitting as high as $28 million. The “Whale” Effect: Only 4% of Players Are Paying the BillsPerhaps the most shocking revelation? The vast majority of the revenue comes from a tiny slice of the player base. Between September 2025 and March 2026, just 4% of players accounted for 100% of the spending during that period — and that 4% even includes brand-new players who joined in the same window. Shark Cards dominate the revenue stream, making up 74% of all income, with the rest coming from GTA+ subscriptions. Peak spending moments are predictable: Christmas Day 2020 saw the single biggest haul of the year — $8.485 million in one day — thanks to the Cayo Perico Heist update. Average revenue per paying user hit $60.68 during the 2025 holiday season, and the game’s all-time peak daily active users reached 9.34 million back in May 2020. Where the Money Comes From: Top Spending CountriesThe leak also breaks down spending by country (September 2025 – March 2026 period): United States: $153 million (by far the biggest contributor) United Kingdom: $25 million Germany: $16 million Australia, Canada, Netherlands, Switzerland, Italy, and Spain each under $10 million What It All Means for the GTA CommunityThis data confirms what many longtime players have suspected: GTA Online is a self-sustaining cash cow that requires minimal new content to keep the lights on — and the servers humming. Despite the long wait for GTA 6, the game continues to deliver steady revenue with relatively little investment. Of course, the leak has already sparked plenty of debate online. Some players are calling the microtransaction model “predatory,” while others point out that the game has delivered thousands of hours of free entertainment to millions. Debunked rumors (like a single player dropping $1 million on Shark Cards in one go) have also been circulating, but the real story is the sheer scale of the operation. Bottom line: GTA Online isn’t just one of the most successful multiplayer games ever — it’s a billion-dollar empire built on a surprisingly small group of dedicated (and generous) players. Whether you’re a free-to-play grinder or a Shark Card whale, this leak shows exactly why Rockstar can afford to take its time with the next big thing. The full leaked documents are still making the rounds across GTA forums and social media. If you’re curious about the charts and raw data, the original breakdown is available on RockstarINTEL. What do you think — impressive longevity or proof that the Shark Card system is too good at emptying wallets? Drop your thoughts below. View full article
-
 A major data breach has pulled back the curtain on one of GTA Online’s most profitable — and controversial — features. According to documents leaked this week, GTA+ now boasts hundreds of thousands of paying subscribers, generating millions in monthly revenue for Rockstar with surprisingly little ongoing effort. The numbers come from the same ShinyHunters hack that targeted Rockstar last week. After the studio refused a $200,000 ransom demand, internal financial files began circulating online. Among the revelations: exact GTA+ subscriber counts that paint a picture of steady, double-digit growth despite the service’s rocky 2022 launch. From Backlash to Bank Account FillerWhen GTA+ first dropped, the GTA Online community revolted. Players organized boycotts, slammed the $7.99 monthly fee for what many called “pay-to-skip-grind” perks, and vowed to hurt Rockstar’s bottom line. Four years later, the story has flipped dramatically. As of April 2026, there are 878,284 active paying GTA+ members. The service hit an all-time high of 1,351,569 subscribers on January 11, 2026 — right after a major promotional push tied to the “Safehouse in the Hills” update that offered three months for the price of two. That means roughly 1 in 10 of GTA Online’s 8+ million weekly players is shelling out for the subscription. Spikes in sign-ups consistently align with big content drops, early access to new vehicles, and bonus rewards — proving Rockstar’s strategy of timing promos with fresh GTA Online updates is paying off handsomely. The Real Money Math Behind GTA+At $7.99 per month, those 878,284 subscribers generated $10,799,036.31 in a single month. After the standard 30% cut taken by PlayStation and Xbox (where most subscribers play), Rockstar still pockets more than $7.5 million monthly. Break it down further: Weekly average: $2,262,725 Daily average: $344,501 According to the leaked figures, GTA+ now accounts for 26% of total GTA Online revenue. It’s essentially a low-maintenance money printer compared to developing new heists, vehicles, or map expansions. What This Means for the Future of GTAThe growth trajectory is especially striking given Take-Two Interactive’s public comments that GTA+ continues to exceed expectations even after price hikes. The leaked data shows consistent upward trends from 2022 through early 2026, with sharp jumps whenever new content hits. As Rockstar gears up for GTA 6, these numbers underscore how valuable the subscription model has become. It delivers predictable recurring revenue while keeping millions of players logged in week after week. Whether GTA+ expands further — or evolves into something bigger for the next generation — remains to be seen, but one thing is clear: the initial outrage has done nothing to slow its momentum. The full picture of the breach is still unfolding, with additional leaks revealing platform-by-platform player counts and overall GTA Online earnings. For now, this single data point proves that GTA+ has quietly become one of the most successful subscription experiments in live-service gaming history. Rockstar hasn’t commented publicly on the leak, but the numbers speak for themselves: in a decade-old game, GTA+ is still delivering fresh millions every month. Stay tuned — GTA Online’s financial dominance shows no signs of slowing down.
 -
A major data breach has pulled back the curtain on one of GTA Online’s most profitable — and controversial — features. According to documents leaked this week, GTA+ now boasts hundreds of thousands of paying subscribers, generating millions in monthly revenue for Rockstar with surprisingly little ongoing effort. The numbers come from the same ShinyHunters hack that targeted Rockstar last week. After the studio refused a $200,000 ransom demand, internal financial files began circulating online. Among the revelations: exact GTA+ subscriber counts that paint a picture of steady, double-digit growth despite the service’s rocky 2022 launch. From Backlash to Bank Account FillerWhen GTA+ first dropped, the GTA Online community revolted. Players organized boycotts, slammed the $7.99 monthly fee for what many called “pay-to-skip-grind” perks, and vowed to hurt Rockstar’s bottom line. Four years later, the story has flipped dramatically. As of April 2026, there are 878,284 active paying GTA+ members. The service hit an all-time high of 1,351,569 subscribers on January 11, 2026 — right after a major promotional push tied to the “Safehouse in the Hills” update that offered three months for the price of two. That means roughly 1 in 10 of GTA Online’s 8+ million weekly players is shelling out for the subscription. Spikes in sign-ups consistently align with big content drops, early access to new vehicles, and bonus rewards — proving Rockstar’s strategy of timing promos with fresh GTA Online updates is paying off handsomely. The Real Money Math Behind GTA+At $7.99 per month, those 878,284 subscribers generated $10,799,036.31 in a single month. After the standard 30% cut taken by PlayStation and Xbox (where most subscribers play), Rockstar still pockets more than $7.5 million monthly. Break it down further: Weekly average: $2,262,725 Daily average: $344,501 According to the leaked figures, GTA+ now accounts for 26% of total GTA Online revenue. It’s essentially a low-maintenance money printer compared to developing new heists, vehicles, or map expansions. What This Means for the Future of GTAThe growth trajectory is especially striking given Take-Two Interactive’s public comments that GTA+ continues to exceed expectations even after price hikes. The leaked data shows consistent upward trends from 2022 through early 2026, with sharp jumps whenever new content hits. As Rockstar gears up for GTA 6, these numbers underscore how valuable the subscription model has become. It delivers predictable recurring revenue while keeping millions of players logged in week after week. Whether GTA+ expands further — or evolves into something bigger for the next generation — remains to be seen, but one thing is clear: the initial outrage has done nothing to slow its momentum. The full picture of the breach is still unfolding, with additional leaks revealing platform-by-platform player counts and overall GTA Online earnings. For now, this single data point proves that GTA+ has quietly become one of the most successful subscription experiments in live-service gaming history. Rockstar hasn’t commented publicly on the leak, but the numbers speak for themselves: in a decade-old game, GTA+ is still delivering fresh millions every month. Stay tuned — GTA Online’s financial dominance shows no signs of slowing down. View full article
-
.webp.4406ed519d30008bf9220d2fd660e55b.webp) A major data breach at Rockstar Games has spilled the beans on exactly how GTA Online performs across platforms more than 13 years after its 2013 launch. Internal documents leaked on April 14, 2026, by the hacker group ShinyHunters show precise weekly player counts and revenue (bookings from Shark Cards and in-game purchases) for PlayStation, Xbox, and PC versions of the game. The data covers the seven-month period from September 9, 2025, to March 24, 2026, and paints a clear picture: GTA Online is still a cash-printing machine with roughly 8.5–9.9 million weekly active players overall, generating millions in weekly revenue—mostly from consoles. How the Leak HappenedThe documents were stolen during a hack last week by ShinyHunters, who demanded a modest $200,000 ransom from Rockstar. When the company refused to pay, the group released a relatively small batch of internal analytics files (a few gigabytes, despite initial claims of terabytes). The files include player metrics, Shark Card earnings, and even some customer support ticket data for both GTA Online and Red Dead Online. No GTA 6 footage or major gameplay secrets were included. Platform-by-Platform Breakdown: Players and Weekly EarningsHere’s the exact leaked data showing average weekly active users and bookings (revenue): Platform Weekly Active Players Weekly Bookings (Revenue) PS5 3,474,021 $4,486,346 PS4 1,889,729 $973,308 Xbox Series X/S 1,129,023 $1,867,947 Xbox One 1,026,695 $918,373 PC (base game, no FiveM) 894,621 $264,273 Total weekly revenue across all platforms: approximately $9.59 million. PlayStation dominates. The PS5 alone accounts for about 41% of players and over half of all weekly revenue. Even the aging PS4 pulls in nearly as many players as the Xbox Series X/S and still generates solid earnings. Xbox holds its own on spending. Xbox Series X/S players spend disproportionately more per user (around $1.65 per weekly active player vs. $1.29 on PS5), which is why that platform punches above its weight in revenue. PC lags dramatically. Despite the massive FiveM RP community (which isn’t counted in these base-game numbers), unmodified GTA Online on PC has the smallest player base and by far the lowest spending—earning just $260k–$264k per week. This explains why Rockstar has historically prioritized console support and why many expect GTA 6’s PC version to arrive later. What This Means for Rockstar and the Future of GTA OnlineThe leak shatters the common narrative that PC players and GTA RP servers are single-handedly keeping the game alive. In reality, console players—especially on PlayStation and current-gen Xbox—are driving the vast majority of both engagement and revenue. GTA Online continues to defy expectations, pulling in nearly $500 million annually from microtransactions alone. Combined with earlier reports of over 20 million unique players in January 2026 and GTA V being one of the most-streamed games year after year, it’s clear the live-service model is still thriving. Rockstar’s focus on consoles makes perfect sense from a business standpoint: higher player counts + higher spending = more money with less platform-specific headache. Older consoles like PS4 and Xbox One still contribute meaningfully, showing the value of long-term support. No official comment from Rockstar or parent company Take-Two has been issued yet, but the numbers prove one thing beyond doubt: GTA Online isn’t slowing down anytime soon. Whether you’re grinding on PS5, cruising Los Santos on Xbox, or modding on PC, the Los Santos crime empire keeps printing money—one Shark Card at a time.
A major data breach at Rockstar Games has spilled the beans on exactly how GTA Online performs across platforms more than 13 years after its 2013 launch. Internal documents leaked on April 14, 2026, by the hacker group ShinyHunters show precise weekly player counts and revenue (bookings from Shark Cards and in-game purchases) for PlayStation, Xbox, and PC versions of the game. The data covers the seven-month period from September 9, 2025, to March 24, 2026, and paints a clear picture: GTA Online is still a cash-printing machine with roughly 8.5–9.9 million weekly active players overall, generating millions in weekly revenue—mostly from consoles. How the Leak HappenedThe documents were stolen during a hack last week by ShinyHunters, who demanded a modest $200,000 ransom from Rockstar. When the company refused to pay, the group released a relatively small batch of internal analytics files (a few gigabytes, despite initial claims of terabytes). The files include player metrics, Shark Card earnings, and even some customer support ticket data for both GTA Online and Red Dead Online. No GTA 6 footage or major gameplay secrets were included. Platform-by-Platform Breakdown: Players and Weekly EarningsHere’s the exact leaked data showing average weekly active users and bookings (revenue): Platform Weekly Active Players Weekly Bookings (Revenue) PS5 3,474,021 $4,486,346 PS4 1,889,729 $973,308 Xbox Series X/S 1,129,023 $1,867,947 Xbox One 1,026,695 $918,373 PC (base game, no FiveM) 894,621 $264,273 Total weekly revenue across all platforms: approximately $9.59 million. PlayStation dominates. The PS5 alone accounts for about 41% of players and over half of all weekly revenue. Even the aging PS4 pulls in nearly as many players as the Xbox Series X/S and still generates solid earnings. Xbox holds its own on spending. Xbox Series X/S players spend disproportionately more per user (around $1.65 per weekly active player vs. $1.29 on PS5), which is why that platform punches above its weight in revenue. PC lags dramatically. Despite the massive FiveM RP community (which isn’t counted in these base-game numbers), unmodified GTA Online on PC has the smallest player base and by far the lowest spending—earning just $260k–$264k per week. This explains why Rockstar has historically prioritized console support and why many expect GTA 6’s PC version to arrive later. What This Means for Rockstar and the Future of GTA OnlineThe leak shatters the common narrative that PC players and GTA RP servers are single-handedly keeping the game alive. In reality, console players—especially on PlayStation and current-gen Xbox—are driving the vast majority of both engagement and revenue. GTA Online continues to defy expectations, pulling in nearly $500 million annually from microtransactions alone. Combined with earlier reports of over 20 million unique players in January 2026 and GTA V being one of the most-streamed games year after year, it’s clear the live-service model is still thriving. Rockstar’s focus on consoles makes perfect sense from a business standpoint: higher player counts + higher spending = more money with less platform-specific headache. Older consoles like PS4 and Xbox One still contribute meaningfully, showing the value of long-term support. No official comment from Rockstar or parent company Take-Two has been issued yet, but the numbers prove one thing beyond doubt: GTA Online isn’t slowing down anytime soon. Whether you’re grinding on PS5, cruising Los Santos on Xbox, or modding on PC, the Los Santos crime empire keeps printing money—one Shark Card at a time. -
A major data breach at Rockstar Games has spilled the beans on exactly how GTA Online performs across platforms more than 13 years after its 2013 launch. Internal documents leaked on April 14, 2026, by the hacker group ShinyHunters show precise weekly player counts and revenue (bookings from Shark Cards and in-game purchases) for PlayStation, Xbox, and PC versions of the game. The data covers the seven-month period from September 9, 2025, to March 24, 2026, and paints a clear picture: GTA Online is still a cash-printing machine with roughly 8.5–9.9 million weekly active players overall, generating millions in weekly revenue—mostly from consoles. How the Leak HappenedThe documents were stolen during a hack last week by ShinyHunters, who demanded a modest $200,000 ransom from Rockstar. When the company refused to pay, the group released a relatively small batch of internal analytics files (a few gigabytes, despite initial claims of terabytes). The files include player metrics, Shark Card earnings, and even some customer support ticket data for both GTA Online and Red Dead Online. No GTA 6 footage or major gameplay secrets were included. Platform-by-Platform Breakdown: Players and Weekly EarningsHere’s the exact leaked data showing average weekly active users and bookings (revenue): Platform Weekly Active Players Weekly Bookings (Revenue) PS5 3,474,021 $4,486,346 PS4 1,889,729 $973,308 Xbox Series X/S 1,129,023 $1,867,947 Xbox One 1,026,695 $918,373 PC (base game, no FiveM) 894,621 $264,273 Total weekly revenue across all platforms: approximately $9.59 million. PlayStation dominates. The PS5 alone accounts for about 41% of players and over half of all weekly revenue. Even the aging PS4 pulls in nearly as many players as the Xbox Series X/S and still generates solid earnings. Xbox holds its own on spending. Xbox Series X/S players spend disproportionately more per user (around $1.65 per weekly active player vs. $1.29 on PS5), which is why that platform punches above its weight in revenue. PC lags dramatically. Despite the massive FiveM RP community (which isn’t counted in these base-game numbers), unmodified GTA Online on PC has the smallest player base and by far the lowest spending—earning just $260k–$264k per week. This explains why Rockstar has historically prioritized console support and why many expect GTA 6’s PC version to arrive later. What This Means for Rockstar and the Future of GTA OnlineThe leak shatters the common narrative that PC players and GTA RP servers are single-handedly keeping the game alive. In reality, console players—especially on PlayStation and current-gen Xbox—are driving the vast majority of both engagement and revenue. GTA Online continues to defy expectations, pulling in nearly $500 million annually from microtransactions alone. Combined with earlier reports of over 20 million unique players in January 2026 and GTA V being one of the most-streamed games year after year, it’s clear the live-service model is still thriving. Rockstar’s focus on consoles makes perfect sense from a business standpoint: higher player counts + higher spending = more money with less platform-specific headache. Older consoles like PS4 and Xbox One still contribute meaningfully, showing the value of long-term support. No official comment from Rockstar or parent company Take-Two has been issued yet, but the numbers prove one thing beyond doubt: GTA Online isn’t slowing down anytime soon. Whether you’re grinding on PS5, cruising Los Santos on Xbox, or modding on PC, the Los Santos crime empire keeps printing money—one Shark Card at a time. View full article
-
 Rockstar Games, the studio behind the massively anticipated Grand Theft Auto VI, is once again the target of a high-profile cyber incident. According to multiple cybersecurity reports published today, the notorious hacking collective ShinyHunters has claimed responsibility for breaching the company’s systems and is now demanding a ransom — with a deadline of April 14, 2026. Unlike the devastating 2022 leak that flooded the internet with 90 minutes of raw GTA 6 gameplay footage, this breach did not involve a direct attack on Rockstar’s internal networks. Instead, ShinyHunters exploited a third-party service: Anodot, an AI-powered cloud-cost monitoring platform that Rockstar uses to track spending and analytics. The hackers allegedly stole authentication tokens from Anodot, which granted them legitimate-looking access to Rockstar’s Snowflake data warehouse environment. Snowflake itself was not hacked — the tokens simply allowed the attackers to “walk in through the front door” as a trusted internal service, bypassing many standard security alerts. What Data Is at Risk?ShinyHunters has not yet released any files, but the group claims access to a wide range of sensitive corporate information, including: Financial records from GTA Online and Red Dead Online Player spending patterns and geographic data Marketing timelines and release schedules Platform agreements and contracts with Sony, Microsoft, voice actors, and music labels Potentially even source code or other development-related documents While there is no indication that individual player account passwords or payment details were compromised, the breach could expose behind-the-scenes details about GTA 6’s marketing strategy, budget, and partnerships — information that would be highly valuable (and embarrassing) if leaked. In a message posted on their dark web leak site, the group warned: Rockstar’s History with Hacks — and Ransom Demands This is far from Rockstar’s first brush with cybercriminals. In 2022, the Lapsus$ group (led by then-teenager Arion Kurtaj) leaked extensive GTA 6 footage and source code snippets after breaching the company’s Slack and internal systems. Rockstar confirmed the incident, spent millions on recovery, and publicly stated it would not negotiate with hackers. Gaming industry experts expect a similar stance this time. Major studios rarely pay ransoms publicly, as doing so often encourages further attacks. If ShinyHunters follows through after April 14, the data could begin appearing on forums and file-sharing sites within days. Will This Affect GTA 6?At this early stage, the breach appears focused on financial and marketing data rather than core game code or assets. Rockstar has not issued any official statement, and neither the studio nor parent company Take-Two Interactive has confirmed the incident as of this writing. However, the timing is awkward. GTA VI is widely expected to launch later in 2026, making any leaked marketing plans or contract details a potential PR nightmare. Fans are already speculating whether the breach could delay the game or force changes to its promotional rollout — though most analysts believe development itself remains unaffected. What Happens Next?April 14, 2026: Ransom deadline. If unmet, ShinyHunters has threatened to begin leaking files. Rockstar and Take-Two are almost certainly investigating and may already be in contact with law enforcement and cybersecurity firms. Players are advised to enable two-factor authentication on their Rockstar accounts as a precaution, though no consumer data appears to be at immediate risk. This story is developing rapidly. ShinyHunters has a long track record of targeting large corporations (including past claims against Microsoft, Cisco, and Ticketmaster), and this appears to be part of a broader campaign exploiting Anodot and similar SaaS integrations across dozens of companies. Stay tuned to RockstarINTEL and major gaming outlets for updates. In the meantime, the gaming community holds its breath — wondering whether Rockstar’s next big headache will once again spill onto the internet before GTA VI even launches.
 -
Rockstar Games, the studio behind the massively anticipated Grand Theft Auto VI, is once again the target of a high-profile cyber incident. According to multiple cybersecurity reports published today, the notorious hacking collective ShinyHunters has claimed responsibility for breaching the company’s systems and is now demanding a ransom — with a deadline of April 14, 2026. Unlike the devastating 2022 leak that flooded the internet with 90 minutes of raw GTA 6 gameplay footage, this breach did not involve a direct attack on Rockstar’s internal networks. Instead, ShinyHunters exploited a third-party service: Anodot, an AI-powered cloud-cost monitoring platform that Rockstar uses to track spending and analytics. The hackers allegedly stole authentication tokens from Anodot, which granted them legitimate-looking access to Rockstar’s Snowflake data warehouse environment. Snowflake itself was not hacked — the tokens simply allowed the attackers to “walk in through the front door” as a trusted internal service, bypassing many standard security alerts. What Data Is at Risk?ShinyHunters has not yet released any files, but the group claims access to a wide range of sensitive corporate information, including: Financial records from GTA Online and Red Dead Online Player spending patterns and geographic data Marketing timelines and release schedules Platform agreements and contracts with Sony, Microsoft, voice actors, and music labels Potentially even source code or other development-related documents While there is no indication that individual player account passwords or payment details were compromised, the breach could expose behind-the-scenes details about GTA 6’s marketing strategy, budget, and partnerships — information that would be highly valuable (and embarrassing) if leaked. In a message posted on their dark web leak site, the group warned: Rockstar’s History with Hacks — and Ransom Demands This is far from Rockstar’s first brush with cybercriminals. In 2022, the Lapsus$ group (led by then-teenager Arion Kurtaj) leaked extensive GTA 6 footage and source code snippets after breaching the company’s Slack and internal systems. Rockstar confirmed the incident, spent millions on recovery, and publicly stated it would not negotiate with hackers. Gaming industry experts expect a similar stance this time. Major studios rarely pay ransoms publicly, as doing so often encourages further attacks. If ShinyHunters follows through after April 14, the data could begin appearing on forums and file-sharing sites within days. Will This Affect GTA 6?At this early stage, the breach appears focused on financial and marketing data rather than core game code or assets. Rockstar has not issued any official statement, and neither the studio nor parent company Take-Two Interactive has confirmed the incident as of this writing. However, the timing is awkward. GTA VI is widely expected to launch later in 2026, making any leaked marketing plans or contract details a potential PR nightmare. Fans are already speculating whether the breach could delay the game or force changes to its promotional rollout — though most analysts believe development itself remains unaffected. What Happens Next?April 14, 2026: Ransom deadline. If unmet, ShinyHunters has threatened to begin leaking files. Rockstar and Take-Two are almost certainly investigating and may already be in contact with law enforcement and cybersecurity firms. Players are advised to enable two-factor authentication on their Rockstar accounts as a precaution, though no consumer data appears to be at immediate risk. This story is developing rapidly. ShinyHunters has a long track record of targeting large corporations (including past claims against Microsoft, Cisco, and Ticketmaster), and this appears to be part of a broader campaign exploiting Anodot and similar SaaS integrations across dozens of companies. Stay tuned to RockstarINTEL and major gaming outlets for updates. In the meantime, the gaming community holds its breath — wondering whether Rockstar’s next big headache will once again spill onto the internet before GTA VI even launches. View full article
-
 Rockstar Games is gearing up for the next era of player-driven experiences in the Grand Theft Auto universe. As the highly anticipated GTA 6 launch approaches, the studio is aggressively expanding its Creator Platform team — the same group now overseeing FiveM — with a clear focus on user-generated content (UGC) inspired by the biggest names in creator economies. According to fresh job listings spotted by the RockstarINTEL community, Rockstar is actively hiring experts who live and breathe platforms like Roblox, Fortnite, YouTube, Twitch, and TikTok. The message is loud and clear: the future of GTA Online isn’t just about Rockstar’s own content — it’s about empowering creators to build, share, and monetize their own worlds inside the game. Why Roblox, Fortnite, and TikTok? Rockstar Wants In on the Creator EconomyThe new roles — including a Strategy Research Associate and Senior Manager, Product — are based at Rockstar’s New York City headquarters, signaling high-level strategic importance. Candidates are expected to have a “deep understanding of the landscape of Creator Platforms (Roblox, Fortnite, YouTube, Twitch, TikTok, etc.)” along with hands-on experience in UGC tools, marketplaces, and live-service games. Roblox and Fortnite have proven that fan-made experiences can outdraw many AAA titles. Some Roblox games regularly pull bigger audiences than GTA itself. TikTok, meanwhile, has completely changed how gaming content is discovered and consumed through short-form clips. Rockstar clearly sees the writing on the wall: the next GTA Online needs to tap into that same explosive creator energy. The Creator Platform team’s mission statement says it all: This is the same team that recently launched the official Cfx Marketplace — Rockstar’s first sanctioned mod store — back in January 2026. GTA Roleplay Ecosystem Gets a Seat at the TableOne of the most exciting details in the listings is the explicit call for “familiarity with the GTA Roleplay ecosystem.” FiveM and RedM have built massive communities over the years, and it looks like Rockstar plans to bring those lessons directly into the next generation of GTA Online. The Senior Manager role will focus on “building sustainable systems that empower creators to build experiences, attract players, and operate thriving communities.” In other words, Rockstar isn’t just adding mod support — they’re building an entire ecosystem where creators can run profitable, long-term servers. While it’s still unclear exactly how much of this tech will land in GTA 6’s online mode at launch, the timing is no coincidence. These hires come as the studio prepares one of the biggest game launches in history. “Worth the Wait,” Says InsiderLong-time Rockstar collaborator and journalist HipHopGamer recently teased that the UGC side of the next GTA Online will be “worth the wait.” Given Rockstar’s history of under-promising and over-delivering, that’s high praise. What This Means for Players and CreatorsFor creators: Expect better tools, easier publishing, built-in monetization, and official support — moving far beyond the current FiveM setup. For players: More variety, more roleplay servers, more custom game modes, and potentially endless new ways to experience Los Santos and Leonida. For Rockstar: A massive, constantly refreshed library of content that keeps GTA 6 fresh for years after launch — just like Fortnite and Roblox have done. The Creator Platform team is also expanding globally, with openings still listed in London and Leeds, and a recent (now closed) role in Bangalore. This worldwide push shows Rockstar is treating UGC as a core pillar of its future strategy. The Road to GTA 6 Just Got a Lot More ExcitingGTA 6 isn’t just going to be the biggest open-world game ever made — it’s shaping up to be the biggest creator platform Rockstar has ever built. By studying what works on Roblox, Fortnite, and TikTok, Rockstar is positioning itself to dominate the next decade of online gaming. Stay tuned to Nexus Gaming for more updates as these roles get filled and more details emerge. The wait for GTA 6 just got a whole lot more interesting — and a whole lot more creative. What do you think — ready for player-created GTA 6 experiences that rival Roblox hits? Drop your thoughts in the comments below!
 -
Rockstar Games is gearing up for the next era of player-driven experiences in the Grand Theft Auto universe. As the highly anticipated GTA 6 launch approaches, the studio is aggressively expanding its Creator Platform team — the same group now overseeing FiveM — with a clear focus on user-generated content (UGC) inspired by the biggest names in creator economies. According to fresh job listings spotted by the RockstarINTEL community, Rockstar is actively hiring experts who live and breathe platforms like Roblox, Fortnite, YouTube, Twitch, and TikTok. The message is loud and clear: the future of GTA Online isn’t just about Rockstar’s own content — it’s about empowering creators to build, share, and monetize their own worlds inside the game. Why Roblox, Fortnite, and TikTok? Rockstar Wants In on the Creator EconomyThe new roles — including a Strategy Research Associate and Senior Manager, Product — are based at Rockstar’s New York City headquarters, signaling high-level strategic importance. Candidates are expected to have a “deep understanding of the landscape of Creator Platforms (Roblox, Fortnite, YouTube, Twitch, TikTok, etc.)” along with hands-on experience in UGC tools, marketplaces, and live-service games. Roblox and Fortnite have proven that fan-made experiences can outdraw many AAA titles. Some Roblox games regularly pull bigger audiences than GTA itself. TikTok, meanwhile, has completely changed how gaming content is discovered and consumed through short-form clips. Rockstar clearly sees the writing on the wall: the next GTA Online needs to tap into that same explosive creator energy. The Creator Platform team’s mission statement says it all: This is the same team that recently launched the official Cfx Marketplace — Rockstar’s first sanctioned mod store — back in January 2026. GTA Roleplay Ecosystem Gets a Seat at the TableOne of the most exciting details in the listings is the explicit call for “familiarity with the GTA Roleplay ecosystem.” FiveM and RedM have built massive communities over the years, and it looks like Rockstar plans to bring those lessons directly into the next generation of GTA Online. The Senior Manager role will focus on “building sustainable systems that empower creators to build experiences, attract players, and operate thriving communities.” In other words, Rockstar isn’t just adding mod support — they’re building an entire ecosystem where creators can run profitable, long-term servers. While it’s still unclear exactly how much of this tech will land in GTA 6’s online mode at launch, the timing is no coincidence. These hires come as the studio prepares one of the biggest game launches in history. “Worth the Wait,” Says InsiderLong-time Rockstar collaborator and journalist HipHopGamer recently teased that the UGC side of the next GTA Online will be “worth the wait.” Given Rockstar’s history of under-promising and over-delivering, that’s high praise. What This Means for Players and CreatorsFor creators: Expect better tools, easier publishing, built-in monetization, and official support — moving far beyond the current FiveM setup. For players: More variety, more roleplay servers, more custom game modes, and potentially endless new ways to experience Los Santos and Leonida. For Rockstar: A massive, constantly refreshed library of content that keeps GTA 6 fresh for years after launch — just like Fortnite and Roblox have done. The Creator Platform team is also expanding globally, with openings still listed in London and Leeds, and a recent (now closed) role in Bangalore. This worldwide push shows Rockstar is treating UGC as a core pillar of its future strategy. The Road to GTA 6 Just Got a Lot More ExcitingGTA 6 isn’t just going to be the biggest open-world game ever made — it’s shaping up to be the biggest creator platform Rockstar has ever built. By studying what works on Roblox, Fortnite, and TikTok, Rockstar is positioning itself to dominate the next decade of online gaming. Stay tuned to Nexus Gaming for more updates as these roles get filled and more details emerge. The wait for GTA 6 just got a whole lot more interesting — and a whole lot more creative. What do you think — ready for player-created GTA 6 experiences that rival Roblox hits? Drop your thoughts in the comments below! View full article
-
 Grand Theft Auto V, one of the most popular games in Indonesia, was briefly hit with a “Refused Classification” (RC) rating under the country’s brand-new Indonesia Game Rating System (IGRS). The label effectively made the game unavailable for purchase on Steam for Indonesian users earlier this month, sparking widespread confusion and backlash among local gamers. The drama began in the first week of April 2026 when Steam started displaying IGRS age ratings for games in Indonesia. Instead of the expected 18+ rating for mature titles, GTA V was slapped with an RC tag — the system’s strictest category, meaning the game was deemed “not fit for distribution.” This triggered Steam’s policy that games without a valid local rating would no longer be shown to customers in the region. What Is the New IGRS System?Indonesia’s Ministry of Communication and Digital Affairs (Komdigi) introduced the IGRS earlier this year as part of a broader push to regulate online content and protect younger players. The system features six categories: 3+ 7+ 13+ 15+ 18+ Refused Classification (RC) While the IGRS was designed to work alongside the International Age Rating Coalition (IARC) — which already rates GTA V as 18+ in many regions — early implementation relied heavily on an automated self-classification questionnaire filled out by developers. Many players and industry observers criticized the rollout for producing wildly inconsistent results. Other notable examples included: Violent shooters like Call of Duty receiving a child-friendly 3+ rating. Wholesome farming sim Story of Seasons being rated 18+. Several major titles (including Baldur’s Gate 3, Cyberpunk 2077, and others) also receiving the dreaded RC label. Government and Valve Step In The confusion quickly drew public criticism. On April 6, Komdigi issued an official statement clarifying that the ratings appearing on Steam were not the final, official IGRS classifications and could mislead parents about age-appropriate content. In response, Valve removed all IGRS labels from the Indonesian Steam store. A few days later, Steam addressed the situation directly, calling it “a technical bug and miscommunication” that led to “incorrect and incomplete ratings” being displayed between April 2 and April 5. The company confirmed it is now working closely with the Indonesian ministry to implement a smoother, more accurate process moving forward. As of now, the issue has been resolved. GTA V and the other affected titles are once again visible and purchasable on Steam in Indonesia. Some reports indicate the platform has temporarily reverted to showing PEGI ratings while the full IGRS integration is refined. Why This Matters for Indonesian GamersIndonesia has a massive and passionate gaming community, and GTA V remains hugely popular there thanks to its single-player campaign and ongoing GTA Online updates. The brief RC scare highlighted growing pains with the new regulatory system, especially around automated classification tools and potential overreach via the RC category (which can function as an effective ban). The Indonesian Game Association (AGI) has described the regulation as a “guideline, not a restriction,” but many players remain cautious about how strictly it will be enforced in the long term — especially with GTA VI on the horizon. For now, though, the situation has a happy ending: no permanent bans, clearer communication between Valve and the government, and a commitment to improve the system. Indonesian fans can continue enjoying Los Santos without interruption. Stay tuned to Nexus Gaming for the latest GTA news, including any future developments on regional ratings or GTA Online updates in Southeast Asia.
 -
Grand Theft Auto V, one of the most popular games in Indonesia, was briefly hit with a “Refused Classification” (RC) rating under the country’s brand-new Indonesia Game Rating System (IGRS). The label effectively made the game unavailable for purchase on Steam for Indonesian users earlier this month, sparking widespread confusion and backlash among local gamers. The drama began in the first week of April 2026 when Steam started displaying IGRS age ratings for games in Indonesia. Instead of the expected 18+ rating for mature titles, GTA V was slapped with an RC tag — the system’s strictest category, meaning the game was deemed “not fit for distribution.” This triggered Steam’s policy that games without a valid local rating would no longer be shown to customers in the region. What Is the New IGRS System?Indonesia’s Ministry of Communication and Digital Affairs (Komdigi) introduced the IGRS earlier this year as part of a broader push to regulate online content and protect younger players. The system features six categories: 3+ 7+ 13+ 15+ 18+ Refused Classification (RC) While the IGRS was designed to work alongside the International Age Rating Coalition (IARC) — which already rates GTA V as 18+ in many regions — early implementation relied heavily on an automated self-classification questionnaire filled out by developers. Many players and industry observers criticized the rollout for producing wildly inconsistent results. Other notable examples included: Violent shooters like Call of Duty receiving a child-friendly 3+ rating. Wholesome farming sim Story of Seasons being rated 18+. Several major titles (including Baldur’s Gate 3, Cyberpunk 2077, and others) also receiving the dreaded RC label. Government and Valve Step In The confusion quickly drew public criticism. On April 6, Komdigi issued an official statement clarifying that the ratings appearing on Steam were not the final, official IGRS classifications and could mislead parents about age-appropriate content. In response, Valve removed all IGRS labels from the Indonesian Steam store. A few days later, Steam addressed the situation directly, calling it “a technical bug and miscommunication” that led to “incorrect and incomplete ratings” being displayed between April 2 and April 5. The company confirmed it is now working closely with the Indonesian ministry to implement a smoother, more accurate process moving forward. As of now, the issue has been resolved. GTA V and the other affected titles are once again visible and purchasable on Steam in Indonesia. Some reports indicate the platform has temporarily reverted to showing PEGI ratings while the full IGRS integration is refined. Why This Matters for Indonesian GamersIndonesia has a massive and passionate gaming community, and GTA V remains hugely popular there thanks to its single-player campaign and ongoing GTA Online updates. The brief RC scare highlighted growing pains with the new regulatory system, especially around automated classification tools and potential overreach via the RC category (which can function as an effective ban). The Indonesian Game Association (AGI) has described the regulation as a “guideline, not a restriction,” but many players remain cautious about how strictly it will be enforced in the long term — especially with GTA VI on the horizon. For now, though, the situation has a happy ending: no permanent bans, clearer communication between Valve and the government, and a commitment to improve the system. Indonesian fans can continue enjoying Los Santos without interruption. Stay tuned to Nexus Gaming for the latest GTA news, including any future developments on regional ratings or GTA Online updates in Southeast Asia. View full article
-
.jpg.abbbc40d652d617336218f24b18b7916.jpg) The GTA 6 hype train shows no signs of slowing down. With the game still on track for its November 19, 2026 release on PS5 and Xbox Series X/S (and PC to follow), fresh details have surfaced that are getting fans even more excited about both the single-player story and the inevitable GTA 6 Online experience. According to a new interview spotlighted by RockstarINTEL and PC Gamer, veteran games journalist and content creator HipHopGamer (aka The Goat of the Game) has dropped what he calls a "small exclusive" about a special side mission in GTA 6. He also teased that Rockstar is building a next-level user-generated content (UGC) system that could turn regular players into millionaires. The Star-Studded Side MissionHipHopGamer described a “special side mission” featuring “a major rapper that left CM Punk bloody by accident.” Fans and outlets quickly connected the dots to Freddie Gibbs — the rapper who accidentally injured WWE superstar CM Punk during filming of their 2025 horror movie Night Patrol. This wouldn’t be Gibbs’ first appearance in the GTA universe. His track “Still Livin’” was featured on GTA V’s Radio Los Santos station, and he also had music in Max Payne 3. HipHopGamer emphasized his close ties to Rockstar, saying he literally partied with the team and has been hyping GTA 6 since snapping a photo with Take-Two CEO Strauss Zelnick back in 2023. While Rockstar has remained completely silent on the claim (as they always do with leaks), the detail fits perfectly with the studio’s history of packing the game world with real-world celebrities, musicians, and pop-culture references. GTA 6 Online: A Creator Economy That Could Make Players Rich The bigger headline might be what HipHopGamer said about GTA 6’s online component. He claims Rockstar is heavily investing in a full-blown UGC ecosystem — essentially turning GTA 6 Online into a creator-driven marketplace where players can build, share, and even monetize their own content. He went even further, telling fans that if they thought GTA 5’s RP servers and modding scene were wild, “you ain’t seen nothing yet” — especially once the PC version launches. This lines up with Rockstar’s recent moves: acquiring the FiveM and RedM teams, launching official paid marketplaces for GTA Online, and pushing creator tools harder than ever. Many insiders believe GTA 6 Online will feel more like Roblox or Fortnite’s Creative mode on steroids — complete with in-game tools for missions, maps, races, and even full roleplay experiences that players can sell or promote. Why This Leak Feels DifferentHipHopGamer isn’t some random Twitter account. He’s a long-time industry figure with documented relationships at the highest levels of Take-Two and Rockstar. While nothing is officially confirmed until Rockstar says so, his track record and connections make this one of the more intriguing tidbits we’ve heard in 2026. Of course, as with all pre-release info, take it with a grain of salt until we see official footage or the game itself. Rockstar has a habit of keeping things under wraps until they’re ready to blow minds. What This Means for FansStory Mode: More celebrity cameos and side content that feels fresh and tied to current pop culture. Online: Potentially the most creator-friendly GTA ever — one where talented players could literally build careers inside the game. The Wait: With marketing ramping up this summer, we’re hopefully only months away from Trailer 3 and deeper dives into these features. GTA 6 is shaping up to be more than just the next big open-world game — it could redefine how we play, create, and even earn within a virtual world. Stay locked to Nexus Gaming for the latest GTA 6 updates, leaks, and analysis as we count down to launch. What do you think — would a Freddie Gibbs mission be fire, or are you more hyped for the creator tools? Drop your thoughts in the comments!
The GTA 6 hype train shows no signs of slowing down. With the game still on track for its November 19, 2026 release on PS5 and Xbox Series X/S (and PC to follow), fresh details have surfaced that are getting fans even more excited about both the single-player story and the inevitable GTA 6 Online experience. According to a new interview spotlighted by RockstarINTEL and PC Gamer, veteran games journalist and content creator HipHopGamer (aka The Goat of the Game) has dropped what he calls a "small exclusive" about a special side mission in GTA 6. He also teased that Rockstar is building a next-level user-generated content (UGC) system that could turn regular players into millionaires. The Star-Studded Side MissionHipHopGamer described a “special side mission” featuring “a major rapper that left CM Punk bloody by accident.” Fans and outlets quickly connected the dots to Freddie Gibbs — the rapper who accidentally injured WWE superstar CM Punk during filming of their 2025 horror movie Night Patrol. This wouldn’t be Gibbs’ first appearance in the GTA universe. His track “Still Livin’” was featured on GTA V’s Radio Los Santos station, and he also had music in Max Payne 3. HipHopGamer emphasized his close ties to Rockstar, saying he literally partied with the team and has been hyping GTA 6 since snapping a photo with Take-Two CEO Strauss Zelnick back in 2023. While Rockstar has remained completely silent on the claim (as they always do with leaks), the detail fits perfectly with the studio’s history of packing the game world with real-world celebrities, musicians, and pop-culture references. GTA 6 Online: A Creator Economy That Could Make Players Rich The bigger headline might be what HipHopGamer said about GTA 6’s online component. He claims Rockstar is heavily investing in a full-blown UGC ecosystem — essentially turning GTA 6 Online into a creator-driven marketplace where players can build, share, and even monetize their own content. He went even further, telling fans that if they thought GTA 5’s RP servers and modding scene were wild, “you ain’t seen nothing yet” — especially once the PC version launches. This lines up with Rockstar’s recent moves: acquiring the FiveM and RedM teams, launching official paid marketplaces for GTA Online, and pushing creator tools harder than ever. Many insiders believe GTA 6 Online will feel more like Roblox or Fortnite’s Creative mode on steroids — complete with in-game tools for missions, maps, races, and even full roleplay experiences that players can sell or promote. Why This Leak Feels DifferentHipHopGamer isn’t some random Twitter account. He’s a long-time industry figure with documented relationships at the highest levels of Take-Two and Rockstar. While nothing is officially confirmed until Rockstar says so, his track record and connections make this one of the more intriguing tidbits we’ve heard in 2026. Of course, as with all pre-release info, take it with a grain of salt until we see official footage or the game itself. Rockstar has a habit of keeping things under wraps until they’re ready to blow minds. What This Means for FansStory Mode: More celebrity cameos and side content that feels fresh and tied to current pop culture. Online: Potentially the most creator-friendly GTA ever — one where talented players could literally build careers inside the game. The Wait: With marketing ramping up this summer, we’re hopefully only months away from Trailer 3 and deeper dives into these features. GTA 6 is shaping up to be more than just the next big open-world game — it could redefine how we play, create, and even earn within a virtual world. Stay locked to Nexus Gaming for the latest GTA 6 updates, leaks, and analysis as we count down to launch. What do you think — would a Freddie Gibbs mission be fire, or are you more hyped for the creator tools? Drop your thoughts in the comments! -
The GTA 6 hype train shows no signs of slowing down. With the game still on track for its November 19, 2026 release on PS5 and Xbox Series X/S (and PC to follow), fresh details have surfaced that are getting fans even more excited about both the single-player story and the inevitable GTA 6 Online experience. According to a new interview spotlighted by RockstarINTEL and PC Gamer, veteran games journalist and content creator HipHopGamer (aka The Goat of the Game) has dropped what he calls a "small exclusive" about a special side mission in GTA 6. He also teased that Rockstar is building a next-level user-generated content (UGC) system that could turn regular players into millionaires. The Star-Studded Side MissionHipHopGamer described a “special side mission” featuring “a major rapper that left CM Punk bloody by accident.” Fans and outlets quickly connected the dots to Freddie Gibbs — the rapper who accidentally injured WWE superstar CM Punk during filming of their 2025 horror movie Night Patrol. This wouldn’t be Gibbs’ first appearance in the GTA universe. His track “Still Livin’” was featured on GTA V’s Radio Los Santos station, and he also had music in Max Payne 3. HipHopGamer emphasized his close ties to Rockstar, saying he literally partied with the team and has been hyping GTA 6 since snapping a photo with Take-Two CEO Strauss Zelnick back in 2023. While Rockstar has remained completely silent on the claim (as they always do with leaks), the detail fits perfectly with the studio’s history of packing the game world with real-world celebrities, musicians, and pop-culture references. GTA 6 Online: A Creator Economy That Could Make Players Rich The bigger headline might be what HipHopGamer said about GTA 6’s online component. He claims Rockstar is heavily investing in a full-blown UGC ecosystem — essentially turning GTA 6 Online into a creator-driven marketplace where players can build, share, and even monetize their own content. He went even further, telling fans that if they thought GTA 5’s RP servers and modding scene were wild, “you ain’t seen nothing yet” — especially once the PC version launches. This lines up with Rockstar’s recent moves: acquiring the FiveM and RedM teams, launching official paid marketplaces for GTA Online, and pushing creator tools harder than ever. Many insiders believe GTA 6 Online will feel more like Roblox or Fortnite’s Creative mode on steroids — complete with in-game tools for missions, maps, races, and even full roleplay experiences that players can sell or promote. Why This Leak Feels DifferentHipHopGamer isn’t some random Twitter account. He’s a long-time industry figure with documented relationships at the highest levels of Take-Two and Rockstar. While nothing is officially confirmed until Rockstar says so, his track record and connections make this one of the more intriguing tidbits we’ve heard in 2026. Of course, as with all pre-release info, take it with a grain of salt until we see official footage or the game itself. Rockstar has a habit of keeping things under wraps until they’re ready to blow minds. What This Means for FansStory Mode: More celebrity cameos and side content that feels fresh and tied to current pop culture. Online: Potentially the most creator-friendly GTA ever — one where talented players could literally build careers inside the game. The Wait: With marketing ramping up this summer, we’re hopefully only months away from Trailer 3 and deeper dives into these features. GTA 6 is shaping up to be more than just the next big open-world game — it could redefine how we play, create, and even earn within a virtual world. Stay locked to Nexus Gaming for the latest GTA 6 updates, leaks, and analysis as we count down to launch. What do you think — would a Freddie Gibbs mission be fire, or are you more hyped for the creator tools? Drop your thoughts in the comments! View full article