


Rockstar
Administrators
-
Joined
-
Last visited
Everything posted by Rockstar
-

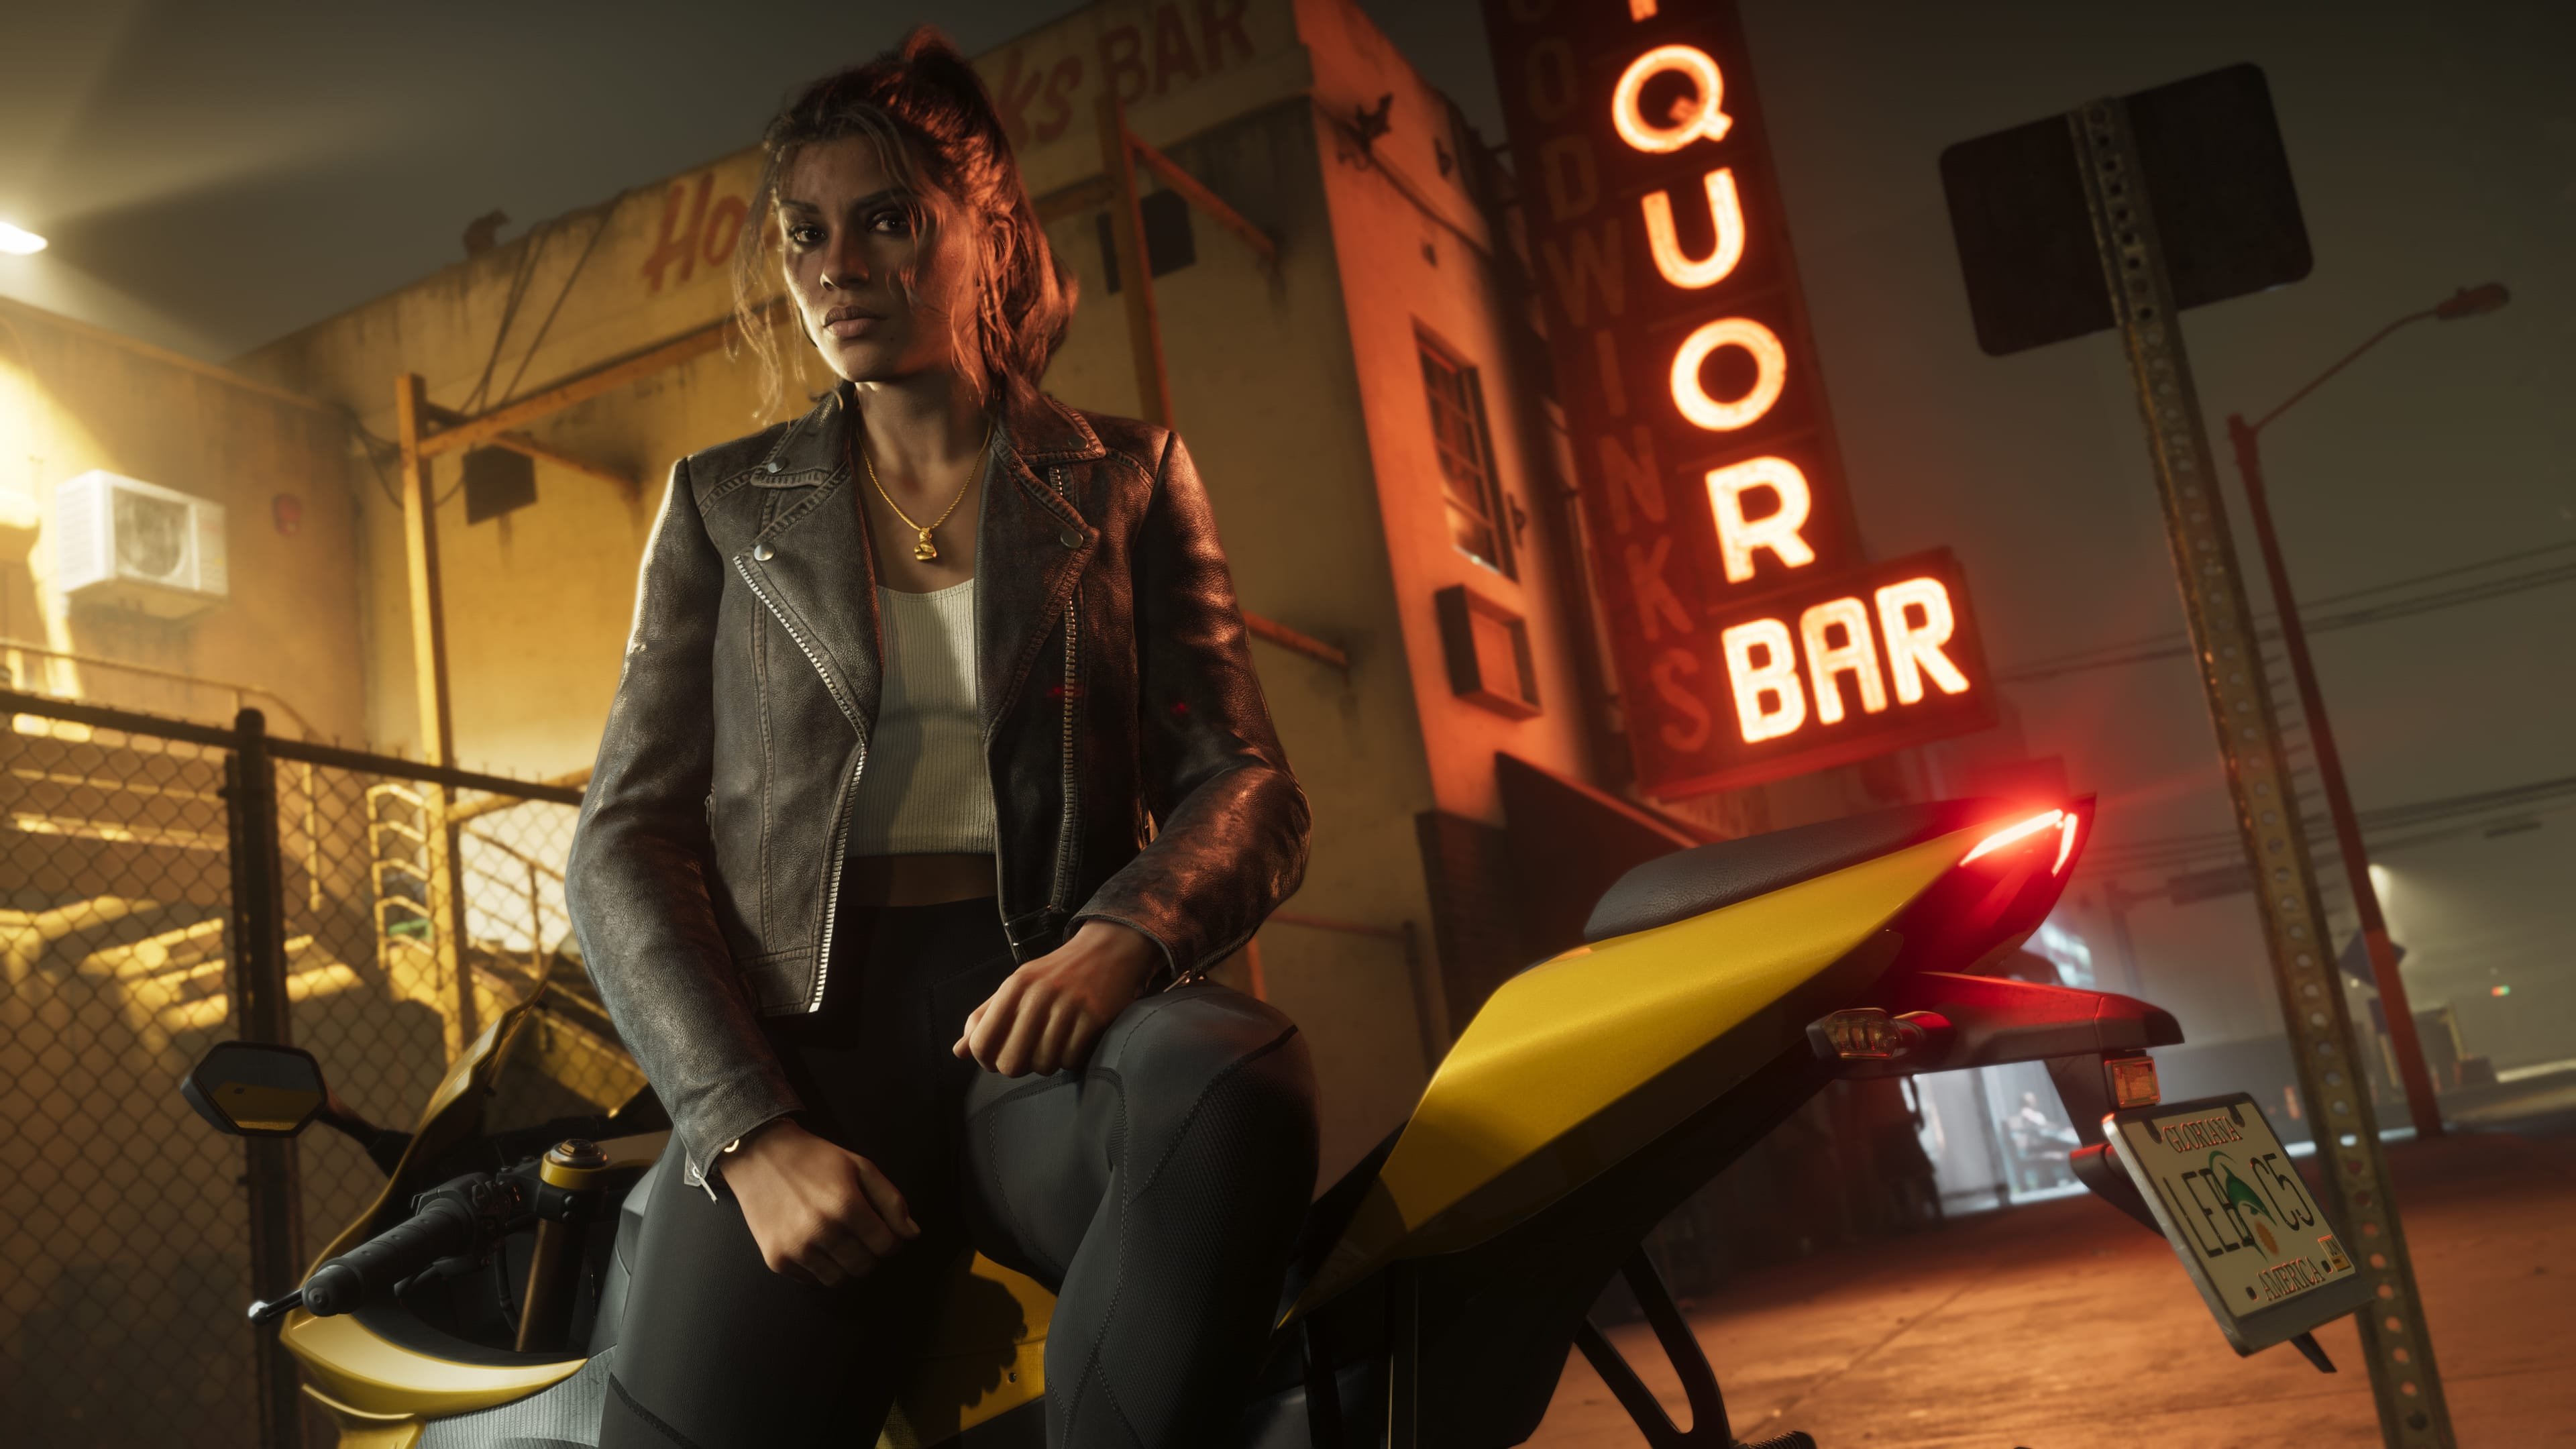
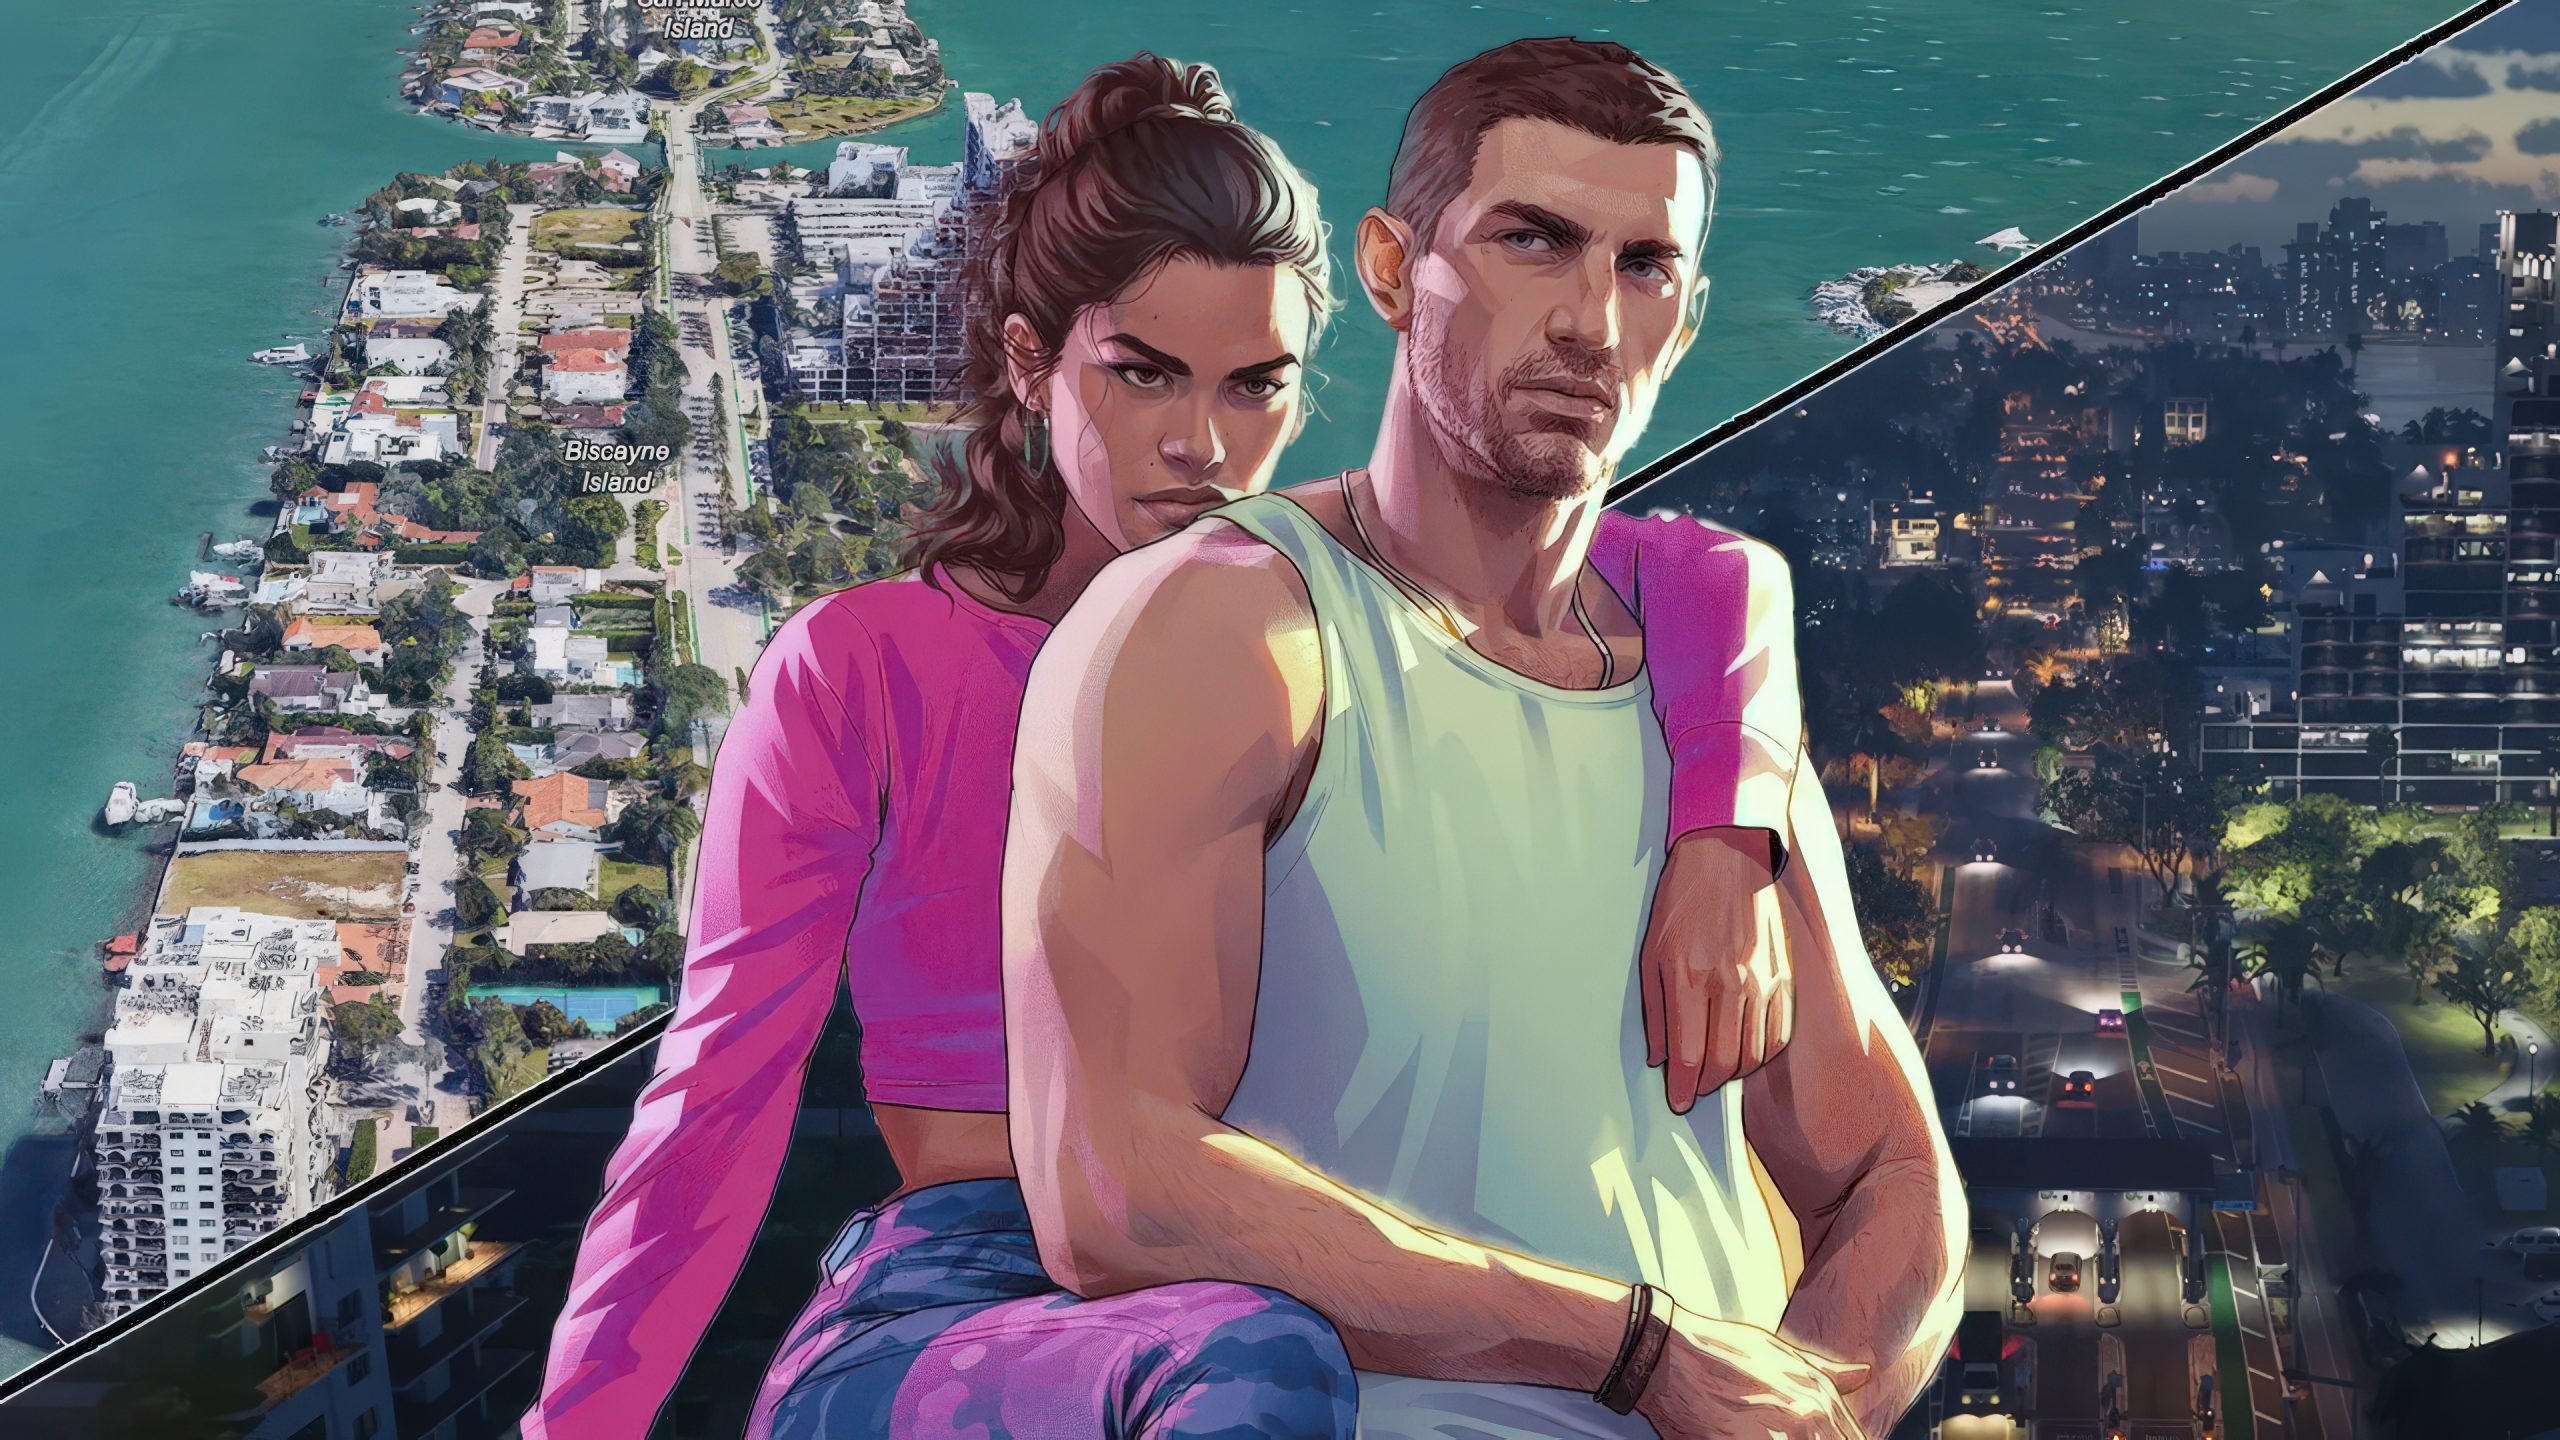
 As the gaming industry braces for the colossus that is Grand Theft Auto VI, a former Call of Duty executive has issued a stark warning: the upcoming title may not just dominate the charts—it could completely drain the life out of current free-to-play giants. Greg Reisdorf, the former Creative Director at Sledgehammer Games who led development on Call of Duty: Advanced Warfare’s multiplayer, believes the launch of GTA 6 represents an existential threat to mature-themed live-service games. Speaking to Esportsbets, Reisdorf painted a grim picture for titles like Call of Duty: Warzone, predicting that Rockstar’s latest entry could turn rival lobbies into "ghost towns" overnight. The "AAAAA" ThreatThe industry is no stranger to hype, but GTA 6 is a different beast entirely. With projections estimating $7.6 billion in revenue within the first 60 days and sales potentially doubling those of its predecessor, the game is poised to suck the oxygen out of the room. Reisdorf notes that when a title of this magnitude launches—one that has been described as the industry's first "AAAAA" game—it demands a level of player attention that leaves little room for competitors. Reisdorf’s primary concern lies with player retention. Live-service games survive on momentum and daily active users. If millions of players migrate to Vice City to explore the new Leonida setting and its rumored MMO-like online features, games that rely on the same mature demographic may struggle to fill matches. Who is Safe?Interestingly, Reisdorf makes a crucial distinction regarding who is in the blast radius. He suggests that while mature shooters are in direct danger, titles targeting younger audiences, such as Fortnite and Roblox, might weather the storm. The crossover between the Grand Theft Auto demographic and the Call of Duty player base is significant; both franchises cater to adults seeking high-fidelity, competitive, and gritty experiences. The Industry ScrambleThe warning comes amidst a wider industry retreat. Major publishers have already begun strategic maneuvers to avoid the GTA 6 launch window, currently expected around November 19, 2026. High-profile titles like Death Stranding 2 and The Outer Worlds 2 are reportedly benefitting from release dates that steer clear of Rockstar’s juggernaut. Reisdorf points out that this defensive positioning is rare. It highlights a collective recognition that GTA 6 is not just a game release, but a cultural event that could monopolize gaming conversations for months, if not years. A Live-Service "Existential Crisis"The long-term worry for executives is the staying power of GTA Online. If the new iteration replicates the decade-long success of its predecessor, it could permanently shift where "whales" and casual players alike spend their time and money. Reisdorf praised Rockstar's history of community-focused content, noting that a successful transition to the new online era could seal the fate of struggling live-service competitors. As 2026 approaches, the question remains: Can the market support multiple titans, or will GTA 6 prove to be the "meteor" that forces a mass extinction event for current favorites? For now, developers of mature free-to-play shooters are likely double-checking their contingency plans.
 -
As the gaming industry braces for the colossus that is Grand Theft Auto VI, a former Call of Duty executive has issued a stark warning: the upcoming title may not just dominate the charts—it could completely drain the life out of current free-to-play giants. Greg Reisdorf, the former Creative Director at Sledgehammer Games who led development on Call of Duty: Advanced Warfare’s multiplayer, believes the launch of GTA 6 represents an existential threat to mature-themed live-service games. Speaking to Esportsbets, Reisdorf painted a grim picture for titles like Call of Duty: Warzone, predicting that Rockstar’s latest entry could turn rival lobbies into "ghost towns" overnight. The "AAAAA" ThreatThe industry is no stranger to hype, but GTA 6 is a different beast entirely. With projections estimating $7.6 billion in revenue within the first 60 days and sales potentially doubling those of its predecessor, the game is poised to suck the oxygen out of the room. Reisdorf notes that when a title of this magnitude launches—one that has been described as the industry's first "AAAAA" game—it demands a level of player attention that leaves little room for competitors. Reisdorf’s primary concern lies with player retention. Live-service games survive on momentum and daily active users. If millions of players migrate to Vice City to explore the new Leonida setting and its rumored MMO-like online features, games that rely on the same mature demographic may struggle to fill matches. Who is Safe?Interestingly, Reisdorf makes a crucial distinction regarding who is in the blast radius. He suggests that while mature shooters are in direct danger, titles targeting younger audiences, such as Fortnite and Roblox, might weather the storm. The crossover between the Grand Theft Auto demographic and the Call of Duty player base is significant; both franchises cater to adults seeking high-fidelity, competitive, and gritty experiences. The Industry ScrambleThe warning comes amidst a wider industry retreat. Major publishers have already begun strategic maneuvers to avoid the GTA 6 launch window, currently expected around November 19, 2026. High-profile titles like Death Stranding 2 and The Outer Worlds 2 are reportedly benefitting from release dates that steer clear of Rockstar’s juggernaut. Reisdorf points out that this defensive positioning is rare. It highlights a collective recognition that GTA 6 is not just a game release, but a cultural event that could monopolize gaming conversations for months, if not years. A Live-Service "Existential Crisis"The long-term worry for executives is the staying power of GTA Online. If the new iteration replicates the decade-long success of its predecessor, it could permanently shift where "whales" and casual players alike spend their time and money. Reisdorf praised Rockstar's history of community-focused content, noting that a successful transition to the new online era could seal the fate of struggling live-service competitors. As 2026 approaches, the question remains: Can the market support multiple titans, or will GTA 6 prove to be the "meteor" that forces a mass extinction event for current favorites? For now, developers of mature free-to-play shooters are likely double-checking their contingency plans. View full article
-
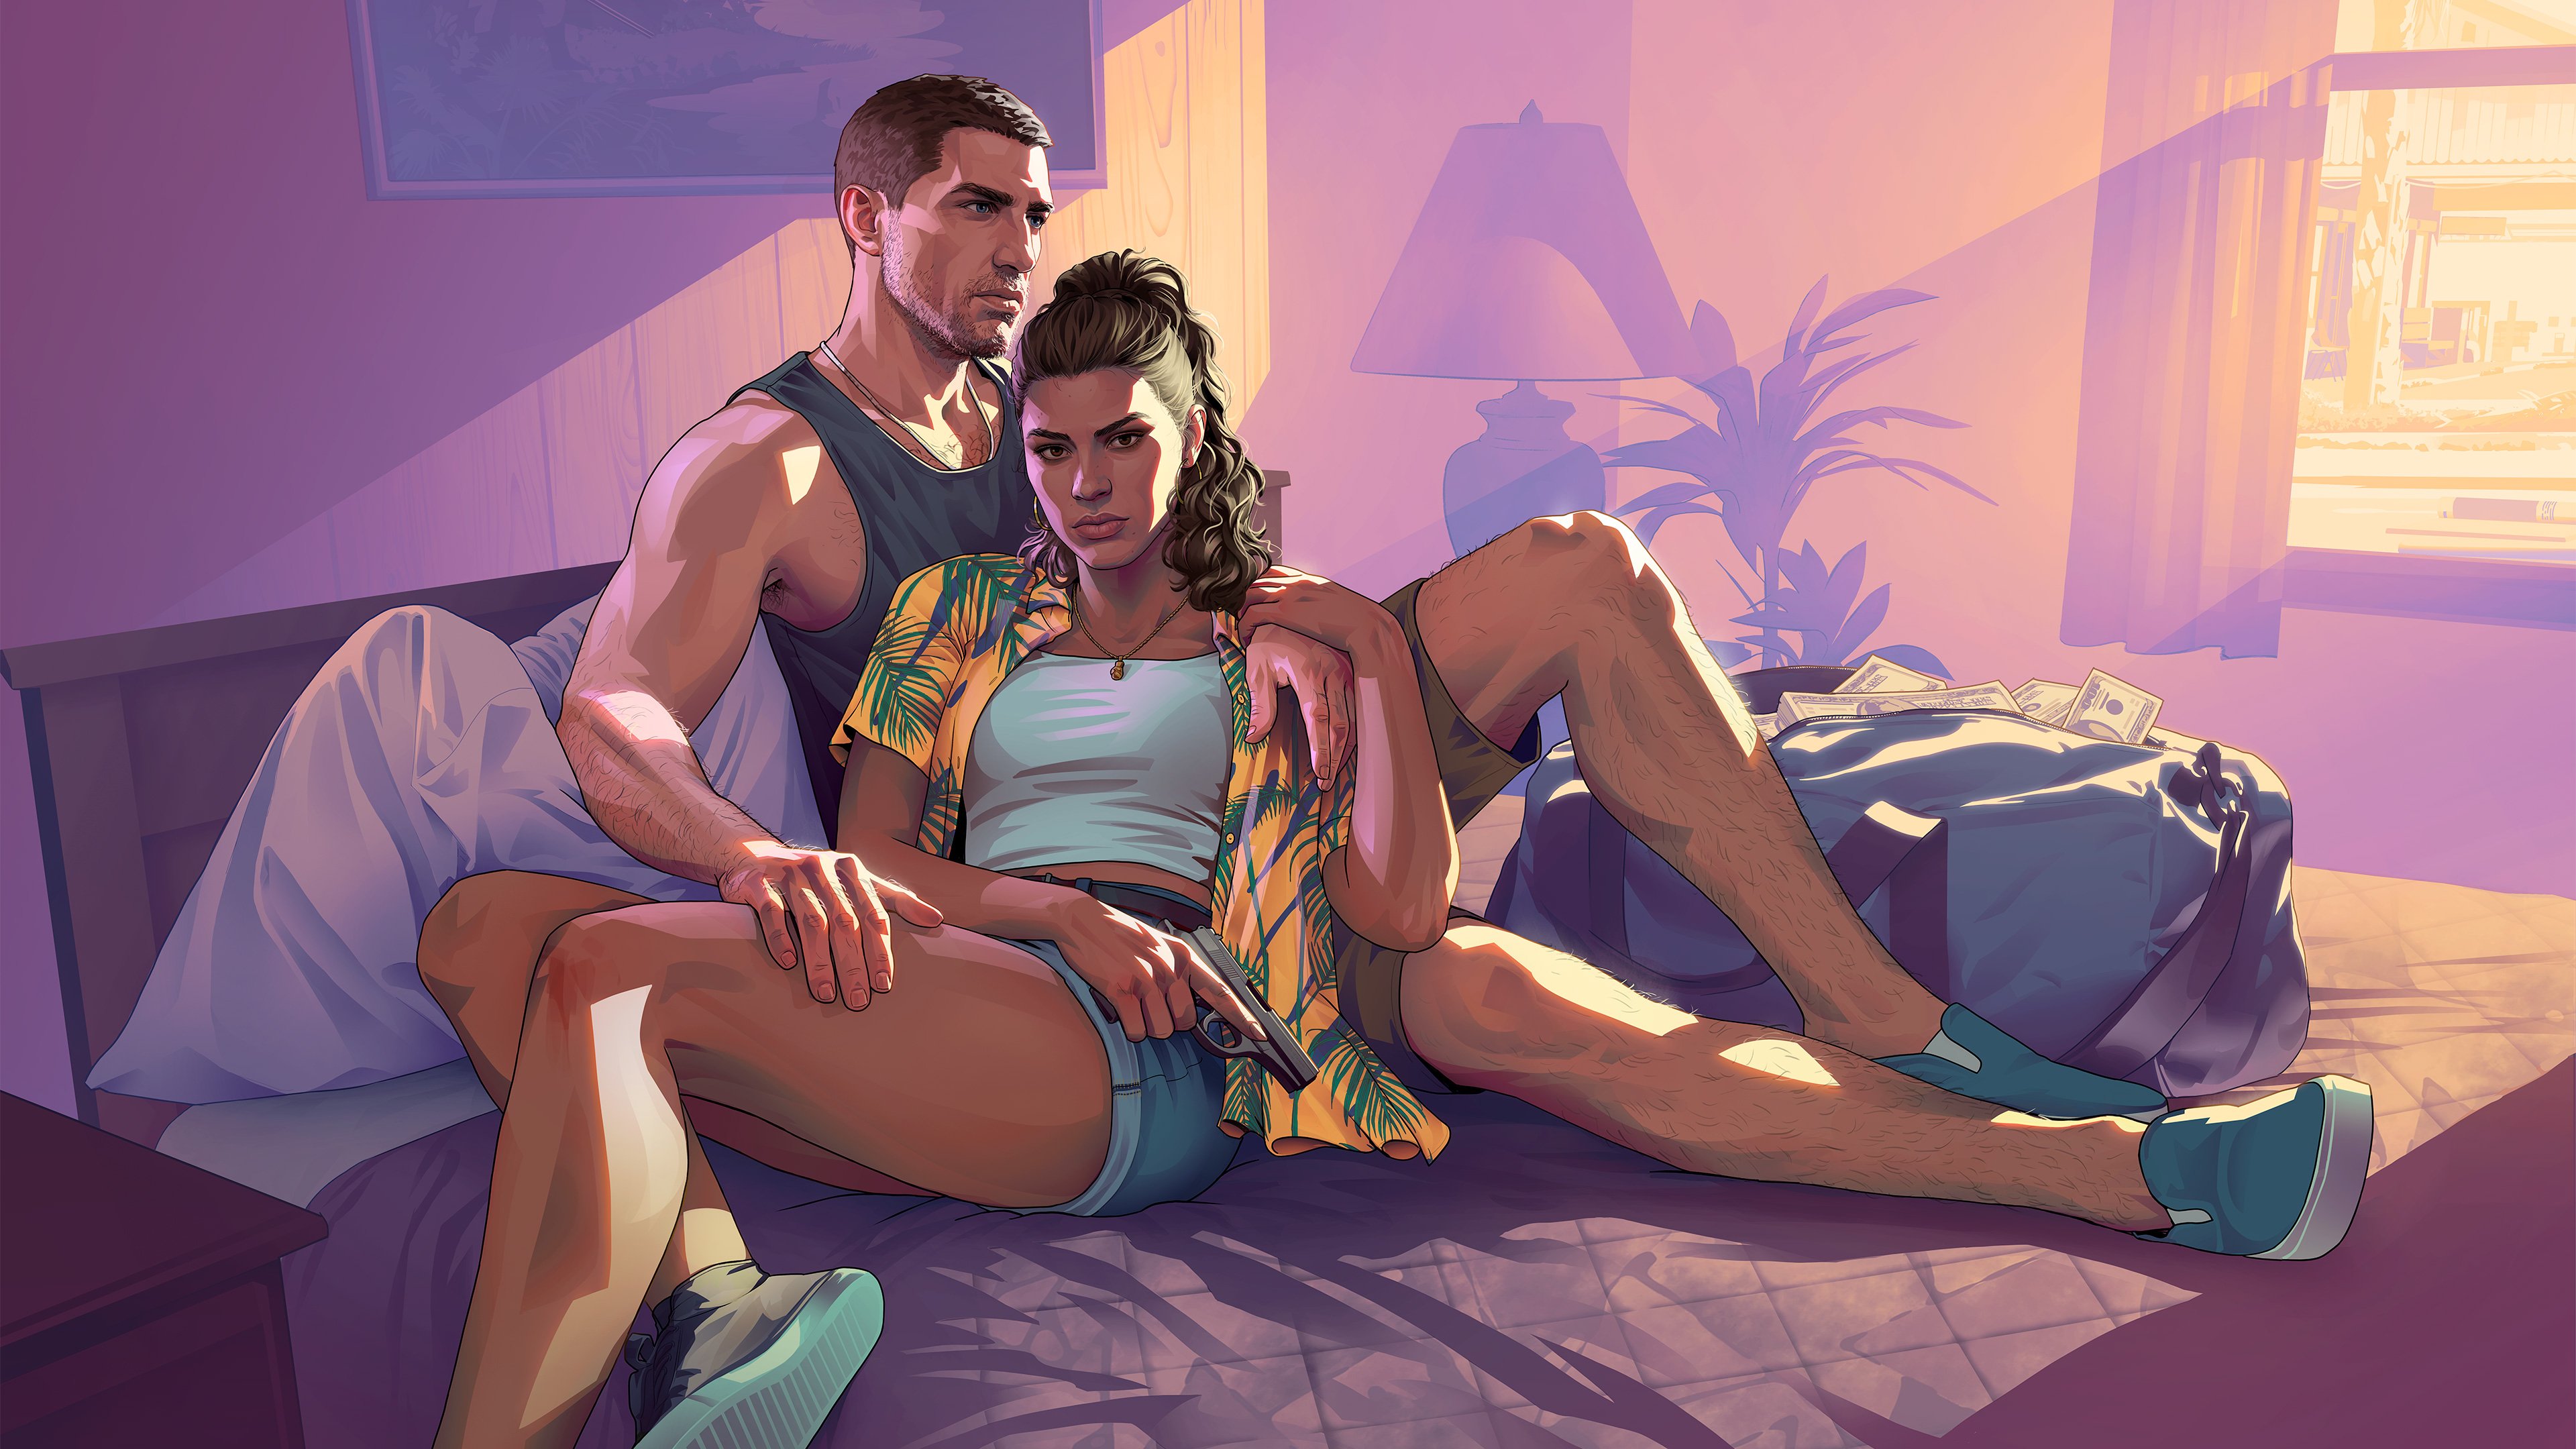 The wait for the most anticipated video game of all time just got a little longer. While fans have been scouring the internet for every scrap of information regarding Grand Theft Auto 6, recent reports indicate a significant shift in the release timeline, along with intriguing new details about what the next generation of GTA Online might look like. Release Date Pushback to late 2026According to recent updates, Rockstar Games has delayed the release of Grand Theft Auto 6 to November 19, 2026. The studio cited the need for extra months to ensure the game reaches the "level of polish" fans expect. For players eagerly awaiting the new Online mode, this delay inevitably pushes back the timeline for multiplayer chaos as well. Historically, Rockstar has launched its Online modes either simultaneously with the base game or shortly after the single-player campaign release (as seen with GTA V and Red Dead Redemption 2). While an official "Online" release date has not been confirmed separately, it is safe to assume it will arrive on or shortly after that November 2026 window. Industry Veteran Teases MMORPG ElementsWhile the wait continues, speculation about the gameplay itself is heating up. Rich Vogel, a gaming industry veteran known for his work on Ultima Online, Star Wars Galaxies, and DOOM, recently shared rumors he has heard regarding the new Online mode. Speaking to Wccftech, Vogel suggested that GTA 6 Online might evolve into something resembling a Massively Multiplayer Online Role-Playing Game (MMORPG). "If what I have been hearing about GTA 6’s features and gameplay is true, it could evolve into an MMORPG, as many of its planned features are typically found in MMORPGs," Vogel stated. While Vogel clarified that he has not worked on the game himself and is sharing second-hand information, the move would make sense for Rockstar. The current iteration of GTA Online has already adopted many RPG-lite elements over its decade-long lifespan, and a full embrace of MMO mechanics could support the game's longevity for years to come. Musician Cameos and Fan TheoriesBeyond mechanics and dates, the rumor mill is churning regarding the game's soundtrack and culture. Electronic musician Anyma sparked speculation recently by posting a photo on Instagram with Sam Houser, the president and co-founder of Rockstar Games. Fans on Reddit were quick to dissect the interaction. Some believe this confirms Anyma’s music will be featured on the game's radio stations, while others remain skeptical, noting that Houser is notoriously private and the meeting could be casual. As one Reddit user noted, "As long as Rockstar keeps sharing content about GTA Online, it's normal to come across meaningless posts like this." The Long Road AheadRockstar Games has yet to officially confirm the existence of a specific "GTA 6 Online" mode, though its inclusion is considered a certainty given the massive financial success of its predecessor. For now, fans will have to exercise patience. With a new target date of late 2026, the road to Vice City—and the online world built around it—is still under construction.
 -
The wait for the most anticipated video game of all time just got a little longer. While fans have been scouring the internet for every scrap of information regarding Grand Theft Auto 6, recent reports indicate a significant shift in the release timeline, along with intriguing new details about what the next generation of GTA Online might look like. Release Date Pushback to late 2026According to recent updates, Rockstar Games has delayed the release of Grand Theft Auto 6 to November 19, 2026. The studio cited the need for extra months to ensure the game reaches the "level of polish" fans expect. For players eagerly awaiting the new Online mode, this delay inevitably pushes back the timeline for multiplayer chaos as well. Historically, Rockstar has launched its Online modes either simultaneously with the base game or shortly after the single-player campaign release (as seen with GTA V and Red Dead Redemption 2). While an official "Online" release date has not been confirmed separately, it is safe to assume it will arrive on or shortly after that November 2026 window. Industry Veteran Teases MMORPG ElementsWhile the wait continues, speculation about the gameplay itself is heating up. Rich Vogel, a gaming industry veteran known for his work on Ultima Online, Star Wars Galaxies, and DOOM, recently shared rumors he has heard regarding the new Online mode. Speaking to Wccftech, Vogel suggested that GTA 6 Online might evolve into something resembling a Massively Multiplayer Online Role-Playing Game (MMORPG). "If what I have been hearing about GTA 6’s features and gameplay is true, it could evolve into an MMORPG, as many of its planned features are typically found in MMORPGs," Vogel stated. While Vogel clarified that he has not worked on the game himself and is sharing second-hand information, the move would make sense for Rockstar. The current iteration of GTA Online has already adopted many RPG-lite elements over its decade-long lifespan, and a full embrace of MMO mechanics could support the game's longevity for years to come. Musician Cameos and Fan TheoriesBeyond mechanics and dates, the rumor mill is churning regarding the game's soundtrack and culture. Electronic musician Anyma sparked speculation recently by posting a photo on Instagram with Sam Houser, the president and co-founder of Rockstar Games. Fans on Reddit were quick to dissect the interaction. Some believe this confirms Anyma’s music will be featured on the game's radio stations, while others remain skeptical, noting that Houser is notoriously private and the meeting could be casual. As one Reddit user noted, "As long as Rockstar keeps sharing content about GTA Online, it's normal to come across meaningless posts like this." The Long Road AheadRockstar Games has yet to officially confirm the existence of a specific "GTA 6 Online" mode, though its inclusion is considered a certainty given the massive financial success of its predecessor. For now, fans will have to exercise patience. With a new target date of late 2026, the road to Vice City—and the online world built around it—is still under construction. View full article
-
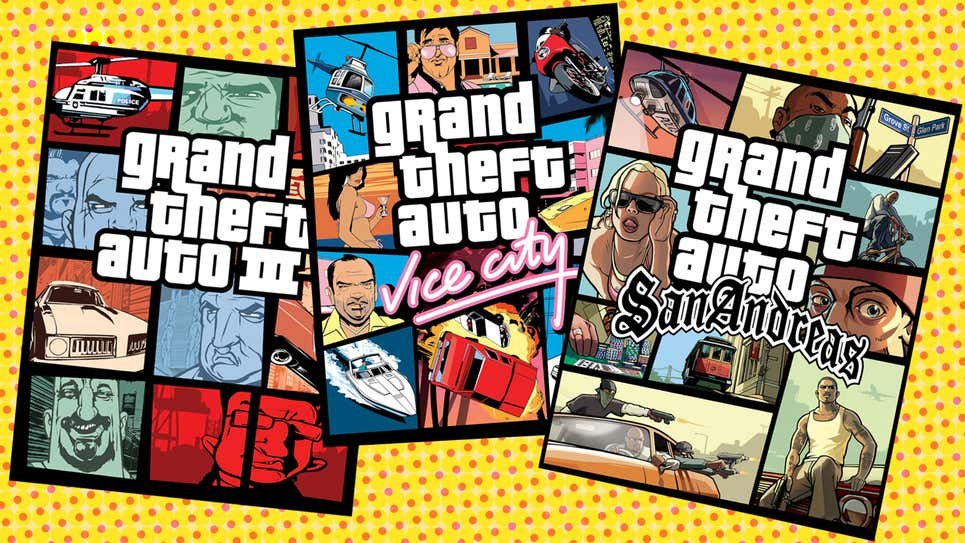
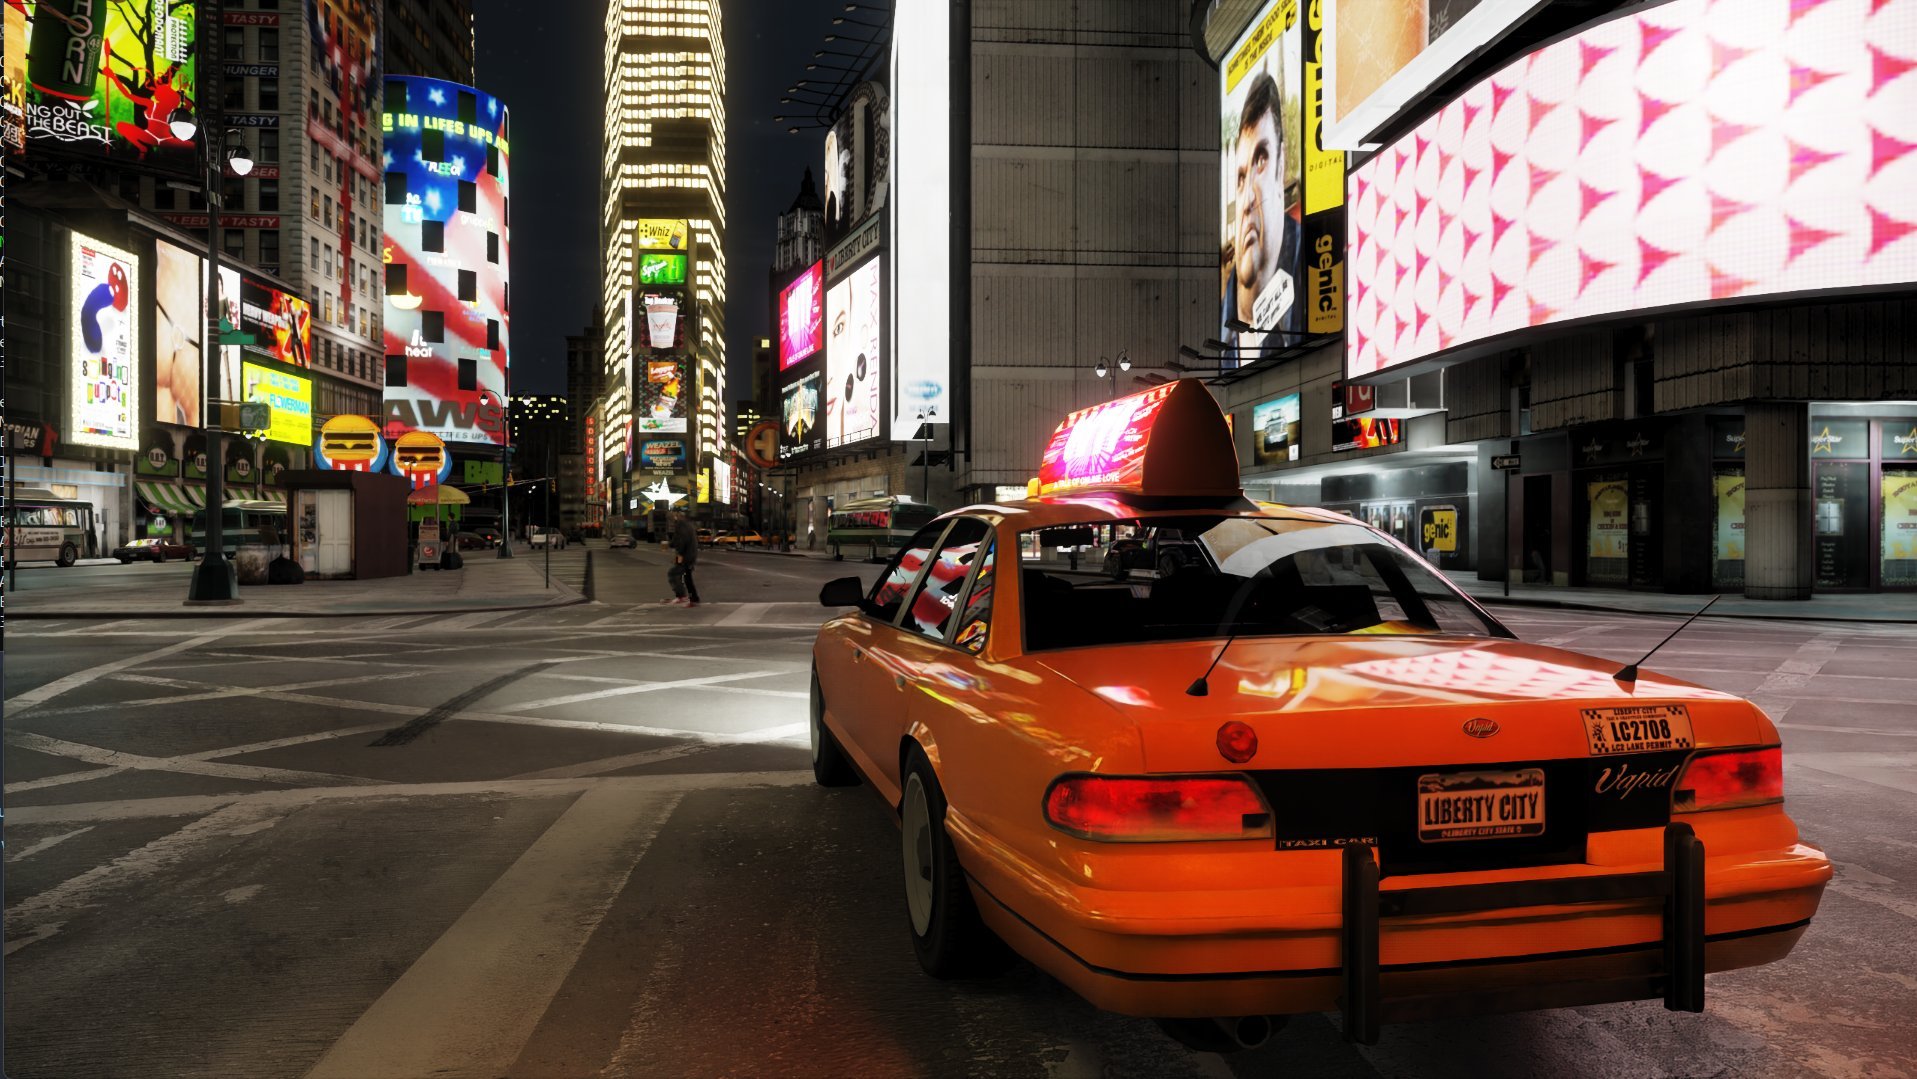
With Grand Theft Auto VI officially pushed back to November 19, 2026, the wait for a return to Vice City has grown just a little bit longer. While delays are painful, they offer a unique opportunity: there is now ample time to revisit the franchise that defined the open-world genre. Most fans played these games as they were released, bouncing from the 80s to the 2000s and back again. But playing them in the order the events actually happened—from the neon-soaked 1980s to the high-definition modern day—reveals a surprisingly cohesive narrative web of rising empires, betrayals, and tragic downfalls. If you want to experience the Rockstar saga as a linear history, here is how to play the games in chronological order. Understanding the "Universes"Before diving into the timeline, it is crucial to understand that not all GTA games exist in the same reality. Rockstar Games officially separates the franchise into three distinct "universes," meaning characters from one era generally do not exist in the others (with a few spiritual exceptions like radio hosts). The 2D Universe: GTA 1, GTA London, and GTA 2. The 3D Universe: GTA III, Vice City, San Andreas, etc. The HD Universe: GTA IV, GTA V, and GTA VI. While you can technically play London 1969 first, the narrative meat of the series begins with the 3D Universe. The 3D Universe TimelineThe classic era of the PlayStation 2 and PSP. 1. Grand Theft Auto: Vice City StoriesSetting: 1984 | Release: 2006 Chronologically, the 3D saga begins not with Tommy Vercetti, but with Victor Vance. Set two years before the events of Vice City, this PSP classic (later ported to PS2) tells a more tragic tale. Vic is a soldier trying to pay for his brother’s medical bills, but he is quickly chewed up by the criminal machinery of the city. Why it matters: It adds immense weight to the opening of Vice City. The "Empire Building" mechanic here is also a direct gameplay precursor to the property management systems seen in later titles. 2. Grand Theft Auto: Vice CitySetting: 1986 | Release: 2002 This is the game that put the timeline on the map. You play as Tommy Vercetti, fresh out of prison and looking to reclaim his spot in the Mafia. The neon aesthetics and 80s soundtrack are iconic, but the story is where the connections shine. The Connection: If you played Vice City Stories first, the opening drug deal ambush hits harder—you know exactly who is killed in that scene, bringing a grim closure to the previous protagonist's story. 3. Grand Theft Auto: San AndreasSetting: 1992 | Release: 2004 We jump forward to the early 90s West Coast. Carl "CJ" Johnson returns to Los Santos following his mother's murder. This game is pivotal for bridging the gap between the eras. The Connection: During a mission in the countryside, CJ races a frantic woman named Catalina and her new boyfriend—a silent, leather-jacket-wearing man. This is Claude, the protagonist of GTA III, and they are literally driving off to Liberty City to start the events of that game. 4. Grand Theft Auto: Liberty City StoriesSetting: 1998 | Release: 2005 Toni Cipriani returns to Liberty City to restore order to the Leone Crime Family. This game serves as a direct setup for the political and gang landscape you find in GTA III. It explains how the city fell into chaos and how the Leone family consolidated the power that they would eventually lose just three years later. 5. Grand Theft Auto AdvanceSetting: 2000 | Release: 2004 Often overlooked due to its hardware limitations on the Game Boy Advance, this title is actually canon. It serves as a direct prequel to GTA III, explaining the backstory of minor characters like 8-Ball and how he ended up arrested with burned hands. 6. Grand Theft Auto IIISetting: 2001 | Release: 2001 The game that started the 3D revolution is historically the final chapter of this universe. Claude arrives in Liberty City, is betrayed by Catalina (who we saw him leave with in San Andreas), and goes on a rampage that dismantles the Mafia families Toni Cipriani worked so hard to build in Liberty City Stories. The HD Universe TimelineThe modern era, introducing high-definition graphics and a new, separate canon. 1. Grand Theft Auto IV (and Episodes from Liberty City)Setting: 2008 | Release: 2008 The HD universe resets the clock. Niko Bellic arrives in a reimagined Liberty City chasing the American Dream. Unlike the 3D universe, the expansions here (The Lost and Damned and The Ballad of Gay Tony) happen concurrently with the main story. The Best Way to Play: To get the true chronological experience, you should alternate between the three campaigns, as the diamond deal missions in all three games intersect at the exact same moment in the timeline. 2. Grand Theft Auto: Chinatown WarsSetting: 2009 | Release: 2009 While it uses a top-down view, this DS/PSP/Mobile title is firmly in the HD universe. It deals with the Triad power struggles in Liberty City shortly after Niko Bellic's story concludes. It offers a grittier look at the drug trade mechanics that would later influence GTA Online. 3. Grand Theft Auto VSetting: 2013 (Prologue in 2004) | Release: 2013 GTA V is unique because its prologue takes place in 2004 (North Yankton), pre-dating GTA IV. However, the main story picks up in 2013. The connections to GTA IV are subtle but cool: Packie McReary, a major character from Niko’s story, can be found robbing a store and recruited as a heist crew member. The Tragic Connection: Johnny Klebitz, the protagonist of The Lost and Damned, meets a gruesome end at the hands of Trevor Philips, proving that being a main character doesn't grant you immunity in this universe. 4. Grand Theft Auto OnlineSetting: 2013 – Present | Release: 2013 Originally, GTA Online was a prequel set months before the GTA V story. However, with years of updates (like the Gunrunning and The Contract updates), the timeline has shifted to the present day (2017-2025). It is now a living timeline that has surpassed the single-player story. 5. Grand Theft Auto VISetting: 2026 (Projected) | Release: November 19, 2026 Set in the state of Leonida (a fictional Florida), GTA VI will bring the HD universe into the mid-2020s. Trailers have already hinted at a social-media-obsessed modern world. Will we see an older Michael De Santa or a mention of the bewildering success of GTA Online protagonists? We will find out in 2026. Summary: The Master ListIf you are ready to start your marathon, here is the cheat sheet: Game Title Chronological Year Universe GTA: London 1961 1961 2D GTA: London 1969 1969 2D GTA: Vice City Stories 1984 3D GTA: Vice City 1986 3D GTA: San Andreas 1992 3D Grand Theft Auto 1 1997 2D GTA: Liberty City Stories 1998 3D Grand Theft Auto 2 1999 (or 2013) 2D GTA Advance 2000 3D Grand Theft Auto III 2001 3D GTA V (Prologue) 2004 HD GTA IV + Episodes 2008 HD GTA: Chinatown Wars 2009 HD Grand Theft Auto V 2013 HD GTA Online 2013 – Present HD Grand Theft Auto VI 2026 HD
-
 As the gaming world waits with bated breath for Grand Theft Auto VI, developers and publishers are scrambling to clear their release schedules to avoid its shadow. But amidst the usual hype about graphics and map size, a new and intriguing rumor has emerged from an industry heavyweight: GTA 6 might be steering the franchise into the territory of Massively Multiplayer Online Role-Playing Games (MMORPGs). The Source: A Titan of the MMO GenreThe insight comes from Rich Vogel, a seasoned veteran whose resume reads like a history book of the MMO genre. Vogel has worked on seminal titles such as Ultima Online, Star Wars Galaxies, and The Old Republic. In a recent interview with Wccftech regarding the state of Western MMOs, Vogel dropped a significant nugget of information. While discussing the lack of high-budget Western MMOs currently in development, he noted that the next major evolution in the genre might not come from a traditional fantasy RPG, but from Rockstar Games. "If what I have been hearing about GTA 6's features and gameplay is true," Vogel stated, "it could evolve into an MMORPG, as many of its planned features are typically found in MMORPGs." Blurring the Lines Between Action and RPGVogel’s comments highlight a shift that many players have already begun to feel in the current iteration of GTA Online. While he clarified that his information is second-hand—he is not working on the project himself—the trajectory of the franchise supports his theory. It is universally expected that GTA 6 will launch with a traditional, narrative-driven single-player campaign. However, the online component appears poised to deepen the "persistent world" mechanics that made its predecessor a financial juggernaut. The "FiveM" FactorThe strongest evidence supporting an MMORPG shift is Rockstar’s acquisition of Cfx.re in August 2023. Cfx.re is the team behind FiveM, a popular modification framework for GTA V that allows players to join dedicated roleplay servers. On these servers, players don't just shoot and drive; they assume specific roles—police officers, paramedics, business owners, and criminals—adhering to strict rules of engagement and character persistence. This style of gameplay is the very definition of an MMORPG. FiveM became so popular that it frequently boasted higher concurrent player counts than the base game on Steam. By officially bringing the FiveM team into the fold, Rockstar signaled a massive interest in officializing this style of play. If GTA 6 integrates these roleplaying systems, dedicated servers, and persistent character progression natively, it would effectively become the most expensive and high-fidelity MMORPG ever made. What This Means for PlayersIf these rumors hold true, the "Online" portion of GTA 6 could offer a far more immersive living world than previous entries. Instead of simple lobby-based deathmatches or races, players might find themselves in a seamless economy where their chosen "job" or role impacts the wider server. While Rockstar has yet to confirm specific details about the online modes, the combination of Rich Vogel’s industry hearsay and the studio's recent business moves suggests that Grand Theft Auto is ready to transcend its action-adventure roots and dominate the MMO space as well.
 -
As the gaming world waits with bated breath for Grand Theft Auto VI, developers and publishers are scrambling to clear their release schedules to avoid its shadow. But amidst the usual hype about graphics and map size, a new and intriguing rumor has emerged from an industry heavyweight: GTA 6 might be steering the franchise into the territory of Massively Multiplayer Online Role-Playing Games (MMORPGs). The Source: A Titan of the MMO GenreThe insight comes from Rich Vogel, a seasoned veteran whose resume reads like a history book of the MMO genre. Vogel has worked on seminal titles such as Ultima Online, Star Wars Galaxies, and The Old Republic. In a recent interview with Wccftech regarding the state of Western MMOs, Vogel dropped a significant nugget of information. While discussing the lack of high-budget Western MMOs currently in development, he noted that the next major evolution in the genre might not come from a traditional fantasy RPG, but from Rockstar Games. "If what I have been hearing about GTA 6's features and gameplay is true," Vogel stated, "it could evolve into an MMORPG, as many of its planned features are typically found in MMORPGs." Blurring the Lines Between Action and RPGVogel’s comments highlight a shift that many players have already begun to feel in the current iteration of GTA Online. While he clarified that his information is second-hand—he is not working on the project himself—the trajectory of the franchise supports his theory. It is universally expected that GTA 6 will launch with a traditional, narrative-driven single-player campaign. However, the online component appears poised to deepen the "persistent world" mechanics that made its predecessor a financial juggernaut. The "FiveM" FactorThe strongest evidence supporting an MMORPG shift is Rockstar’s acquisition of Cfx.re in August 2023. Cfx.re is the team behind FiveM, a popular modification framework for GTA V that allows players to join dedicated roleplay servers. On these servers, players don't just shoot and drive; they assume specific roles—police officers, paramedics, business owners, and criminals—adhering to strict rules of engagement and character persistence. This style of gameplay is the very definition of an MMORPG. FiveM became so popular that it frequently boasted higher concurrent player counts than the base game on Steam. By officially bringing the FiveM team into the fold, Rockstar signaled a massive interest in officializing this style of play. If GTA 6 integrates these roleplaying systems, dedicated servers, and persistent character progression natively, it would effectively become the most expensive and high-fidelity MMORPG ever made. What This Means for PlayersIf these rumors hold true, the "Online" portion of GTA 6 could offer a far more immersive living world than previous entries. Instead of simple lobby-based deathmatches or races, players might find themselves in a seamless economy where their chosen "job" or role impacts the wider server. While Rockstar has yet to confirm specific details about the online modes, the combination of Rich Vogel’s industry hearsay and the studio's recent business moves suggests that Grand Theft Auto is ready to transcend its action-adventure roots and dominate the MMO space as well. View full article
-
 Rockstar Games has kicked off the holiday season in Los Santos with a massive multi-week event. Running from December 18th through January 7th, this "Christmas Special" update brings snow, new vehicles, rare collectibles, and a sack full of gifts for players. Here is the full rundown of everything arriving in GTA Online for the holidays. New VehiclesTwo high-end vehicles have hit the streets of Los Santos this week: Vapid FMJ MK V: Available at Legendary Motorsport for $3,074,500. (Free for GTA+ subscribers until early January). Progen Luiva: Available at Legendary Motorsport for $2,697,500. Both cars are also currently on display at the Luxury Autos Showroom in Rockford Hills. Holiday Content & GiftsLos Santos is getting a wintry makeover. Snow is scheduled to blanket the map starting December 23rd through December 29th. Players who log in during the event window will receive a host of festive gifts, including: Season's Greetings Sweater New Year Fireworks Bodysuit Snowball Launcher & Candy Cane Firework Launcher (with 20 rockets) Full refills on Snacks, Armor, and Ammo Returning Holiday Events: The Yeti Hunt and The Gooch random events return. Weazel Plaza Shootout event. eCola Happy Holidays Hauler truck. Snowball Fights and other festive modes. Additionally, subscribers to the Rockstar mailing list (by Dec 31st) will receive the Red Festive Tree Hat. Bonuses and RewardsCluckin' Bell Farm Raid: Completing the finale as a Leader awards a GTA$500,000 bonus. Associates and Bodyguards also receive a GTA$500,000 bonus for helping. (Available through Jan 7). Weed Farm Sell Missions: 2x GTA$ and RP. Community Series: 2x GTA$ and RP (4x for GTA+ Members). Overtime Rumble: 2x GTA$ and RP. FIB Priority File: The "Brute Force File" is paying out double rewards. Salvage Yard RobberiesThe Salvage Yard has a particularly lucrative rotation this week, featuring a rare vanity plate: The Gangbanger Robbery: Vapid Clique (Features Merry Cliquemas livery & Liberty City License Plate). Note: This vehicle is claimable. The Podium Robbery: Ocelot Virtue. The Cargo Ship Robbery: Bravado Buffalo STX. Weekly ChallengesRockstar has introduced a 3-part weekly challenge structure. Completing all three stages over the next few weeks will unlock a GTA$300,000 bonus and the Krampus Sweater. Dec 18–22: Sell GTA$100,000 with businesses. Dec 23–29: Win 4 Adversary Modes. Dec 30–Jan 7: Complete The Cluckin' Bell Farm Raid Finale as Leader. Discounts40% Off: Weed Farm Properties (plus upgrades/mods) Service Carbine 30% Off: Albany Brigham Annis Remus Declasse Walton L35 Dinka RT3000 Enus Deity HVY Insurgent Karin S95 Pegassi Reaper Progen Itali GTB Sea Sparrow Vehicle RotationsLucky Wheel Podium: Bollokan Envisage. LS Car Meet Prize Ride: Pfister Comet Safari (Trees Camo Livery) – Win 1 race in the LS Car Meet Series. Premium Deluxe Motorsport: Features the BF Dune FAV, HVY Nightshark, Ocelot Ardent, and Pfister Comet S2 Cabrio in limited-time holiday liveries. Premium Test Ride (PS5/Xbox Series): Übermacht Sentinel XS.
 -
Rockstar Games has kicked off the holiday season in Los Santos with a massive multi-week event. Running from December 18th through January 7th, this "Christmas Special" update brings snow, new vehicles, rare collectibles, and a sack full of gifts for players. Here is the full rundown of everything arriving in GTA Online for the holidays. New VehiclesTwo high-end vehicles have hit the streets of Los Santos this week: Vapid FMJ MK V: Available at Legendary Motorsport for $3,074,500. (Free for GTA+ subscribers until early January). Progen Luiva: Available at Legendary Motorsport for $2,697,500. Both cars are also currently on display at the Luxury Autos Showroom in Rockford Hills. Holiday Content & GiftsLos Santos is getting a wintry makeover. Snow is scheduled to blanket the map starting December 23rd through December 29th. Players who log in during the event window will receive a host of festive gifts, including: Season's Greetings Sweater New Year Fireworks Bodysuit Snowball Launcher & Candy Cane Firework Launcher (with 20 rockets) Full refills on Snacks, Armor, and Ammo Returning Holiday Events: The Yeti Hunt and The Gooch random events return. Weazel Plaza Shootout event. eCola Happy Holidays Hauler truck. Snowball Fights and other festive modes. Additionally, subscribers to the Rockstar mailing list (by Dec 31st) will receive the Red Festive Tree Hat. Bonuses and RewardsCluckin' Bell Farm Raid: Completing the finale as a Leader awards a GTA$500,000 bonus. Associates and Bodyguards also receive a GTA$500,000 bonus for helping. (Available through Jan 7). Weed Farm Sell Missions: 2x GTA$ and RP. Community Series: 2x GTA$ and RP (4x for GTA+ Members). Overtime Rumble: 2x GTA$ and RP. FIB Priority File: The "Brute Force File" is paying out double rewards. Salvage Yard RobberiesThe Salvage Yard has a particularly lucrative rotation this week, featuring a rare vanity plate: The Gangbanger Robbery: Vapid Clique (Features Merry Cliquemas livery & Liberty City License Plate). Note: This vehicle is claimable. The Podium Robbery: Ocelot Virtue. The Cargo Ship Robbery: Bravado Buffalo STX. Weekly ChallengesRockstar has introduced a 3-part weekly challenge structure. Completing all three stages over the next few weeks will unlock a GTA$300,000 bonus and the Krampus Sweater. Dec 18–22: Sell GTA$100,000 with businesses. Dec 23–29: Win 4 Adversary Modes. Dec 30–Jan 7: Complete The Cluckin' Bell Farm Raid Finale as Leader. Discounts40% Off: Weed Farm Properties (plus upgrades/mods) Service Carbine 30% Off: Albany Brigham Annis Remus Declasse Walton L35 Dinka RT3000 Enus Deity HVY Insurgent Karin S95 Pegassi Reaper Progen Itali GTB Sea Sparrow Vehicle RotationsLucky Wheel Podium: Bollokan Envisage. LS Car Meet Prize Ride: Pfister Comet Safari (Trees Camo Livery) – Win 1 race in the LS Car Meet Series. Premium Deluxe Motorsport: Features the BF Dune FAV, HVY Nightshark, Ocelot Ardent, and Pfister Comet S2 Cabrio in limited-time holiday liveries. Premium Test Ride (PS5/Xbox Series): Übermacht Sentinel XS. View full article
-
 As the snow begins to fall and the holiday festivities kick off in Los Santos, Rockstar Games has dropped a nostalgic treat for veteran players and collectors alike. For a limited time during the Holiday Event (December 18, 2025 – January 7, 2026), GTA Online players can secure one of the rarest vanity items in the game: the iconic Liberty City License Plate. Here is everything you need to know about this exclusive drop and how to claim it for your collection. A Nod to the ClassicsThe Liberty City plate is a coveted cosmetic item featuring the "State of Liberty" text and the famous skyline of the metropolis that defined Grand Theft Auto III and GTA IV. Unlike standard custom plates that can be crafted via the License Plate Creator, this vanity item is "locked" to specific vehicles and only appears during special Salvage Yard rotations, making it a true status symbol for car enthusiasts. How to Get the Liberty City Plate To get your hands on this rare plate, you need to engage with the Salvage Yard Robberies for the current event week. The plate is exclusively attached to the robbery target vehicle, which you must steal and then claim as your own. Step-by-Step Guide: Visit Your Salvage Yard: Log in to GTA Online and head to your Salvage Yard business. Select "The Gangbanger Robbery": Check the planning computer. You are looking for The Gangbanger Robbery mission. Target Vehicle: The target for this robbery is the Vapid Clique. Complete the Heist: Finish the robbery setup and finale. Claim the Vehicle: Once the job is done, do not sell the car or salvage it for parts. Instead, choose the option to Claim the Vehicle. By claiming the car, you add the Vapid Clique to your personal garage, keeping the exclusive Liberty City license plate intact. As a bonus, this week's Vapid Clique also comes wrapped in the limited-time "Merry Cliquemas" livery. The "Document Forgery" Discount Trickclaiming a Salvage Yard vehicle usually comes with a fee, but savvy business owners can slash this price significantly. Standard Claim Price: $20,000 Discounted Price: $10,000 To unlock the 50% discount, you simply need to own a Document Forgery Office. The business does not need to be active or upgraded; mere ownership is enough to drop the claim fee to a measly $10,000—a steal for a removed vehicle that previously cost over $900,000. Limited AvailabilityThis opportunity is part of the GTA Online Christmas Special and is expected to end when the event week concludes on January 7, 2026. With Rockstar rotating these rare plates infrequently, collectors are advised to act fast before the Liberty City plate disappears back into the vault.
 -
As the snow begins to fall and the holiday festivities kick off in Los Santos, Rockstar Games has dropped a nostalgic treat for veteran players and collectors alike. For a limited time during the Holiday Event (December 18, 2025 – January 7, 2026), GTA Online players can secure one of the rarest vanity items in the game: the iconic Liberty City License Plate. Here is everything you need to know about this exclusive drop and how to claim it for your collection. A Nod to the ClassicsThe Liberty City plate is a coveted cosmetic item featuring the "State of Liberty" text and the famous skyline of the metropolis that defined Grand Theft Auto III and GTA IV. Unlike standard custom plates that can be crafted via the License Plate Creator, this vanity item is "locked" to specific vehicles and only appears during special Salvage Yard rotations, making it a true status symbol for car enthusiasts. How to Get the Liberty City Plate To get your hands on this rare plate, you need to engage with the Salvage Yard Robberies for the current event week. The plate is exclusively attached to the robbery target vehicle, which you must steal and then claim as your own. Step-by-Step Guide: Visit Your Salvage Yard: Log in to GTA Online and head to your Salvage Yard business. Select "The Gangbanger Robbery": Check the planning computer. You are looking for The Gangbanger Robbery mission. Target Vehicle: The target for this robbery is the Vapid Clique. Complete the Heist: Finish the robbery setup and finale. Claim the Vehicle: Once the job is done, do not sell the car or salvage it for parts. Instead, choose the option to Claim the Vehicle. By claiming the car, you add the Vapid Clique to your personal garage, keeping the exclusive Liberty City license plate intact. As a bonus, this week's Vapid Clique also comes wrapped in the limited-time "Merry Cliquemas" livery. The "Document Forgery" Discount Trickclaiming a Salvage Yard vehicle usually comes with a fee, but savvy business owners can slash this price significantly. Standard Claim Price: $20,000 Discounted Price: $10,000 To unlock the 50% discount, you simply need to own a Document Forgery Office. The business does not need to be active or upgraded; mere ownership is enough to drop the claim fee to a measly $10,000—a steal for a removed vehicle that previously cost over $900,000. Limited AvailabilityThis opportunity is part of the GTA Online Christmas Special and is expected to end when the event week concludes on January 7, 2026. With Rockstar rotating these rare plates infrequently, collectors are advised to act fast before the Liberty City plate disappears back into the vault. View full article
-
Despite launching with a ton of new content including mansions GTA Online’s A Safehouse in the Hills update still has a ton of unreleased content. Rockstar teased in a Newswire post on Wednesday “There’s plenty to look forward to in the weeks and months ahead as well, including festive celebrations, more new vehicles, Odd Jobs and Missions, along with seasonal Adversary Modes and more. “ Twitter user _arthur1781 has datamined all of the new content from within the game files. Much like every GTA online update, lots of content will be spread out as dripfeed over the next weeks and months. We’ve already taken a look at the unreleased vehicles as part of this update’s drip feed so let’s now take a look at new events and work that you will soon be able to take part in. All of the images below come from Arthur. Odd JobsNewspaper Delivery Work (Paper Route) The Los Santos Meteor wants newspaper delivery drivers. Visit the paper’s office to begin delivering papers for them. There are 10 papers that need delivering in a short amount of time. Doing all 10 will unlock the trade price of the Dinka Thrust. Forklift Operator Work Visit the nearby Alpha Mail warehouse to become a forklift operator. You’ll be tasked with loading goods into vans. You can load up to three goods at a time onto a conveyor belt for transfer to the van. Doing all of goods will unlock a bonus reward. Firefighter Work The Los Santos Fire Department require more firefighters. Visit your local fire station to to start working as a firefighter. There are five variants: car, cat, gas, house, prop according to @PLTytus. If you complete 25 firefighter jobs you’ll unlock a bonus reward. Random EventsValentine Cheater The Stag Do Running Man event from GTA V Story Mode sort of comes to GTA Online. You’ll find a man has tied up to a telephone line pole. You’ll see that this man is a cheater and can be untied. You can choose to do so or not. You don’t have to take him anywhere. Given the name and voice lines, this will likely come to the game around Valentine’s Day on February 14th 2026. Stoner Survival A new festive themed survival is coming to GTA Online. This will be a random event and given the theme, likely available around April 20th 2026. It will spawn between 4pm and 8pm in-game time at various locations which can be found on the map with a new icon. You have to take a hit then you will hallucinate. Each round will be different. You’ll earn cash and RP for doing it. The High Life 420 Outfit will unlock if you survive all 7 waves. According to Arthur, Rockstar are able to pick if this is done solo or require a set amount of players via tunables. CollectiblesGolden Clover Break open the Golden Clover in Los Santos each in-game day to earn $25,000 cash and RP. Opening the Golden Clover once will unlock The Golden Clover Outfit. Given the theme, it will likely be available around St Patrick’s Day which will occur on March 17th 2026. Lucky Clover Break open the Lucky Clover in Los Santos each in-game day to earn $25,000 cash and RP. Opening all 25 of the Lucky Clovers will unlock The Lucky Clover Outfit. Given the theme, it will likely be available around St Patrick’s Day which will occur on March 17th 2026. Dispatch WorkAccording to dataminer PLTytus, two new Dispatch Work jobs are coming. These are “heli” and “prisoner transport”. Protective Custody (Prisoner Transport) In this job, you’ll need to enter a Police Transporter that contains a corrupt cop. The objective will be to take them to Bolingbroke Penitentiary. Along the way, a bomb must be disarmed whilst you’re driving. Complete this once to unlock the trade price for the Buffalo STX Pursuit.
-
Purchasable and accessible mansions have finally come to GTA Online and they have a wealth of options. An unexpected part of the new GTA Online A Safehouse in the Hills update is that all three of the mansions can be owned at one time by each player. Fans assumed before release you could only pick one however that is not the case. Plus, owning all three comes with some interesting options and even limitations. A reddit user called Unlikely-Rub-7614 purchased all three mansions (The Tongva Estate, Richman Villa and The Vinewood Residence) and revealed a bunch details that you might want to know. The GoodFirstly, the private security upgrade only needs to be purchased once for $1,750,000. It will cover all three mansions. Next up, you do not need to purchase customisation options such as paintings multiple times. Buy them once, use them across all of your mansions. Similarly, you can place the same trophy in each trophy room. The BadNow onto some disappointing details. All three share the exact same Prix Luxury AI Concierge. This means you can’t have a different persona at each location. They all have to be either Haviland, Angel or OG. Similarly, you can only own 1 dog and 1 cat. The exact same dog and cat will be found at each mansion. As we know, ecah mansion has 20 spaces in the garage taking the max total to 60 if you own all three. However, the podium car and driveway slots will count towards the 20. If you put a car on the podium, you can get it delivered to you by your mechanic. Or use the mansion’s AI tablets to exit with personal vehicle and select the one on the podium. On top of that, you cannot trade/sell a mansion. Some users have regretted purchasing a different location and are unable to get any money back. Keep this in mind when deciding which mansion you want to own. The cutscene with Michael, Amanda and Mr Faber only plays when you enter your first mansion. So there you have it, that’s what it is like to own all three mansions in GTA Online. In other news, Rockstar rolled out a bug fixing update for mansions and more.
-
Capcom has a variety of beloved franchises that haven't seen much in the way of new entries as of late. A financial report from Capcom looking back on 2025 shows that the company did well, due to the successes of new Resident Evil, Street Fighter, and Monster Hunter titles. The higher-ups at the company, however, believe that Capcom needs to have more frequent entries into some of its more stagnant IPs in order to continue growing in the years ahead. Specifically, it looks like we'll be seeing remakes, new games, and ports of three series in the future: Ace Attorney, Devil May Cry, and Mega Man. Capcom also plans to expand on one of its development offices by 2027, leading to hiring more employees to work on these theoretical games. Source
-
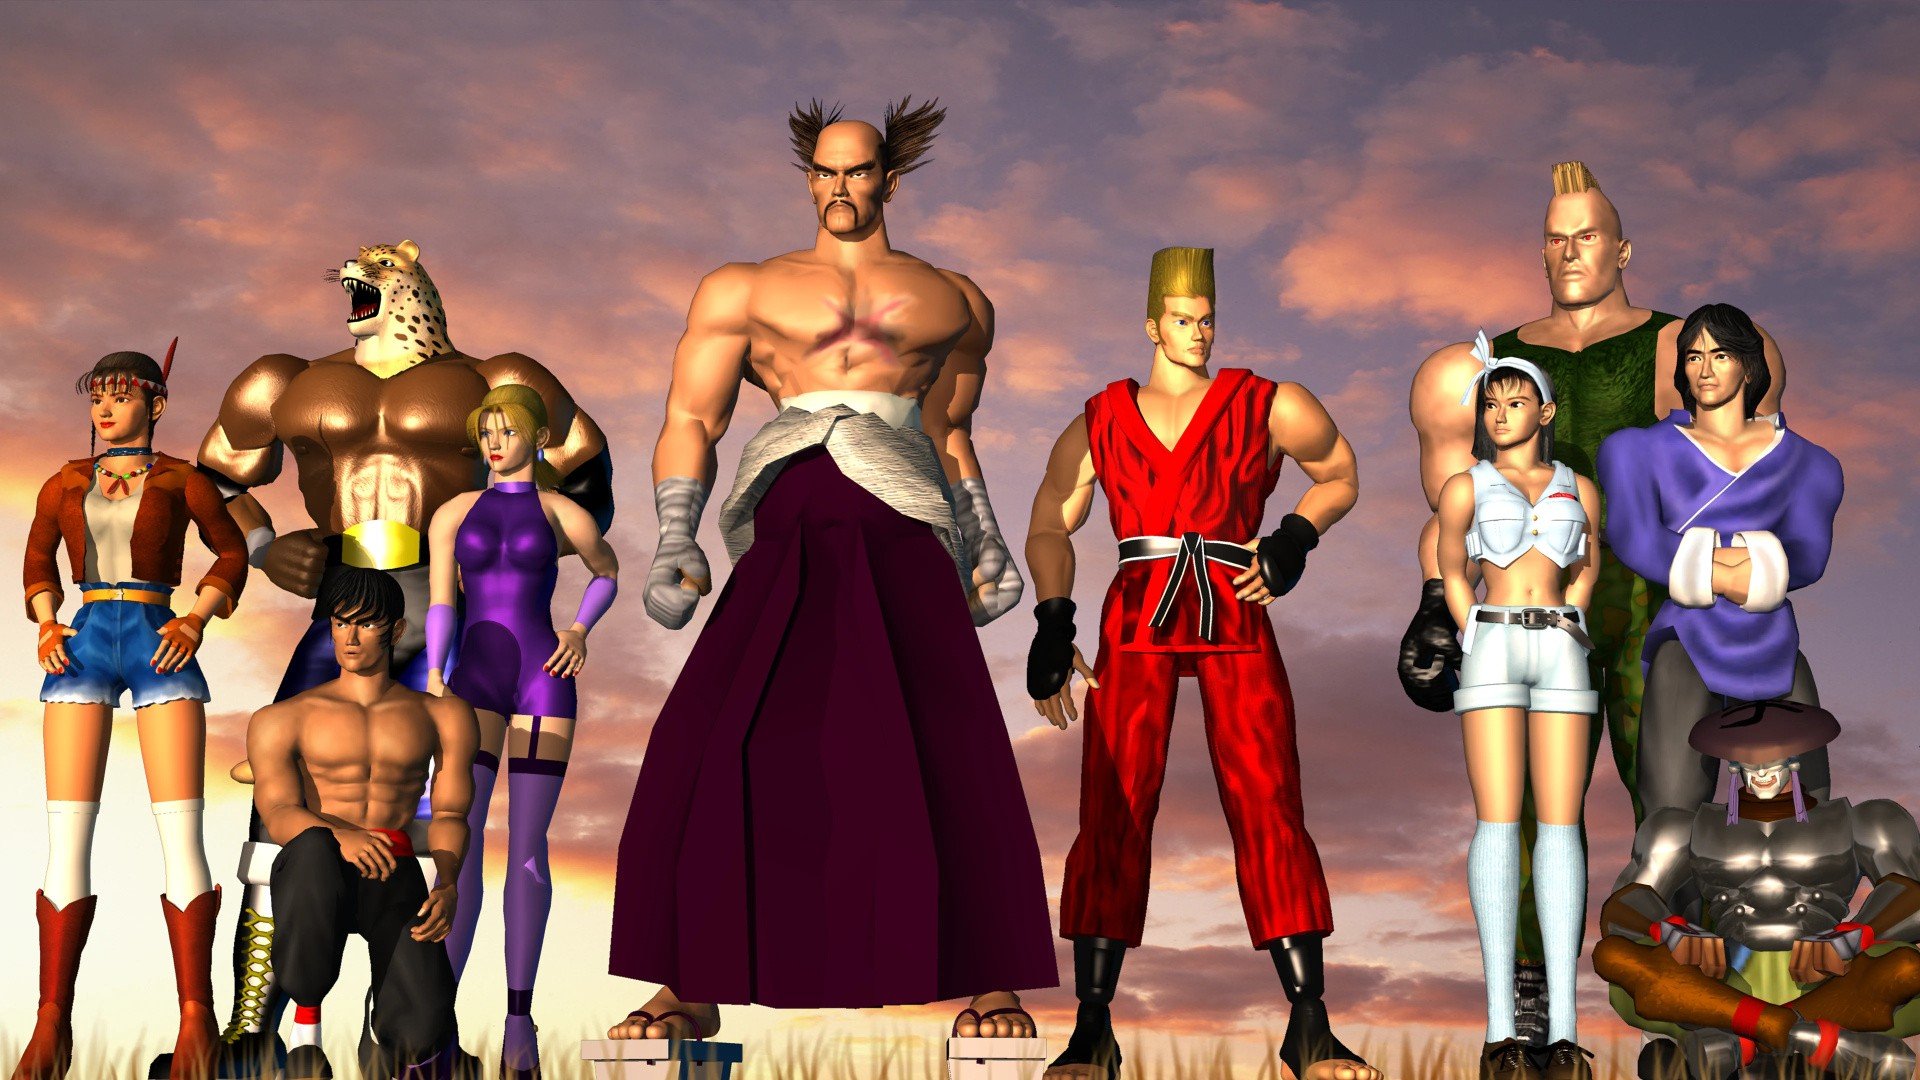 Alongside the announcement that he's leaving Bandai Namco, legendary Tekken director Katsuhiro Harada has dropped a treat for fans in the form of a 60-minute music mix. The track, which at the time of writing is only available on SoundCloud, basically covers 30 years of Tekken history, mashing countless pieces of music together from across the series. If you've been playing Tekken since the beginning, then this truly will feel like an exercise in pure nostalgia. Harada says he edited the track himself; it even incorporates iconic sound effects and voice samples. "For 30 years I kept saying, 'I’ll do it someday,' and never once performed as a DJ at a tournament event," Harada writes on social media. "So instead, I will be releasing — for the first and last time — a 60-minute TEKKEN DJ-style nonstop mix (DJ mix), personally edited by myself. Listening to it brings back many memories," he concludes. We think it's a great little gift, and again, it'll hit longtime Tekken fans in a similar way to what Harada's describing. Do you have any favorite Tekken tracks? Will you be giving this mega mix a listen? Remember a time of much simpler combos in the comments section below.
 -
Alongside the announcement that he's leaving Bandai Namco, legendary Tekken director Katsuhiro Harada has dropped a treat for fans in the form of a 60-minute music mix. The track, which at the time of writing is only available on SoundCloud, basically covers 30 years of Tekken history, mashing countless pieces of music together from across the series. If you've been playing Tekken since the beginning, then this truly will feel like an exercise in pure nostalgia. Harada says he edited the track himself; it even incorporates iconic sound effects and voice samples. "For 30 years I kept saying, 'I’ll do it someday,' and never once performed as a DJ at a tournament event," Harada writes on social media. "So instead, I will be releasing — for the first and last time — a 60-minute TEKKEN DJ-style nonstop mix (DJ mix), personally edited by myself. Listening to it brings back many memories," he concludes. We think it's a great little gift, and again, it'll hit longtime Tekken fans in a similar way to what Harada's describing. Do you have any favorite Tekken tracks? Will you be giving this mega mix a listen? Remember a time of much simpler combos in the comments section below. View full article
-
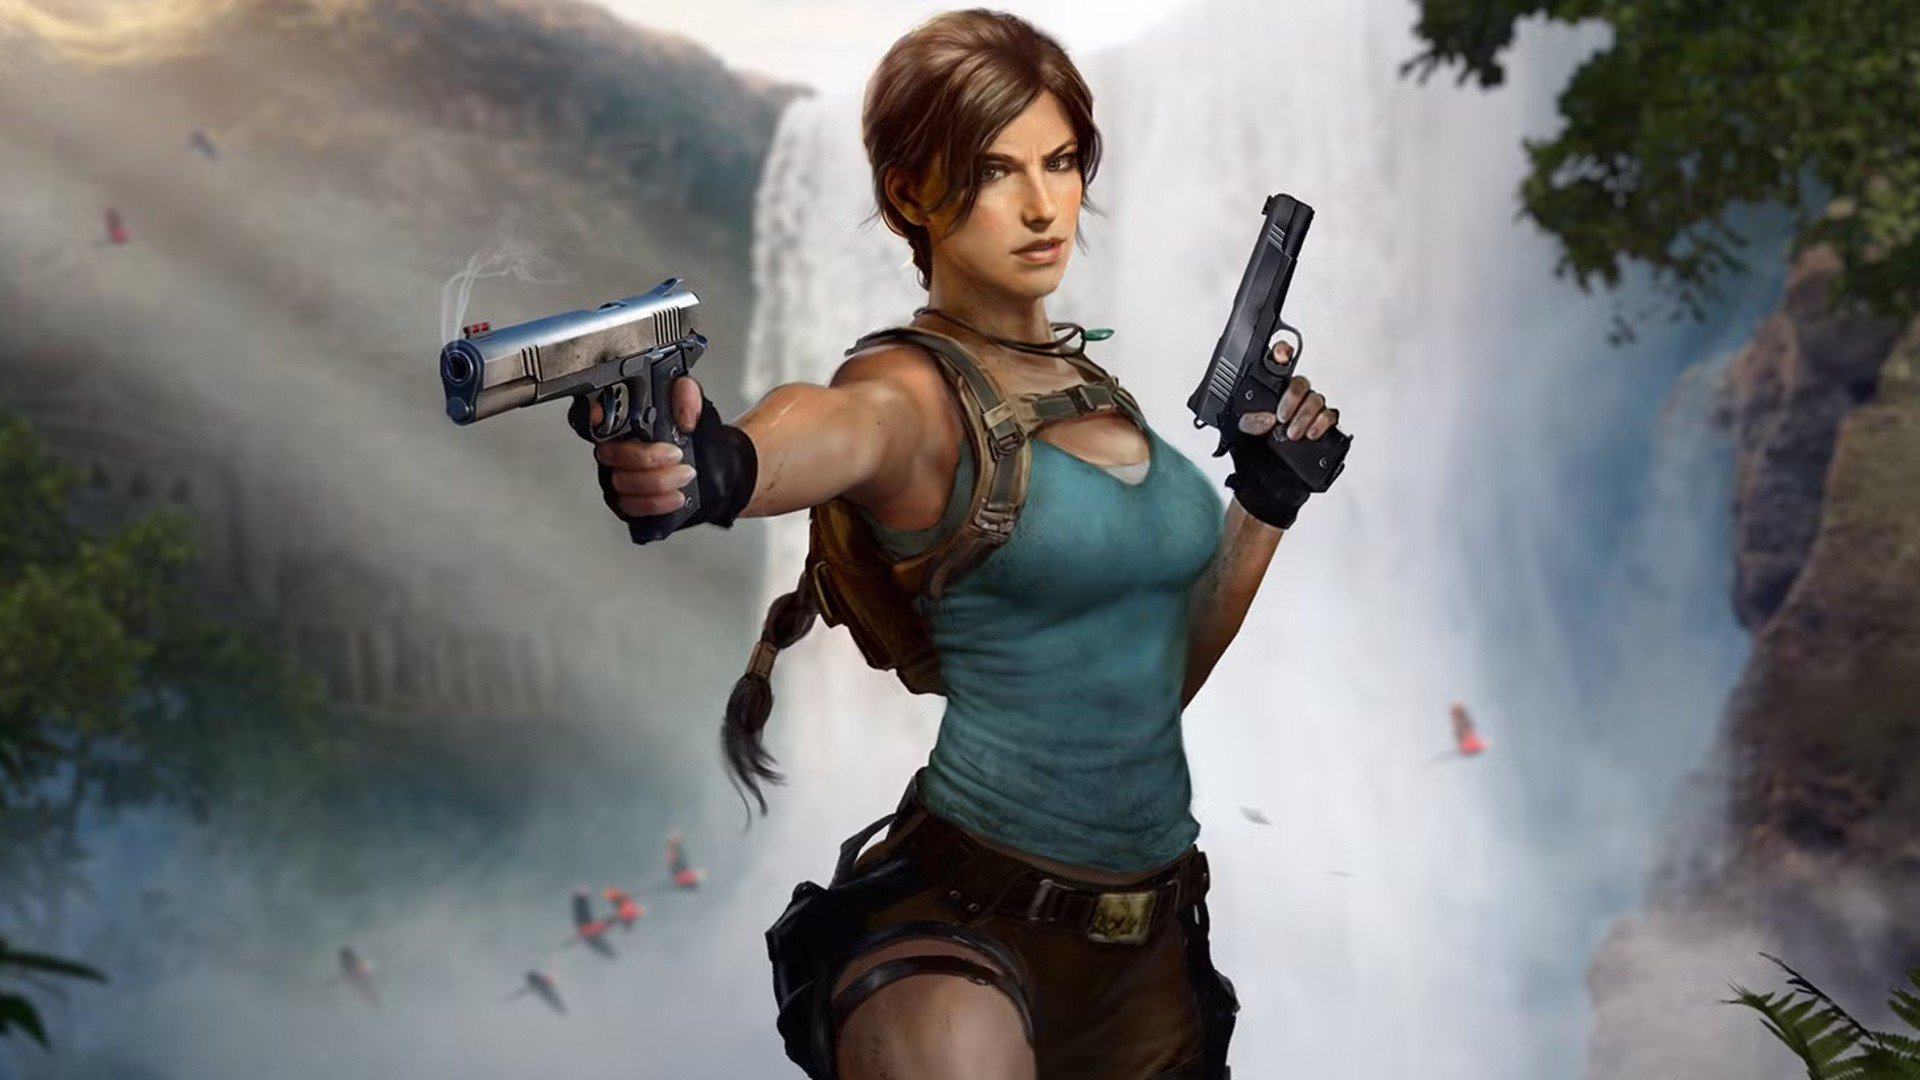 The next Tomb Raider game will be officially unveiled at The Game Awards later this week, Geoff Keighley has revealed. In a tweet ahead of the show, Keighley said on social media we'll get "a look at the future of one of gaming's most iconic franchises" this Thursday. "This is one you won't want to miss." For information on when you can tune in for the breaking news, refer to our When Is The Game Awards 2025 page. Across the show, there'll also be updates and trailers from Resident Evil Requiem, Exodus, that strange statue, and more. This next Tomb Raider game is expected to be a completely original entry that's its own standalone thing, and isn't tied to any of the previous storylines. Crystal Dynamics, the developer making the game, has actually been hit by layoffs as of late, but in terms of the game at least, it appears the studio is ready to show what it's working on. Are you looking forward to seeing the next Tomb Raider game? Let us know in the comments below.
 -
The next Tomb Raider game will be officially unveiled at The Game Awards later this week, Geoff Keighley has revealed. In a tweet ahead of the show, Keighley said on social media we'll get "a look at the future of one of gaming's most iconic franchises" this Thursday. "This is one you won't want to miss." For information on when you can tune in for the breaking news, refer to our When Is The Game Awards 2025 page. Across the show, there'll also be updates and trailers from Resident Evil Requiem, Exodus, that strange statue, and more. This next Tomb Raider game is expected to be a completely original entry that's its own standalone thing, and isn't tied to any of the previous storylines. Crystal Dynamics, the developer making the game, has actually been hit by layoffs as of late, but in terms of the game at least, it appears the studio is ready to show what it's working on. Are you looking forward to seeing the next Tomb Raider game? Let us know in the comments below. View full article
-
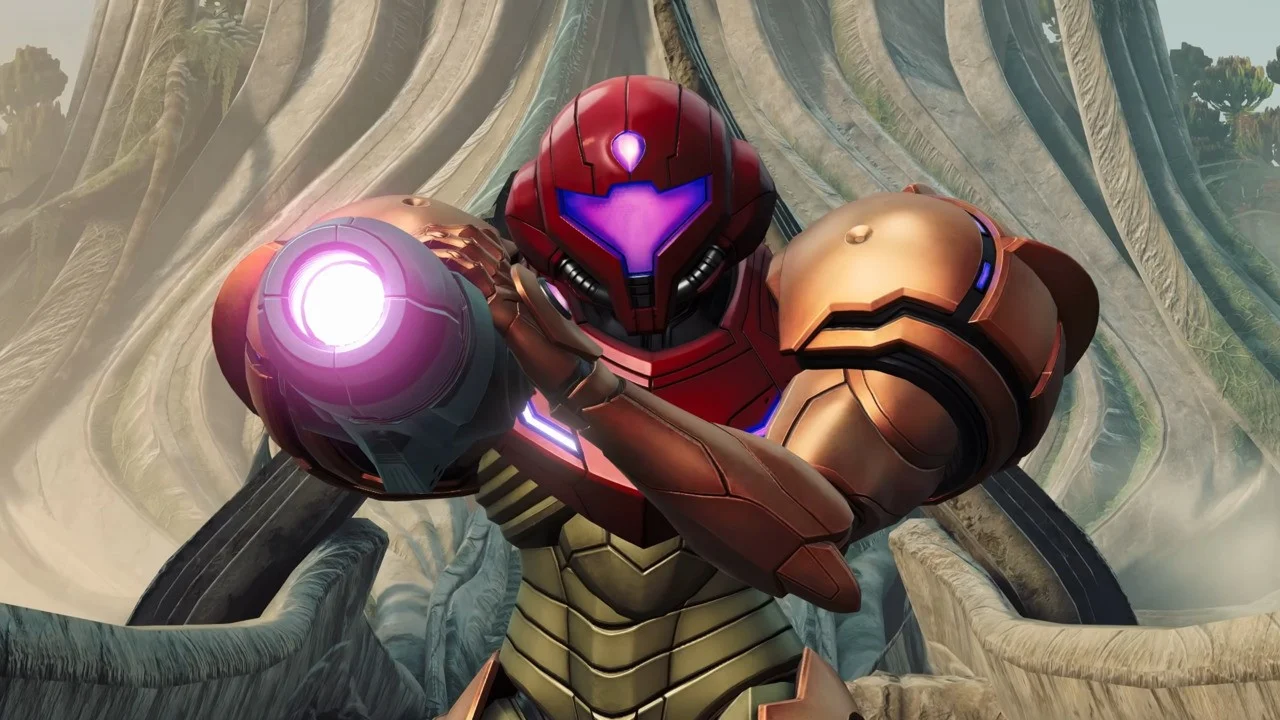 We already know that Metroid Prime 4: Beyond is a technical showcase on Switch 2, and we're sure many of you have spent the weekend exploring Viewros on the new console over the weekend. But for those of you who are still clinging on to your Switch 1 and wondering whether Samus' brand new adventure holds up on the old system, fear not. Digital Foundry has taken a look at the Switch 1 release of Metroid Prime 4 and is pretty much in agreement with us on the surprising quality of the release. You can read their impressions on their shiny new website, or listen to the trio talk about the game on this week's DF Direct Weekly (up top). Leave it to Retro Studios, hey? The game has understandably taken a hit on Switch 1, as you'd expect, but Digital Foundry says "Our resolution and frame-rate analysis tools tell a positive story for one of Switch 1's prettiest games yet." That's high praise indeed, with much of the positivity from the team coming from just what the developers have managed to squeeze out of the old system. Perhaps the most impressive aspect of Prime 4 on Switch 1 is the solid 60fps performance, which Digital Foundry feels confident enough to say"we classify this as a 'locked 60fps' game on all Switch consoles." The only drops the folks note are a handful in the open-world bike sections, and they're extremely few and far between. Even though image quality takes a hit — pixel count is around "504p for geometry, 576p for Samus' visor", which is lower than 2023's Metroid Prime Remastered on Switch — there's a lot more going on here. While the pixels might be lower, the level-of-detail in the environment, shadows, and particular effects are "seemingly identical" to the Switch 2 version. So that cut in pixel count and visual smoothness is to allow Retro to still give the full experience to players on the older consoles. You'll be missing some detail and smoothness, and you'll have to put up with worse texture filtering, an apparent lack of anti-aliasing, and fuzzy, jagged edges and textures in places. But it's an impressive experience on the Switch 1, all the same. Images: Digital Foundry Heck, we said so ourselves last week: "if you’re not looking to upgrade anytime soon and you’re keen to jump into Samus’ latest adventure, it's well worth picking up, as there's a fantastic game to be had." Of course, the Switch 2 version is the version to get, and Digital Foundry were full of praise for that release. You're getting a good game regardless of where you're playing it, essentially.
 -
We already know that Metroid Prime 4: Beyond is a technical showcase on Switch 2, and we're sure many of you have spent the weekend exploring Viewros on the new console over the weekend. But for those of you who are still clinging on to your Switch 1 and wondering whether Samus' brand new adventure holds up on the old system, fear not. Digital Foundry has taken a look at the Switch 1 release of Metroid Prime 4 and is pretty much in agreement with us on the surprising quality of the release. You can read their impressions on their shiny new website, or listen to the trio talk about the game on this week's DF Direct Weekly (up top). Leave it to Retro Studios, hey? The game has understandably taken a hit on Switch 1, as you'd expect, but Digital Foundry says "Our resolution and frame-rate analysis tools tell a positive story for one of Switch 1's prettiest games yet." That's high praise indeed, with much of the positivity from the team coming from just what the developers have managed to squeeze out of the old system. Perhaps the most impressive aspect of Prime 4 on Switch 1 is the solid 60fps performance, which Digital Foundry feels confident enough to say"we classify this as a 'locked 60fps' game on all Switch consoles." The only drops the folks note are a handful in the open-world bike sections, and they're extremely few and far between. Even though image quality takes a hit — pixel count is around "504p for geometry, 576p for Samus' visor", which is lower than 2023's Metroid Prime Remastered on Switch — there's a lot more going on here. While the pixels might be lower, the level-of-detail in the environment, shadows, and particular effects are "seemingly identical" to the Switch 2 version. So that cut in pixel count and visual smoothness is to allow Retro to still give the full experience to players on the older consoles. You'll be missing some detail and smoothness, and you'll have to put up with worse texture filtering, an apparent lack of anti-aliasing, and fuzzy, jagged edges and textures in places. But it's an impressive experience on the Switch 1, all the same. Images: Digital Foundry Heck, we said so ourselves last week: "if you’re not looking to upgrade anytime soon and you’re keen to jump into Samus’ latest adventure, it's well worth picking up, as there's a fantastic game to be had." Of course, the Switch 2 version is the version to get, and Digital Foundry were full of praise for that release. You're getting a good game regardless of where you're playing it, essentially. View full article
-
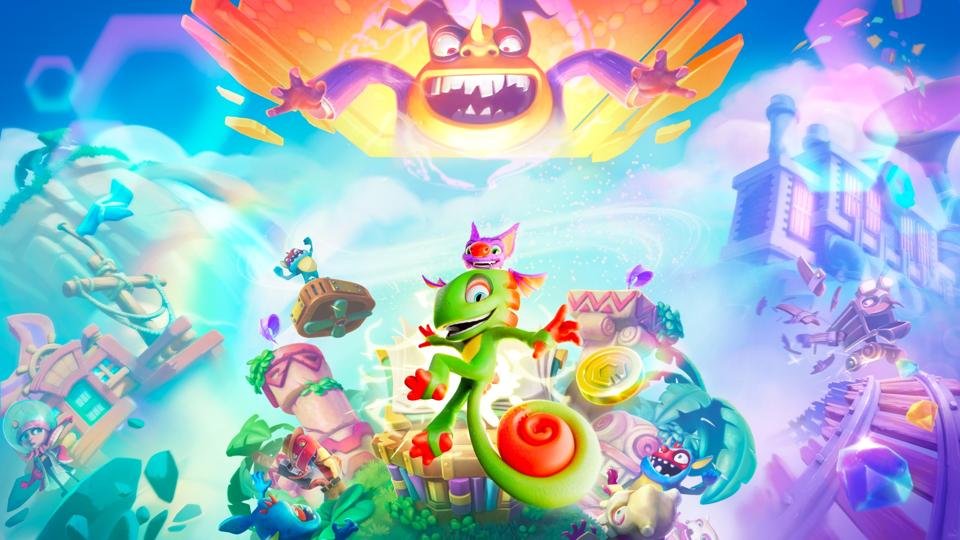 Playtonic and PM Studios have today released a free Switch 2 demo for the throwback platforming remake Yooka-Replaylee, giving you a chance to try before you buy. You'll find the new demo on the Switch 2 eShop right now, and, you'll be pleased to hear, all the data carries over to the full game — so there's no time wasted if you choose to go all-in on the full release afterwards. The demo announcement kicks off Playtonic's 10-day countdown to the release of the Yooka-Replaylee physical, which launches on 18th December. This boxed release bundles in a map and some stickers alongside the pièce de résistance, the full game on a cartridge.
 -
Playtonic and PM Studios have today released a free Switch 2 demo for the throwback platforming remake Yooka-Replaylee, giving you a chance to try before you buy. You'll find the new demo on the Switch 2 eShop right now, and, you'll be pleased to hear, all the data carries over to the full game — so there's no time wasted if you choose to go all-in on the full release afterwards. The demo announcement kicks off Playtonic's 10-day countdown to the release of the Yooka-Replaylee physical, which launches on 18th December. This boxed release bundles in a map and some stickers alongside the pièce de résistance, the full game on a cartridge. View full article
-
 The Analogue 3D is getting some transparent colour options ahead of its next restock. The options are: Gold Smoke Jungle Ice Watermelon Fire Grape Clear
 -
The Analogue 3D is getting some transparent colour options ahead of its next restock. The options are: Gold Smoke Jungle Ice Watermelon Fire Grape Clear View full article
-
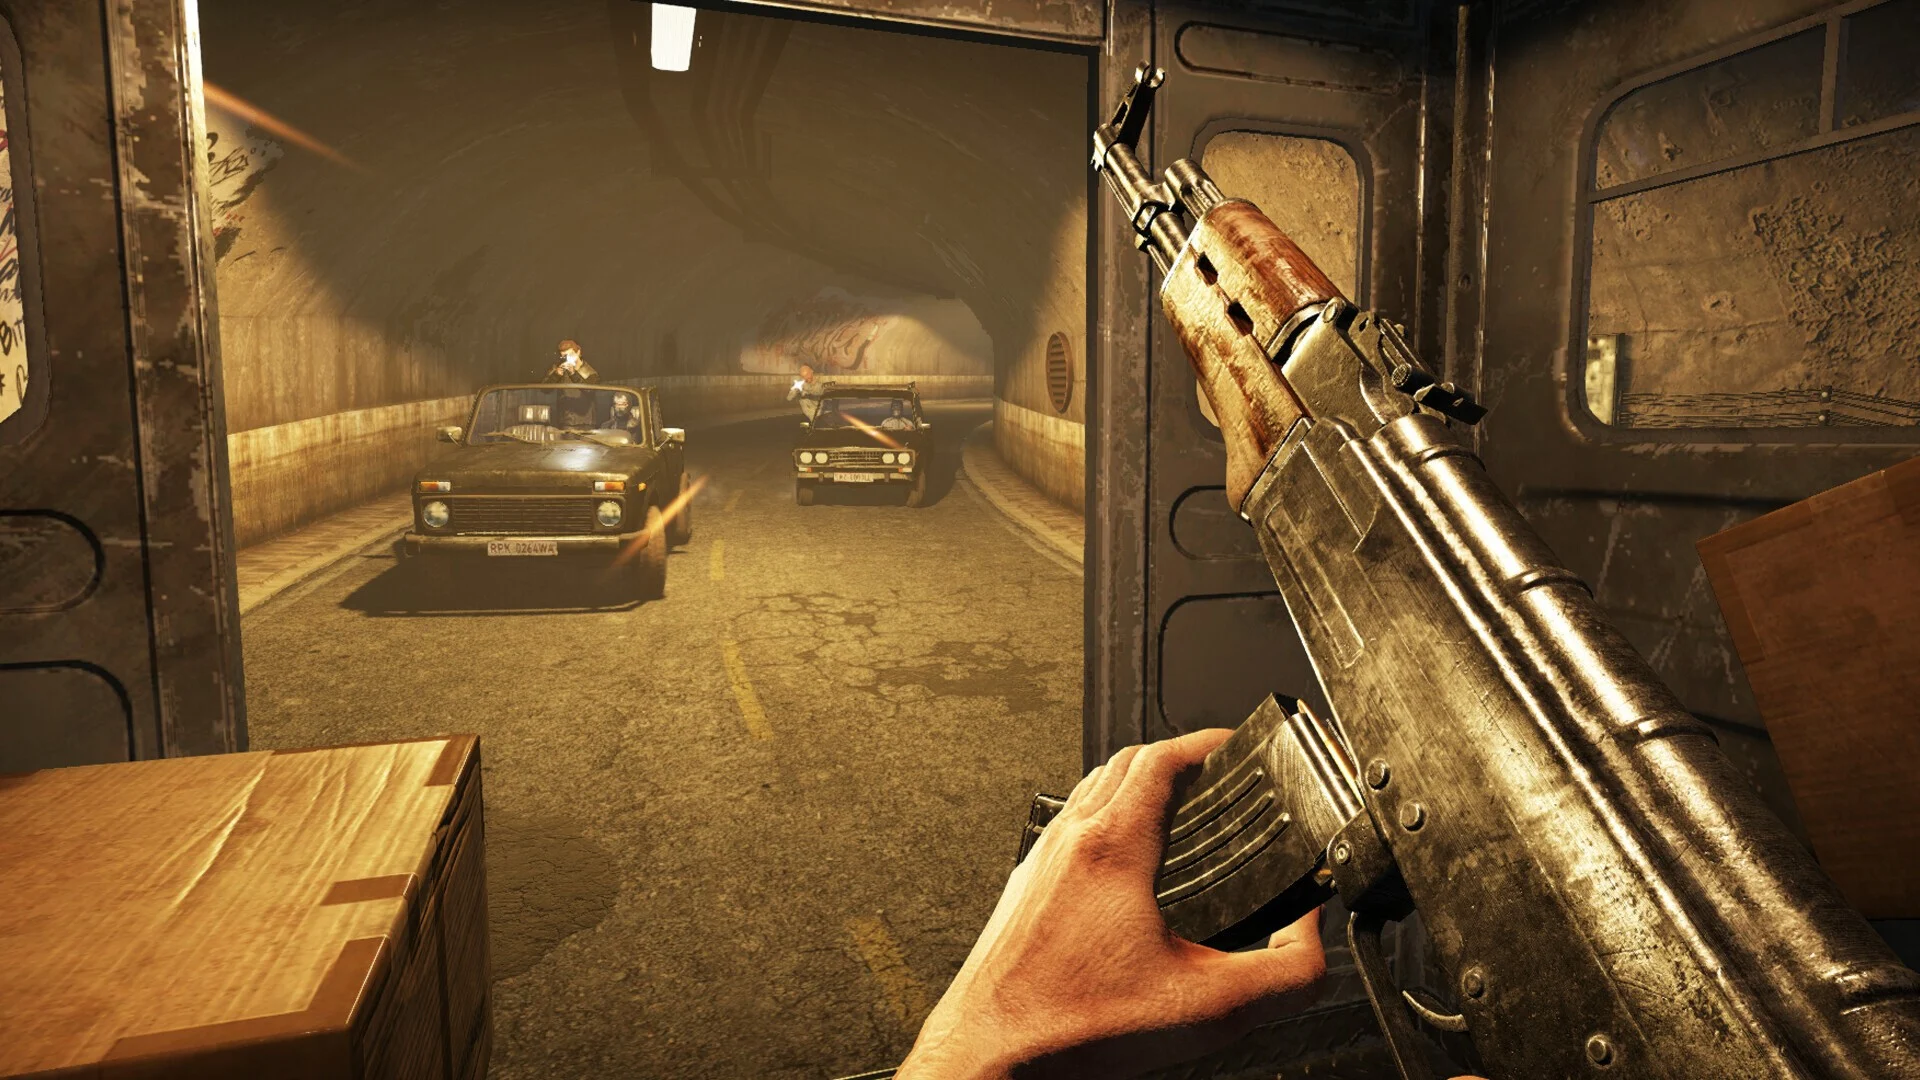 The Xbox Winter Demo Fest for 2025 (otherwise known as the Indie Selects Demo Fest) has now kicked off, allowing you to play over 20 games for free. It's not officially being promoted at the time of writing, but we've done some sleuthing and discovered these 20+ titles that are part of it — with 30+ set to be announced in total. With that in mind, we'll be updating this list as more demos become available over the next 24 hours. As of December 9th, you'll see a tab for the Xbox Demo Fest on your console's dashboard. Before then, you can use the links below, navigate to the "demos" section of the Xbox Store, or search for the ones you want to try manually. Let's take a look at more details on all of the available demos in the Xbox Winter Demo Fest 2025 so far: Aikyam Demo: "It’s up to Vishva, Ramli, and Guruji to dazzle the hearts of disgruntled villagers with extravagant turn-based battles and rally them against the demons in this Bollywood-inspired fantasy RPG!" AWAYSIS Demo: "A cutting edge blend of reactive and emergent physics, backed up by arcade-tight controls. It’s all about momentum and mayhem as you bounce off walls and bonk your enemies into the abyss." Biped 2 Demo: "Biped 2 is the sequel to the exciting game about two charming bipedal robots, Aku and Sila, who have each other’s backs and embark on incredible adventures side by side. Dive into this groovy co-op action-adventure game, full of puzzles, friendship, support, and fun!" Boxes: Lost Fragments Demo: "As a legendary thief, your next assignment lures you into a grand and lavish mansion. There you find a series of puzzle boxes, designed for an unknown purpose." Cash Cleaner Simulator: Piggy Bank Demo: "Cash Cleaner Simulator welcomes you into the life of a low-level criminal with a particular specialty. When your underworld contacts need dirty money to come back squeaky clean, they call you." CASSETTE BOY Demo: "At first glance Cassette Boy looks like a charming pixel-style adventure, but beneath the surface lies something far more complex. What seems like a flat 2D pixel world is in fact a three-dimensional space. By rotating the environment, the boundaries of existence shift. What comes into view becomes real, and what slips away from sight fades into nothingness." ColorBlend FX: Desaturation Demo: "Help Splatians blend the stolen colors back with the world and get rid of the evil Lord Ashen in this 2.5D puzzle-platformer metroidvania. Splat'n'stomp juicy enemies, swim in paint pools, solve physics and color puzzles and of course survive the death while figuring out the evil plans of the Lord." Contraband Police Demo: "The year is 1981, and as a young officer trainee, you are assigned to work at a border post in the mountainous region of Karikatka. Entry into the Acarist People's Republic is strictly regulated by the party and your every move is monitored! The situation at the border escalates when your comrade is killed during one of the interventions..." Empire in Decay Demo: "Empire in Decay is a roguelike deckbuilding turn-based tactical game, loosely based on chess. Its gameplay has been broadened with the use of cards and the progression of units. In the game, you'll proceed through procedurally generated routes across the districts of Daandria, the capital of the Empire." Froggy Hates Snow Demo: "In this demo, you are Froggy — a determined survivor in a hostile, snowy desert. Dig paths through the snow to discover treasure, battle eerie creatures, and adapt in a world where warmth is survival and the freezing temperatures aren’t the only thing that can kill!" Go North - Demo: "Go North is a cozy and immersive maze adventure. With the help of numerous magical and technological items, navigate beautifully unique mazes and explore expansive worlds in a story-driven adventure like no other." Incantation Demo: "Immerse yourself in the chilling tale of the Chen Family Village, where a mother searching for her missing daughter accidentally stumbles into a haunted place filled with mysterious cults." Knuckle Jet Demo: "Knuckle Jet is an off-the-wall, jetpunk, fast-paced, ricochet action platformer, where you use the titular Knuckle Jet to propel yourself through the air, bounce off walls and smash enemies." Kristala Demo: "Kristala is a dark fantasy Action RPG that invites you into the role of a magically gifted feline warrior on a quest to master the ancient magics of the Sacred Kristals." Limbot Demo: "Welcome to Limbot, the ultimate physics-based city stomping experience where up to 4 players must attempt to pilot a person dressed as a giant cardboard robot! Embrace the chaos in a paper-craft metropolis designed to be crushed, smashed, and destroyed!" Megabattle Demo: "Build your DECK and your ROBOT. Fight with STRATEGY and don’t die — roguelike style. A unique and FUN game where you’ll create your own character and develop a one-of-a-kind way to FIGHT." Pathologic 3 Demo: "You have only 12 days to stop the lethal plague. But in your hands lies the most valuable resource—time. Travel into the future to witness the worst outcomes. Correct mistakes in the past to change them. Bend the fates of people around you to save or condemn you—in search of answers." Reef Defense Demo: "Reef Defense is a fast-paced, intense strategy game where relentless waves of crustaceans are coming for your precious eggs! Arm your reef with strategically positioned defenses and hold the line. Can you outlast the swarm, or will your eggs become crab food?" Relooted Demo: "A crew. A job. A plan. Toss those ingredients together, and you’ve got yourself a classic heist — but with a few twists. Your crew members are everyday citizens (from different countries in Africa) with pretty normal careers. The job is to liberate African artifacts from Western museums. And the plan? Well, that’s up to you to create." Showgunners Demo: "In a dystopian future where corporations rule, a brutal reality show is the hottest entertainment property in town! You play as Scarlett Martillo, a contestant out for revenge. To win, you must navigate dangerous urban arenas packed with lethal traps and face off against hordes of heavily-armed psychopaths." Worshippers of Cthulhu Demo: "Worshippers of Cthulhu Demo is a game that combines city-building, resource management, and strategic decision-making within a world inspired by H.P. Lovecraft." Under Par Golf Architect Demo: "Design world-class golf courses by terraforming rough wasteland into lush fairways for smooth drives and pristine greens to ensure a true roll for every putt." Will you be trying any of these free Xbox demos during the 2025 Winter Demo Fest? Let us know down below.