


Rockstar
Administrators
-
Joined
-
Last visited
-

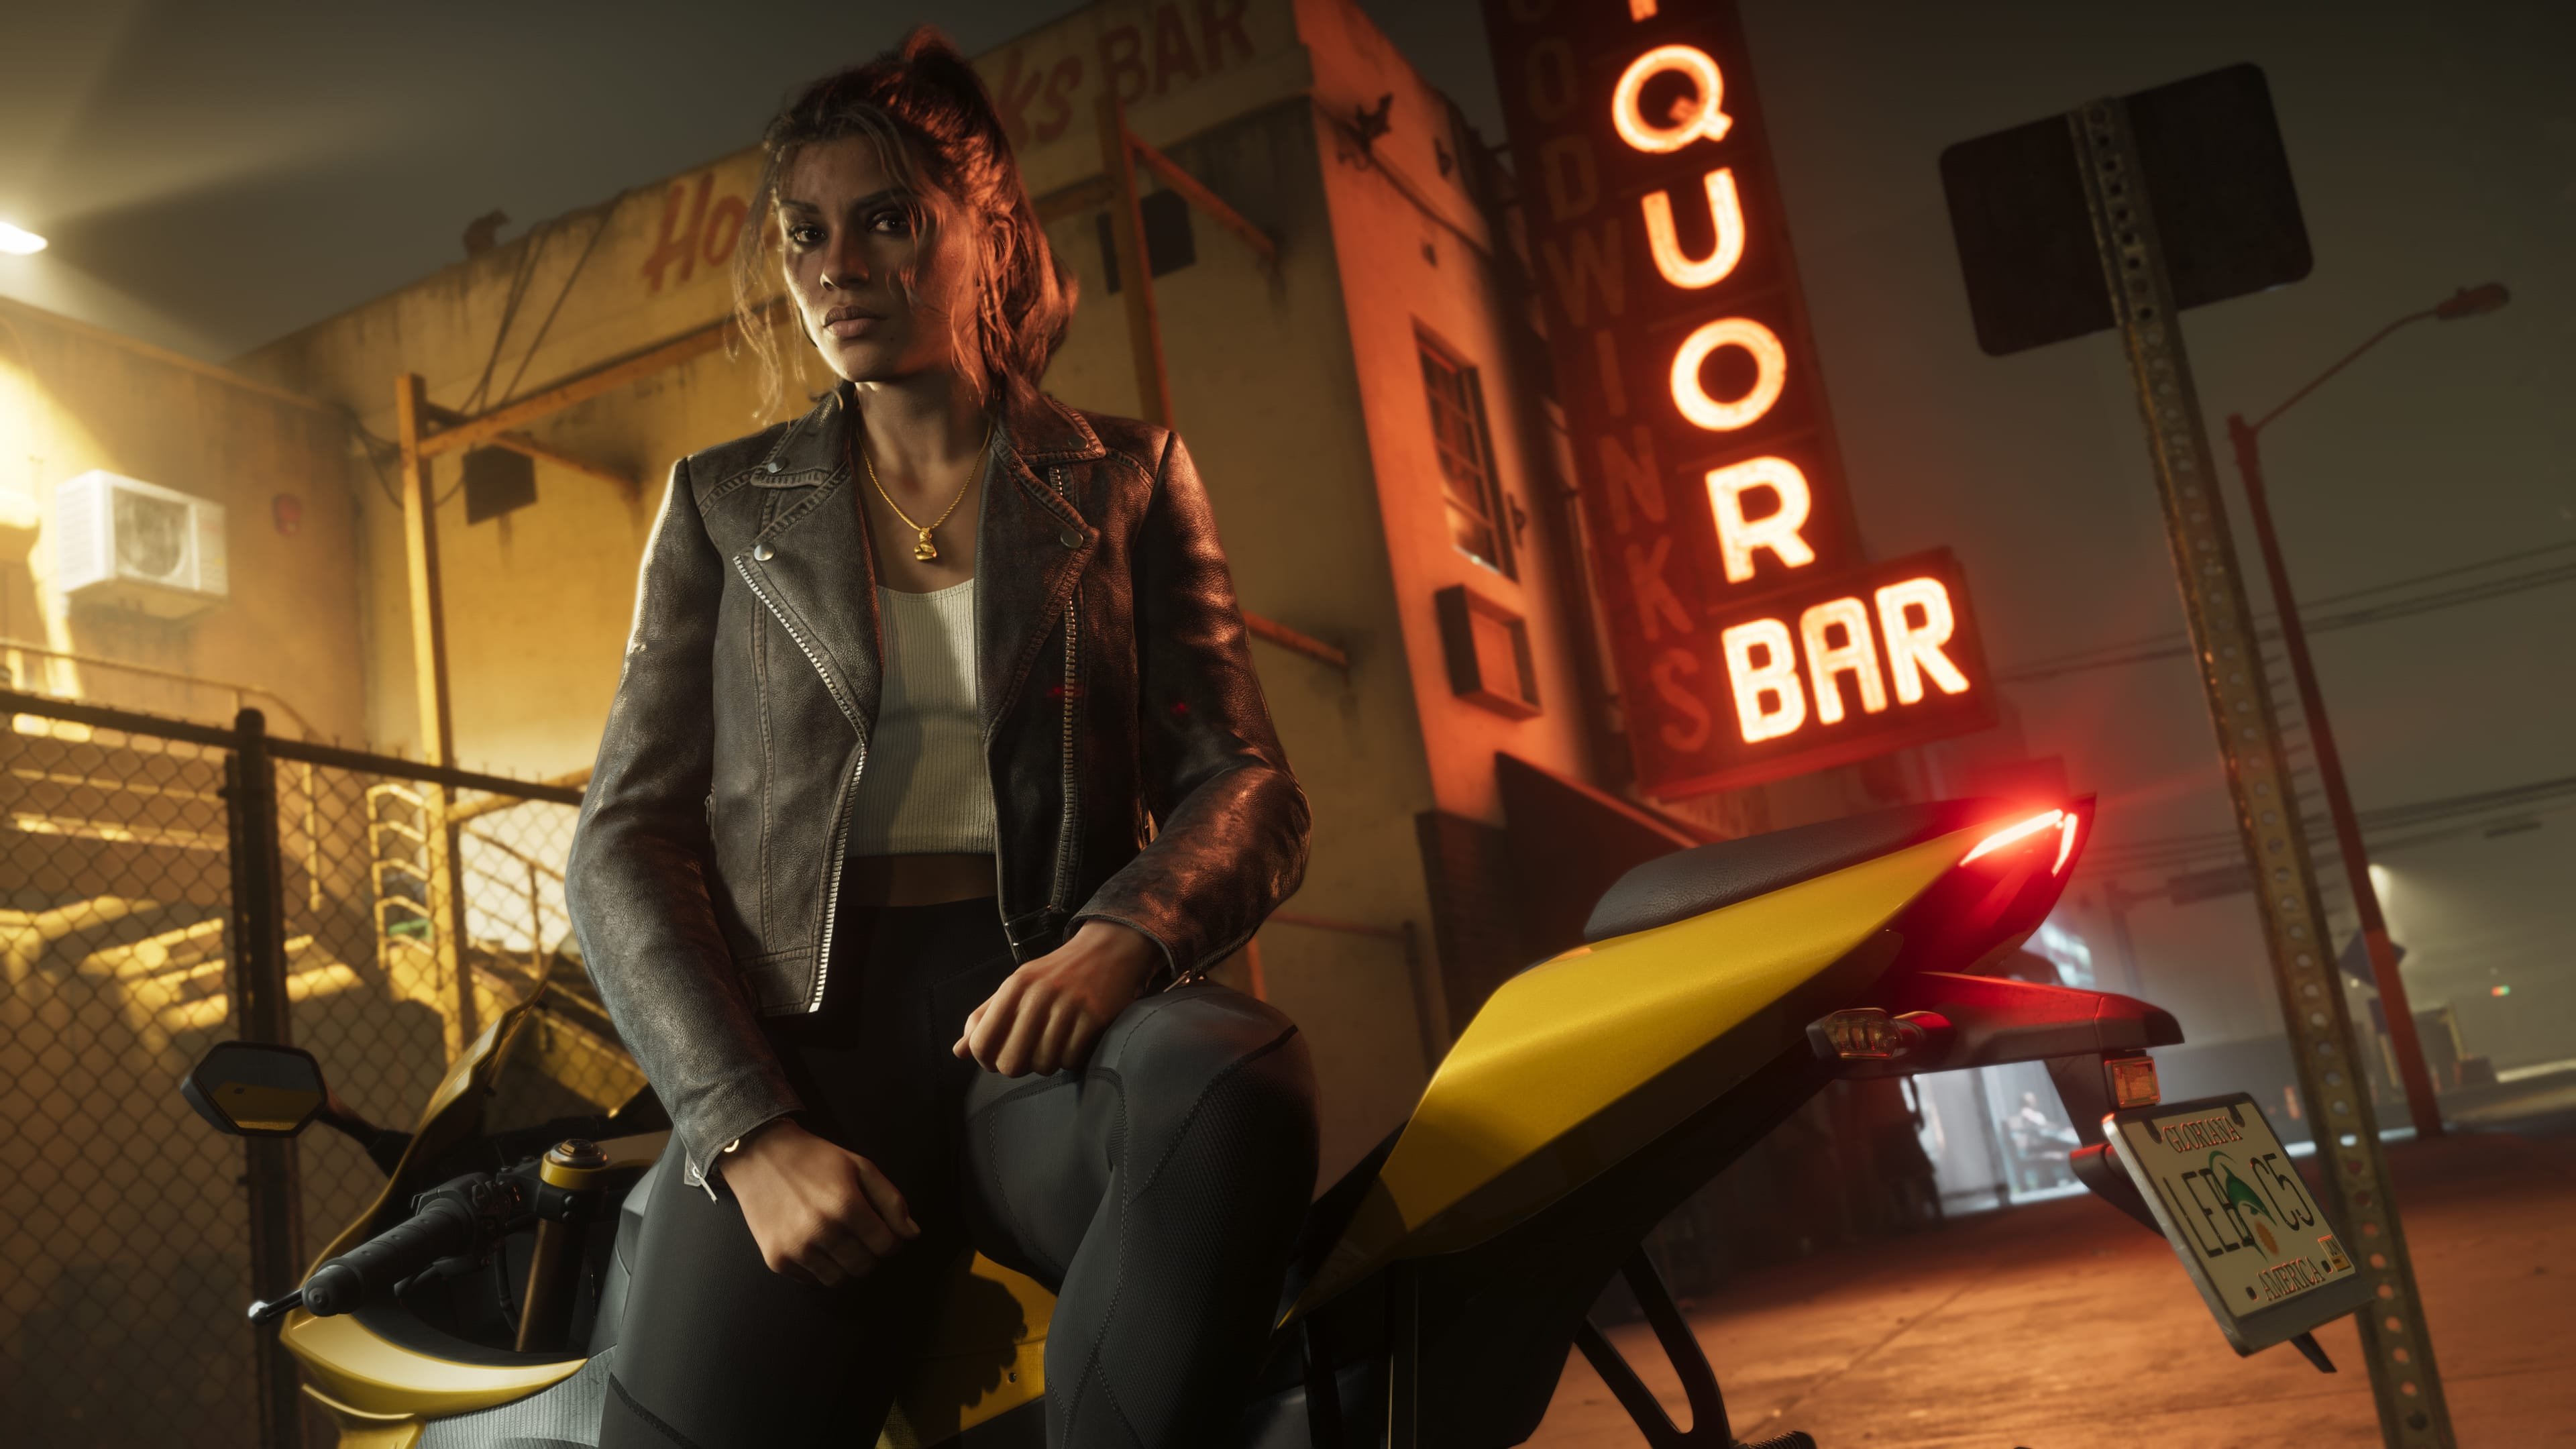
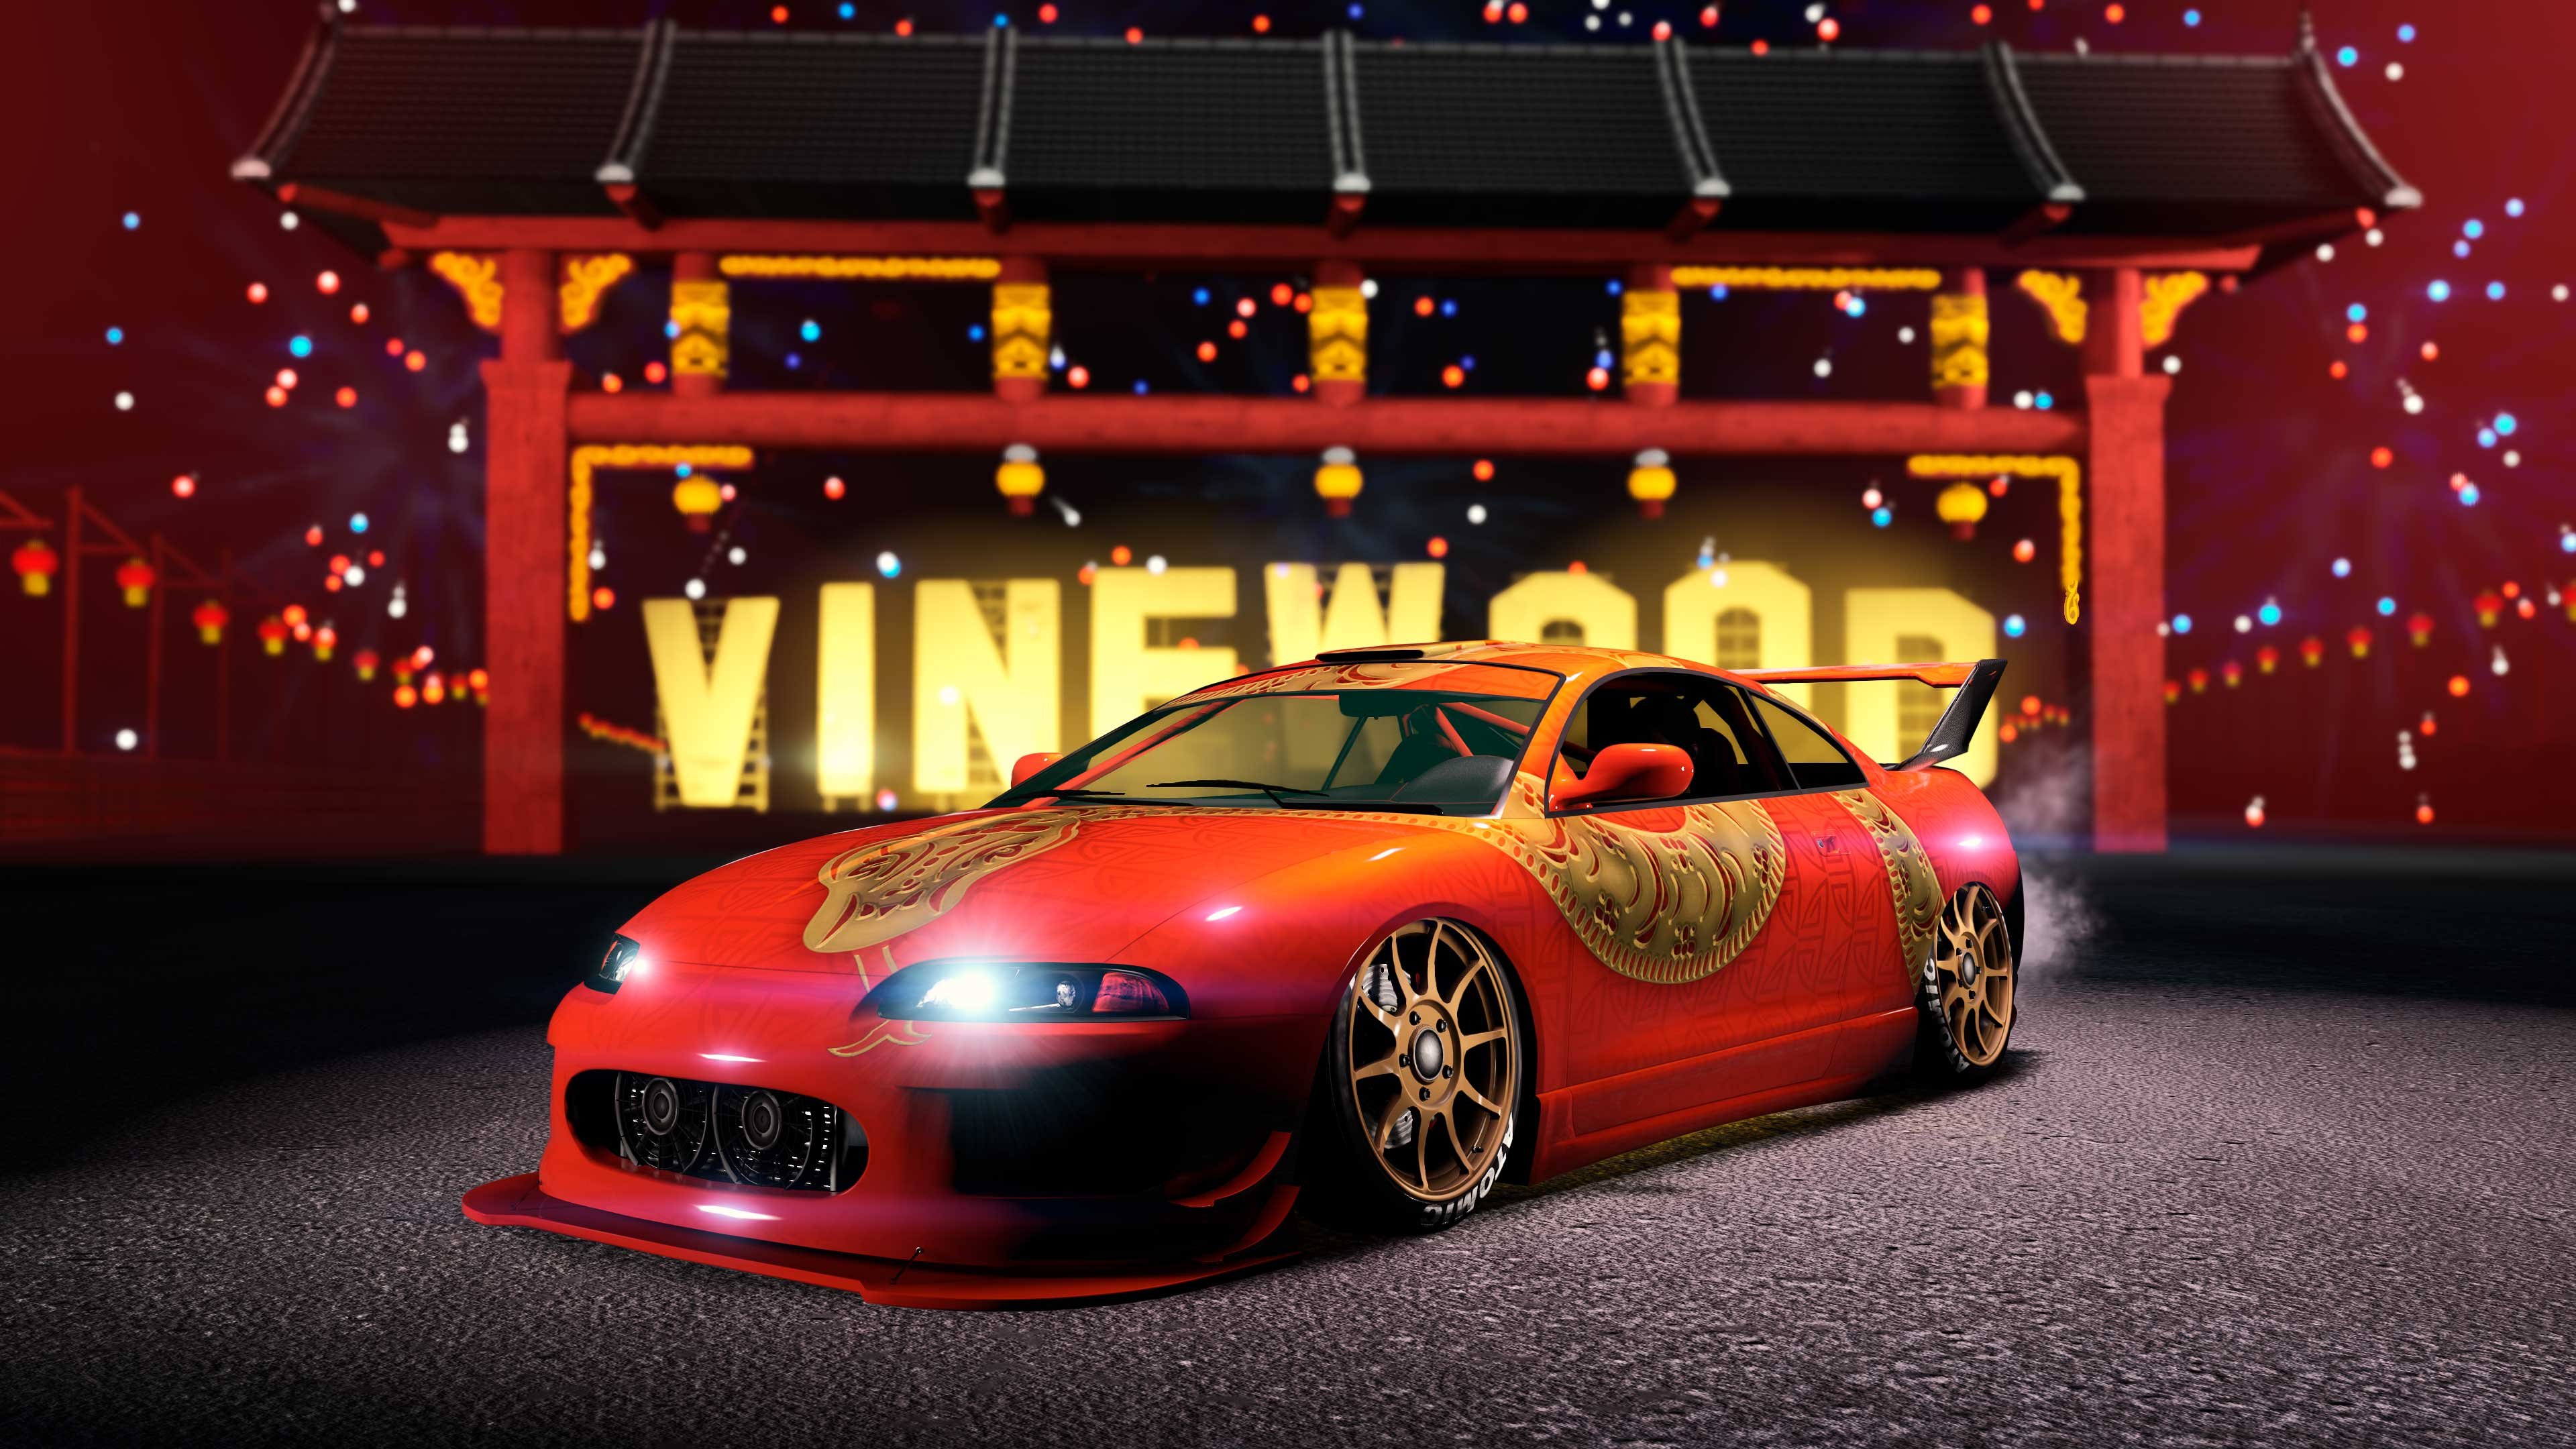
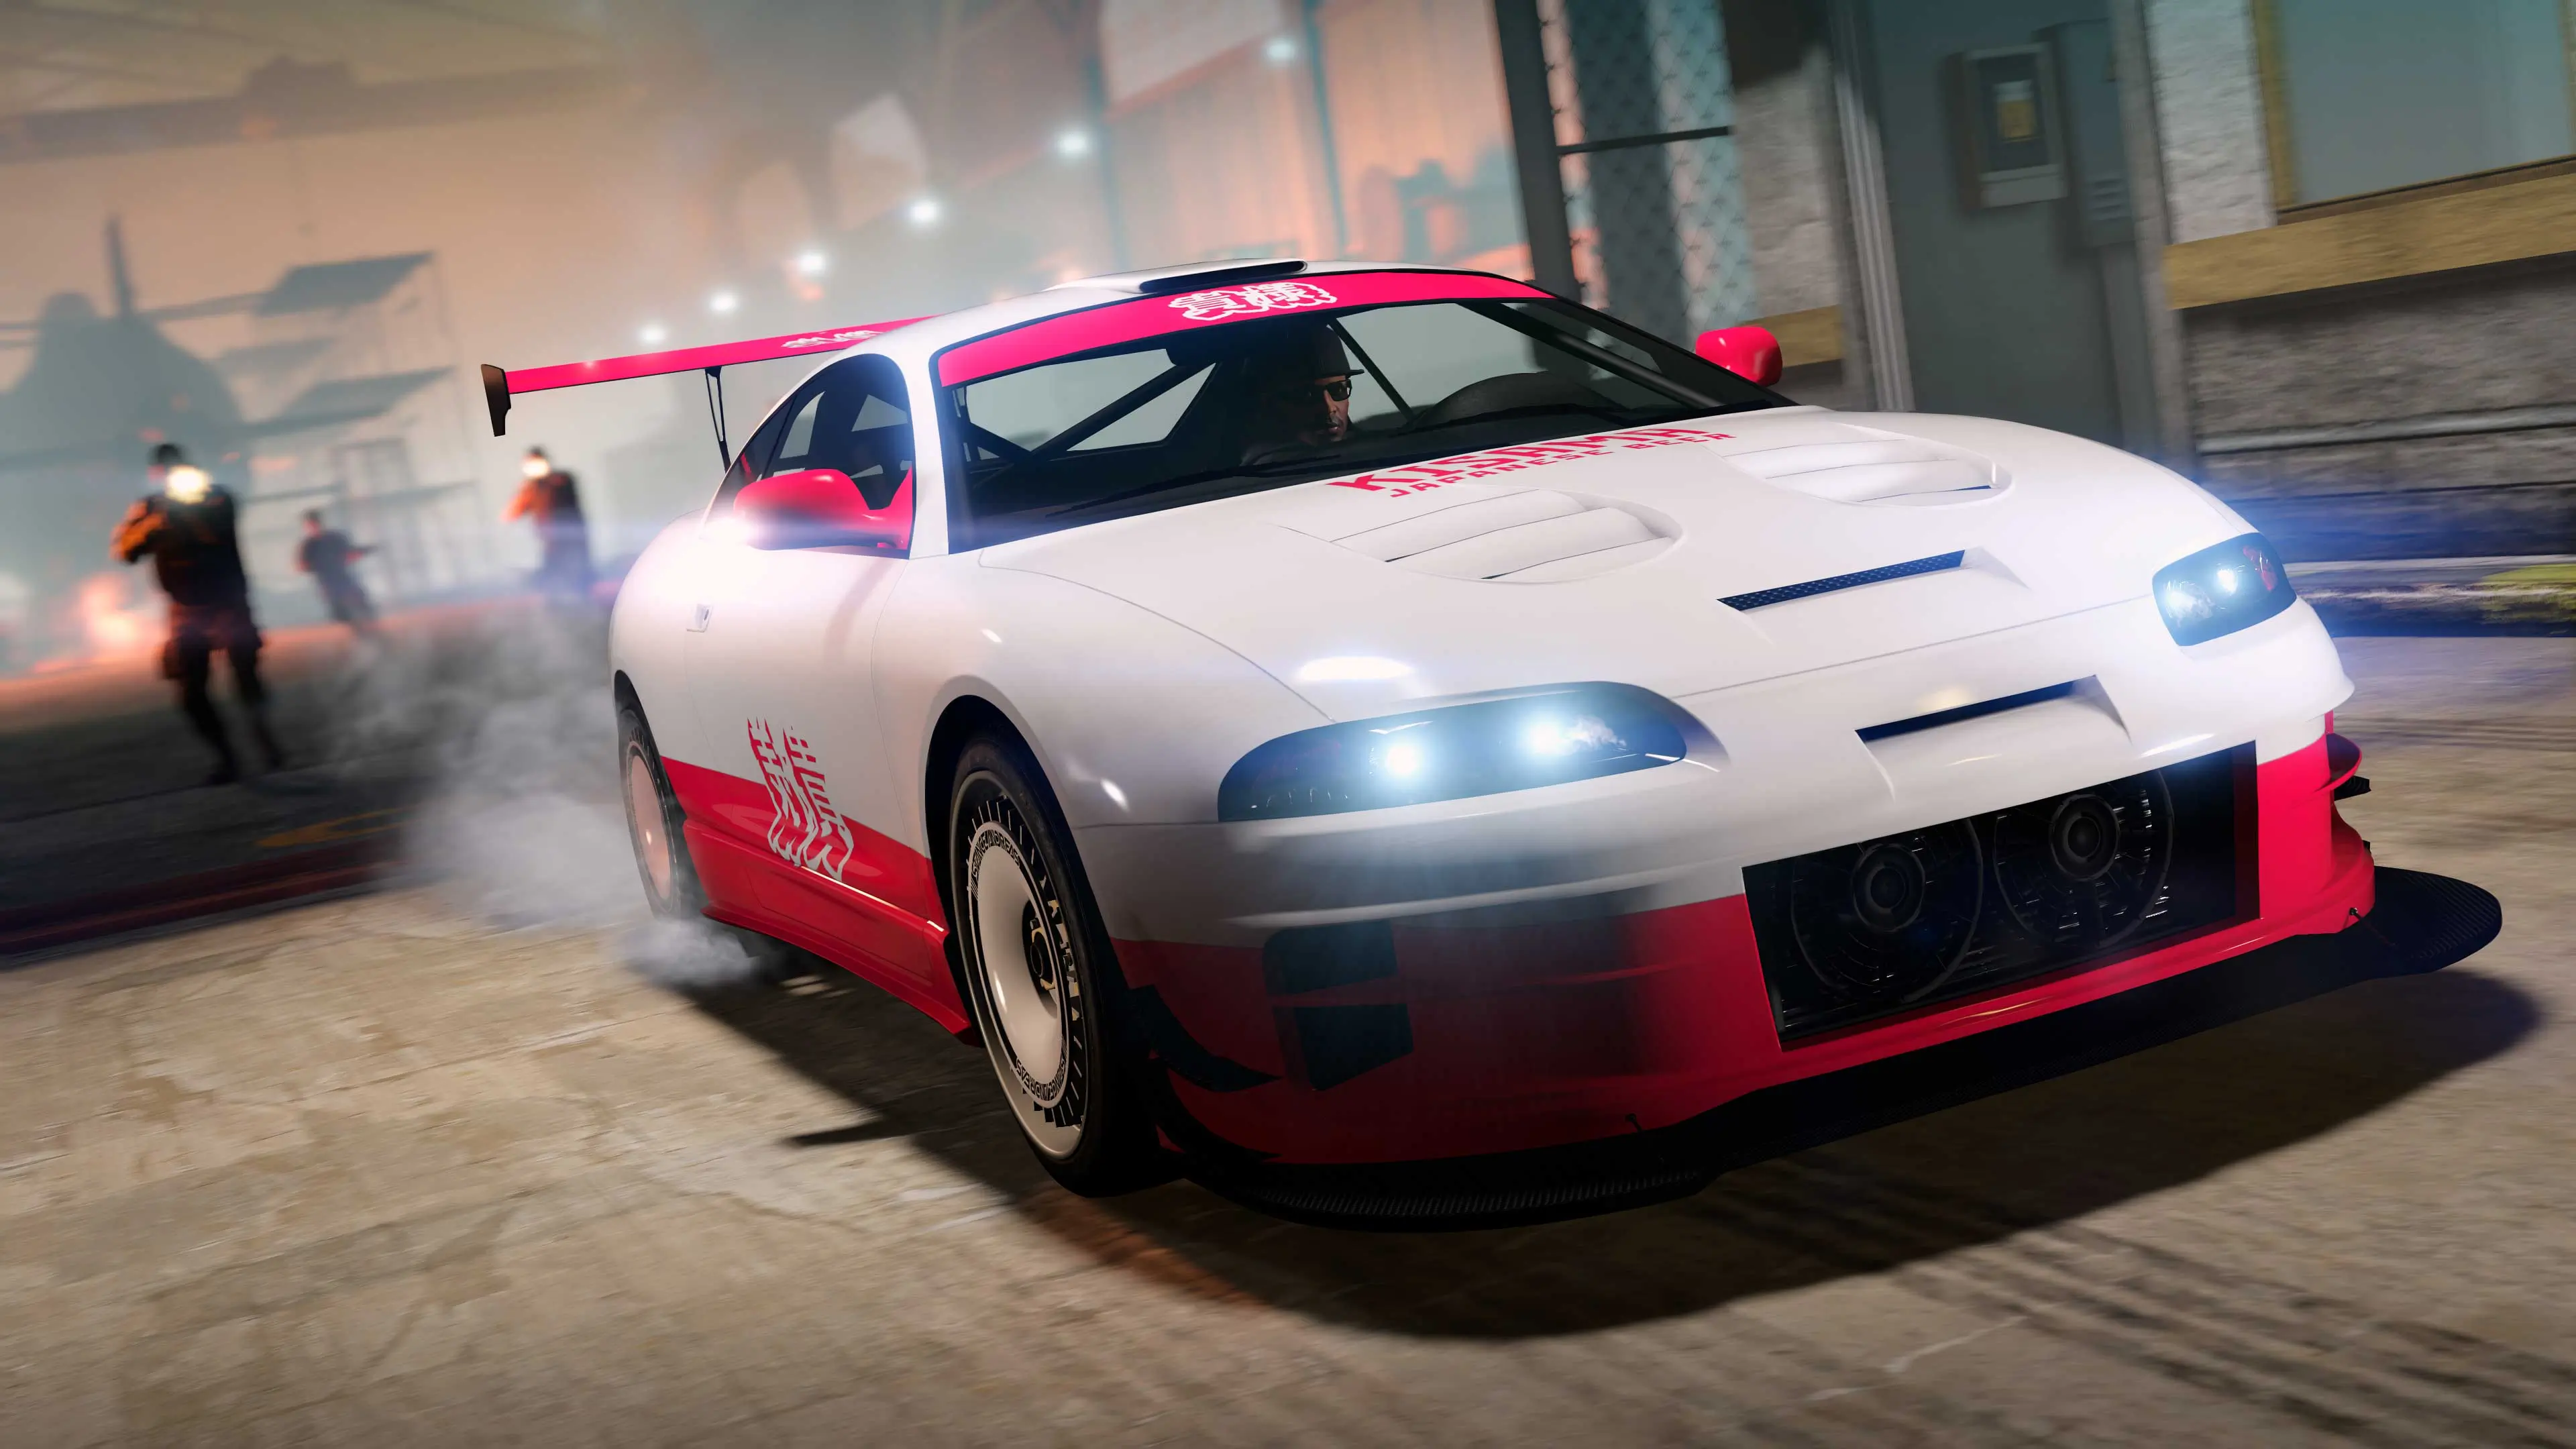 GTA Online collectors and car meet regulars — this one’s for you. During the current Drift Week (February 26th through March 4th), Rockstar has dropped one of the cleanest limited-edition vanity plates in recent memory: the exclusive red-and-white LS Car Meet Plate. The claimable Penumbra FF from the Salvage Yard robbery comes with an LSCM plate The Vehicle: Maibatsu Penumbra FF with Exclusive PlateThis week’s rare plate is attached to the Maibatsu Penumbra FF, a sharp JDM-style sports coupe that normally sells for $1,380,000 at Southern San Andreas Super Autos. Thanks to the Salvage Yard Robbery system, you can claim this exact vehicle — complete with the rare LS Car Meet plate — for a fraction of the price. Step-by-Step: How to Claim the Rare LS Car Meet PlateOwn a Salvage Yard (required to start any robbery missions). Head to your Salvage Yard planning board/computer. Select and complete The Duggan Robbery (this week’s Standard Tier job). Finish all setups and the finale successfully. Return to the Salvage Yard and claim the Maibatsu Penumbra FF. Pay the tiny registration fee: $20,000 standard price $10,000 if you own a Document Forgery Office (just owning it is enough — no need to run it) Once claimed and registered as a personal vehicle, the LS Car Meet plate is locked in permanently on that car. GTA Online Almost Free Vehicle [Maibatsu Penumbra FF] Get the LS Car Meet License Plate Extra Profit TipDon’t want to keep the Penumbra FF long-term? Sell it straight to Los Santos Customs for around $65,000 after claiming it. You’ll still walk away with the plate experience and some easy cash. This Week’s Full Salvage Yard RobberiesThe Duggan (Standard Tier) → Maibatsu Penumbra FF with LS Car Meet Plate (claimable) The McTony (Standard Tier) → Grotti GT500 The Cargo Ship (Low Tier) → BF Weevil Only The Duggan carries the rare plate this week. Perfect Timing with Drift WeekThis plate drop lines up beautifully with the current weekly bonuses: 5x LS Car Meet Rep All-new Drift Tuning upgrades available 3x GTA$ & RP on Drift Races New Shitzu Keitora and tons of drift-related content Take your freshly claimed Penumbra FF straight to the LS Car Meet, slap on some new drift parts, and flex the rare plate in front of everyone. Pro TipsThese special event plates cannot be recreated with the custom plate creator — they’re truly exclusive. The robbery and plate are only available until March 4, 2026 — so knock it out early. If you don’t own a Salvage Yard yet, this is a solid reason to grab one while Drift Week is still live. GTA Online - How To Complete All Challenges! (The Duggan Robbery) Whether you’re a serious collector or just want one of the cleanest-looking plates in Los Santos, this is your week. Run The Duggan Robbery, claim the Penumbra FF, and show off that red-and-white LS Car Meet plate at the next meet. Already got your Salvage Yard running? Planning to claim it tonight? Drop a comment below and let us know what you think of the new plate! 🚗💨 Don’t miss out — rare plates like this don’t stick around long. Happy hunting!
 -
GTA Online collectors and car meet regulars — this one’s for you. During the current Drift Week (February 26th through March 4th), Rockstar has dropped one of the cleanest limited-edition vanity plates in recent memory: the exclusive red-and-white LS Car Meet Plate. The claimable Penumbra FF from the Salvage Yard robbery comes with an LSCM plate The Vehicle: Maibatsu Penumbra FF with Exclusive PlateThis week’s rare plate is attached to the Maibatsu Penumbra FF, a sharp JDM-style sports coupe that normally sells for $1,380,000 at Southern San Andreas Super Autos. Thanks to the Salvage Yard Robbery system, you can claim this exact vehicle — complete with the rare LS Car Meet plate — for a fraction of the price. Step-by-Step: How to Claim the Rare LS Car Meet PlateOwn a Salvage Yard (required to start any robbery missions). Head to your Salvage Yard planning board/computer. Select and complete The Duggan Robbery (this week’s Standard Tier job). Finish all setups and the finale successfully. Return to the Salvage Yard and claim the Maibatsu Penumbra FF. Pay the tiny registration fee: $20,000 standard price $10,000 if you own a Document Forgery Office (just owning it is enough — no need to run it) Once claimed and registered as a personal vehicle, the LS Car Meet plate is locked in permanently on that car. GTA Online Almost Free Vehicle [Maibatsu Penumbra FF] Get the LS Car Meet License Plate Extra Profit TipDon’t want to keep the Penumbra FF long-term? Sell it straight to Los Santos Customs for around $65,000 after claiming it. You’ll still walk away with the plate experience and some easy cash. This Week’s Full Salvage Yard RobberiesThe Duggan (Standard Tier) → Maibatsu Penumbra FF with LS Car Meet Plate (claimable) The McTony (Standard Tier) → Grotti GT500 The Cargo Ship (Low Tier) → BF Weevil Only The Duggan carries the rare plate this week. Perfect Timing with Drift WeekThis plate drop lines up beautifully with the current weekly bonuses: 5x LS Car Meet Rep All-new Drift Tuning upgrades available 3x GTA$ & RP on Drift Races New Shitzu Keitora and tons of drift-related content Take your freshly claimed Penumbra FF straight to the LS Car Meet, slap on some new drift parts, and flex the rare plate in front of everyone. Pro TipsThese special event plates cannot be recreated with the custom plate creator — they’re truly exclusive. The robbery and plate are only available until March 4, 2026 — so knock it out early. If you don’t own a Salvage Yard yet, this is a solid reason to grab one while Drift Week is still live. GTA Online - How To Complete All Challenges! (The Duggan Robbery) Whether you’re a serious collector or just want one of the cleanest-looking plates in Los Santos, this is your week. Run The Duggan Robbery, claim the Penumbra FF, and show off that red-and-white LS Car Meet plate at the next meet. Already got your Salvage Yard running? Planning to claim it tonight? Drop a comment below and let us know what you think of the new plate! 🚗💨 Don’t miss out — rare plates like this don’t stick around long. Happy hunting! View full article
-
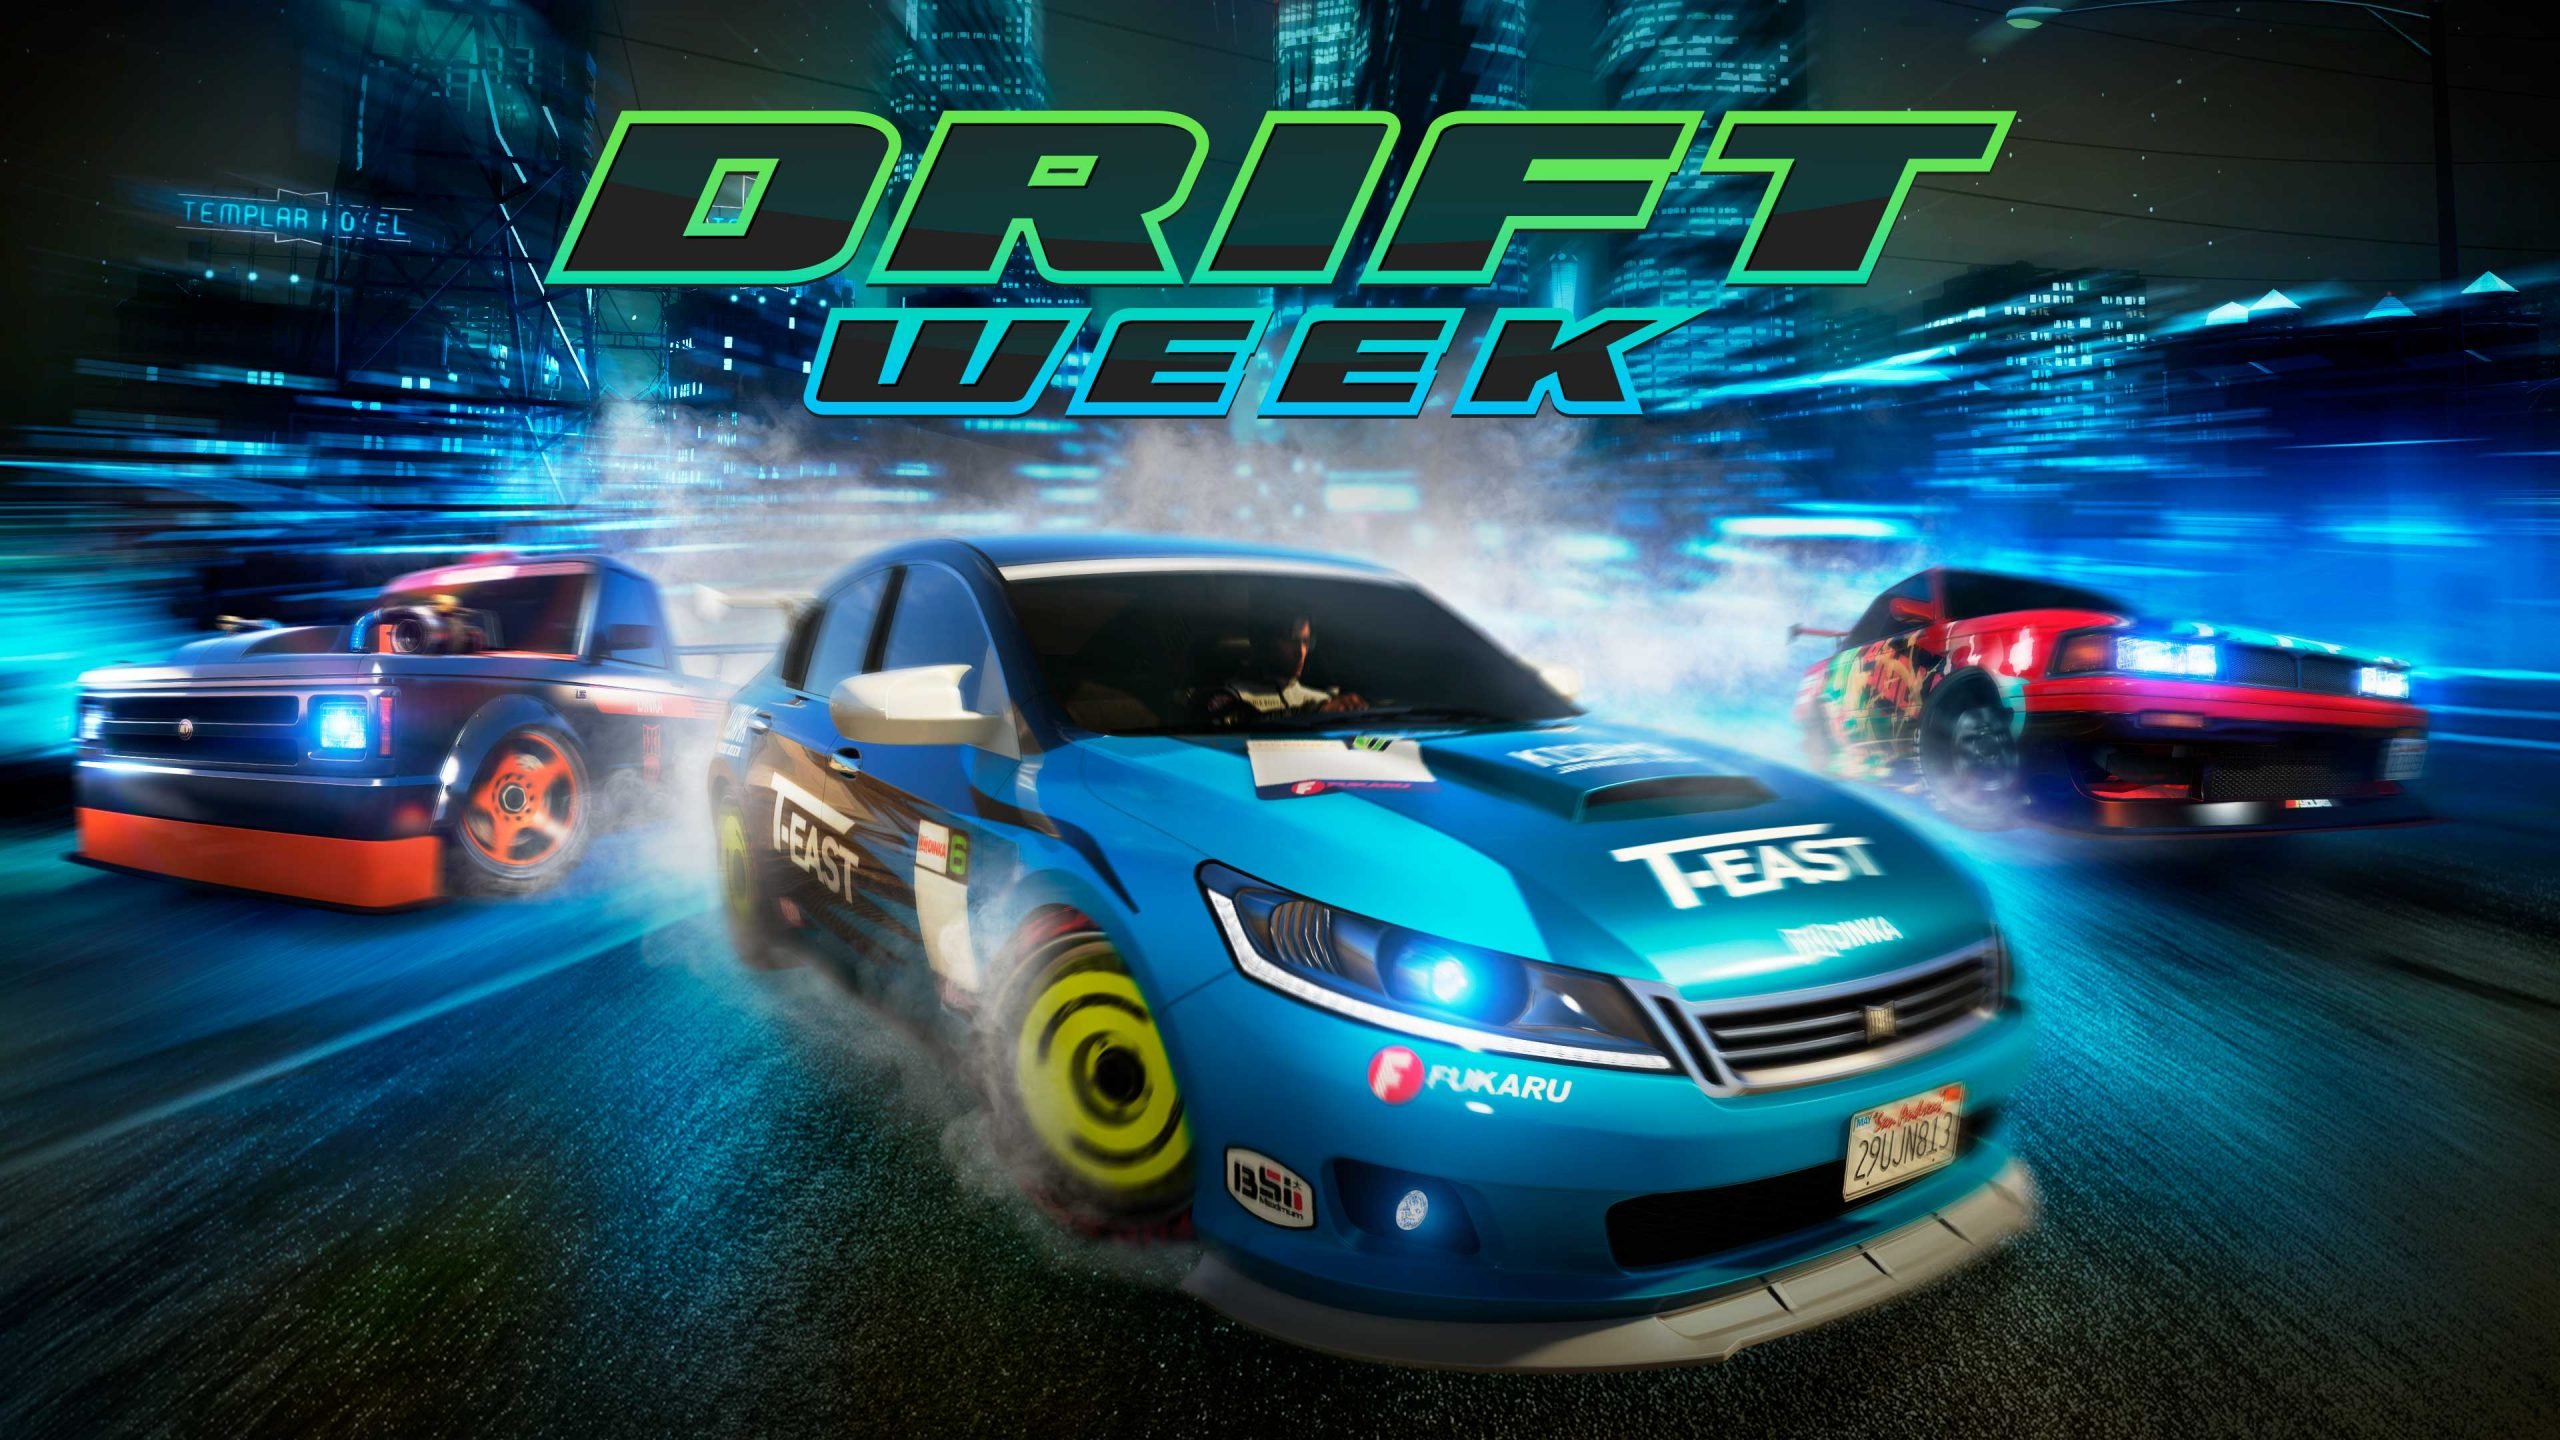 Rockstar Games has fired up the engines for another action-packed GTA Online weekly update, and this one is pure sideways chaos. Drift Week runs from February 26 through March 4, 2026, bringing a brand-new vehicle, fresh drift tuning options, and some of the best bonuses of the year so far. Meet the New Shitzu Keitora – The Unexpected Drift KingThe headline addition is the Shitzu Keitora, a compact pickup truck that’s surprisingly potent on the tarmac. Priced at $810,000 from Southern San Andreas Super Autos, it comes standard with Drift Tuning and a Missile Lock-On Jammer — perfect for shaking off cops or rival players while sliding through corners. Drift Tuning has also been added this week to three other vehicles: Übermacht Sentinel XS Vapid Dominator GT Dinka RT3000 Head to the LS Car Meet to fully customize these rides with the new drift-focused upgrades and show off your skills. Drift Week Bonuses – Stack That Cash & RepThis week is built for drifters and grinders alike: 5x LS Car Meet Rep (perfect time to level up your membership) 3x GTA$ and RP on all Drift Races (6x for GTA+ Members) 4x GTA$ and RP on Exotic Exports 2x GTA$ on Weed Sell Missions 2x GTA$ and RP on Sumo (Remix) Double GTA$ and RP on Priority Files (this week’s file: The Brute Force File) Weekly Challenge: Complete just 3 Drift Races to earn the Bright Manor Racing Suit and $100,000 in GTA$. Prize Ride Challenge: Place in the top 3 of an LS Car Meet Series race for 4 days straight to unlock the Fathom FR36 (normally $1,610,000). Lunar New Year Celebrations ContinueThe Year of the Horse vibes are still strong: New Senora Derby Lunar New Year Stunt Race now available Log in anytime before March 4 to claim the Red Year of the Horse Tee for free All Horse masks and tattoos are free this week Yuanbao Collectibles have returned across the map Complete one Drift Race using the Annis Euros (Drift variant) to unlock the exclusive Manga Classic livery within 72 hours. Massive Discounts & Free VehiclesDon’t miss these deals at the dealerships: Completely FREE: Dinka Blista Kanjo Declasse Drift Walton L35 LS Car Meet Membership 40% off: Weed Farm Businesses & Upgrades 30% off: All Drift Tuning Upgrades Dinka Jester RR, Fathom FR36, Dinka Chavos V6, Declasse Drift Yosemite, Buckingham Howard NX-25, Zirconium Journey II, Bravado Gauntlet Hellfire, RUNE Cheburek, Karin Futo Other Highlights This WeekPodium Vehicle: Benefactor Stirling GT ($975,000 value) – spin the Lucky Wheel daily (GTA+ gets two spins) Test Track Vehicles: Shitzu Keitora, Vapid Dominator GT, Dinka RT3000 Salvage Yard Robberies: The Duggan (Maibatsu Penumbra FF with LS Car Meet Vanity Plate), The McTony (Grotti GT500), The Cargo Ship (BF Weevil) Premium Race: Cutting Coroners Time Trials: HSW Terminal, RC Construction Site I, Tongva Valley Bottom LineWhether you’re a drift enthusiast looking to perfect your angles, a business owner cashing in on 2x Weed sales, or just logging in for free gear and the new Keitora — this week has something for every player in Los Santos. Fire up GTA Online today, hit the LS Car Meet, and start sliding. Drift Week only lasts until March 4 — don’t sleep on these bonuses! 🚗💨 What are you grinding first — the new Keitora or those 3x Drift Races? Let us know in the comments.
 -
Rockstar Games has fired up the engines for another action-packed GTA Online weekly update, and this one is pure sideways chaos. Drift Week runs from February 26 through March 4, 2026, bringing a brand-new vehicle, fresh drift tuning options, and some of the best bonuses of the year so far. Meet the New Shitzu Keitora – The Unexpected Drift KingThe headline addition is the Shitzu Keitora, a compact pickup truck that’s surprisingly potent on the tarmac. Priced at $810,000 from Southern San Andreas Super Autos, it comes standard with Drift Tuning and a Missile Lock-On Jammer — perfect for shaking off cops or rival players while sliding through corners. Drift Tuning has also been added this week to three other vehicles: Übermacht Sentinel XS Vapid Dominator GT Dinka RT3000 Head to the LS Car Meet to fully customize these rides with the new drift-focused upgrades and show off your skills. Drift Week Bonuses – Stack That Cash & RepThis week is built for drifters and grinders alike: 5x LS Car Meet Rep (perfect time to level up your membership) 3x GTA$ and RP on all Drift Races (6x for GTA+ Members) 4x GTA$ and RP on Exotic Exports 2x GTA$ on Weed Sell Missions 2x GTA$ and RP on Sumo (Remix) Double GTA$ and RP on Priority Files (this week’s file: The Brute Force File) Weekly Challenge: Complete just 3 Drift Races to earn the Bright Manor Racing Suit and $100,000 in GTA$. Prize Ride Challenge: Place in the top 3 of an LS Car Meet Series race for 4 days straight to unlock the Fathom FR36 (normally $1,610,000). Lunar New Year Celebrations ContinueThe Year of the Horse vibes are still strong: New Senora Derby Lunar New Year Stunt Race now available Log in anytime before March 4 to claim the Red Year of the Horse Tee for free All Horse masks and tattoos are free this week Yuanbao Collectibles have returned across the map Complete one Drift Race using the Annis Euros (Drift variant) to unlock the exclusive Manga Classic livery within 72 hours. Massive Discounts & Free VehiclesDon’t miss these deals at the dealerships: Completely FREE: Dinka Blista Kanjo Declasse Drift Walton L35 LS Car Meet Membership 40% off: Weed Farm Businesses & Upgrades 30% off: All Drift Tuning Upgrades Dinka Jester RR, Fathom FR36, Dinka Chavos V6, Declasse Drift Yosemite, Buckingham Howard NX-25, Zirconium Journey II, Bravado Gauntlet Hellfire, RUNE Cheburek, Karin Futo Other Highlights This WeekPodium Vehicle: Benefactor Stirling GT ($975,000 value) – spin the Lucky Wheel daily (GTA+ gets two spins) Test Track Vehicles: Shitzu Keitora, Vapid Dominator GT, Dinka RT3000 Salvage Yard Robberies: The Duggan (Maibatsu Penumbra FF with LS Car Meet Vanity Plate), The McTony (Grotti GT500), The Cargo Ship (BF Weevil) Premium Race: Cutting Coroners Time Trials: HSW Terminal, RC Construction Site I, Tongva Valley Bottom LineWhether you’re a drift enthusiast looking to perfect your angles, a business owner cashing in on 2x Weed sales, or just logging in for free gear and the new Keitora — this week has something for every player in Los Santos. Fire up GTA Online today, hit the LS Car Meet, and start sliding. Drift Week only lasts until March 4 — don’t sleep on these bonuses! 🚗💨 What are you grinding first — the new Keitora or those 3x Drift Races? Let us know in the comments. View full article
-
 Rockstar Games has quietly rolled out a new software update for the original Red Dead Redemption, targeting frustrating audio problems that have annoyed players since the native current-generation ports launched in December 2025. The patch, which began deploying on February 24, 2026 (listed as version 1.06 officially and 1.002 on consoles), applies primarily to PlayStation 5 and Xbox Series X|S. Although Rockstar’s support page mentions PC in the notes, no update has appeared for that platform yet. What the Patch Actually Fixes Rockstar’s official changelog is as vague as ever: “General bug fixes and improvements.” Thankfully, the dedicated community stepped in immediately. Players on Reddit (first spotted by user InspiredNitemares in r/rdr1) and confirmed across social media quickly identified the real changes: Loud, overpowering music during cutscenes (most notably the game’s dramatic intro sequence) has been properly balanced so it no longer drowns out dialogue and sound effects. Music now correctly plays on the main game selection/title screen. These issues were especially irritating because they did not exist in the last-generation versions on PS4 and Xbox One, creating a clear regression in what was otherwise a welcome 4K/60 FPS-enhanced port. First Patch Since Launch The current-gen re-release of Red Dead Redemption (including the full Undead Nightmare expansion) arrived on December 2, 2025, bringing native enhancements, HDR, improved visuals, and smoother performance to modern hardware. While largely praised, the audio mixing problems quickly became a common complaint in reviews and player forums. This marks the first post-launch patch for the PS5 and Xbox Series versions. In contrast, the mobile ports (iOS, Android, and Netflix versions) have already received several updates in recent months. Player Reactions Feedback has been overwhelmingly positive. One popular X post summed it up: “Red Dead Redemption on PS5 and Xbox has received an update addressing the audio mixing issues in cutscenes. The intro cutscene audio now matches correctly.” Fans are relieved to see Rockstar addressing quality-of-life issues even for an older title. Many hope this small patch signals ongoing support for the franchise while the community continues to speculate about next-gen upgrades for Red Dead Redemption 2 or future projects. How to Get the Update If you own Red Dead Redemption on PS5 or Xbox Series X|S, the update should download automatically. Otherwise, check your console’s game library or library settings to trigger it manually. The file size is reported as small, so installation is quick. Whether you’re revisiting John Marston’s story for the first time in years or replaying it in stunning 4K, the experience is now that much more polished. Saddle up, partner — the frontier sounds better than ever. Stay tuned to gaming news outlets (and Rockstar’s official support page) for any future updates. What do you think — is this enough to keep the original Red Dead Redemption feeling fresh in 2026? Let us know in the comments!
 -
Rockstar Games has quietly rolled out a new software update for the original Red Dead Redemption, targeting frustrating audio problems that have annoyed players since the native current-generation ports launched in December 2025. The patch, which began deploying on February 24, 2026 (listed as version 1.06 officially and 1.002 on consoles), applies primarily to PlayStation 5 and Xbox Series X|S. Although Rockstar’s support page mentions PC in the notes, no update has appeared for that platform yet. What the Patch Actually Fixes Rockstar’s official changelog is as vague as ever: “General bug fixes and improvements.” Thankfully, the dedicated community stepped in immediately. Players on Reddit (first spotted by user InspiredNitemares in r/rdr1) and confirmed across social media quickly identified the real changes: Loud, overpowering music during cutscenes (most notably the game’s dramatic intro sequence) has been properly balanced so it no longer drowns out dialogue and sound effects. Music now correctly plays on the main game selection/title screen. These issues were especially irritating because they did not exist in the last-generation versions on PS4 and Xbox One, creating a clear regression in what was otherwise a welcome 4K/60 FPS-enhanced port. First Patch Since Launch The current-gen re-release of Red Dead Redemption (including the full Undead Nightmare expansion) arrived on December 2, 2025, bringing native enhancements, HDR, improved visuals, and smoother performance to modern hardware. While largely praised, the audio mixing problems quickly became a common complaint in reviews and player forums. This marks the first post-launch patch for the PS5 and Xbox Series versions. In contrast, the mobile ports (iOS, Android, and Netflix versions) have already received several updates in recent months. Player Reactions Feedback has been overwhelmingly positive. One popular X post summed it up: “Red Dead Redemption on PS5 and Xbox has received an update addressing the audio mixing issues in cutscenes. The intro cutscene audio now matches correctly.” Fans are relieved to see Rockstar addressing quality-of-life issues even for an older title. Many hope this small patch signals ongoing support for the franchise while the community continues to speculate about next-gen upgrades for Red Dead Redemption 2 or future projects. How to Get the Update If you own Red Dead Redemption on PS5 or Xbox Series X|S, the update should download automatically. Otherwise, check your console’s game library or library settings to trigger it manually. The file size is reported as small, so installation is quick. Whether you’re revisiting John Marston’s story for the first time in years or replaying it in stunning 4K, the experience is now that much more polished. Saddle up, partner — the frontier sounds better than ever. Stay tuned to gaming news outlets (and Rockstar’s official support page) for any future updates. What do you think — is this enough to keep the original Red Dead Redemption feeling fresh in 2026? Let us know in the comments! View full article
-
Fans of the Grand Theft Auto series have waited nearly two decades for an official PC release of Grand Theft Auto: Vice City Stories. Today, a dedicated team of Russian modders has stepped up to deliver exactly that — and then some. On February 23, 2026, the modding group White Trash Games announced Grand Theft Auto: Vice City Stories 20th Anniversary Edition, an unofficial native PC port and remaster of the 2006 PSP classic (and its 2007 PS2 counterpart). The project aims to introduce the prequel to a whole new generation of players while letting veterans relive the neon-soaked streets of Vice City on modern hardware. A Long-Awaited Homecoming Vice City Stories launched exclusively on PSP in October 2006, with a PS2 port following in March 2007. It told the story of Vic Vance — brother of Vice City protagonist Tommy — as he built his criminal empire in the sun-soaked, crime-ridden 1984 version of Vice City. Despite critical acclaim and strong sales, Rockstar never brought the game to PC, leaving fans to rely on emulators for years. White Trash Games is changing that. In their official announcement, the team wrote: What to Expect: 4K 60FPS, Cut Content, and Full Customization The port is built as a true native PC experience (reverse-engineered from the original code) rather than a simple emulator wrapper. Highlights include: 4K resolution at 60 FPS with full modern controls — keyboard & mouse plus native controller support. Extensive graphics options: Individual 0–100% sliders for Map, Textures Enhancement, Vehicles, Peds, Weapons, Animations, Cutscenes, Unique mechanics, UI, Scripts, Audio, and Particles. All PS2 content plus cut material restored. Quality-of-life upgrades: Replay story missions immediately after failing them. Multi-language support: English, German, Italian, Spanish, French, and Russian at launch; Polish and Ukrainian coming later. The team promises “much more to come” on release, which is targeted for sometime in 2026 — perfectly timed for the game’s 20th anniversary. Trailer Drops the Beats (and the Vibes) Accompanying the announcement is an official trailer on YouTube (search “GTA Vice City Stories 20th Anniversary Edition Trailer”), set to Blondie’s iconic “Heart of Glass.” Early footage shows crisp 4K gameplay, smooth 60 FPS action, and plenty of classic Vice City chaos. Additional clips shared on the team’s Telegram channel highlight unique vehicles and weapon mechanics. The Modding Community Strikes Again White Trash Games joins a growing wave of ambitious Russian-based GTA projects. Similar efforts — including the recent GTA Vice City Next-Gen Edition (Vice City ported into GTA IV’s engine) — have faced takedowns from Take-Two Interactive but quickly resurfaced via re-uploads and alternative distribution methods. The team is already preparing for that possibility, directing fans to their Telegram channel (t.me/gta_vcs_20) for updates and future downloads. Whether Rockstar ever officially ports Vice City Stories remains unknown, but the modding community has once again proven that fan passion can fill the gap — often with results that surpass what a corporate remaster might deliver. Stay Tuned for Neon Nostalgia If you’ve ever wanted to ride a PCJ 600 through Vice City’s palm-lined streets in glorious 4K or finally experience Vic Vance’s full story without digging out an old PSP, 2026 is shaping up to be a banner year. Keep an eye on White Trash Games’ Telegram and YouTube channels for more screenshots, dev updates, and the eventual release date. The City of Vice is coming to PC — and it’s going to be hot. What do you think — will you be firing up Vice City Stories 20th Anniversary Edition on day one? Drop your thoughts in the comments, and let’s celebrate two decades of one of GTA’s most underrated gems.
-
 Rockstar Games has rolled out another quick server-side patch for GTA Online, released on February 19, 2026 (live as of February 20). This is the second background update in just one week, showing Rockstar’s aggressive stance on maintaining game integrity following the massive “A Safehouse in the Hills” mansion DLC back in December 2025. The update requires no download — it applies automatically the next time you launch GTA Online. The focus this time? Shutting down several popular exploits that were letting players gain unfair advantages in public sessions. Full Patch Notes (Confirmed via Community Insider Tez2)Fixed an issue that caused certain personal vehicles to be blacklisted while matchmaking via On Call in Freemode Patched “Michael’s Special Ability in MP” glitch Patched Facility Vehicle God Mode glitch Patched RC Bandito God Mode glitch Patched Mansion OTR (Off The Radar) glitch Patched Mansion Car Dupe glitch These fixes hit especially hard on god mode exploits involving Facility vehicles and the RC Bandito, which had become a major annoyance in PvP-heavy lobbies. The Mansion Car Dupe and OTR glitches — both tied to the new luxury properties — are also now closed, protecting the in-game economy and fairness for everyone. One Persistent Annoyance Still Not FixedMansion owners are still dealing with an irritating audio bug introduced by the Lunar New Year lantern decorations. The decorative lanterns create a constant looping fire crackling sound inside your property. Social media has been flooded with complaints, but this one didn’t make the cut in today’s patch. Rockstar is expected to address it in a future update. Why This Update MattersRockstar has now pushed out more than half a dozen patches (background + full downloads) since the mansions dropped. The company appears determined to keep GTA Online stable and cheat-free while players enjoy the new high-end content and seasonal events. This patch lands right in the middle of the Lunar New Year Event Week (February 19–25, 2026), which features double GTA$ & RP on several businesses, so the timing is perfect — clean sessions while you grind those bonuses. Quick Tips for PlayersLog in and test your Facility vehicles, RC Bandito, and mansion features to confirm the fixes are active. If you were relying on any of the now-patched glitches… sorry, they’re gone. Still hearing fire sounds in your mansion? You’re not alone — expect another background update soon. Rockstar is clearly listening to the community and moving fast. With the game in such an active post-DLC phase, more patches are almost guaranteed in the coming weeks. Did any of these exploits ruin your sessions before today? How’s the mansion life treating you now that dupes are dead? Let us know in the comments!
 -
Rockstar Games has rolled out another quick server-side patch for GTA Online, released on February 19, 2026 (live as of February 20). This is the second background update in just one week, showing Rockstar’s aggressive stance on maintaining game integrity following the massive “A Safehouse in the Hills” mansion DLC back in December 2025. The update requires no download — it applies automatically the next time you launch GTA Online. The focus this time? Shutting down several popular exploits that were letting players gain unfair advantages in public sessions. Full Patch Notes (Confirmed via Community Insider Tez2)Fixed an issue that caused certain personal vehicles to be blacklisted while matchmaking via On Call in Freemode Patched “Michael’s Special Ability in MP” glitch Patched Facility Vehicle God Mode glitch Patched RC Bandito God Mode glitch Patched Mansion OTR (Off The Radar) glitch Patched Mansion Car Dupe glitch These fixes hit especially hard on god mode exploits involving Facility vehicles and the RC Bandito, which had become a major annoyance in PvP-heavy lobbies. The Mansion Car Dupe and OTR glitches — both tied to the new luxury properties — are also now closed, protecting the in-game economy and fairness for everyone. One Persistent Annoyance Still Not FixedMansion owners are still dealing with an irritating audio bug introduced by the Lunar New Year lantern decorations. The decorative lanterns create a constant looping fire crackling sound inside your property. Social media has been flooded with complaints, but this one didn’t make the cut in today’s patch. Rockstar is expected to address it in a future update. Why This Update MattersRockstar has now pushed out more than half a dozen patches (background + full downloads) since the mansions dropped. The company appears determined to keep GTA Online stable and cheat-free while players enjoy the new high-end content and seasonal events. This patch lands right in the middle of the Lunar New Year Event Week (February 19–25, 2026), which features double GTA$ & RP on several businesses, so the timing is perfect — clean sessions while you grind those bonuses. Quick Tips for PlayersLog in and test your Facility vehicles, RC Bandito, and mansion features to confirm the fixes are active. If you were relying on any of the now-patched glitches… sorry, they’re gone. Still hearing fire sounds in your mansion? You’re not alone — expect another background update soon. Rockstar is clearly listening to the community and moving fast. With the game in such an active post-DLC phase, more patches are almost guaranteed in the coming weeks. Did any of these exploits ruin your sessions before today? How’s the mansion life treating you now that dupes are dead? Let us know in the comments! View full article
-
 Rockstar Games is surprising GTA Online players with a generous, no-strings-attached cash bonus promotion delivered straight to select inboxes. Announced via targeted emails from Rockstar Propaganda on February 19, 2026, the offer lets players collect up to GTA$1,500,000 simply by completing sell missions over the next three weeks. This comes at the perfect time following the December 2025 “A Safehouse in the Hills” update, which introduced luxurious new mansion properties. The bonus money is clearly designed to help players recoup some of those hefty real estate costs—or fund their next big purchase. Promotion BreakdownThe deal is straightforward and player-friendly: Week 1: February 19 – 25, 2026 → GTA$500,000 Week 2: February 26 – March 4, 2026 → GTA$500,000 Week 3: March 5 – 11, 2026 → GTA$500,000 Total possible bonus: GTA$1,500,000 According to the email and multiple player reports (including screenshots shared on X), completing just one qualifying sell mission per week is enough to trigger each GTA$500,000 bonus. The money is automatically deposited into your Maze Bank account within 72 hours of completing the sale. Qualifying Sell MissionsAny of the following business sell missions count toward the promotion: Special Cargo Sell Missions (CEO Office) Vehicle Cargo Sell Missions (CEO Office) Gunrunning / Arms Trafficking Sell Missions Nightclub Warehouse product offloads Motorcycle Club (MC) Business product deliveries Air Freight Cargo Sell Missions Acid Lab Sell Missions (especially popular for quick solo runs) How to Claim Your Free GTA$Check your email – Look for the subject line “Just for You: Get Up To GTA$1,500,000 in GTA Online Bonuses” from Rockstar Propaganda. (It may land in spam/junk folders.) Log into GTA Online during each weekly window. Complete one sell mission from the eligible list above. Wait up to 72 hours for the bonus to hit your Maze Bank account. Important note: This appears to be a targeted promotion. Not every player has received the email yet, even those subscribed to Rockstar emails. However, community reports and sites like Sportskeeda and Gameranx suggest it may roll out more broadly—worth trying a sell mission regardless. Pro Tips to Maximize the DealThis week (Feb 19–25) already features 2X GTA$ and RP on Counterfeit Cash Sell Missions and Street Dealer Sales as part of the Lunar New Year event week. If you own a Counterfeit Cash Factory, knock out your promotion sale while earning double rewards. Easiest options for casual players: Acid Lab sells (quick, solo-friendly) or Nightclub Warehouse goods (passive buildup). Stack with friends or solo—most of these missions scale well either way. Whether you’re a high-rolling CEO, a patched-up Biker President, or just someone looking to afford that shiny new mansion in the hills, this is one of the easiest free-money handouts Rockstar has offered in months. Fire up GTA Online, make that sale, and watch the cash roll in. What are you spending your GTA$1.5 million on first? Let us know in the comments!
 -
Rockstar Games is surprising GTA Online players with a generous, no-strings-attached cash bonus promotion delivered straight to select inboxes. Announced via targeted emails from Rockstar Propaganda on February 19, 2026, the offer lets players collect up to GTA$1,500,000 simply by completing sell missions over the next three weeks. This comes at the perfect time following the December 2025 “A Safehouse in the Hills” update, which introduced luxurious new mansion properties. The bonus money is clearly designed to help players recoup some of those hefty real estate costs—or fund their next big purchase. Promotion BreakdownThe deal is straightforward and player-friendly: Week 1: February 19 – 25, 2026 → GTA$500,000 Week 2: February 26 – March 4, 2026 → GTA$500,000 Week 3: March 5 – 11, 2026 → GTA$500,000 Total possible bonus: GTA$1,500,000 According to the email and multiple player reports (including screenshots shared on X), completing just one qualifying sell mission per week is enough to trigger each GTA$500,000 bonus. The money is automatically deposited into your Maze Bank account within 72 hours of completing the sale. Qualifying Sell MissionsAny of the following business sell missions count toward the promotion: Special Cargo Sell Missions (CEO Office) Vehicle Cargo Sell Missions (CEO Office) Gunrunning / Arms Trafficking Sell Missions Nightclub Warehouse product offloads Motorcycle Club (MC) Business product deliveries Air Freight Cargo Sell Missions Acid Lab Sell Missions (especially popular for quick solo runs) How to Claim Your Free GTA$Check your email – Look for the subject line “Just for You: Get Up To GTA$1,500,000 in GTA Online Bonuses” from Rockstar Propaganda. (It may land in spam/junk folders.) Log into GTA Online during each weekly window. Complete one sell mission from the eligible list above. Wait up to 72 hours for the bonus to hit your Maze Bank account. Important note: This appears to be a targeted promotion. Not every player has received the email yet, even those subscribed to Rockstar emails. However, community reports and sites like Sportskeeda and Gameranx suggest it may roll out more broadly—worth trying a sell mission regardless. Pro Tips to Maximize the DealThis week (Feb 19–25) already features 2X GTA$ and RP on Counterfeit Cash Sell Missions and Street Dealer Sales as part of the Lunar New Year event week. If you own a Counterfeit Cash Factory, knock out your promotion sale while earning double rewards. Easiest options for casual players: Acid Lab sells (quick, solo-friendly) or Nightclub Warehouse goods (passive buildup). Stack with friends or solo—most of these missions scale well either way. Whether you’re a high-rolling CEO, a patched-up Biker President, or just someone looking to afford that shiny new mansion in the hills, this is one of the easiest free-money handouts Rockstar has offered in months. Fire up GTA Online, make that sale, and watch the cash roll in. What are you spending your GTA$1.5 million on first? Let us know in the comments! View full article
-
 Rockstar Games is ringing in the Lunar New Year (Year of the Horse) with a fresh week of festivities in GTA Online. Running from February 19th through February 25th, 2026, this event brings festive flair, big money multipliers, sweet vehicle deals, and brand-new content to Los Santos. Whether you're a longtime Los Santos veteran or just logging in for the free goodies, there's something for every player this week. Festive Vibes Hit Los SantosMansions across the map are decked out with glowing red lanterns for that authentic Lunar New Year atmosphere. Yuanbao Collectibles (those shiny golden ingots) have returned and are scattered across San Andreas—grab them for quick cash and RP while the event is live. Pro tip: The Valentine’s Day “Cheater” random event has been temporarily disabled to make room for the new celebrations. New Content: Senora Derby Stunt RaceThe star of the show is the brand-new Senora Derby Lunar New Year Stunt Race! Jump behind the wheel of high-performance rides and tackle this explosive, fireworks-filled course packed with massive jumps and cinematic stunts. You can jump straight into it via the Rockstar Social Club link or find it in the Stunt Race menu in-game. Login Rewards – Free Horse Gear & Exclusive TeeSimply log in anytime before March 4th, 2026 and you’ll automatically receive: The Red Year of the Horse Tee (a limited-edition shirt featuring a rearing horse) All Horse Masks (free forever) All Horse Tattoos (free forever) These horse-themed items are perfect for showing off your Lunar New Year spirit in any session. 2x & Double Rewards Across Multiple ModesThis week’s payout schedule is stacked: 2x GTA$ and RP on Community Combat Series 2x GTA$ and RP on Biker Clubhouse Contracts, MC Work, and MC Challenges 2x GTA$ on Counterfeit Cash Sell Missions 2x GTA$ on Street Dealer Sales Double Rewards on FIB Priority File missions (specifically The Black Box File) Perfect time to grind Biker businesses or run quick sells with your crew. Massive Discounts (Up to 40% Off)Rockstar is slashing prices to help you expand your empire and garage: 40% off Counterfeit Cash Factories + all upgrades and modifications 30% off the following vehicles: Canis Terminus Declasse Drift Tampa Declasse Walton L35 Stock Dinka Jester Classic HVY Insurgent Pick-Up Ocelot Jugular Vapid Caracara Vapid Retinue Mk II Vapid Slamtruck Vulcar Nebula Turbo Western Company Cargobob (both variants) Time to upgrade your MC businesses and fill your garage with discounted muscle and utility vehicles. Weekly Prizes & ChallengesCasino Podium Vehicle: Karin Sultan RS Classic (worth $1,789,000) – spin the wheel daily (GTA+ members get 2 spins every 24 hours) Prize Ride Challenge: Place in the top 4 of any LS Car Meet Series race to win the Grotti Stinger GT (worth $875,000) Weekly Challenge: Win just 2 Stunt Races to earn $100,000 cash Premium Race: Art to Art HSW Time Trial: Ron Alternates RC Time Trial: Cypress Flats Regular Time Trial: Maze Bank Arena Podium Vehicle of the Week: Karin Sultan RS Classic Salvage Yard Robberies This WeekThe Gangbanger Robbery → Dewbauchee Champion The Podium Robbery → Karin Everon The McTony Robbery → BF Weevil Gun Van Inventory (Discounts for GTA+ Members)The Gun Van is stocked with: Military Rifle, Combat Shotgun, Battle Rifle, Homing Launcher, MG Proximity Mines, Molotovs, Sticky Bombs Full range of Body Armor (Super Light to Super Heavy) GTA+ members get deeper discounts on everything. GTA+ Members Get Even MoreSubscribers enjoy extra spins, bigger Gun Van discounts, and the full February 2026 GTA+ monthly rewards package (check Rockstar’s site for the complete list). Ready to Celebrate?Log into GTA Online today, grab your free Horse gear, test out the explosive new Senora Derby Stunt Race, and stack those double payouts while the discounts last. The Year of the Horse is off to a roaring start in Los Santos!
 -
Rockstar Games is ringing in the Lunar New Year (Year of the Horse) with a fresh week of festivities in GTA Online. Running from February 19th through February 25th, 2026, this event brings festive flair, big money multipliers, sweet vehicle deals, and brand-new content to Los Santos. Whether you're a longtime Los Santos veteran or just logging in for the free goodies, there's something for every player this week. Festive Vibes Hit Los SantosMansions across the map are decked out with glowing red lanterns for that authentic Lunar New Year atmosphere. Yuanbao Collectibles (those shiny golden ingots) have returned and are scattered across San Andreas—grab them for quick cash and RP while the event is live. Pro tip: The Valentine’s Day “Cheater” random event has been temporarily disabled to make room for the new celebrations. New Content: Senora Derby Stunt RaceThe star of the show is the brand-new Senora Derby Lunar New Year Stunt Race! Jump behind the wheel of high-performance rides and tackle this explosive, fireworks-filled course packed with massive jumps and cinematic stunts. You can jump straight into it via the Rockstar Social Club link or find it in the Stunt Race menu in-game. Login Rewards – Free Horse Gear & Exclusive TeeSimply log in anytime before March 4th, 2026 and you’ll automatically receive: The Red Year of the Horse Tee (a limited-edition shirt featuring a rearing horse) All Horse Masks (free forever) All Horse Tattoos (free forever) These horse-themed items are perfect for showing off your Lunar New Year spirit in any session. 2x & Double Rewards Across Multiple ModesThis week’s payout schedule is stacked: 2x GTA$ and RP on Community Combat Series 2x GTA$ and RP on Biker Clubhouse Contracts, MC Work, and MC Challenges 2x GTA$ on Counterfeit Cash Sell Missions 2x GTA$ on Street Dealer Sales Double Rewards on FIB Priority File missions (specifically The Black Box File) Perfect time to grind Biker businesses or run quick sells with your crew. Massive Discounts (Up to 40% Off)Rockstar is slashing prices to help you expand your empire and garage: 40% off Counterfeit Cash Factories + all upgrades and modifications 30% off the following vehicles: Canis Terminus Declasse Drift Tampa Declasse Walton L35 Stock Dinka Jester Classic HVY Insurgent Pick-Up Ocelot Jugular Vapid Caracara Vapid Retinue Mk II Vapid Slamtruck Vulcar Nebula Turbo Western Company Cargobob (both variants) Time to upgrade your MC businesses and fill your garage with discounted muscle and utility vehicles. Weekly Prizes & ChallengesCasino Podium Vehicle: Karin Sultan RS Classic (worth $1,789,000) – spin the wheel daily (GTA+ members get 2 spins every 24 hours) Prize Ride Challenge: Place in the top 4 of any LS Car Meet Series race to win the Grotti Stinger GT (worth $875,000) Weekly Challenge: Win just 2 Stunt Races to earn $100,000 cash Premium Race: Art to Art HSW Time Trial: Ron Alternates RC Time Trial: Cypress Flats Regular Time Trial: Maze Bank Arena Podium Vehicle of the Week: Karin Sultan RS Classic Salvage Yard Robberies This WeekThe Gangbanger Robbery → Dewbauchee Champion The Podium Robbery → Karin Everon The McTony Robbery → BF Weevil Gun Van Inventory (Discounts for GTA+ Members)The Gun Van is stocked with: Military Rifle, Combat Shotgun, Battle Rifle, Homing Launcher, MG Proximity Mines, Molotovs, Sticky Bombs Full range of Body Armor (Super Light to Super Heavy) GTA+ members get deeper discounts on everything. GTA+ Members Get Even MoreSubscribers enjoy extra spins, bigger Gun Van discounts, and the full February 2026 GTA+ monthly rewards package (check Rockstar’s site for the complete list). Ready to Celebrate?Log into GTA Online today, grab your free Horse gear, test out the explosive new Senora Derby Stunt Race, and stack those double payouts while the discounts last. The Year of the Horse is off to a roaring start in Los Santos! View full article
-
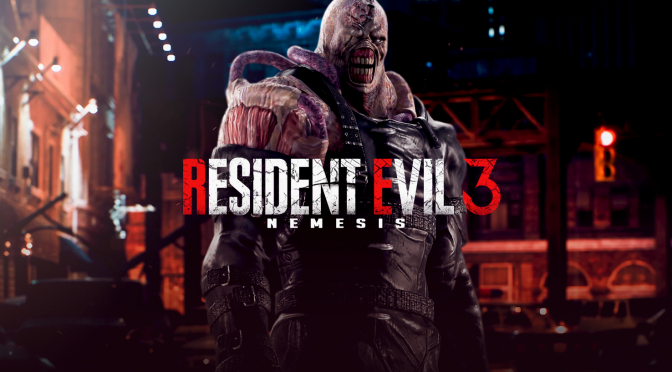
When Capcom launched Resident Evil 3 Remake in April 2020, it wowed players with breathtaking visuals, heart-pounding Nemesis pursuits, and a faithful recreation of Jill Valentine’s frantic escape from zombie-infested Raccoon City. Yet longtime fans of the 1999 classic Resident Evil 3: Nemesis (also known as Biohazard 3: Last Escape) felt shortchanged. Entire iconic locations vanished, the campaign felt shorter and more linear, and key exploration, puzzles, and story elements were cut to streamline the experience for modern audiences. Now, one dedicated modder is working to right those wrongs—and then some. Enter Resident Evil 3 Last Escape, a massive, in-development PC mod that restores nearly all the content removed from the 2020 remake while adding brand-new locations, overhauling gameplay systems, and creating what promises to be the ultimate survival-horror reimagining of Jill’s nightmare. Restoring the Classics, Building Something BiggerAccording to progress shared via the modder’s YouTube channel (@RE3_Remake_LastEscape) and coverage on sites like DSOGaming and Wccftech, the project goes far beyond simple fixes: Restored original content — Full access to the legendary Clock Tower, the Park, the Disused Plant, the Cemetery, the Raccoon Police Department (RPD), and more. The very first Nemesis encounter has also been reworked—replacing the remake’s dramatic introduction with a zombie ambush and explosion sequence straight out of the 1999 game. Brand-new expansions — Extended city blocks in Uptown, a fully playable Jack’s Bar (previously just a cutscene backdrop), and redesigned level layouts that encourage genuine exploration instead of corridor-to-corridor progression. Gameplay overhauls — A reworked crafting system with multiple new gunpowder types, fresh puzzles, adjusted item placement and progression, and entirely new or expanded Nemesis boss fights. Classic survival tension — The iconic Ink Ribbon save system (limited ink ribbons that make every typewriter moment count) has been added, echoing both the original games and Resident Evil 2 Remake. In the modder’s own words: Progress Videos Already Turning HeadsThe modder has been dropping short showcase videos that have the community buzzing: Jack’s Bar – Watch Jill explore the once-off-limits watering hole. Uptown expansion – Brand-new streets and alleyways that make Raccoon City feel alive (and terrifying). New items – Including Jill’s classic Samurai Edge handgun. Ink Ribbon system – In action, complete with that nostalgic typewriter clack. SAMURAI EDGE (Part 3) Jill Valentine Model │Surviving Handgun of Raccoon City (Resident Evil 3) The videos are short but polished, showing smooth integration with the RE Engine and impressive attention to detail. Fans on Reddit, NeoGAF, and YouTube comments are already calling it “the mod RE3 Remake deserved” and “the ultimate way to replay Jill’s story.” No Release Date Yet—But the Hype Is RealAs with any ambitious mod of this scale, there is currently no ETA or download link. The project is clearly in active development, and the modder continues to post regular updates. When it does drop, it will be for the PC version of Resident Evil 3 Remake (Steam, Epic, etc.). The timing couldn’t be better: with Resident Evil Requiem (one of 2026’s most anticipated titles) on the horizon, fans are hungry for more Raccoon City content—and this mod is delivering exactly that. residentevil.fandom.com Hall | Resident Evil Wiki | Fandom Clock Tower interior from the original 1999 game — soon to be fully explorable in the remake thanks to this mod. Why This MattersThe Resident Evil franchise has one of the most passionate and talented modding communities in gaming. From HD texture overhauls to full reimaginings, fans have kept these classics alive and evolving for decades. Resident Evil 3 Last Escape stands out as one of the most ambitious attempts yet to “fix” a remake that many felt sacrificed too much of the original’s soul. Whether you’re a purist who still prefers the PS1 version or a newcomer who wants more bang for your buck out of the 2020 remake, this mod could completely change how you experience Jill Valentine’s last escape. Stay tuned to the RESIDENT EVIL 3 LAST ESCAPE YouTube channel for the latest footage. Once the mod launches, it will likely become essential playing for any Resident Evil fan on PC. What do you think—will this be the definitive version of RE3 Remake? Drop your thoughts below, and keep an eye on this page for future updates!
-
 In a fresh wave of scrutiny hitting one of gaming’s biggest players, Rockstar Games’ latest UK company accounts have thrust the studio into the spotlight — not for its blockbuster titles, but for its aggressive use of government tax incentives. The fan-site RockstarINTEL broke down the numbers on February 18, 2026, under the headline “Rockstar Games Financials Revealed: ‘Grand Theft Tax’ Scandal Sparks Urgent Demands,” reigniting debates about corporate welfare, worker rights, and the true cost of keeping GTA and Red Dead in the UK. The Numbers Don’t Lie — Or Do They?According to Rockstar Games UK Ltd’s accounts for the financial year ending March 31, 2025 (filed earlier this month and publicly available via Companies House): Turnover: £508 million — the fourth consecutive year above the half-billion-pound mark. Pre-tax profits: More than £87 million (second-highest on record). Dividends paid out: £85 million. Video Games Tax Relief (VGTR) claimed: Over £70 million (precisely £70.7m plus £7m in HMRC interest for late payments). Additional R&D tax credits: £1.9 million. Zoom out, and the picture gets even bigger. Since the VGTR scheme launched in April 2014, Rockstar has pocketed a staggering £504 million in total relief — money intended to support “culturally British” game development. Over the past decade, the UK subsidiary has reported cumulative profits exceeding £600–604 million and paid out more than £400 million in dividends. The accounts note that much of the revenue comes from “provision of research and development functions” to parent company Take-Two Interactive in New York. Notably, no major new title has launched since 2018 (Red Dead Redemption 2), yet the company continues to claim relief on ongoing work — widely understood to include GTA VI. “Grand Theft Tax”: How a Political Soundbite Was Born The phrase “Grand Theft Tax” was coined by Tracy Gilbert, Labour MP for Edinburgh North and Leith, during a December 2025 parliamentary session. Gilbert, whose constituency includes Rockstar North’s Edinburgh studio, highlighted the £70m+ relief at a time when the company faced allegations of dismissing around 30–40 Scottish staff amid union-organizing efforts. The Independent Workers’ Union of Great Britain (IWGB), which has been supporting the affected workers, has joined the fray, calling for a full review of the VGTR program. Tax Watch UK and outlets like The Scotsman have amplified the criticism, pointing out that large multinationals appear to be the biggest beneficiaries of a scheme originally designed to help smaller, independent developers. Critics argue it’s galling to see a profitable giant — whose co-founders Sam and Dan Houser sit on the UK Rich List with a combined net worth reportedly over £400 million as of early 2025 — receive hundreds of millions in public support while paying out huge dividends and facing labor disputes. Rockstar Fires BackRockstar has pushed back firmly. In a statement quoted by RockstarINTEL and earlier Scottish media: The company categorically denies any union-busting and maintains all actions comply with UK law. It also stresses that the royalties flowing through Take-Two (historically $2.5 billion between 2014–2019, much of it from GTA V) ultimately reward the creative talent behind the games. What Happens Next?The controversy has already prompted ministerial interest and calls for reform or tighter auditing of the VGTR scheme (which is set to be phased out and replaced by a new Video Games Expenditure Credit in coming years). Unions want clearer conditions tying tax relief to fair labor practices. Politicians are asking whether profitable studios with no recent releases should continue receiving such generous support. For gamers, the stakes are high: GTA VI is still the most anticipated title of the decade, and Rockstar’s UK studios (Edinburgh, Dundee, Leeds, Lincoln, and London) remain central to its development. Supporters of the scheme argue that without these incentives, major projects could drift overseas, costing British jobs and tax revenue in the long run. Whether this is genuine “scandal” or just political theater remains hotly debated. But one thing is clear: the days of unchecked, headline-grabbing tax relief for the games industry’s biggest names may be numbered. What do you think — should governments keep subsidizing billion-dollar franchises, or is it time to tighten the rules? Drop your take in the comments. In the meantime, we’ll be watching Companies House, Parliament, and Rockstar’s next moves closely.
