


Rockstar
Administrators
-
Joined
-
Last visited
Everything posted by Rockstar
-
 If you're a dedicated Grand Theft Auto Online player looking to expand your collection of rare items, you'll want to log in this week. The latest GTA Online Event Week, running from May 21st through May 27th, is offering players the chance to snag an exclusive and highly sought-after item: the Los Santos (LS) Car Meet vanity plate. Here is everything you need to know to claim this rare cosmetic and score a hefty discount on a classic vehicle in the process. The Salvage Yard Robberies Each week, Rockstar Games rotates the Salvage Yard Robbery missions, providing players with three fresh targets. Occasionally, these robberies feature a unique twist—allowing players to keep the target vehicle as a personal ride, and sometimes, those vehicles come equipped with rare license plates. This week’s lineup of Salvage Yard Robberies includes: The Gangbanger Robbery: Obey Omnis (Claimable vehicle) The Cargo Ship Robbery: Grotti Turismo Omaggio The McTony Robbery: Vapid Hustler While you can execute all three robberies for profit, the one you need to focus on for the rare plate is The Gangbanger Robbery. What Makes the LS Car Meet Plate Special? The LS Car Meet plate is a rare cosmetic option that stands out with its distinct red and white color scheme, proudly displaying your affinity for the city's underground racing culture. Plates like these are rarely made available to players to keep natively on their personal vehicles, making it a must-have for car collectors in Los Santos. How to Claim the Car and the PlateTo get your hands on the LS Car Meet plate, you must successfully complete The Gangbanger Robbery. The target vehicle for this specific job is the Obey Omnis. Normally, purchasing the Obey Omnis straight from Southern San Andreas Super Autos would set you back a steep $701,000. However, by completing the robbery and opting to claim the vehicle instead of salvaging it, you can make the car your personal vehicle for a heavily reduced salvage fee of just $20,000. The car will be added to your garage, completely outfitted with the exclusive LS Car Meet vanity plate. How to Get an Even Bigger DiscountRockstar has thrown in an extra perk for savvy business owners. If you own a Document Forgery office, your salvage fee to claim the Obey Omnis is slashed in half. You will only have to pay $10,000 to make the car yours. The best part? Your Document Forgery business doesn't even need to be active or supplied; merely owning the property is enough to trigger the discount. Once you claim the vehicle, you can keep it to show off the rare plate, or, if you're strapped for cash, you can turn around and sell the Obey Omnis to Los Santos Customs for $65,000—yielding a quick, tidy profit on your $10k-$20k investment. With the event week ending on May 27th, make sure you head to your Salvage Yard and start planning your Gangbanger Robbery before this rare piece of Los Santos Car Meet history speeds away! View full article
 -
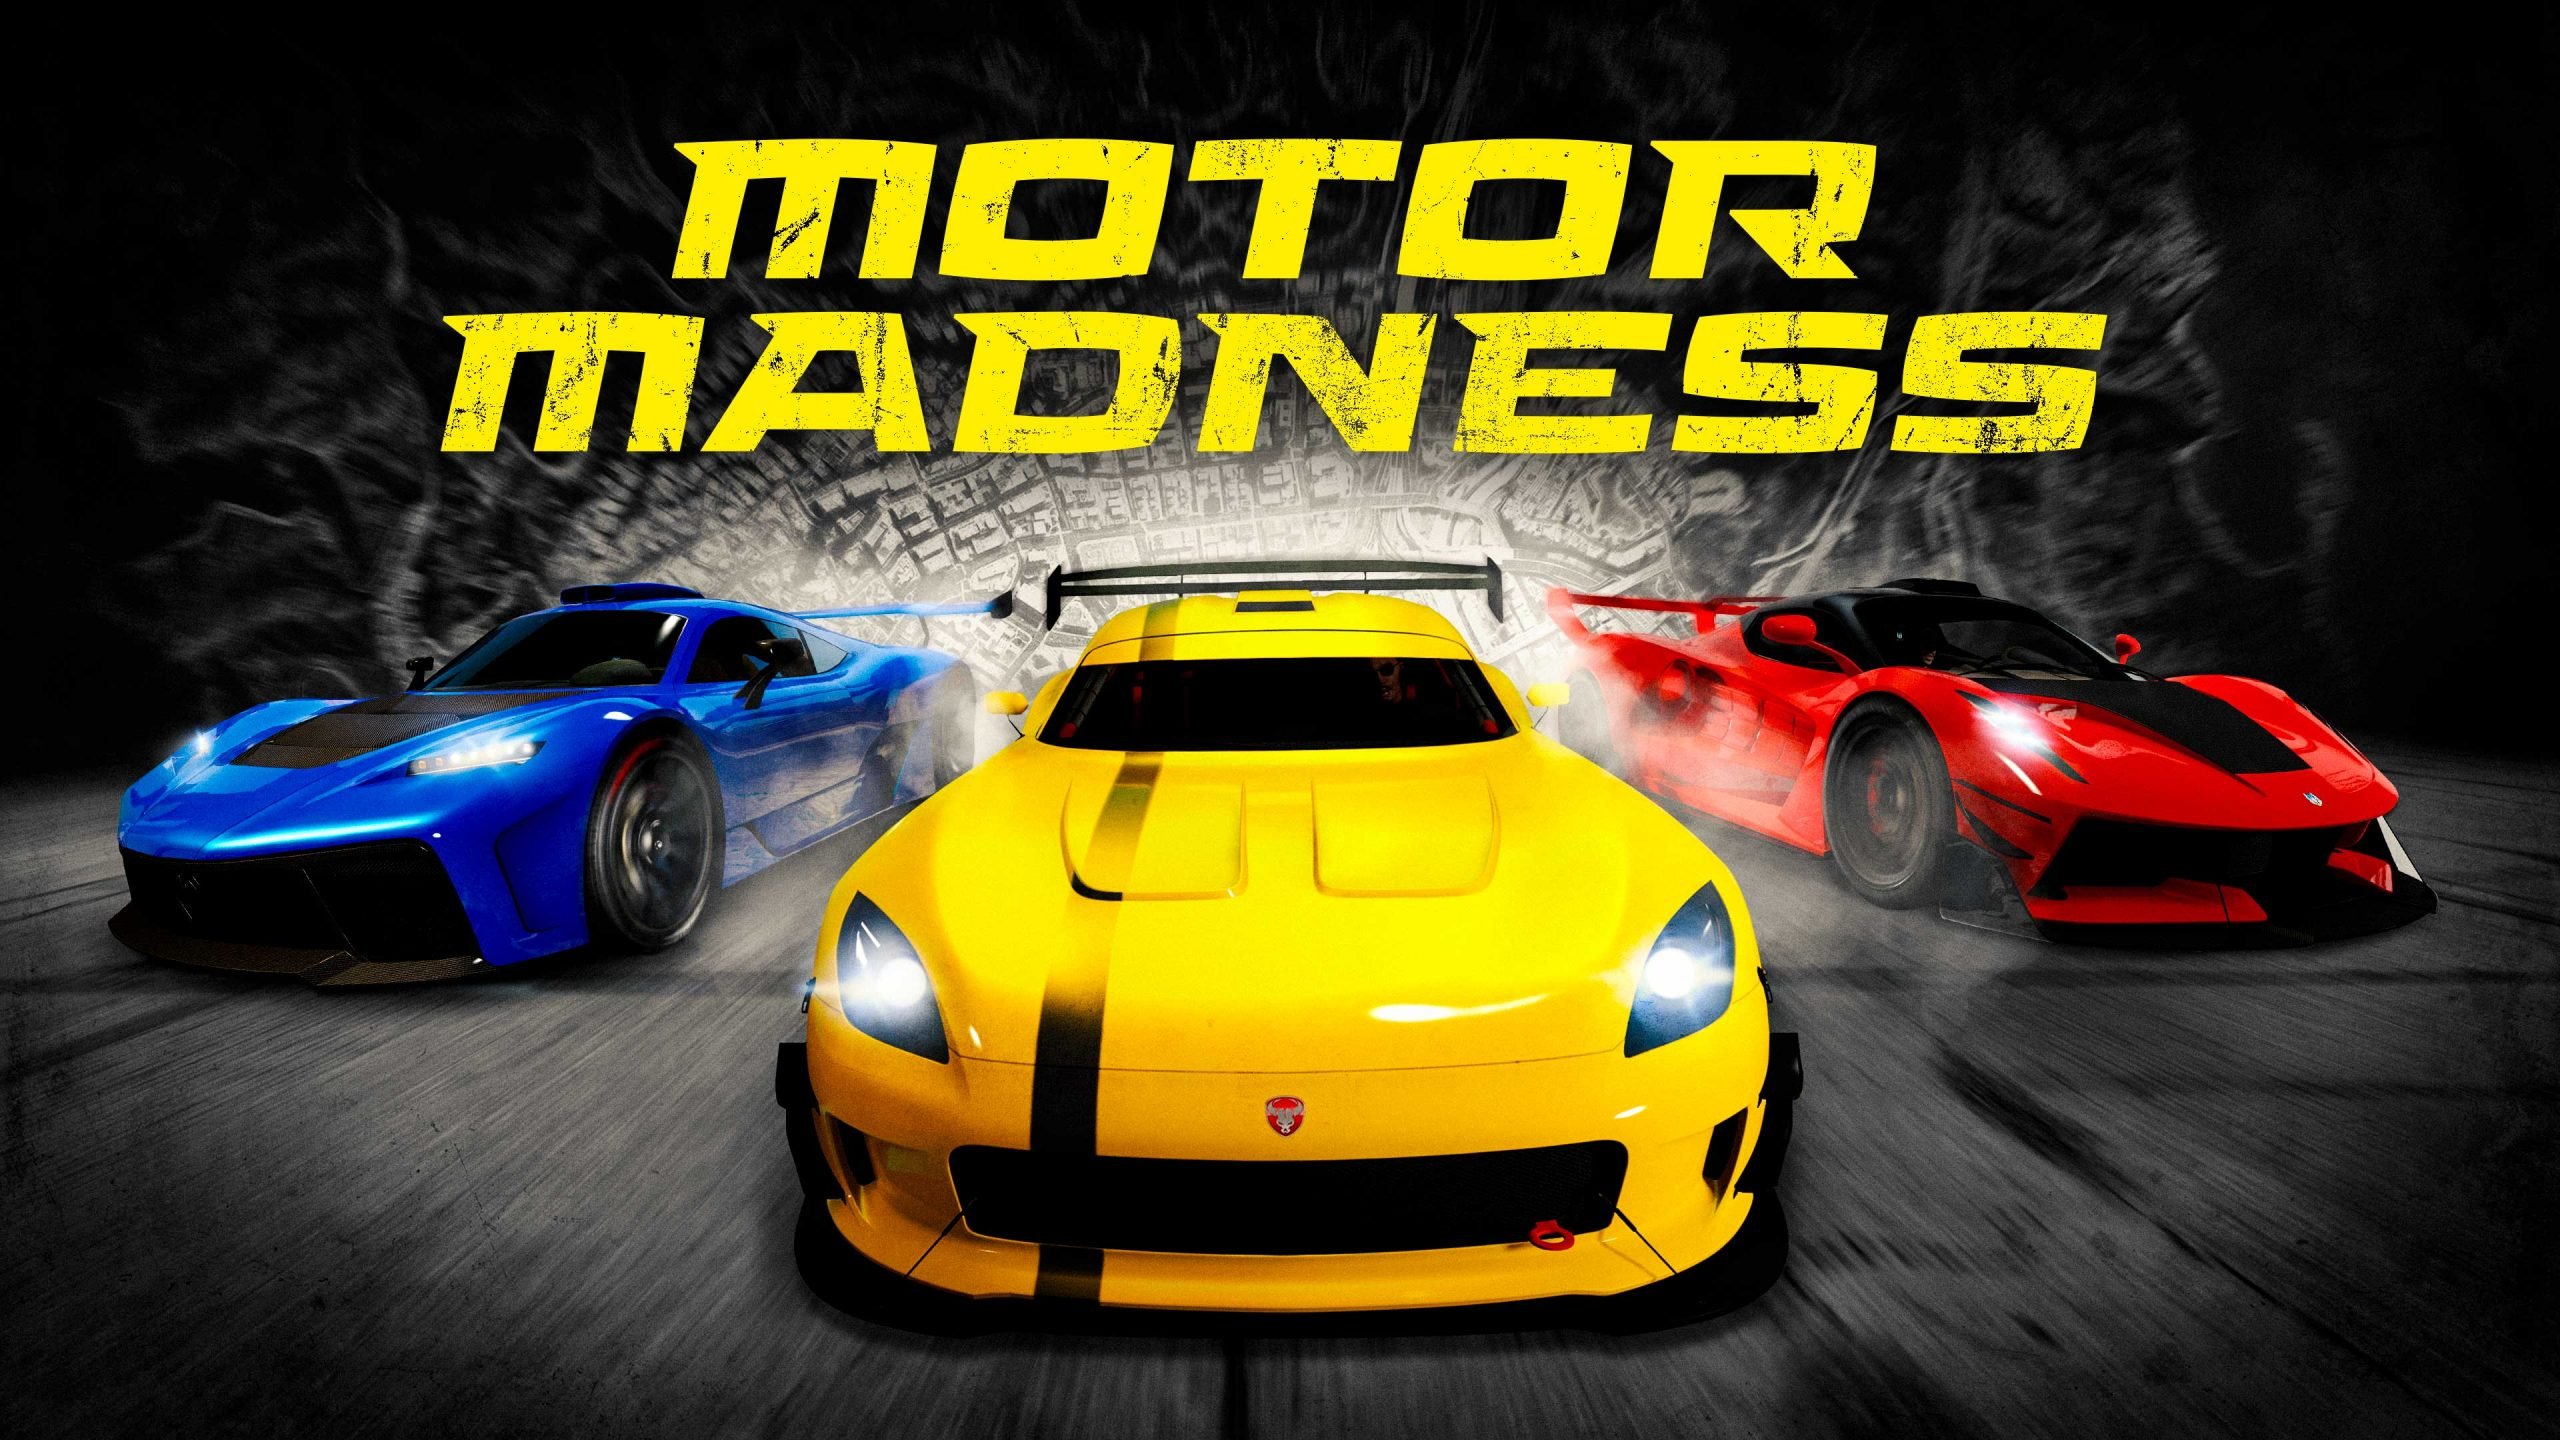 Rev your engines, Los Santos! Rockstar Games is keeping the pedal to the metal with the continuation of the "Motor Madness" event week in GTA Online. Running through May 27th, this week’s update brings massive vehicular discounts, double-money bonuses, rare claimable vehicles, and a slew of exclusive clothing rewards. Here is your complete breakdown of everything happening in GTA Online this week. Gameplay AdjustmentsBefore diving into the weekly bonuses, it is worth noting that Rockstar has recently rolled out some major economy changes. Over 30 vehicles have had their prices permanently adjusted, and vehicle sell prices have been tweaked to reflect the game's evolving market. Exclusive Rewards & Log-in BonusesRockstar is giving away a wardrobe's worth of exclusive racing gear this week. Simply by playing and purchasing vehicles from specific vendors, you can unlock: Log-in Reward: Receive the Rockstar Helmet just for playing. Premium Deluxe Motorsport: Purchase any vehicle from Simeon to receive the Rockstar Racing Suit (delivered within 72 hours). Luxury Autos: Buy any vehicle from the Rockford Hills showroom to earn the LS Customs Varsity Jacket. LS Car Meet: Purchase any featured vehicle inside the LS Car Meet to receive the Blue Banshee Tee. Weekly Challenge & Massive BonusesIf you want to line your pockets and boost your reputation, this is the week to do it. Weekly Challenge: Win two LS Car Meet Races to complete the Weekly Challenge. Your reward? The Bright Manor Racing Suit and a cool GTA$100,000. Event Bonuses: 5x LS Car Meet Reputation 2x GTA$ & RP on the LS Car Meet Series 2x GTA$ & RP on Auto Shop Robbery Contracts 2x GTA$ & RP on RC Time Trials 2x GTA$ & RP on Junk Energy Time Trials (4x for GTA+ Members) 2x Rewards on the FIB Priority File (The Brute Force File) Salvage Yard RobberiesYusuf Amir has a new set of targets for Salvage Yard owners. Most notably, players can actually claim the Gangbanger Robbery target this week! The Gangbanger Robbery: Obey Omnis (Claimable, features an exclusive LS Car Meet vanity plate!) The Cargo Ship Robbery: Grotti Turismo Omaggio The McTony Robbery: Vapid Hustler Featured Vehicles & DealershipsWhether you are spinning the Lucky Wheel or testing rides at the Car Meet, there are plenty of top-tier cars to check out. Casino Podium Vehicle: Ocelot R88 (Normally $2,915,000) LS Car Meet Prize Ride: Ocelot Virtue (Place Top 3 in the LS Car Meet Series for three races to win this $2,980,000 supercar). Premium Test Ride (PS5/Xbox Series X|S/PC Enhanced): Übermacht Niobe Test Track Vehicles: Banshee GTS, Emperor Vectre (Xero 29 livery), and Übermacht Cypher (Negative Speed Demon livery). Luxury Autos Dealership: Progen Luiva and Shitzu Keitora. Premium Deluxe Motorsport: Lampadati Felon GT, Western Rat Bike, Declasse Lifeguard, Dewbauchee Rapid GT, and Överflöd Entity XF. Discounts & Gun Van Car enthusiasts can save millions this week with heavy discounts on vehicles, upgrades, and properties: FREE: LS Car Meet Membership Horn Customizations 50% Off: LS Tuners Racing Suits HSW Performance Upgrades Benny's Conversion Upgrades Turbo Tuning Blue & Yellow Tire Smoke 40% Off: Garage Properties Assorted Vehicles: Bravado Banshee GTS, Emperor Vectre, Übermacht Cypher, Enus Paragon R, Lampadati Felon GT, Declasse Lifeguard, Nagasaki Hot Rod Blazer, Dewbauchee Rapid GT, Överflöd Entity XF, RC Bandito, HVY Chernobog, Pegassi Torero, Vapid Desert Raid, and Dashound. 30% Off: Bravado Gauntlet Classic Coil Brawler Declasse Impaler SZ Lampadati Novak Übermacht Rhinehart Finally, don't forget to track down the Gun Van for discounted weaponry, including 40% off the Railgun, and check out this week's featured races: Premium Race: Criminal Records Time Trial: Stab City HSW Time Trial: Del Perro Beach
 -
Rev your engines, Los Santos! Rockstar Games is keeping the pedal to the metal with the continuation of the "Motor Madness" event week in GTA Online. Running through May 27th, this week’s update brings massive vehicular discounts, double-money bonuses, rare claimable vehicles, and a slew of exclusive clothing rewards. Here is your complete breakdown of everything happening in GTA Online this week. Gameplay AdjustmentsBefore diving into the weekly bonuses, it is worth noting that Rockstar has recently rolled out some major economy changes. Over 30 vehicles have had their prices permanently adjusted, and vehicle sell prices have been tweaked to reflect the game's evolving market. Exclusive Rewards & Log-in BonusesRockstar is giving away a wardrobe's worth of exclusive racing gear this week. Simply by playing and purchasing vehicles from specific vendors, you can unlock: Log-in Reward: Receive the Rockstar Helmet just for playing. Premium Deluxe Motorsport: Purchase any vehicle from Simeon to receive the Rockstar Racing Suit (delivered within 72 hours). Luxury Autos: Buy any vehicle from the Rockford Hills showroom to earn the LS Customs Varsity Jacket. LS Car Meet: Purchase any featured vehicle inside the LS Car Meet to receive the Blue Banshee Tee. Weekly Challenge & Massive BonusesIf you want to line your pockets and boost your reputation, this is the week to do it. Weekly Challenge: Win two LS Car Meet Races to complete the Weekly Challenge. Your reward? The Bright Manor Racing Suit and a cool GTA$100,000. Event Bonuses: 5x LS Car Meet Reputation 2x GTA$ & RP on the LS Car Meet Series 2x GTA$ & RP on Auto Shop Robbery Contracts 2x GTA$ & RP on RC Time Trials 2x GTA$ & RP on Junk Energy Time Trials (4x for GTA+ Members) 2x Rewards on the FIB Priority File (The Brute Force File) Salvage Yard RobberiesYusuf Amir has a new set of targets for Salvage Yard owners. Most notably, players can actually claim the Gangbanger Robbery target this week! The Gangbanger Robbery: Obey Omnis (Claimable, features an exclusive LS Car Meet vanity plate!) The Cargo Ship Robbery: Grotti Turismo Omaggio The McTony Robbery: Vapid Hustler Featured Vehicles & DealershipsWhether you are spinning the Lucky Wheel or testing rides at the Car Meet, there are plenty of top-tier cars to check out. Casino Podium Vehicle: Ocelot R88 (Normally $2,915,000) LS Car Meet Prize Ride: Ocelot Virtue (Place Top 3 in the LS Car Meet Series for three races to win this $2,980,000 supercar). Premium Test Ride (PS5/Xbox Series X|S/PC Enhanced): Übermacht Niobe Test Track Vehicles: Banshee GTS, Emperor Vectre (Xero 29 livery), and Übermacht Cypher (Negative Speed Demon livery). Luxury Autos Dealership: Progen Luiva and Shitzu Keitora. Premium Deluxe Motorsport: Lampadati Felon GT, Western Rat Bike, Declasse Lifeguard, Dewbauchee Rapid GT, and Överflöd Entity XF. Discounts & Gun Van Car enthusiasts can save millions this week with heavy discounts on vehicles, upgrades, and properties: FREE: LS Car Meet Membership Horn Customizations 50% Off: LS Tuners Racing Suits HSW Performance Upgrades Benny's Conversion Upgrades Turbo Tuning Blue & Yellow Tire Smoke 40% Off: Garage Properties Assorted Vehicles: Bravado Banshee GTS, Emperor Vectre, Übermacht Cypher, Enus Paragon R, Lampadati Felon GT, Declasse Lifeguard, Nagasaki Hot Rod Blazer, Dewbauchee Rapid GT, Överflöd Entity XF, RC Bandito, HVY Chernobog, Pegassi Torero, Vapid Desert Raid, and Dashound. 30% Off: Bravado Gauntlet Classic Coil Brawler Declasse Impaler SZ Lampadati Novak Übermacht Rhinehart Finally, don't forget to track down the Gun Van for discounted weaponry, including 40% off the Railgun, and check out this week's featured races: Premium Race: Criminal Records Time Trial: Stab City HSW Time Trial: Del Perro Beach View full article
-
.webp.e2441cde536902201324b1cae6f62d2b.webp) Could two of the biggest open-world masterpieces in gaming history finally make their way to Nintendo platforms? If porting powerhouse Virtuos has its way, the answer is a resounding yes. According to a recent report by RockstarINTEL, Singapore-based studio Virtuos has revealed it is “eager” to adapt both Grand Theft Auto V and Red Dead Redemption 2 for the Nintendo Switch family of systems. A Proven History with Rockstar GamesThe revelation came during an interview with Pocket Tactics, where Virtuos’ Andy Fong discussed the 15th anniversary of L.A. Noire—the 1940s detective thriller originally developed by Team Bondi and published by Rockstar Games. Virtuos is no stranger to Rockstar’s catalog. The studio was responsible for the critically acclaimed Nintendo Switch port of L.A. Noire back in late 2017, proving they have the technical prowess to handle Rockstar’s detailed worlds on mobile hardware. Fong stated that the team at Virtuos are "big fans" of Rockstar's legacy and are highly motivated to expand it. Specifically, Fong noted that the studio is "eager to adapt Grand Theft Auto 5 and Red Dead Redemption 2 for the Nintendo Switch," believing that both titles could "shine again on the Switch, delighting even more players." Are These Massive Ports Technically Possible? While running massive titles like GTA V and Red Dead Redemption 2 on a handheld console might sound like an impossible feat to some, the technical precedents say otherwise. Grand Theft Auto V was originally built for seventh-generation consoles—the Xbox 360 and PlayStation 3—operating on a meager 512MB of system RAM. Given how much more capable the original Nintendo Switch is compared to those 2005-era consoles, a well-optimized port is well within the realm of possibility. Red Dead Redemption 2 presents a steeper hurdle, having been built from the ground up for the PlayStation 4 and Xbox One. However, the hardware capabilities of the Nintendo Switch 2 could easily bridge that gap. Furthermore, Virtuos has a stellar track record of squeezing seemingly impossible games onto Nintendo hardware, having previously delivered impressive Switch ports for demanding titles like The Witcher 3: Wild Hunt and Doom Eternal. Rockstar’s Moving History on the SwitchRockstar Games has had a mixed but ultimately successful relationship with the Nintendo Switch. While Grand Theft Auto: The Trilogy – The Definitive Edition faced severe criticism at launch due to technical bugs (later remedied by Video Game Deluxe, now Rockstar Australia), other releases have fared much better. The Nintendo Switch port of the original Red Dead Redemption, handled by Double Eleven, was widely praised for its smooth performance and visual fidelity across multiple platforms, including the Switch. As the gaming community eagerly anticipates the release of Grand Theft Auto VI, Rockstar’s internal development resources are understandably stretched thin. However, industry insiders speculate that once GTA 6 hits store shelves, Rockstar may open up its schedule—and its back catalog—allowing trusted external partners like Virtuos to breathe new life into these iconic classics for Nintendo gamers. Ultimately, while no official ports have been greenlit by Rockstar or Take-Two Interactive just yet, knowing that a veteran studio is actively campaigning to make them happen gives Nintendo fans plenty of reason to be optimistic.
Could two of the biggest open-world masterpieces in gaming history finally make their way to Nintendo platforms? If porting powerhouse Virtuos has its way, the answer is a resounding yes. According to a recent report by RockstarINTEL, Singapore-based studio Virtuos has revealed it is “eager” to adapt both Grand Theft Auto V and Red Dead Redemption 2 for the Nintendo Switch family of systems. A Proven History with Rockstar GamesThe revelation came during an interview with Pocket Tactics, where Virtuos’ Andy Fong discussed the 15th anniversary of L.A. Noire—the 1940s detective thriller originally developed by Team Bondi and published by Rockstar Games. Virtuos is no stranger to Rockstar’s catalog. The studio was responsible for the critically acclaimed Nintendo Switch port of L.A. Noire back in late 2017, proving they have the technical prowess to handle Rockstar’s detailed worlds on mobile hardware. Fong stated that the team at Virtuos are "big fans" of Rockstar's legacy and are highly motivated to expand it. Specifically, Fong noted that the studio is "eager to adapt Grand Theft Auto 5 and Red Dead Redemption 2 for the Nintendo Switch," believing that both titles could "shine again on the Switch, delighting even more players." Are These Massive Ports Technically Possible? While running massive titles like GTA V and Red Dead Redemption 2 on a handheld console might sound like an impossible feat to some, the technical precedents say otherwise. Grand Theft Auto V was originally built for seventh-generation consoles—the Xbox 360 and PlayStation 3—operating on a meager 512MB of system RAM. Given how much more capable the original Nintendo Switch is compared to those 2005-era consoles, a well-optimized port is well within the realm of possibility. Red Dead Redemption 2 presents a steeper hurdle, having been built from the ground up for the PlayStation 4 and Xbox One. However, the hardware capabilities of the Nintendo Switch 2 could easily bridge that gap. Furthermore, Virtuos has a stellar track record of squeezing seemingly impossible games onto Nintendo hardware, having previously delivered impressive Switch ports for demanding titles like The Witcher 3: Wild Hunt and Doom Eternal. Rockstar’s Moving History on the SwitchRockstar Games has had a mixed but ultimately successful relationship with the Nintendo Switch. While Grand Theft Auto: The Trilogy – The Definitive Edition faced severe criticism at launch due to technical bugs (later remedied by Video Game Deluxe, now Rockstar Australia), other releases have fared much better. The Nintendo Switch port of the original Red Dead Redemption, handled by Double Eleven, was widely praised for its smooth performance and visual fidelity across multiple platforms, including the Switch. As the gaming community eagerly anticipates the release of Grand Theft Auto VI, Rockstar’s internal development resources are understandably stretched thin. However, industry insiders speculate that once GTA 6 hits store shelves, Rockstar may open up its schedule—and its back catalog—allowing trusted external partners like Virtuos to breathe new life into these iconic classics for Nintendo gamers. Ultimately, while no official ports have been greenlit by Rockstar or Take-Two Interactive just yet, knowing that a veteran studio is actively campaigning to make them happen gives Nintendo fans plenty of reason to be optimistic. -
Could two of the biggest open-world masterpieces in gaming history finally make their way to Nintendo platforms? If porting powerhouse Virtuos has its way, the answer is a resounding yes. According to a recent report by RockstarINTEL, Singapore-based studio Virtuos has revealed it is “eager” to adapt both Grand Theft Auto V and Red Dead Redemption 2 for the Nintendo Switch family of systems. A Proven History with Rockstar GamesThe revelation came during an interview with Pocket Tactics, where Virtuos’ Andy Fong discussed the 15th anniversary of L.A. Noire—the 1940s detective thriller originally developed by Team Bondi and published by Rockstar Games. Virtuos is no stranger to Rockstar’s catalog. The studio was responsible for the critically acclaimed Nintendo Switch port of L.A. Noire back in late 2017, proving they have the technical prowess to handle Rockstar’s detailed worlds on mobile hardware. Fong stated that the team at Virtuos are "big fans" of Rockstar's legacy and are highly motivated to expand it. Specifically, Fong noted that the studio is "eager to adapt Grand Theft Auto 5 and Red Dead Redemption 2 for the Nintendo Switch," believing that both titles could "shine again on the Switch, delighting even more players." Are These Massive Ports Technically Possible? While running massive titles like GTA V and Red Dead Redemption 2 on a handheld console might sound like an impossible feat to some, the technical precedents say otherwise. Grand Theft Auto V was originally built for seventh-generation consoles—the Xbox 360 and PlayStation 3—operating on a meager 512MB of system RAM. Given how much more capable the original Nintendo Switch is compared to those 2005-era consoles, a well-optimized port is well within the realm of possibility. Red Dead Redemption 2 presents a steeper hurdle, having been built from the ground up for the PlayStation 4 and Xbox One. However, the hardware capabilities of the Nintendo Switch 2 could easily bridge that gap. Furthermore, Virtuos has a stellar track record of squeezing seemingly impossible games onto Nintendo hardware, having previously delivered impressive Switch ports for demanding titles like The Witcher 3: Wild Hunt and Doom Eternal. Rockstar’s Moving History on the SwitchRockstar Games has had a mixed but ultimately successful relationship with the Nintendo Switch. While Grand Theft Auto: The Trilogy – The Definitive Edition faced severe criticism at launch due to technical bugs (later remedied by Video Game Deluxe, now Rockstar Australia), other releases have fared much better. The Nintendo Switch port of the original Red Dead Redemption, handled by Double Eleven, was widely praised for its smooth performance and visual fidelity across multiple platforms, including the Switch. As the gaming community eagerly anticipates the release of Grand Theft Auto VI, Rockstar’s internal development resources are understandably stretched thin. However, industry insiders speculate that once GTA 6 hits store shelves, Rockstar may open up its schedule—and its back catalog—allowing trusted external partners like Virtuos to breathe new life into these iconic classics for Nintendo gamers. Ultimately, while no official ports have been greenlit by Rockstar or Take-Two Interactive just yet, knowing that a veteran studio is actively campaigning to make them happen gives Nintendo fans plenty of reason to be optimistic. View full article
-
 The countdown to the most anticipated game in entertainment history remains firmly on track—but a new slip of the tongue has revealed that players were originally supposed to step into Vice City much sooner. In a recent interview with David Senra, Strauss Zelnick, the CEO of Rockstar Games’ parent company Take-Two Interactive, officially reconfirmed that Grand Theft Auto VI is locked in for release on Thursday, November 19, 2026. While fans will be relieved to hear that the current timeline isn't slipping any further, Zelnick accidentally pulled back the curtain on the game's secret development history, revealing an original internal release window that was never made public. The 18-Month Slip-Up During the interview, Zelnick was pressed about the shifting timeline of the game and how its development schedule has faced setbacks. Clarifying the current status of the project, Zelnick noted that the game is now targeting its mid-November 2026 date. However, he followed that up with a highly revealing comment: “I think we're about 18 months behind the original date.” By doing the math backward from November 2026, Zelnick inadvertently confirmed that GTA 6 originally carried an internal target window of Spring 2025. Rockstar Games never publicly shared this Spring 2025 window. When the historic first trailer dropped in December 2023, the public-facing release window was set for "Fall 2025." This means that even before the public ever saw a single frame of gameplay, the title had already been internally delayed. Accounting for this new information, GTA 6 has been delayed at least three times across its turbulent production cycle: Spring 2025 (Original internal target, moved to Fall 2025) Fall 2025 (Publicized window from Trailer 1, later delayed to May 26, 2026) May 26, 2026 (Internal/Public target after Trailer 2, ultimately pushed to November 19, 2026) This timeline doesn't even factor in a major internal reboot the game underwent years prior. According to Zelnick, full-scale development on the iteration of GTA 6 we see today didn't truly get underway until 2020. Pre-Order Frenzy and What’s NextThe news comes at an incredibly volatile time for Take-Two Interactive's stock. Just days prior, a viral pre-order rumor took the internet by storm, leading to a massive $2 billion surge in Take-Two's market capitalization. While that rumor has since been thoroughly debunked as a false alarm, it underscores the unprecedented financial gravity that GTA 6 holds over the market. Despite the lack of official pre-orders or fresh trailers, Zelnick offered a glimmer of reassurance to eager fans, noting that he has personally seen GTA 6 demoed and is confident in the project. With Take-Two Interactive scheduled to report its latest financial data later this week, investors and gamers alike will be watching closely for any further updates. For now, the target is clear: mark your calendars for November 19, 2026.
 -
The countdown to the most anticipated game in entertainment history remains firmly on track—but a new slip of the tongue has revealed that players were originally supposed to step into Vice City much sooner. In a recent interview with David Senra, Strauss Zelnick, the CEO of Rockstar Games’ parent company Take-Two Interactive, officially reconfirmed that Grand Theft Auto VI is locked in for release on Thursday, November 19, 2026. While fans will be relieved to hear that the current timeline isn't slipping any further, Zelnick accidentally pulled back the curtain on the game's secret development history, revealing an original internal release window that was never made public. The 18-Month Slip-Up During the interview, Zelnick was pressed about the shifting timeline of the game and how its development schedule has faced setbacks. Clarifying the current status of the project, Zelnick noted that the game is now targeting its mid-November 2026 date. However, he followed that up with a highly revealing comment: “I think we're about 18 months behind the original date.” By doing the math backward from November 2026, Zelnick inadvertently confirmed that GTA 6 originally carried an internal target window of Spring 2025. Rockstar Games never publicly shared this Spring 2025 window. When the historic first trailer dropped in December 2023, the public-facing release window was set for "Fall 2025." This means that even before the public ever saw a single frame of gameplay, the title had already been internally delayed. Accounting for this new information, GTA 6 has been delayed at least three times across its turbulent production cycle: Spring 2025 (Original internal target, moved to Fall 2025) Fall 2025 (Publicized window from Trailer 1, later delayed to May 26, 2026) May 26, 2026 (Internal/Public target after Trailer 2, ultimately pushed to November 19, 2026) This timeline doesn't even factor in a major internal reboot the game underwent years prior. According to Zelnick, full-scale development on the iteration of GTA 6 we see today didn't truly get underway until 2020. Pre-Order Frenzy and What’s NextThe news comes at an incredibly volatile time for Take-Two Interactive's stock. Just days prior, a viral pre-order rumor took the internet by storm, leading to a massive $2 billion surge in Take-Two's market capitalization. While that rumor has since been thoroughly debunked as a false alarm, it underscores the unprecedented financial gravity that GTA 6 holds over the market. Despite the lack of official pre-orders or fresh trailers, Zelnick offered a glimmer of reassurance to eager fans, noting that he has personally seen GTA 6 demoed and is confident in the project. With Take-Two Interactive scheduled to report its latest financial data later this week, investors and gamers alike will be watching closely for any further updates. For now, the target is clear: mark your calendars for November 19, 2026. View full article
-
 The grand cycle of Grand Theft Auto 6 rumors has taken another dramatic turn. Over the past week, gaming communities were sent into a frenzy following a supposed leak indicating that GTA 6 pre-orders would officially go live on Monday, May 18, 2026. However, new reports have thoroughly debunked the claim, leaving fans disappointed and retailers scrambling to handle the fallout. The Origin of the HypeThe excitement began last week when an email sent out by US retail giant Best Buy to its affiliate partners listed May 18th as the date for GTA 6 pre-orders. The news spread like wildfire across social media platforms like X (formerly Twitter), Reddit, and TikTok. The rumor gained so much traction that it didn't just captivate fans—it shook Wall Street. Following the Best Buy "leak," parent company Take-Two Interactive saw its stock surge, temporarily adding a staggering $2 billion to the company’s market capitalization. Debunked by Distribution SourcesDespite the massive hype, industry insiders quickly threw cold water on the flames. According to a prominent member of the GTA Forums, Graczdari_91—who has a proven track record of reliable leaks due to their position at a European video game distribution company—internal communications confirm that no such pre-orders are taking place. Internal emails shared within the distribution network suggest that Best Buy's affiliate team simply made an error. The date was likely an accidental placeholder rather than a coordinated marketing launch from Rockstar Games. As a result, "damage control" has reportedly begun behind the scenes. Retail stores and distribution networks have been flooded with inquiries from eager customers and lower-tier retailers, forcing companies to issue internal clarifications to quiet the noise. A Predictable Retail Blunder Industry experts and analysts note that this type of mistake is relatively common in affiliate marketing platforms, where placeholder dates are frequently used for highly anticipated products. Many have criticized Best Buy for failing to issue a public statement to clarify the mistake before the rumor spiraled out of control and artificially inflated Take-Two's market value. Furthermore, Rockstar Games' own timeline contradicts the leak. Take-Two Interactive previously stated that the official marketing push for GTA 6 would begin in the summer of 2026. As it is still mid-May, an abrupt pre-order rollout would have been highly unusual for the notoriously calculated developer. What’s Next for GTA 6?While today won't bring the long-awaited pre-order buttons, fans might not have to wait too long for official updates. Take-Two Interactive is scheduled to host its quarterly earnings report for investors this coming Thursday. Historically, these investor calls are a prime window for Take-Two to outline release windows or tease upcoming marketing beats. While it remains speculative whether Rockstar will drop a new trailer or officially announce pre-order details this week, all eyes will undoubtedly be on Take-Two’s executive team on Thursday. For now, the grand theft community is advised to keep their expectations in check and ignore the retail placeholders. When GTA 6 pre-orders finally do go live, the announcement will almost certainly come directly from Rockstar Games itself.
 -
The grand cycle of Grand Theft Auto 6 rumors has taken another dramatic turn. Over the past week, gaming communities were sent into a frenzy following a supposed leak indicating that GTA 6 pre-orders would officially go live on Monday, May 18, 2026. However, new reports have thoroughly debunked the claim, leaving fans disappointed and retailers scrambling to handle the fallout. The Origin of the HypeThe excitement began last week when an email sent out by US retail giant Best Buy to its affiliate partners listed May 18th as the date for GTA 6 pre-orders. The news spread like wildfire across social media platforms like X (formerly Twitter), Reddit, and TikTok. The rumor gained so much traction that it didn't just captivate fans—it shook Wall Street. Following the Best Buy "leak," parent company Take-Two Interactive saw its stock surge, temporarily adding a staggering $2 billion to the company’s market capitalization. Debunked by Distribution SourcesDespite the massive hype, industry insiders quickly threw cold water on the flames. According to a prominent member of the GTA Forums, Graczdari_91—who has a proven track record of reliable leaks due to their position at a European video game distribution company—internal communications confirm that no such pre-orders are taking place. Internal emails shared within the distribution network suggest that Best Buy's affiliate team simply made an error. The date was likely an accidental placeholder rather than a coordinated marketing launch from Rockstar Games. As a result, "damage control" has reportedly begun behind the scenes. Retail stores and distribution networks have been flooded with inquiries from eager customers and lower-tier retailers, forcing companies to issue internal clarifications to quiet the noise. A Predictable Retail Blunder Industry experts and analysts note that this type of mistake is relatively common in affiliate marketing platforms, where placeholder dates are frequently used for highly anticipated products. Many have criticized Best Buy for failing to issue a public statement to clarify the mistake before the rumor spiraled out of control and artificially inflated Take-Two's market value. Furthermore, Rockstar Games' own timeline contradicts the leak. Take-Two Interactive previously stated that the official marketing push for GTA 6 would begin in the summer of 2026. As it is still mid-May, an abrupt pre-order rollout would have been highly unusual for the notoriously calculated developer. What’s Next for GTA 6?While today won't bring the long-awaited pre-order buttons, fans might not have to wait too long for official updates. Take-Two Interactive is scheduled to host its quarterly earnings report for investors this coming Thursday. Historically, these investor calls are a prime window for Take-Two to outline release windows or tease upcoming marketing beats. While it remains speculative whether Rockstar will drop a new trailer or officially announce pre-order details this week, all eyes will undoubtedly be on Take-Two’s executive team on Thursday. For now, the grand theft community is advised to keep their expectations in check and ignore the retail placeholders. When GTA 6 pre-orders finally do go live, the announcement will almost certainly come directly from Rockstar Games itself. View full article
-
.webp.498c657e3c71338c488c0f0a8418b430.webp) Sam and Dan Houser, the brothers who co-founded Rockstar Games, continue to solidify their status among the UK's wealthiest individuals. Their fortunes have grown even as fans await the long-anticipated Grand Theft Auto VI, which has faced delays. According to the 2026 Sunday Times UK Rich List, the Houser brothers rank 310th with a combined estimated wealth of £405 million (approximately $539 million). This marks a modest increase of £5 million from the previous year, when they placed 312th. Steady Growth from Evergreen HitsThe Housers' wealth stems primarily from the enduring success of Rockstar's catalog, particularly the Grand Theft Auto series. Despite no major new single-player releases in nearly a decade, ongoing revenue from GTA V and GTA Online has fueled their financial gains. GTA Online alone generates hundreds of millions annually through microtransactions and player engagement. A recent leak highlighted its continued strong performance, underscoring why Rockstar's business model thrives on live-service elements. Historical royalty data further illustrates this success. Between 2014 and 2019, internal royalties for key Rockstar principals (including the Housers and former key figure Leslie Benzies) reached significant sums. In 2017, GTA V alone generated $583 million in royalties, followed by $383 million in 2018. These arrangements reportedly entitled the principals to a substantial share of operating profits. Their net worth has climbed from around £300 million in 2020 to the current £405 million, representing a £100+ million increase without a new flagship title. This resilience highlights the timeless appeal of Rockstar's open-world creations, including the Red Dead Redemption series. Current Roles and Ventures Sam Houser remains President of Rockstar Games, overseeing operations and the development of GTA VI. He continues to guide the company through one of its most high-profile periods. Dan Houser left Rockstar in 2020 and founded Absurd Ventures. The new studio is working on an open-world action game and other media projects. Dan has become more publicly visible, sharing insights into his creative process, his views on Rockstar's history, and his relationship with his brother in recent interviews. Reports suggest creative differences played a role in his departure. What Lies AheadWith GTA VI expected to be another record-shattering release—potentially pushing the brothers even higher on future rich lists—the Housers' story exemplifies how visionary game development can yield lasting financial success. Their position on the UK Rich List alongside other gaming entrepreneurs like Riccardo Zacconi underscores the industry's growing economic influence. The delay of GTA 6 may have postponed a massive new revenue wave, but the Housers' current trajectory proves that Rockstar's legacy titles remain powerful wealth generators. Fans and analysts alike anticipate that the next chapter will only amplify their already impressive fortunes. As the gaming world waits for GTA VI, the Houser brothers serve as a reminder that great games can create value for years—or even decades—after launch.
Sam and Dan Houser, the brothers who co-founded Rockstar Games, continue to solidify their status among the UK's wealthiest individuals. Their fortunes have grown even as fans await the long-anticipated Grand Theft Auto VI, which has faced delays. According to the 2026 Sunday Times UK Rich List, the Houser brothers rank 310th with a combined estimated wealth of £405 million (approximately $539 million). This marks a modest increase of £5 million from the previous year, when they placed 312th. Steady Growth from Evergreen HitsThe Housers' wealth stems primarily from the enduring success of Rockstar's catalog, particularly the Grand Theft Auto series. Despite no major new single-player releases in nearly a decade, ongoing revenue from GTA V and GTA Online has fueled their financial gains. GTA Online alone generates hundreds of millions annually through microtransactions and player engagement. A recent leak highlighted its continued strong performance, underscoring why Rockstar's business model thrives on live-service elements. Historical royalty data further illustrates this success. Between 2014 and 2019, internal royalties for key Rockstar principals (including the Housers and former key figure Leslie Benzies) reached significant sums. In 2017, GTA V alone generated $583 million in royalties, followed by $383 million in 2018. These arrangements reportedly entitled the principals to a substantial share of operating profits. Their net worth has climbed from around £300 million in 2020 to the current £405 million, representing a £100+ million increase without a new flagship title. This resilience highlights the timeless appeal of Rockstar's open-world creations, including the Red Dead Redemption series. Current Roles and Ventures Sam Houser remains President of Rockstar Games, overseeing operations and the development of GTA VI. He continues to guide the company through one of its most high-profile periods. Dan Houser left Rockstar in 2020 and founded Absurd Ventures. The new studio is working on an open-world action game and other media projects. Dan has become more publicly visible, sharing insights into his creative process, his views on Rockstar's history, and his relationship with his brother in recent interviews. Reports suggest creative differences played a role in his departure. What Lies AheadWith GTA VI expected to be another record-shattering release—potentially pushing the brothers even higher on future rich lists—the Housers' story exemplifies how visionary game development can yield lasting financial success. Their position on the UK Rich List alongside other gaming entrepreneurs like Riccardo Zacconi underscores the industry's growing economic influence. The delay of GTA 6 may have postponed a massive new revenue wave, but the Housers' current trajectory proves that Rockstar's legacy titles remain powerful wealth generators. Fans and analysts alike anticipate that the next chapter will only amplify their already impressive fortunes. As the gaming world waits for GTA VI, the Houser brothers serve as a reminder that great games can create value for years—or even decades—after launch. -
Sam and Dan Houser, the brothers who co-founded Rockstar Games, continue to solidify their status among the UK's wealthiest individuals. Their fortunes have grown even as fans await the long-anticipated Grand Theft Auto VI, which has faced delays. According to the 2026 Sunday Times UK Rich List, the Houser brothers rank 310th with a combined estimated wealth of £405 million (approximately $539 million). This marks a modest increase of £5 million from the previous year, when they placed 312th. Steady Growth from Evergreen HitsThe Housers' wealth stems primarily from the enduring success of Rockstar's catalog, particularly the Grand Theft Auto series. Despite no major new single-player releases in nearly a decade, ongoing revenue from GTA V and GTA Online has fueled their financial gains. GTA Online alone generates hundreds of millions annually through microtransactions and player engagement. A recent leak highlighted its continued strong performance, underscoring why Rockstar's business model thrives on live-service elements. Historical royalty data further illustrates this success. Between 2014 and 2019, internal royalties for key Rockstar principals (including the Housers and former key figure Leslie Benzies) reached significant sums. In 2017, GTA V alone generated $583 million in royalties, followed by $383 million in 2018. These arrangements reportedly entitled the principals to a substantial share of operating profits. Their net worth has climbed from around £300 million in 2020 to the current £405 million, representing a £100+ million increase without a new flagship title. This resilience highlights the timeless appeal of Rockstar's open-world creations, including the Red Dead Redemption series. Current Roles and Ventures Sam Houser remains President of Rockstar Games, overseeing operations and the development of GTA VI. He continues to guide the company through one of its most high-profile periods. Dan Houser left Rockstar in 2020 and founded Absurd Ventures. The new studio is working on an open-world action game and other media projects. Dan has become more publicly visible, sharing insights into his creative process, his views on Rockstar's history, and his relationship with his brother in recent interviews. Reports suggest creative differences played a role in his departure. What Lies AheadWith GTA VI expected to be another record-shattering release—potentially pushing the brothers even higher on future rich lists—the Housers' story exemplifies how visionary game development can yield lasting financial success. Their position on the UK Rich List alongside other gaming entrepreneurs like Riccardo Zacconi underscores the industry's growing economic influence. The delay of GTA 6 may have postponed a massive new revenue wave, but the Housers' current trajectory proves that Rockstar's legacy titles remain powerful wealth generators. Fans and analysts alike anticipate that the next chapter will only amplify their already impressive fortunes. As the gaming world waits for GTA VI, the Houser brothers serve as a reminder that great games can create value for years—or even decades—after launch. View full article
-
 Despite years of massive hype, leaks, trailers, and endless memes, Grand Theft Auto VI currently ranks as only the seventh most anticipated upcoming entertainment release according to a recent consumer survey. A new report from Screen Engine/ASI (via The Wrap) polled over 1,000 media consumers aged 13-64 during the week of May 2–8, 2026. Respondents were asked an open-ended question: “What is the one upcoming entertainment release (movie, show, video game, etc.) that you are most interested in watching or playing in the next month or so?” Where GTA 6 StandsGTA VI received 2.22% of all mentions, earning it a solid spot in the Top 10 with what The Wrap described as “sustained anticipation.” This places it behind several titles that are either freshly released or hitting screens very soon. Leading the chart was Star Wars: The Mandalorian and Grogu at 4.74%, surging ahead of its theatrical release on May 22, 2026. Other high-ranking entries included The Devil Wears Prada 2 (which had just released), NBA Basketball (with postseason buzz), The Super Mario Galaxy Movie, and TV hits like Stranger Things and Euphoria. Context Matters: Timing Is Everything The poll highlights a key factor in hype cycles. Most titles ranking above GTA 6 benefit from imminent availability—they’re either out now or just days/weeks away. In contrast, GTA 6 remains months out, with its official release date locked in for November 19, 2026. Rockstar’s prolonged silence after the second trailer hasn’t helped maintain peak excitement either, though a recent Best Buy pre-order leak has already begun stirring renewed interest. Long-Term Outlook for GTA 6This snapshot doesn’t diminish GTA 6’s enormous cultural significance. The game is still widely projected to be one of the biggest entertainment launches in history, with industry expectations that are, in the words of Take-Two’s CEO, “terrifying.” Analysts forecast massive opening sales, potentially in the tens of millions of units. As marketing ramps up—expected to include a third trailer and pre-orders opening soon—the game’s position in these weekly charts is likely to climb dramatically. Past Rockstar releases have shown how quickly anticipation can explode once official campaigns begin. For now, the data serves as a reminder that in the attention economy, “soon” often beats “eventually,” no matter how groundbreaking the eventual product promises to be. Fans can expect more concrete news from Rockstar in the coming months as the November launch window approaches. In the meantime, the GTA community continues to speculate, meme, and wait—much like they have for over a decade.
 -
Despite years of massive hype, leaks, trailers, and endless memes, Grand Theft Auto VI currently ranks as only the seventh most anticipated upcoming entertainment release according to a recent consumer survey. A new report from Screen Engine/ASI (via The Wrap) polled over 1,000 media consumers aged 13-64 during the week of May 2–8, 2026. Respondents were asked an open-ended question: “What is the one upcoming entertainment release (movie, show, video game, etc.) that you are most interested in watching or playing in the next month or so?” Where GTA 6 StandsGTA VI received 2.22% of all mentions, earning it a solid spot in the Top 10 with what The Wrap described as “sustained anticipation.” This places it behind several titles that are either freshly released or hitting screens very soon. Leading the chart was Star Wars: The Mandalorian and Grogu at 4.74%, surging ahead of its theatrical release on May 22, 2026. Other high-ranking entries included The Devil Wears Prada 2 (which had just released), NBA Basketball (with postseason buzz), The Super Mario Galaxy Movie, and TV hits like Stranger Things and Euphoria. Context Matters: Timing Is Everything The poll highlights a key factor in hype cycles. Most titles ranking above GTA 6 benefit from imminent availability—they’re either out now or just days/weeks away. In contrast, GTA 6 remains months out, with its official release date locked in for November 19, 2026. Rockstar’s prolonged silence after the second trailer hasn’t helped maintain peak excitement either, though a recent Best Buy pre-order leak has already begun stirring renewed interest. Long-Term Outlook for GTA 6This snapshot doesn’t diminish GTA 6’s enormous cultural significance. The game is still widely projected to be one of the biggest entertainment launches in history, with industry expectations that are, in the words of Take-Two’s CEO, “terrifying.” Analysts forecast massive opening sales, potentially in the tens of millions of units. As marketing ramps up—expected to include a third trailer and pre-orders opening soon—the game’s position in these weekly charts is likely to climb dramatically. Past Rockstar releases have shown how quickly anticipation can explode once official campaigns begin. For now, the data serves as a reminder that in the attention economy, “soon” often beats “eventually,” no matter how groundbreaking the eventual product promises to be. Fans can expect more concrete news from Rockstar in the coming months as the November launch window approaches. In the meantime, the GTA community continues to speculate, meme, and wait—much like they have for over a decade. View full article
-
.jpg.477f597894390a528744e3b20bb13600.jpg) In a clear sign of enduring investor enthusiasm for Rockstar Games’ long-awaited blockbuster, Take-Two Interactive’s stock surged on Thursday, May 14, 2026, following leaks suggesting that pre-orders for Grand Theft Auto VI could open as early as next week. The jump added roughly $2 billion to the company’s market capitalization in a single trading session. The Spark: Best Buy Pre-Order LeakThe catalyst was a reported Best Buy email leak indicating that physical pre-orders for GTA 6 would go live between May 18 and May 21, offering affiliate commissions. Multiple sources, including gaming insiders and community accounts, shared and verified the details, creating immediate buzz across the gaming community. This rumor built on earlier anticipation, as GTA 6 is officially slated for release on November 19, 2026, for PlayStation 5 and Xbox Series X|S. Take-Two shares opened at approximately $240.37, reflecting a roughly 10% increase from recent levels. While the stock fluctuated around the $240 mark throughout the day, it marked the highest point since January 2026 and represented strong gains over the prior week. Market Reaction and Broader Context The surge highlights how heavily investors are betting on GTA 6’s commercial success. Even without official confirmation from Rockstar or Take-Two, the mere hint of pre-order availability was enough to drive significant buying. The company’s market cap gained nearly $2 billion on the news, underscoring the massive expectations surrounding the title. This isn’t the first time GTA-related developments have moved the needle for Take-Two. Past leaks, trailers, and financial updates have similarly influenced the stock. The company has been navigating a mix of optimism around GTA 6 and occasional pressure from broader industry trends, including advancements in AI-generated content. Why the Hype Matters: Timing with EarningsThe timing of the leak is particularly notable. Take-Two is scheduled to release its Q4 2026 and full Fiscal Year 2026 financial results on May 21—coinciding with the rumored pre-order window. Early pre-sale data could provide a major boost during the earnings call, giving investors concrete metrics on demand for the biggest entertainment launch of the year. Analysts and shareholders have long viewed GTA 6 as a potential record-breaker, building on the phenomenal success of GTA 5 (over 225 million copies sold) and the ongoing revenue machine that is GTA Online. What’s Next for GTA 6 and Take-TwoWhile digital pre-orders have not yet appeared on major platforms, the Best Buy leak has fans speculating about special editions, pricing details, and possibly even new trailer footage in the near future. Rockstar has remained characteristically silent, but the momentum is undeniable. Take-Two CEO Strauss Zelnick has previously called a recent demo of the game “amazing,” further fueling confidence in its quality. As the November 2026 release date approaches, expect more volatility—and likely more upside—for Take-Two stock tied to GTA 6 updates. For now, the pre-order rumor has given shareholders a timely reminder of the franchise’s unmatched cultural and financial power. Stay tuned for official confirmations, as Rockstar and Take-Two are expected to provide more clarity in the coming days and during the upcoming earnings report. The road to Vice City is heating up, and Wall Street is firmly along for the ride.
In a clear sign of enduring investor enthusiasm for Rockstar Games’ long-awaited blockbuster, Take-Two Interactive’s stock surged on Thursday, May 14, 2026, following leaks suggesting that pre-orders for Grand Theft Auto VI could open as early as next week. The jump added roughly $2 billion to the company’s market capitalization in a single trading session. The Spark: Best Buy Pre-Order LeakThe catalyst was a reported Best Buy email leak indicating that physical pre-orders for GTA 6 would go live between May 18 and May 21, offering affiliate commissions. Multiple sources, including gaming insiders and community accounts, shared and verified the details, creating immediate buzz across the gaming community. This rumor built on earlier anticipation, as GTA 6 is officially slated for release on November 19, 2026, for PlayStation 5 and Xbox Series X|S. Take-Two shares opened at approximately $240.37, reflecting a roughly 10% increase from recent levels. While the stock fluctuated around the $240 mark throughout the day, it marked the highest point since January 2026 and represented strong gains over the prior week. Market Reaction and Broader Context The surge highlights how heavily investors are betting on GTA 6’s commercial success. Even without official confirmation from Rockstar or Take-Two, the mere hint of pre-order availability was enough to drive significant buying. The company’s market cap gained nearly $2 billion on the news, underscoring the massive expectations surrounding the title. This isn’t the first time GTA-related developments have moved the needle for Take-Two. Past leaks, trailers, and financial updates have similarly influenced the stock. The company has been navigating a mix of optimism around GTA 6 and occasional pressure from broader industry trends, including advancements in AI-generated content. Why the Hype Matters: Timing with EarningsThe timing of the leak is particularly notable. Take-Two is scheduled to release its Q4 2026 and full Fiscal Year 2026 financial results on May 21—coinciding with the rumored pre-order window. Early pre-sale data could provide a major boost during the earnings call, giving investors concrete metrics on demand for the biggest entertainment launch of the year. Analysts and shareholders have long viewed GTA 6 as a potential record-breaker, building on the phenomenal success of GTA 5 (over 225 million copies sold) and the ongoing revenue machine that is GTA Online. What’s Next for GTA 6 and Take-TwoWhile digital pre-orders have not yet appeared on major platforms, the Best Buy leak has fans speculating about special editions, pricing details, and possibly even new trailer footage in the near future. Rockstar has remained characteristically silent, but the momentum is undeniable. Take-Two CEO Strauss Zelnick has previously called a recent demo of the game “amazing,” further fueling confidence in its quality. As the November 2026 release date approaches, expect more volatility—and likely more upside—for Take-Two stock tied to GTA 6 updates. For now, the pre-order rumor has given shareholders a timely reminder of the franchise’s unmatched cultural and financial power. Stay tuned for official confirmations, as Rockstar and Take-Two are expected to provide more clarity in the coming days and during the upcoming earnings report. The road to Vice City is heating up, and Wall Street is firmly along for the ride. -
In a clear sign of enduring investor enthusiasm for Rockstar Games’ long-awaited blockbuster, Take-Two Interactive’s stock surged on Thursday, May 14, 2026, following leaks suggesting that pre-orders for Grand Theft Auto VI could open as early as next week. The jump added roughly $2 billion to the company’s market capitalization in a single trading session. The Spark: Best Buy Pre-Order LeakThe catalyst was a reported Best Buy email leak indicating that physical pre-orders for GTA 6 would go live between May 18 and May 21, offering affiliate commissions. Multiple sources, including gaming insiders and community accounts, shared and verified the details, creating immediate buzz across the gaming community. This rumor built on earlier anticipation, as GTA 6 is officially slated for release on November 19, 2026, for PlayStation 5 and Xbox Series X|S. Take-Two shares opened at approximately $240.37, reflecting a roughly 10% increase from recent levels. While the stock fluctuated around the $240 mark throughout the day, it marked the highest point since January 2026 and represented strong gains over the prior week. Market Reaction and Broader Context The surge highlights how heavily investors are betting on GTA 6’s commercial success. Even without official confirmation from Rockstar or Take-Two, the mere hint of pre-order availability was enough to drive significant buying. The company’s market cap gained nearly $2 billion on the news, underscoring the massive expectations surrounding the title. This isn’t the first time GTA-related developments have moved the needle for Take-Two. Past leaks, trailers, and financial updates have similarly influenced the stock. The company has been navigating a mix of optimism around GTA 6 and occasional pressure from broader industry trends, including advancements in AI-generated content. Why the Hype Matters: Timing with EarningsThe timing of the leak is particularly notable. Take-Two is scheduled to release its Q4 2026 and full Fiscal Year 2026 financial results on May 21—coinciding with the rumored pre-order window. Early pre-sale data could provide a major boost during the earnings call, giving investors concrete metrics on demand for the biggest entertainment launch of the year. Analysts and shareholders have long viewed GTA 6 as a potential record-breaker, building on the phenomenal success of GTA 5 (over 225 million copies sold) and the ongoing revenue machine that is GTA Online. What’s Next for GTA 6 and Take-TwoWhile digital pre-orders have not yet appeared on major platforms, the Best Buy leak has fans speculating about special editions, pricing details, and possibly even new trailer footage in the near future. Rockstar has remained characteristically silent, but the momentum is undeniable. Take-Two CEO Strauss Zelnick has previously called a recent demo of the game “amazing,” further fueling confidence in its quality. As the November 2026 release date approaches, expect more volatility—and likely more upside—for Take-Two stock tied to GTA 6 updates. For now, the pre-order rumor has given shareholders a timely reminder of the franchise’s unmatched cultural and financial power. Stay tuned for official confirmations, as Rockstar and Take-Two are expected to provide more clarity in the coming days and during the upcoming earnings report. The road to Vice City is heating up, and Wall Street is firmly along for the ride. View full article
-
 The long wait for Grand Theft Auto VI marketing momentum appears to be nearing an end. According to a leak from retail giant Best Buy, pre-orders for the physical edition of the game may launch as early as Monday, May 18, 2026. The Best Buy Leak DetailsOn Thursday, May 14, 2026, several Best Buy affiliates received an email outlining upcoming campaigns. One entry specifically mentioned a "GTA 6 Pre Order (Physical Game)" campaign running from May 18 through May 21, 2026, with affiliates earning a 5% commission on sales. Content creator Frogboyx1Gaming and others shared screenshots of the email, confirming the details. This isn't a vague rumor from an anonymous source—it's an internal communication from a major retailer preparing promotional efforts for one of the most anticipated games in history. Important caveat: Leaks like this can sometimes be placeholders, errors, or early preparations that get adjusted. Rockstar Games and Take-Two Interactive have not officially confirmed the dates, so fans should treat this with cautious optimism. Why This Timing Makes SenseTake-Two Earnings Call: The campaign window aligns perfectly with Take-Two's upcoming investor earnings report on or around May 21. These calls often include major updates on flagship titles like GTA 6. Marketing Ramp-Up: With the game now set for a November 19, 2026 release on PS5 and Xbox Series X/S, we're roughly six months out—the typical window when heavy marketing (trailers, pre-orders, and editions) begins in earnest. Recent Speculation: Fans had already been buzzing about potential announcements this week, though nothing materialized on earlier rumored dates like May 12 or 13. Many expect a third trailer to drop alongside or shortly before pre-orders go live, which could explain the short affiliate campaign window—designed to capitalize on immediate hype. What to Expect with Pre-Orders When pre-orders do open, fans can likely anticipate: Standard Edition (physical and digital) Potential premium or collector's editions with bonuses like early access to in-game content, maps, or exclusive items Platform-specific incentives (e.g., PlayStation or Xbox exclusives) Pricing details, which have circulated in rumors but remain unconfirmed officially Physical copies are confirmed to be available at launch, a relief for collectors after some recent Rockstar titles emphasized digital. Background on GTA 6 DevelopmentGrand Theft Auto VI was officially announced with a cinematic trailer in December 2023, followed by a second trailer later. The game promises a massive open-world experience set in a reimagined Vice City and surrounding areas in modern-day Leonida, featuring protagonists Lucia and Jason. After delays from the original 2025 target, Rockstar locked in the November 19, 2026 launch date. Recent reports suggest Take-Two CEO Strauss Zelnick has been impressed with playable builds of the game. Stay TunedThis Best Buy leak has reignited excitement across the GTA community. If pre-orders and a new trailer do arrive next week, it will mark the true beginning of the final marketing push for what is expected to be a record-breaking release. For the latest confirmed updates, keep an eye on Rockstar Games' official channels and Take-Two's May 21 earnings call. In the meantime, the speculation and hype continue—right where GTA fans love to be.
 -
The long wait for Grand Theft Auto VI marketing momentum appears to be nearing an end. According to a leak from retail giant Best Buy, pre-orders for the physical edition of the game may launch as early as Monday, May 18, 2026. The Best Buy Leak DetailsOn Thursday, May 14, 2026, several Best Buy affiliates received an email outlining upcoming campaigns. One entry specifically mentioned a "GTA 6 Pre Order (Physical Game)" campaign running from May 18 through May 21, 2026, with affiliates earning a 5% commission on sales. Content creator Frogboyx1Gaming and others shared screenshots of the email, confirming the details. This isn't a vague rumor from an anonymous source—it's an internal communication from a major retailer preparing promotional efforts for one of the most anticipated games in history. Important caveat: Leaks like this can sometimes be placeholders, errors, or early preparations that get adjusted. Rockstar Games and Take-Two Interactive have not officially confirmed the dates, so fans should treat this with cautious optimism. Why This Timing Makes SenseTake-Two Earnings Call: The campaign window aligns perfectly with Take-Two's upcoming investor earnings report on or around May 21. These calls often include major updates on flagship titles like GTA 6. Marketing Ramp-Up: With the game now set for a November 19, 2026 release on PS5 and Xbox Series X/S, we're roughly six months out—the typical window when heavy marketing (trailers, pre-orders, and editions) begins in earnest. Recent Speculation: Fans had already been buzzing about potential announcements this week, though nothing materialized on earlier rumored dates like May 12 or 13. Many expect a third trailer to drop alongside or shortly before pre-orders go live, which could explain the short affiliate campaign window—designed to capitalize on immediate hype. What to Expect with Pre-Orders When pre-orders do open, fans can likely anticipate: Standard Edition (physical and digital) Potential premium or collector's editions with bonuses like early access to in-game content, maps, or exclusive items Platform-specific incentives (e.g., PlayStation or Xbox exclusives) Pricing details, which have circulated in rumors but remain unconfirmed officially Physical copies are confirmed to be available at launch, a relief for collectors after some recent Rockstar titles emphasized digital. Background on GTA 6 DevelopmentGrand Theft Auto VI was officially announced with a cinematic trailer in December 2023, followed by a second trailer later. The game promises a massive open-world experience set in a reimagined Vice City and surrounding areas in modern-day Leonida, featuring protagonists Lucia and Jason. After delays from the original 2025 target, Rockstar locked in the November 19, 2026 launch date. Recent reports suggest Take-Two CEO Strauss Zelnick has been impressed with playable builds of the game. Stay TunedThis Best Buy leak has reignited excitement across the GTA community. If pre-orders and a new trailer do arrive next week, it will mark the true beginning of the final marketing push for what is expected to be a record-breaking release. For the latest confirmed updates, keep an eye on Rockstar Games' official channels and Take-Two's May 21 earnings call. In the meantime, the speculation and hype continue—right where GTA fans love to be. View full article
-
 Rockstar Games has kicked off a high-octane weekly update in GTA Online, themed around Motor Madness. Running from May 14th through May 20th, this event celebrates Los Santos’ car culture with boosted payouts on races, hefty vehicle discounts, exclusive rewards, and plenty of opportunities to expand your garage. Login and Purchase Rewards (Available Through May 27th)Log in this week to claim the Rockstar Helmet for free. Additional stylish rewards are available for vehicle purchases: Buy any vehicle from Premium Deluxe Motorsport (Simeon’s showroom) → Rockstar Racing Suit (within 72 hours). Buy any vehicle from Luxury Autos → LS Customs Varsity Jacket (within 72 hours). Buy any vehicle featured at the LS Car Meet → Blue Banshee Tee (within 72 hours). Vehicles and Showrooms Podium Vehicle at the Casino: Spin the Lucky Wheel for a chance to win the Benefactor LM87 (normally $2,915,000). GTA+ members get two spins per day. Prize Ride Challenge: Place in the top 5 in 5 LS Car Meet Series races to unlock the Benefactor Krieger (normally $2,875,000). Premium Test Ride (PS5, Xbox Series X/S, PC Enhanced): Weeny Issi Rally. Test Track Vehicles: Bravado Banshee GTS, Grotti Itali RSX (Monochrome livery), and Överflöd Pipistrello (Street Camo Right livery). Luxury Autos: Übermacht Sentinel XS4 and Vapid FMJ MK V (new Water Like livery). Premium Deluxe Motorsport: Dewbauchee JB 700, Dewbauchee Rapid GT Cabrio, Karin 190z, Lampadati Furore GT, and Western Rat Bike. Salvage Yard Robberies this week feature the Invetero Coquette D10 (with LS Pounders vanity plate, claimable as personal vehicle), Vapid Dominator GT, and Karin Previon. Multipliers and Bonuses4x GTA$ and RP on Land Races. 3x GTA$ and RP on HSW Time Trial and Simeon Contact Missions. 2x GTA$ and RP on Tow Truck Service and Community Race Series. 2x GTA$ on Salvage Yard Daily Income, plus Salvage Yard Robbery Target Sale and Salvage Value. Weekly Challenge: Win any two races to earn the Dark Manor Racing Suit and GTA$100,000. Races and Trials: Premium Race: The Commute (Sports class). HSW Time Trial: East Vinewood. Time Trial: Galileo Park. Discounts 40% off includes Salvage Yard Properties, Eclipse Blvd Garage, and a long list of performance vehicles (Banshee GTS, Castigator, JB 700, Rapid GT Cabrio, Itali RSX, 190z, Furore GT, Shotaro, Pipistrello, Rat Bike, and more). 30% off covers vehicles like the Bravado Gauntlet Classic, Coil Brawler, Declasse Impaler SZ, Lampadati Novak, and Übermacht Rhinehart. Additional Motor Madness discounts (through May 27) include free LS Car Meet Membership, 50% off LS Tuners Racing Suits, HSW Performance Upgrades, Benny’s Conversions, Turbo Tuning, specific tire smoke, and free horn customizations. Other HighlightsFIB Priority File: The Black Box File (double payouts). Gun Van stocks various weapons, throwables, and armor with discounts (higher for GTA+ members). GTA+ members enjoy extra benefits this month. This Motor Madness week is perfect for racers looking to stack cash, collectors hunting rare liveries and vehicles, and anyone wanting to upgrade their fleet at a discount. Whether you’re tearing up land races for 4x payouts, hitting the Salvage Yard, or spinning for the LM87, there’s plenty to keep you busy in Los Santos. Load up GTA Online, hit the streets, and make the most of the Motor Madness Special before it ends on May 20th!
 -
Rockstar Games has kicked off a high-octane weekly update in GTA Online, themed around Motor Madness. Running from May 14th through May 20th, this event celebrates Los Santos’ car culture with boosted payouts on races, hefty vehicle discounts, exclusive rewards, and plenty of opportunities to expand your garage. Login and Purchase Rewards (Available Through May 27th)Log in this week to claim the Rockstar Helmet for free. Additional stylish rewards are available for vehicle purchases: Buy any vehicle from Premium Deluxe Motorsport (Simeon’s showroom) → Rockstar Racing Suit (within 72 hours). Buy any vehicle from Luxury Autos → LS Customs Varsity Jacket (within 72 hours). Buy any vehicle featured at the LS Car Meet → Blue Banshee Tee (within 72 hours). Vehicles and Showrooms Podium Vehicle at the Casino: Spin the Lucky Wheel for a chance to win the Benefactor LM87 (normally $2,915,000). GTA+ members get two spins per day. Prize Ride Challenge: Place in the top 5 in 5 LS Car Meet Series races to unlock the Benefactor Krieger (normally $2,875,000). Premium Test Ride (PS5, Xbox Series X/S, PC Enhanced): Weeny Issi Rally. Test Track Vehicles: Bravado Banshee GTS, Grotti Itali RSX (Monochrome livery), and Överflöd Pipistrello (Street Camo Right livery). Luxury Autos: Übermacht Sentinel XS4 and Vapid FMJ MK V (new Water Like livery). Premium Deluxe Motorsport: Dewbauchee JB 700, Dewbauchee Rapid GT Cabrio, Karin 190z, Lampadati Furore GT, and Western Rat Bike. Salvage Yard Robberies this week feature the Invetero Coquette D10 (with LS Pounders vanity plate, claimable as personal vehicle), Vapid Dominator GT, and Karin Previon. Multipliers and Bonuses4x GTA$ and RP on Land Races. 3x GTA$ and RP on HSW Time Trial and Simeon Contact Missions. 2x GTA$ and RP on Tow Truck Service and Community Race Series. 2x GTA$ on Salvage Yard Daily Income, plus Salvage Yard Robbery Target Sale and Salvage Value. Weekly Challenge: Win any two races to earn the Dark Manor Racing Suit and GTA$100,000. Races and Trials: Premium Race: The Commute (Sports class). HSW Time Trial: East Vinewood. Time Trial: Galileo Park. Discounts 40% off includes Salvage Yard Properties, Eclipse Blvd Garage, and a long list of performance vehicles (Banshee GTS, Castigator, JB 700, Rapid GT Cabrio, Itali RSX, 190z, Furore GT, Shotaro, Pipistrello, Rat Bike, and more). 30% off covers vehicles like the Bravado Gauntlet Classic, Coil Brawler, Declasse Impaler SZ, Lampadati Novak, and Übermacht Rhinehart. Additional Motor Madness discounts (through May 27) include free LS Car Meet Membership, 50% off LS Tuners Racing Suits, HSW Performance Upgrades, Benny’s Conversions, Turbo Tuning, specific tire smoke, and free horn customizations. Other HighlightsFIB Priority File: The Black Box File (double payouts). Gun Van stocks various weapons, throwables, and armor with discounts (higher for GTA+ members). GTA+ members enjoy extra benefits this month. This Motor Madness week is perfect for racers looking to stack cash, collectors hunting rare liveries and vehicles, and anyone wanting to upgrade their fleet at a discount. Whether you’re tearing up land races for 4x payouts, hitting the Salvage Yard, or spinning for the LM87, there’s plenty to keep you busy in Los Santos. Load up GTA Online, hit the streets, and make the most of the Motor Madness Special before it ends on May 20th! View full article
-
.jpg.3f157a2f5256e254464f66a12fcbdd2b.jpg) As the highly anticipated Grand Theft Auto VI edges closer to its release, Rockstar Games finds itself embroiled in a growing controversy involving allegations of union-busting and a lack of cooperation in related legal proceedings. Scottish Labour MPs have publicly criticized the company for what they describe as obstructive behavior toward former employees and union representatives. Background: The Firings and Union DisputeThe issue stems from events in late 2025, when Rockstar Games dismissed around 34 employees, primarily from its Rockstar North studio in Edinburgh, Scotland. The Independent Workers’ Union of Great Britain (IWGB) claimed these firings constituted illegal union-busting retaliation. According to the union, the affected workers had been involved in discussions about working conditions via a private Discord channel with union organizers. Rockstar maintained that the dismissals were due to misconduct, specifically the leaking of confidential company information, rather than any union activities. The dispute has led to ongoing legal action, including efforts to take the case to an employment tribunal. The process is expected to be lengthy, potentially extending for months or longer before a full resolution. MPs Demand TransparencyIn recent developments reported on May 13, 2026, several Scottish Labour MPs have voiced strong concerns about Rockstar’s handling of the matter. They accuse the company of failing to cooperate fully with disclosure requests, withholding evidence and investigation reports, and denying workers proper appeal rights. Chris Murray, MP for Edinburgh East and Musselburgh: Murray expressed concerns about the “handling and motivation” behind the dismissals. He highlighted the personal impact on constituents, including job losses and one case where a worker had to leave the country due to visa issues. He called for Rockstar to respond with “transparency and full cooperation” and to uphold appeal rights. Tracy Gilbert, MP for Edinburgh North and Leith: She described Rockstar’s actions as “extremely disappointing,” criticizing the company’s refusal to properly engage with staff, representatives, and trade unions. Dr. Scott Arthur, MP for Edinburgh South West: Arthur noted that discussions with Rockstar senior management last year emphasized the need for open, fair, and transparent treatment of staff. He suggested these principles may not have been consistently applied based on accounts from his constituent. The MPs’ statements align with IWGB’s position that Rockstar has met former employees with “silence and closed doors.” Context and Timing This latest wave of criticism comes at a sensitive time for Rockstar, as the company prepares for GTA 6—one of the most eagerly awaited video game releases in history. The original planned May 2026 launch window was reportedly delayed to later in the year, though development appears to be progressing. The involvement of politicians has elevated the dispute beyond a standard labor issue, drawing attention to broader questions about workers’ rights in the video game industry. Earlier, UK Prime Minister Keir Starmer had described the situation as “deeply concerning” and affirmed the right of workers to join trade unions. What’s Next?The legal battle is far from over. With tribunal hearings potentially months away, both sides are likely to continue presenting their cases publicly and in court. Rockstar has not issued a detailed public response to the most recent MP accusations as of the latest reports. This situation underscores ongoing tensions in the gaming sector between major studios and efforts to organize labor, especially amid high-profile projects like GTA 6. Fans and industry observers will be watching closely to see how the dispute affects Rockstar’s reputation and operations moving forward. What are your thoughts on this developing story? Share them in the comments.
As the highly anticipated Grand Theft Auto VI edges closer to its release, Rockstar Games finds itself embroiled in a growing controversy involving allegations of union-busting and a lack of cooperation in related legal proceedings. Scottish Labour MPs have publicly criticized the company for what they describe as obstructive behavior toward former employees and union representatives. Background: The Firings and Union DisputeThe issue stems from events in late 2025, when Rockstar Games dismissed around 34 employees, primarily from its Rockstar North studio in Edinburgh, Scotland. The Independent Workers’ Union of Great Britain (IWGB) claimed these firings constituted illegal union-busting retaliation. According to the union, the affected workers had been involved in discussions about working conditions via a private Discord channel with union organizers. Rockstar maintained that the dismissals were due to misconduct, specifically the leaking of confidential company information, rather than any union activities. The dispute has led to ongoing legal action, including efforts to take the case to an employment tribunal. The process is expected to be lengthy, potentially extending for months or longer before a full resolution. MPs Demand TransparencyIn recent developments reported on May 13, 2026, several Scottish Labour MPs have voiced strong concerns about Rockstar’s handling of the matter. They accuse the company of failing to cooperate fully with disclosure requests, withholding evidence and investigation reports, and denying workers proper appeal rights. Chris Murray, MP for Edinburgh East and Musselburgh: Murray expressed concerns about the “handling and motivation” behind the dismissals. He highlighted the personal impact on constituents, including job losses and one case where a worker had to leave the country due to visa issues. He called for Rockstar to respond with “transparency and full cooperation” and to uphold appeal rights. Tracy Gilbert, MP for Edinburgh North and Leith: She described Rockstar’s actions as “extremely disappointing,” criticizing the company’s refusal to properly engage with staff, representatives, and trade unions. Dr. Scott Arthur, MP for Edinburgh South West: Arthur noted that discussions with Rockstar senior management last year emphasized the need for open, fair, and transparent treatment of staff. He suggested these principles may not have been consistently applied based on accounts from his constituent. The MPs’ statements align with IWGB’s position that Rockstar has met former employees with “silence and closed doors.” Context and Timing This latest wave of criticism comes at a sensitive time for Rockstar, as the company prepares for GTA 6—one of the most eagerly awaited video game releases in history. The original planned May 2026 launch window was reportedly delayed to later in the year, though development appears to be progressing. The involvement of politicians has elevated the dispute beyond a standard labor issue, drawing attention to broader questions about workers’ rights in the video game industry. Earlier, UK Prime Minister Keir Starmer had described the situation as “deeply concerning” and affirmed the right of workers to join trade unions. What’s Next?The legal battle is far from over. With tribunal hearings potentially months away, both sides are likely to continue presenting their cases publicly and in court. Rockstar has not issued a detailed public response to the most recent MP accusations as of the latest reports. This situation underscores ongoing tensions in the gaming sector between major studios and efforts to organize labor, especially amid high-profile projects like GTA 6. Fans and industry observers will be watching closely to see how the dispute affects Rockstar’s reputation and operations moving forward. What are your thoughts on this developing story? Share them in the comments. -
As the highly anticipated Grand Theft Auto VI edges closer to its release, Rockstar Games finds itself embroiled in a growing controversy involving allegations of union-busting and a lack of cooperation in related legal proceedings. Scottish Labour MPs have publicly criticized the company for what they describe as obstructive behavior toward former employees and union representatives. Background: The Firings and Union DisputeThe issue stems from events in late 2025, when Rockstar Games dismissed around 34 employees, primarily from its Rockstar North studio in Edinburgh, Scotland. The Independent Workers’ Union of Great Britain (IWGB) claimed these firings constituted illegal union-busting retaliation. According to the union, the affected workers had been involved in discussions about working conditions via a private Discord channel with union organizers. Rockstar maintained that the dismissals were due to misconduct, specifically the leaking of confidential company information, rather than any union activities. The dispute has led to ongoing legal action, including efforts to take the case to an employment tribunal. The process is expected to be lengthy, potentially extending for months or longer before a full resolution. MPs Demand TransparencyIn recent developments reported on May 13, 2026, several Scottish Labour MPs have voiced strong concerns about Rockstar’s handling of the matter. They accuse the company of failing to cooperate fully with disclosure requests, withholding evidence and investigation reports, and denying workers proper appeal rights. Chris Murray, MP for Edinburgh East and Musselburgh: Murray expressed concerns about the “handling and motivation” behind the dismissals. He highlighted the personal impact on constituents, including job losses and one case where a worker had to leave the country due to visa issues. He called for Rockstar to respond with “transparency and full cooperation” and to uphold appeal rights. Tracy Gilbert, MP for Edinburgh North and Leith: She described Rockstar’s actions as “extremely disappointing,” criticizing the company’s refusal to properly engage with staff, representatives, and trade unions. Dr. Scott Arthur, MP for Edinburgh South West: Arthur noted that discussions with Rockstar senior management last year emphasized the need for open, fair, and transparent treatment of staff. He suggested these principles may not have been consistently applied based on accounts from his constituent. The MPs’ statements align with IWGB’s position that Rockstar has met former employees with “silence and closed doors.” Context and Timing This latest wave of criticism comes at a sensitive time for Rockstar, as the company prepares for GTA 6—one of the most eagerly awaited video game releases in history. The original planned May 2026 launch window was reportedly delayed to later in the year, though development appears to be progressing. The involvement of politicians has elevated the dispute beyond a standard labor issue, drawing attention to broader questions about workers’ rights in the video game industry. Earlier, UK Prime Minister Keir Starmer had described the situation as “deeply concerning” and affirmed the right of workers to join trade unions. What’s Next?The legal battle is far from over. With tribunal hearings potentially months away, both sides are likely to continue presenting their cases publicly and in court. Rockstar has not issued a detailed public response to the most recent MP accusations as of the latest reports. This situation underscores ongoing tensions in the gaming sector between major studios and efforts to organize labor, especially amid high-profile projects like GTA 6. Fans and industry observers will be watching closely to see how the dispute affects Rockstar’s reputation and operations moving forward. What are your thoughts on this developing story? Share them in the comments. View full article
-
 Rumors of a brand-new GTA 6 trailer arriving next week are spreading rapidly across social media, but fans may want to keep their expectations in check. According to a new report from Rockstar Intel, speculation exploded after a series of small online clues and community theories convinced many players that Rockstar Games is preparing to drop another look at the highly anticipated title. However, there is currently no official confirmation from Rockstar that a new trailer is imminent. The latest wave of rumors appears to stem from fan observations involving PlayStation marketing activity, social media chatter, and Rockstar’s history of surprise announcements. Some players believe the timing would make sense given that Rockstar previously confirmed GTA 6’s “launch marketing” campaign would begin this summer. Still, the reality is far less concrete than many fans are hoping. Rockstar has remained completely silent regarding a third trailer or any new gameplay reveal. The studio is known for unpredictable marketing strategies, often releasing trailers without warning and avoiding traditional announcement schedules altogether. That unpredictability has led to constant speculation within the GTA community for months. The anticipation surrounding GTA 6 has only intensified following the game’s delay to November 19, 2026. Rockstar previously explained that the extra development time would allow the team to deliver the level of polish fans expect from the franchise. Since the release of Trailer 2 last year, fans have been dissecting every possible hint for signs of another reveal. Reddit threads, YouTube theories, and social media posts regularly go viral whenever Rockstar updates playlists, changes website metadata, or posts cryptic promotional material. At the same time, Rockstar and parent company Take-Two Interactive continue building excitement around the game. Take-Two CEO Strauss Zelnick recently described GTA 6 as something “never been experienced before” and said Rockstar is aiming to create “the best thing anyone’s ever seen in entertainment.” Even without a new trailer, GTA 6 remains one of the biggest entertainment launches on the horizon. The game is currently confirmed for PlayStation 5 and Xbox Series X|S, while a PC release has yet to be announced. For now, fans are left doing what the GTA community does best: analyzing every possible clue and waiting for Rockstar to make the next move.
 -
Rumors of a brand-new GTA 6 trailer arriving next week are spreading rapidly across social media, but fans may want to keep their expectations in check. According to a new report from Rockstar Intel, speculation exploded after a series of small online clues and community theories convinced many players that Rockstar Games is preparing to drop another look at the highly anticipated title. However, there is currently no official confirmation from Rockstar that a new trailer is imminent. The latest wave of rumors appears to stem from fan observations involving PlayStation marketing activity, social media chatter, and Rockstar’s history of surprise announcements. Some players believe the timing would make sense given that Rockstar previously confirmed GTA 6’s “launch marketing” campaign would begin this summer. Still, the reality is far less concrete than many fans are hoping. Rockstar has remained completely silent regarding a third trailer or any new gameplay reveal. The studio is known for unpredictable marketing strategies, often releasing trailers without warning and avoiding traditional announcement schedules altogether. That unpredictability has led to constant speculation within the GTA community for months. The anticipation surrounding GTA 6 has only intensified following the game’s delay to November 19, 2026. Rockstar previously explained that the extra development time would allow the team to deliver the level of polish fans expect from the franchise. Since the release of Trailer 2 last year, fans have been dissecting every possible hint for signs of another reveal. Reddit threads, YouTube theories, and social media posts regularly go viral whenever Rockstar updates playlists, changes website metadata, or posts cryptic promotional material. At the same time, Rockstar and parent company Take-Two Interactive continue building excitement around the game. Take-Two CEO Strauss Zelnick recently described GTA 6 as something “never been experienced before” and said Rockstar is aiming to create “the best thing anyone’s ever seen in entertainment.” Even without a new trailer, GTA 6 remains one of the biggest entertainment launches on the horizon. The game is currently confirmed for PlayStation 5 and Xbox Series X|S, while a PC release has yet to be announced. For now, fans are left doing what the GTA community does best: analyzing every possible clue and waiting for Rockstar to make the next move. View full article
-
 Despite both games being years old and receiving fewer major updates than in their prime, Grand Theft Auto Online and Red Dead Redemption 2 are still pulling in massive player numbers in 2026. New data highlighted by RockstarINTEL shows that Rockstar Games’ online titles remain some of the biggest games in the industry, even as anticipation for Grand Theft Auto VI continues to grow. According to Ampere Analysis data shared through The Game Business, GTA Online reached 17.9 million players across PlayStation, Xbox, and Steam during March 2026. That figure reportedly excludes players using the Rockstar Games Launcher and Epic Games Store, meaning the actual player count is likely even higher. What makes the number even more impressive is how little it declined compared to February. The game only lost around 59,000 players month-over-month, proving Rockstar’s multiplayer juggernaut still has incredible staying power over a decade after launch. The report states GTA Online was the third most-played game of the month, sitting behind only Fortnite and Counter-Strike 2. GTA V Continues Climbing PlayStation Charts Sony’s latest PlayStation download charts also paint a strong picture for Rockstar’s games. On PS5, Grand Theft Auto V ranked as the third most-downloaded game in Europe during April 2026, improving one spot from the previous month. In North America, the game climbed from eighth place to seventh. The PS4 version also saw gains. GTA V moved from 14th to 9th place in Europe and from 14th to 12th in North America. Meanwhile, Red Dead Redemption 2 continued its surprising dominance on PS4. The western epic reportedly remained the most-downloaded PS4 title in both Europe and North America, continuing a streak that has lasted since last summer. Rockstar’s Older Games Still Print MoneyThe continued success of GTA Online helps explain why Rockstar and parent company Take-Two Interactive have kept supporting the game for so long. Recent discussions surrounding leaked Rockstar data have also sparked renewed conversation online about just how profitable GTA Online remains. Community reactions on Reddit highlighted claims that the game continues generating enormous revenue through microtransactions and GTA+. Players also pointed out the massive PlayStation audience, with many believing Sony remains Rockstar’s strongest console platform for online engagement. Even Red Dead Online — a mode often criticized for receiving limited support — still maintains a sizable player base years after Rockstar shifted resources away from it. GTA 6 Hype Hasn’t Slowed GTA OnlineOne of the most surprising takeaways is that excitement for GTA 6 does not appear to be hurting GTA Online’s numbers at all. If anything, the upcoming release seems to be driving more players back into Rockstar’s ecosystem. Fans continue grinding businesses, collecting cars, and revisiting Los Santos while waiting for Rockstar’s next major release. Rockstar has also continued rolling out smaller GTA Online updates and GTA+ refreshes throughout 2026, helping maintain player engagement between bigger announcements. With GTA 6 scheduled for release later this year, Rockstar now finds itself in a rare position: operating one of the biggest live-service games in the world while simultaneously preparing for what could become the biggest entertainment launch in history.
 -
Despite both games being years old and receiving fewer major updates than in their prime, Grand Theft Auto Online and Red Dead Redemption 2 are still pulling in massive player numbers in 2026. New data highlighted by RockstarINTEL shows that Rockstar Games’ online titles remain some of the biggest games in the industry, even as anticipation for Grand Theft Auto VI continues to grow. According to Ampere Analysis data shared through The Game Business, GTA Online reached 17.9 million players across PlayStation, Xbox, and Steam during March 2026. That figure reportedly excludes players using the Rockstar Games Launcher and Epic Games Store, meaning the actual player count is likely even higher. What makes the number even more impressive is how little it declined compared to February. The game only lost around 59,000 players month-over-month, proving Rockstar’s multiplayer juggernaut still has incredible staying power over a decade after launch. The report states GTA Online was the third most-played game of the month, sitting behind only Fortnite and Counter-Strike 2. GTA V Continues Climbing PlayStation Charts Sony’s latest PlayStation download charts also paint a strong picture for Rockstar’s games. On PS5, Grand Theft Auto V ranked as the third most-downloaded game in Europe during April 2026, improving one spot from the previous month. In North America, the game climbed from eighth place to seventh. The PS4 version also saw gains. GTA V moved from 14th to 9th place in Europe and from 14th to 12th in North America. Meanwhile, Red Dead Redemption 2 continued its surprising dominance on PS4. The western epic reportedly remained the most-downloaded PS4 title in both Europe and North America, continuing a streak that has lasted since last summer. Rockstar’s Older Games Still Print MoneyThe continued success of GTA Online helps explain why Rockstar and parent company Take-Two Interactive have kept supporting the game for so long. Recent discussions surrounding leaked Rockstar data have also sparked renewed conversation online about just how profitable GTA Online remains. Community reactions on Reddit highlighted claims that the game continues generating enormous revenue through microtransactions and GTA+. Players also pointed out the massive PlayStation audience, with many believing Sony remains Rockstar’s strongest console platform for online engagement. Even Red Dead Online — a mode often criticized for receiving limited support — still maintains a sizable player base years after Rockstar shifted resources away from it. GTA 6 Hype Hasn’t Slowed GTA OnlineOne of the most surprising takeaways is that excitement for GTA 6 does not appear to be hurting GTA Online’s numbers at all. If anything, the upcoming release seems to be driving more players back into Rockstar’s ecosystem. Fans continue grinding businesses, collecting cars, and revisiting Los Santos while waiting for Rockstar’s next major release. Rockstar has also continued rolling out smaller GTA Online updates and GTA+ refreshes throughout 2026, helping maintain player engagement between bigger announcements. With GTA 6 scheduled for release later this year, Rockstar now finds itself in a rare position: operating one of the biggest live-service games in the world while simultaneously preparing for what could become the biggest entertainment launch in history. View full article