





Rockstar
Administrators
-
Joined
-
Last visited
-
Currently
Viewing GTA 6 Pre-Orders Are Running 148% Ahead of Any Major Game in Six Years in category Articles: Gaming News
Everything posted by Rockstar
-
 Publisher Meridiem Games has announced a March 2026 release date for action-adventure dark fantasy game The Bearer & the Last Flame; it has also revealed that the game will be available digitally and physically. Developed by Dark Reaper Studio, the game is inspired by classic Soulslike titles and set in a world ravaged by death. In a land where man has become extinct, darkness has ravaged all other signs of life. The darkest creatures and soulless sorcerers live in the underworld, where the bloodthirsty warriors are seeking rest. Only faint traces of light remain in the world: a glimmer of hope emerges from the high mountains of Selender. A living soul has received its quest: carry the last flame, illuminate the dark lands, and return fearsome creatures to the abyss. These are the game’s key features, via Meridiem: Relive the essence of classic Soulslike games — experience strategic combat in a world full of mysteries and a deep story told through the environment and the enigmatic characters you encounter on your journey. Choose from various characters — forge your destiny in this unforgettable adventure. Select your hero from different characters originating from unique worlds. Challenging difficulty — master a combat system where every strike matters. Face demanding enemies with mechanics that reward precision, strategy, and constant learning. Variety of enemies across different environments — confront a vast range of unique creatures, including night beasts, demons, and soulless undead, each designed to exploit your weaknesses. Memorable enemies and bosses — prepare for epic battles against terrifying creatures and colossal guardians. Each encounter is a unique challenge filled with tension and reward. Choose your fighting style — customize your strategy with an arsenal of over 200 unique weapons. Master melee combat, ranged attacks, or the arcane power of magic. Explore the vast landscapes of Hyperborea — traverse dungeons, caves, and castles in an epic medieval fantasy adventure. A fresh musical journey by Francisco Arroyo — an original soundtrack that brings a distinctive musical style to the game experience. The game will launch in two physical editions for PlayStation 5: a standard edition and The Knight’s Edition, which includes the game, a game guide, and a special sleeve. Developed by Dark Reaper Studio and published by Meridiem, The Bearer & the Last Flame will be released digitally for PC via Steam and PlayStation 5 on March 6, 2026; there will be two physical editions for PlayStation 5, launching the same day.
 -
After many years, Final Fantasy X-2 International + Last Mission has received a fully English version for PS2. This game features many exclusive features, such as new dresspheres, a new garment grid, new monsters, a new secret game mode called Last Mission, an extra menu that allows you to capture monsters, train them, learn their stories, and use them in battles (fully playable), an exclusive tournament with powerful monsters, and new missions. This project was created by Gledson999 using tools he developed himself, but it also included image tools by Gdkchan and kernel text tools by Nameless. kr_ps2 also contributed, making several important fixes for the game’s smooth operation. He was also responsible for discovering and correcting the hardware lock-up issue and the RAM limitation in the game. FFX_ISOPatcher.zip
-
Four new games have arrived onto the Nintendo Switch Online retro catalog service. Two are NES games, and two are Game Boy titles. Available to play now for subscribers on the NES front are Battletoads and Ninja Gaiden: II The Dark Sword of Chaos. As for the Game Boy games, Kid Icarus: of Myths and Monsters and Bionic Commando have been added to the lineup.
-
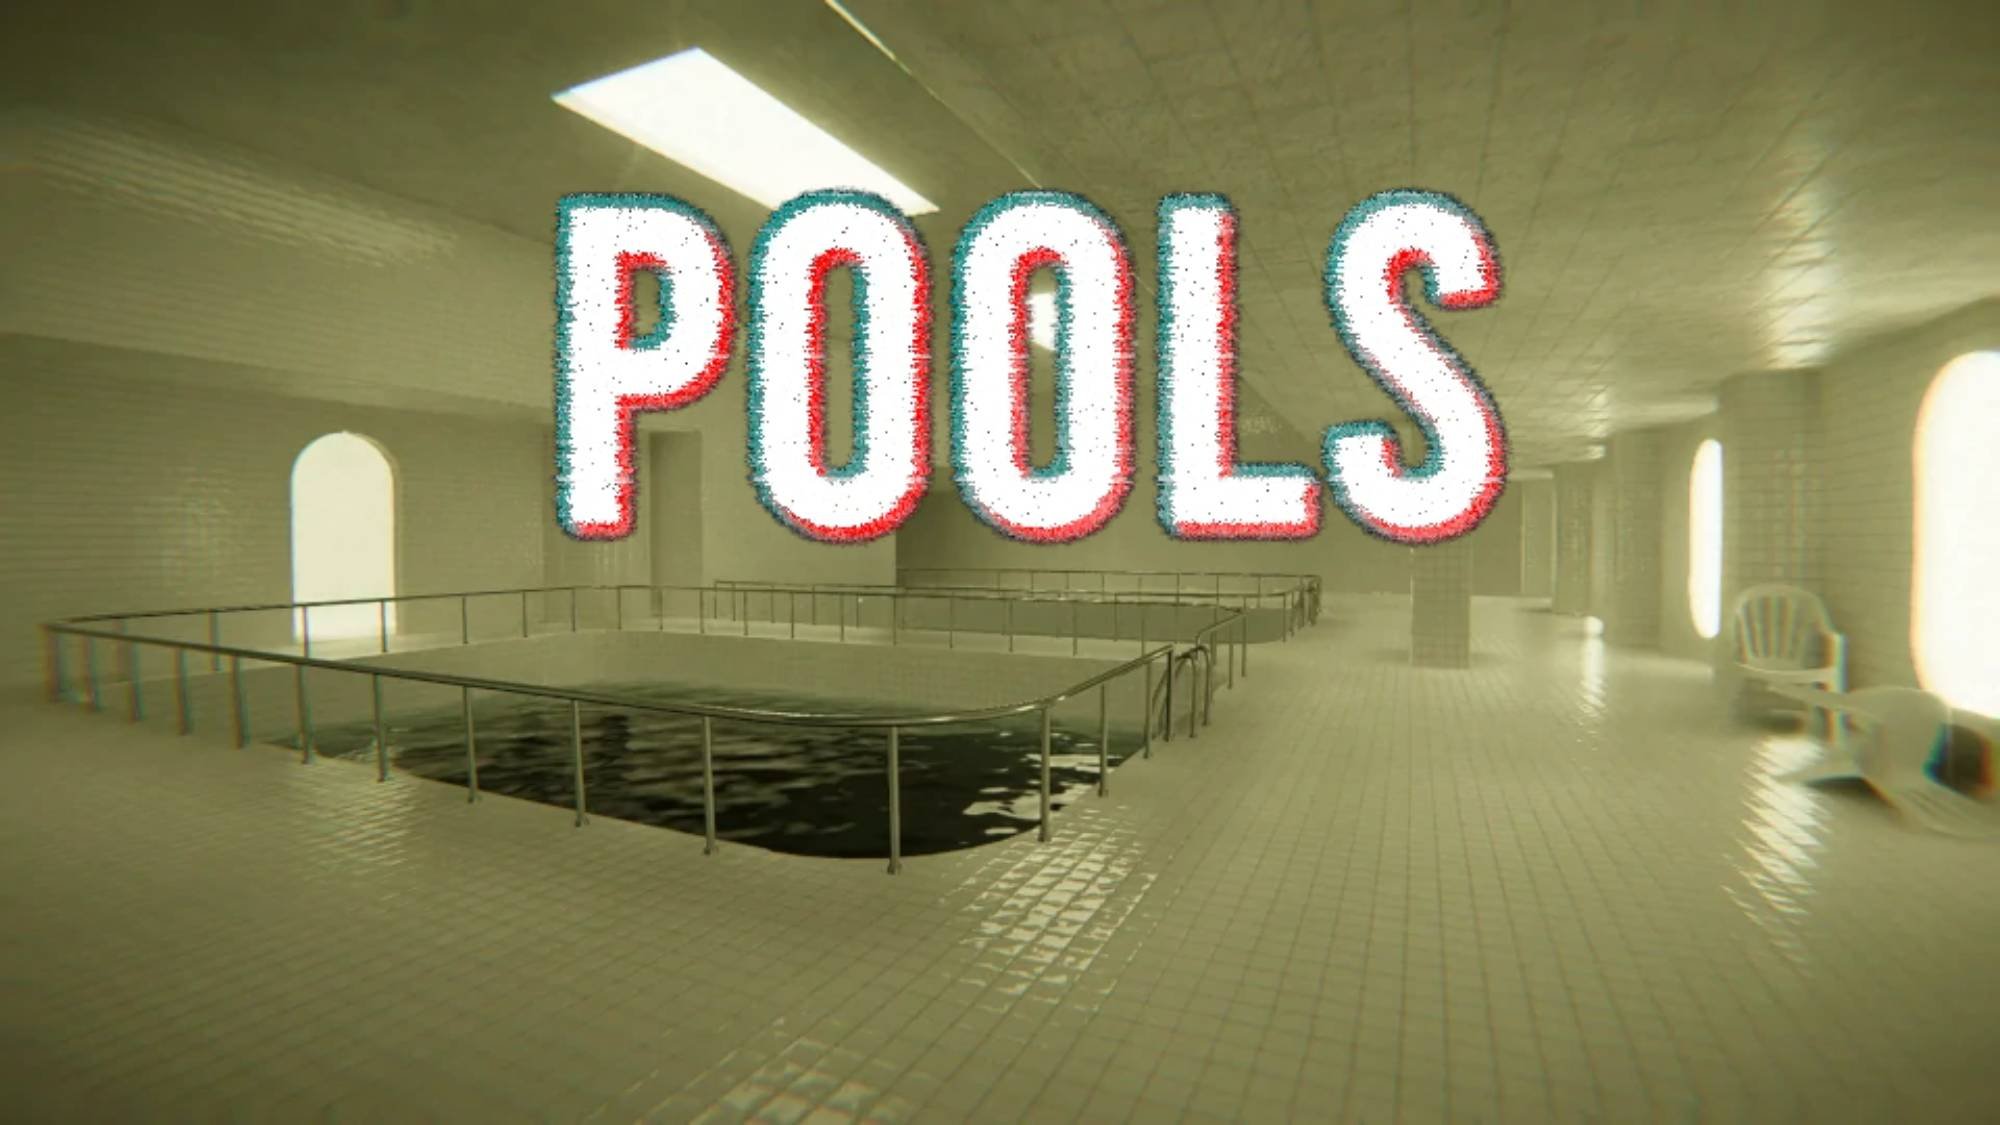 POOLS is more of an experience than a game. You can technically see it through to completion in about an hour. But amid the brevity of our time with it, there's a palpable sense of atmosphere that'll leave you on edge. POOLS is an off-kilter horror walking simulator where you must navigate complex mazes of tiled hallways, pools, and slides. There are no enemies. There’s no time limit. There are no mechanics beyond walking or running around these hallways. But the game taps into the niche liminal horror of the "Backrooms" concept, oscillating between tight dark corridors and abnormally large spaces, with bright water slides almost acting as jump scares. There’s something incredibly unnerving about the game’s six levels, which expertly manage to scare the crap out of you without any form of traditional "scary" stuff. It's purely vibes, and they'll soak into your skin. Visually, it's a real looker on the PS5 and PS5 Pro, emphasised by a brilliant use of lighting. The sound design, too, though minimal, can really raise the hairs on the back of your neck. We scoffed at the game’s approach when we first booted it up, but within 20 minutes, we were twitching at the nearby sounds of sloshing water, and nervously approaching giant inflatable ducks as they bobbed around. There's no score here, so you almost start to think you're hearing things as you wade through the water. It’s a creepy experience on PS5, but it’s taken to a new level on PSVR2. Mechanically, there isn’t much difference other than the ability to physically climb up ladders with the use of the Sense controllers. However, Sony’s headset really lends itself to the scale of the game. We peered down seemingly endless pits, and twitched around to the sight of ladders being tucked into vents by unseen beings. And there's next to no visual disparity between PSVR2 and the flat screen version, making this one of the best visual showcases on Sony's headset. Similar to some other PSVR2 titles, like Kayak VR: Mirage, POOLS is a thin gameplay experience, but you aren’t there for that. You’re there to be transported somewhere else. In Kayak VR, it's beautiful vistas. In POOLS, it’s creepy tiled hallways. So while it’s a short-lived experience, it’s one we couldn’t help but admire. It certainly caters to a niche audience, but it quickly creates a unique and tense atmosphere that plays with your head, even more so when you have the PSVR2 strapped to it.
 -
 Just two weeks to the day after its PS5, PS4 release, Call of Duty: Black Ops 7 is already on sale on the PS Store. This is a separate offer from the huge PS Store Black Friday sale, and it's only live until midnight on Tuesday, 2nd December 2025. Between now and then, you can save 15% on the base version of the game, making it £59.49 / $59.49. This is an incredibly quick turnaround from a full-priced release to a sale, with the game having only been available for 14 days. Compared to past entries in the series, Black Ops 7 has been selling poorly and below the expectations of Activision. Its main competitor, Battlefield 6, is comfortably outselling it, and it's recording the franchise's worst launch in history in some countries. In our Call of Duty: Black Ops 7 PS5 review, we gave the game a 6/10 and concluded: "The most ridiculous Call of Duty has ever been, all of Black Ops 7’s multiplayer strengths are overshadowed by the silliest campaign in the franchise’s history." Are you tempted to pick Black Ops 7 up at £10 / $10 cheaper? Let us know in the comments below.
 -
Just two weeks to the day after its PS5, PS4 release, Call of Duty: Black Ops 7 is already on sale on the PS Store. This is a separate offer from the huge PS Store Black Friday sale, and it's only live until midnight on Tuesday, 2nd December 2025. Between now and then, you can save 15% on the base version of the game, making it £59.49 / $59.49. This is an incredibly quick turnaround from a full-priced release to a sale, with the game having only been available for 14 days. Compared to past entries in the series, Black Ops 7 has been selling poorly and below the expectations of Activision. Its main competitor, Battlefield 6, is comfortably outselling it, and it's recording the franchise's worst launch in history in some countries. In our Call of Duty: Black Ops 7 PS5 review, we gave the game a 6/10 and concluded: "The most ridiculous Call of Duty has ever been, all of Black Ops 7’s multiplayer strengths are overshadowed by the silliest campaign in the franchise’s history." Are you tempted to pick Black Ops 7 up at £10 / $10 cheaper? Let us know in the comments below. View full article
-
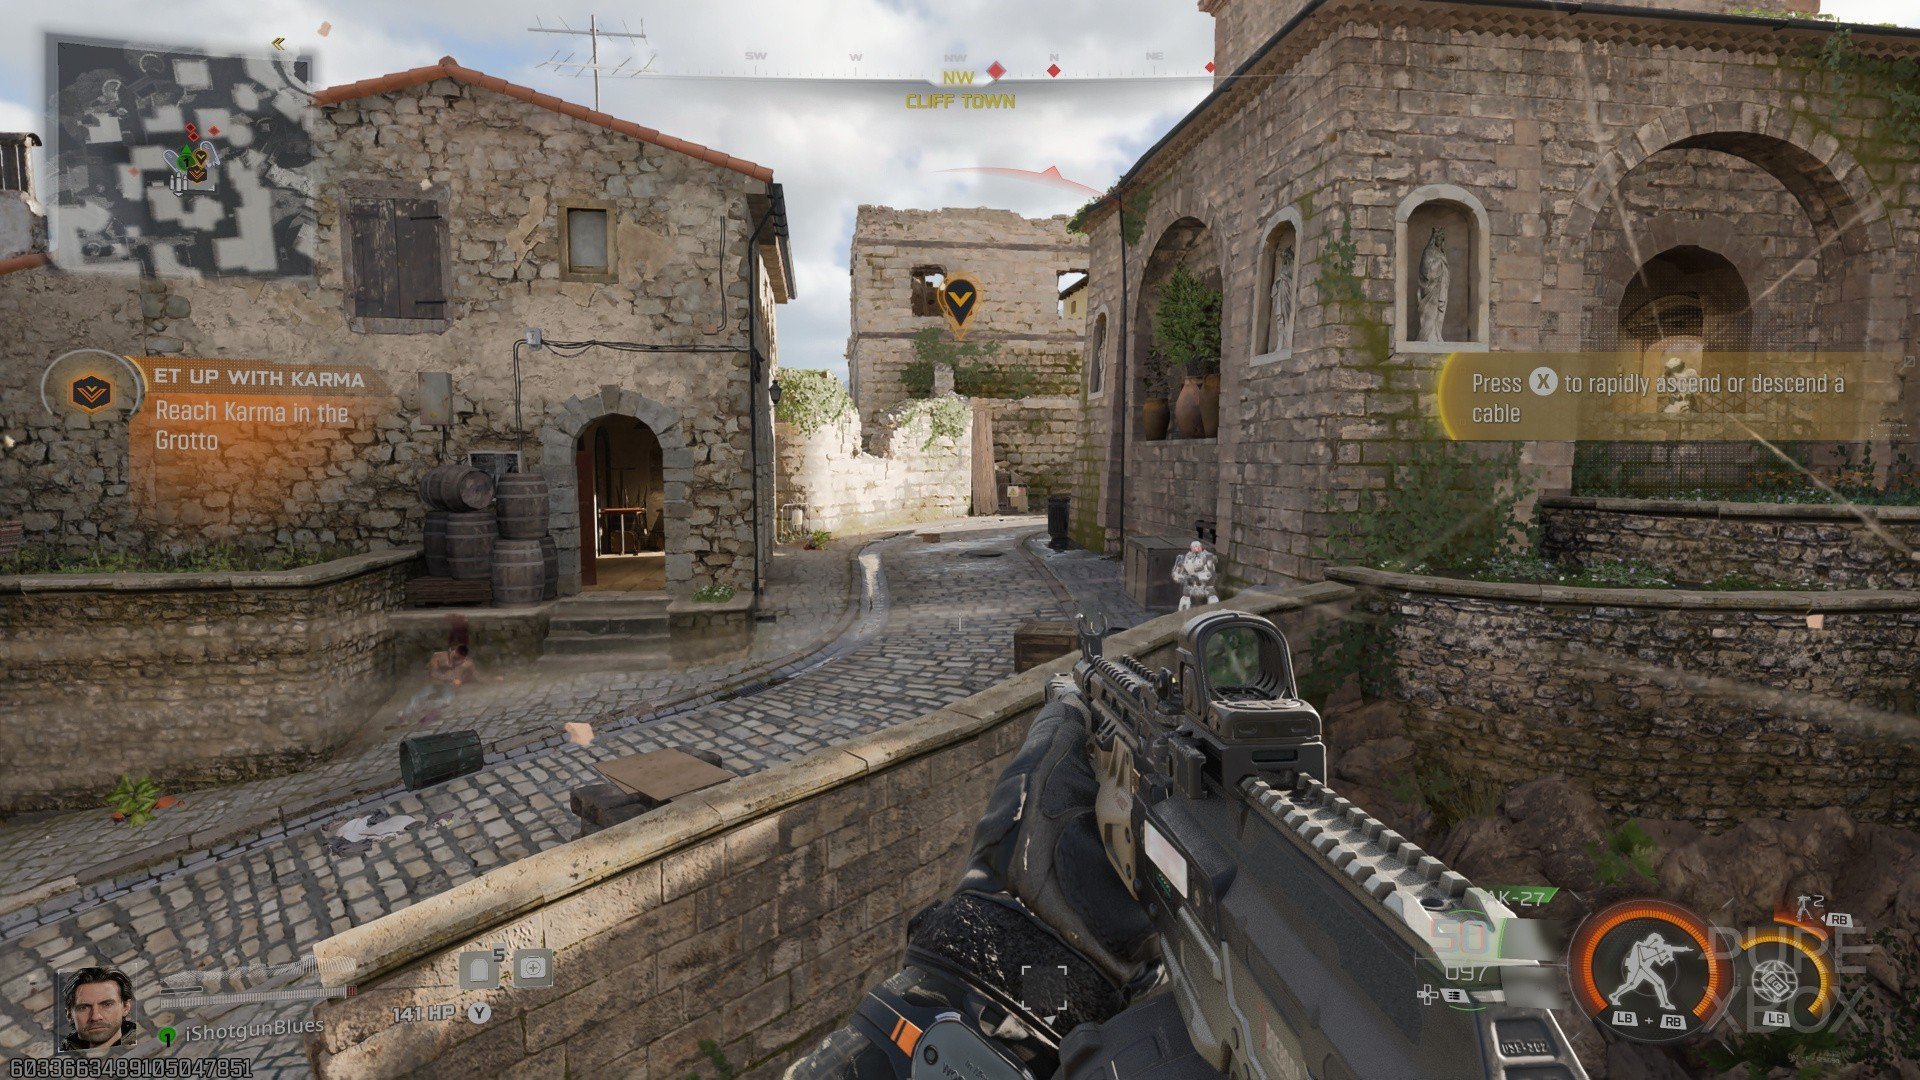 Xbox's big Black Friday sale has been live for more than a week now, featuring some massive AAA titles from a broad range of publishers and developers. One game that seemingly missed the Black Friday boat — mostly due to its very recent release date — was Call of Duty: Black Ops 7, but Microsoft has decided to put it on special discount for the coming weekend only. Yep, live now on the Xbox Store (and indeed PlayStation Network), Black Ops 7 is currently 15% off; the game's first digital discount. The new Call of Duty title is on offer until December 1st, a few days before Xbox's main Black Friday sale ends on December 3rd. Call of Duty: Black Ops 7 Cross-Gen Bundle (Xbox Store) This perhaps isn't the best sign for the game's initial sales performance, given that it only came out two weeks ago today, but it is only 15% off - and the promotion runs for just three days in total. Either way, the sale is live now on both Xbox and PSN if anyone wants to grab a digital copy of the game.
 -
Xbox's big Black Friday sale has been live for more than a week now, featuring some massive AAA titles from a broad range of publishers and developers. One game that seemingly missed the Black Friday boat — mostly due to its very recent release date — was Call of Duty: Black Ops 7, but Microsoft has decided to put it on special discount for the coming weekend only. Yep, live now on the Xbox Store (and indeed PlayStation Network), Black Ops 7 is currently 15% off; the game's first digital discount. The new Call of Duty title is on offer until December 1st, a few days before Xbox's main Black Friday sale ends on December 3rd. Call of Duty: Black Ops 7 Cross-Gen Bundle (Xbox Store) This perhaps isn't the best sign for the game's initial sales performance, given that it only came out two weeks ago today, but it is only 15% off - and the promotion runs for just three days in total. Either way, the sale is live now on both Xbox and PSN if anyone wants to grab a digital copy of the game. View full article
-
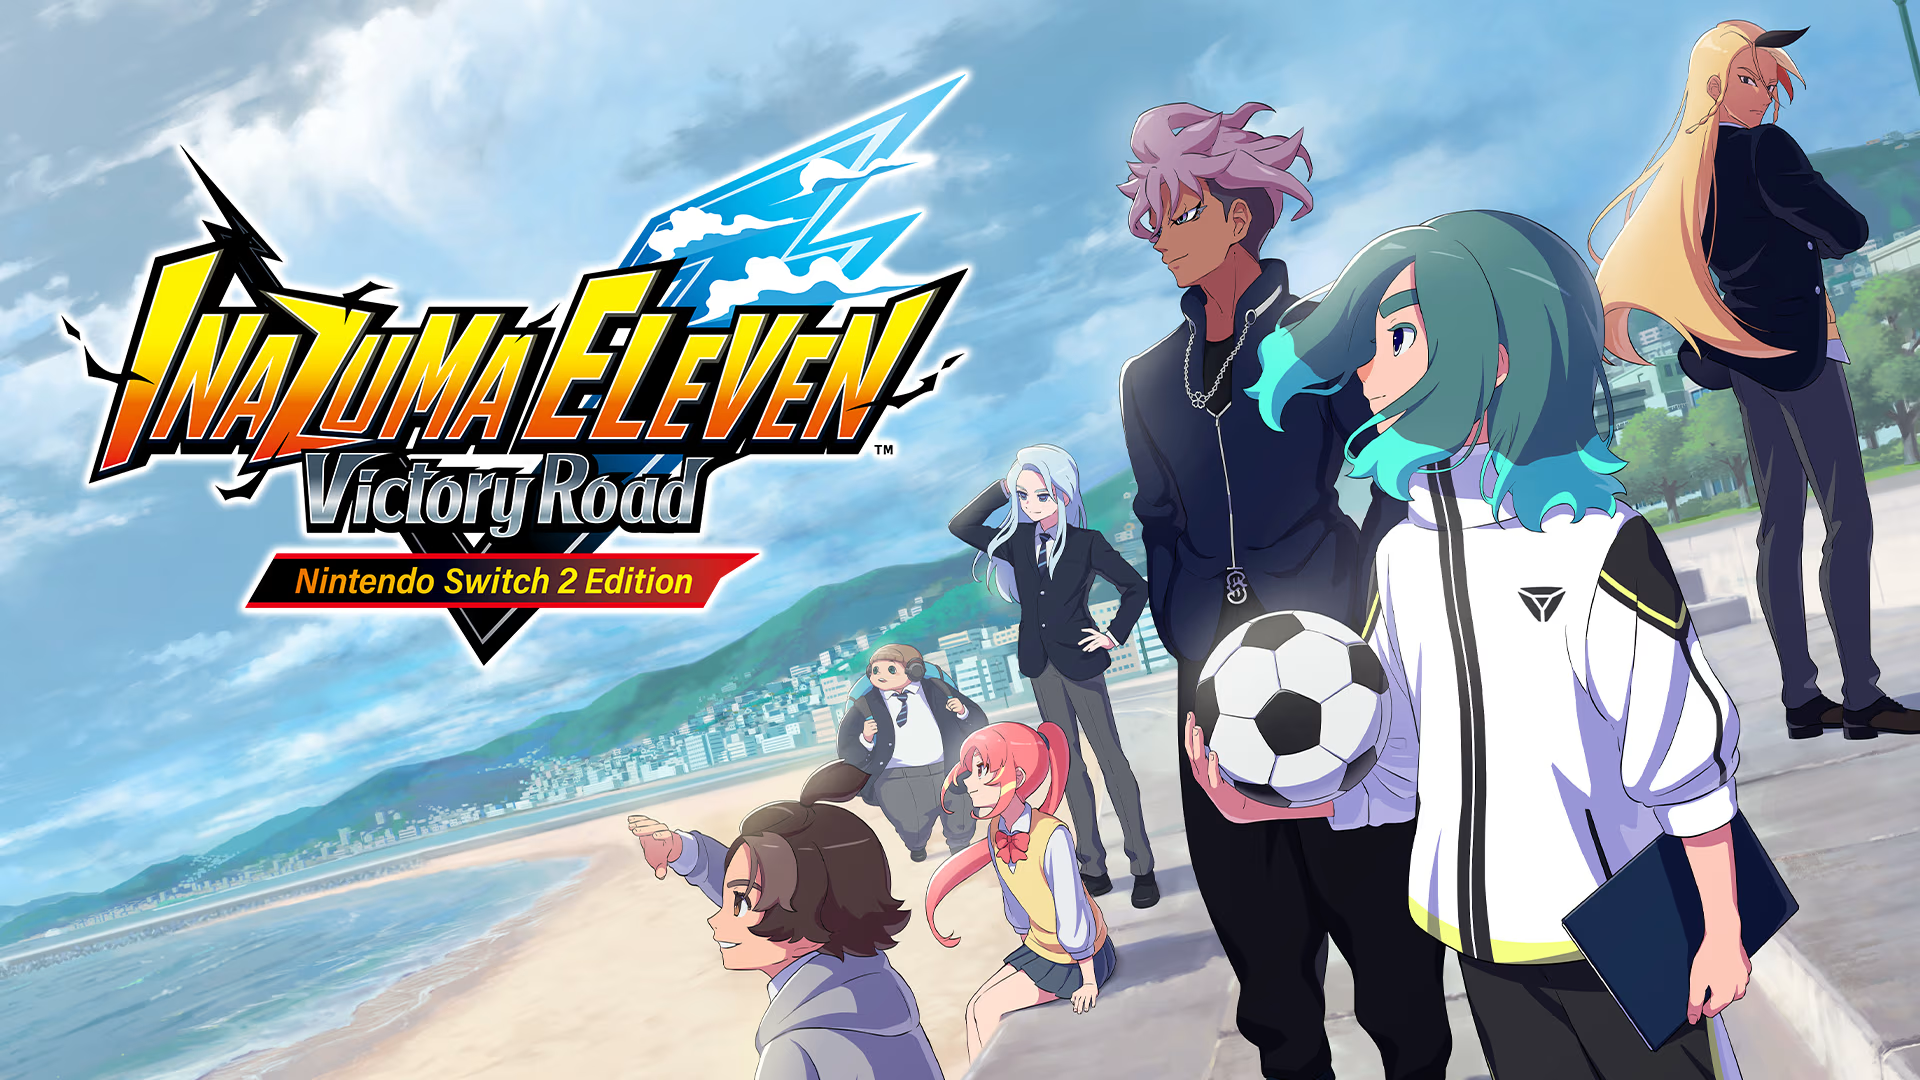 If you’ve spent years of your life waiting for Metroid Prime 4, Silksong, or one of the many other highly anticipated games that spent substantial time on the horizon, just remember that it could always be worse — you could be an Inazuma Eleven fan. Developer Level-5’s RPG-tinged take on football (or soccer, if that’s your bag) started life back on the DS, where the original game and its sequels cemented the franchise’s status as a refreshingly wacky alternative to the hyper-grounded likes of genre counterparts like FIFA or Pro Evolution Soccer. That success continued into the 3DS era with the Inazuma Eleven: GO games, and in 2016 that the company revealed Inazuma Eleven: Ares as the franchise’s exciting next chapter. Unfortunately, Inazuma Eleven: Ares didn’t hit its original 2018 launch window target. It was delayed. And then delayed again. And again, again, again. As years went by, amid changes to the project in name, scope, and gameplay — and a frightening period in which a report indicated that Level-5 was pulling away from English game releases altogether — it was hard to hold out hope for Inazuma Eleven’s chances of returning to the field. Captured on Nintendo Switch 2 (Handheld/Undocked) Yet, here it is. Nearly 12 years since the last mainline entry, the newly-renamed Inazuma Eleven: Victory Road has finally been released on Switch, Switch 2, and other platforms. It’s more of a relief than anything to finally have it out, but can a game with such an agonising lead-up to launch possibly live up to the hype? I’m happy to report that this return to the classic football franchise mostly delivers the goods and then some. As with previous Inazuma Eleven titles, Victory Road’s big claim to fame is its core football gameplay. Across each of the game’s various modes, you build and customise teams of players with all sorts of specialised skills for the sole purpose of duking it out on the pitch against other teams. Matches follow the tried-and-true hallmarks of popular football games, with the added wrinkle of characters being able to pull off over-the-top, RPG-style moves that would most certainly get them disqualified in any sort of real-world scenario. It’s classic Inazuma Eleven gameplay at its finest, with a staggering level of system depth and customisability that will feel rewarding to veterans and, admittedly, a bit overwhelming to newcomers. Level-5 does an adequate job of spoonfeeding the game’s most basic mechanics via Story Mode and optional tutorials, but for every concept that’s clearly explained, there’s another that’s left annoyingly opaque. It’s no stretch to say that having a solid understanding, let alone mastery, of all of the game’s intricate systems can only be accomplished with a significant time investment. Captured on Nintendo Switch 2 (Handheld/Undocked) Fortunately, there are plenty of ways to spend time getting to know Victory Road. This long-awaited release can be summed up in one word: big. The game boasts two full-fat single-player campaigns, along with a bunch of side modes, including a social simulation-style town builder, as well as a robust PvP ecosystem for online matches. It’s not strictly necessary to start with one particular mode over the others, but Story Mode feels like the most solid landing spot to start your journey. It follows new series protagonist Destin Billows (or Unmei Sasanami if you toggle to the Romanised Japanese character names), a teenager and new transfer to Nagumohara Junior High School. A former child athlete who was diagnosed with a heart condition, Destin has turned his back on his dream of playing football. However, a series of chance encounters with his new classmates reignites his passion for the sport, and he embarks on a challenging quest to restore the school’s long-neglected football club, build a team of unlikely star athletes, and take on Japan’s finest: Raimon. Captured on Nintendo Switch 2 (Handheld/Undocked) You control Destin and progress the plot via world exploration, traditional RPG-style battles, athlete-training minigames, and, of course, football matches. While the format will feel familiar to anyone who’s played an RPG before, and the mode-specific mechanics are pretty basic, it’s a solid little adventure that spices up the core football gameplay with a bunch of other activities. It also tells quite the compelling tale, with a cast of likeable, well-developed characters and a whole host of surprisingly emotional story beats. The production values are high as well, as the story features full English and Japanese voice-acting, a grandiose soundtrack, and a ton of beautiful, fully-animated cutscenes courtesy of anime studio MAPPA. If there’s a major downside to Victory Road’s Story Mode, it’s that the pacing is all over the place. While it’s nice to have such a meaty campaign to progress through, there’s a feeling at times that everything is more long-winded than it needs to be. The basic RPG battles and minigames, while generally entertaining, can get pretty repetitive by the time the late-game grind sets in. There’s one point in the story where you’re scouting new team members, and you have to play the same slow-paced passing minigame a whopping 15 times in a row. Some of the fat could have been trimmed here. Captured on Nintendo Switch 2 (Docked) Perhaps Story Mode’s most egregious pacing issue, however, is that it takes a surprisingly long time to actually start playing football matches with any level of frequency. The start of the mode is still entertaining enough on its own, but, strangely, you have to spend a decent handful of hours before football matches start factoring into the story in any meaningful capacity. That said, once it really gets going, Story Mode is a pretty fun ride all the way through its satisfying conclusion. If Story Mode wasn’t enough, Victory Road also features a secondary campaign with its own distinct story and progression in the way of Chronicle Mode. This follows Victorio Cryptix, a boy from a post-apocalyptic future who travels to the past to assemble a team of the best football players from Inazuma Eleven history in the hopes of stopping the threat to his time. Victorio’s journey retells the events of all six previous Inazuma Eleven mainline entries in visual novel format, and sees you progressing through all of the major story matches from each game. In essence, Chronicle Mode contains abridged versions of the series’ entire history of campaigns — an impressive feat that will tide voracious players over with hours upon hours of content. Captured on Nintendo Switch 2 (Handheld/Undocked) That said, the mode can feel rather repetitive as it lacks Story Mode's gameplay variety and requires that each match be completed twice (once with a set story team and once with your own custom team) to progress. Additionally, crucial bits of context for each historic match are often glossed over, making it far from the ideal way to experience previous games' narratives. It’s hard to complain too much, though, as having a bunch of the franchise’s history easily accessible in any form feels like gravy more than anything else. If you’re still not satisfied, beyond the game’s two main campaigns are a plethora of side modes to sink even more time into. Battle Bay Stadium features playable dream matches between powerful teams from series history. Kizuna Station allows you to build your own Bond Town with collectible items and objects and interact with other players off the pitch. Meanwhile, Competition Mode lets you play free matches against the computer or other players online, testing the mettle of your hard-trained team. Captured on Nintendo Switch 2 (Docked) Crucially, progression in most of Victory Road’s modes feeds into each other as you share obtained characters, items, and currencies within your central profile. That means that there’s really no wrong way to pass your time, and this freedom of choice in how you interact with its wealth of riches is commendable. Unfortunately, the game has far too many segmented currencies for obtaining items and summoning new characters to your roster, and determining what to do to gain a certain currency is way more complicated than it needs to be. Performance-wise, Victory Road runs very smoothly on the Switch 2 with no visible frame-rate drops from its 60fps target during my time playing. Controlling everything feels just as responsive as it should. The game also looks decent graphically, though there’s a disappointing amount of shimmer in the background of various environments. Thankfully, the game’s clean and colourful art style keeps its visual identity strong and enjoyable to look at. ConclusionHaving more content does not necessarily equal a better game, but there’s no denying that Inazuma Eleven: Victory Road’s massive wealth of modes, options, and gameplay variety make it feel like the franchise’s most premium experience yet. Between a fun and heartfelt story mode, a second story mode that includes the highlights of all previous games, and a bunch of additional side content along with robust PvP systems for longevity, it really does feel like you could play Victory Road forever. At the end of the day, though, it all comes down to that core loop of teambuilding and playing football matches, and Victory Road’s take on the series’ trademark RPG-esque customisability and intuitive action on the pitch feels just as fresh and stylish as ever. Perhaps all those delays really were worth it.
 -
 Little Rocket Lab is a sweet pixel art automation game from No More Robots and Teenage Astronauts. It arrived on Steam and Xbox last month, and we have been wondering when a Switch release would follow ever since. Well, it's coming real soon. What's more, there's a Switch 2 Edition in tow. Little Rocket Lab - Nintendo Switch 2 Edition, and its Switch 1 counterpart, will be available on the eShop from 10th December for £15.99 / $19.99 (or as a free upgrade for those who make the jump between systems down the road), and it boasts some pretty slick performance on the new hardware. Alongside the promise of boosted resolution, Teenage Astronauts have also got things running at a sweet 120fps — so you know those conveyor belts are going to be looking smooth as anything. It's not necessarily the kind of game that we can imagine being drastically impacted by a triple-figure frame rate, but S2 Editions hitting those upper reaches are always a welcome sight. For those curious, this is a chilled little factory-building game, where you set out to transform your rundown family home into a prime site for rocket construction. To do so, you'll have to lay down transport, delegate machinery, and make the most of your surrounding resources, all while keeping the locals happy. You'll find a brief rundown of the game's key features and a handful of screenshots below: Images: No More Robots The first half of December is looking particularly rammed at the moment, but if you're after something to kick back with between the stresses of Metroid Prime 4 and Assassin's Creed Shadows, this might just end up fitting the bill.
 -
Little Rocket Lab is a sweet pixel art automation game from No More Robots and Teenage Astronauts. It arrived on Steam and Xbox last month, and we have been wondering when a Switch release would follow ever since. Well, it's coming real soon. What's more, there's a Switch 2 Edition in tow. Little Rocket Lab - Nintendo Switch 2 Edition, and its Switch 1 counterpart, will be available on the eShop from 10th December for £15.99 / $19.99 (or as a free upgrade for those who make the jump between systems down the road), and it boasts some pretty slick performance on the new hardware. Alongside the promise of boosted resolution, Teenage Astronauts have also got things running at a sweet 120fps — so you know those conveyor belts are going to be looking smooth as anything. It's not necessarily the kind of game that we can imagine being drastically impacted by a triple-figure frame rate, but S2 Editions hitting those upper reaches are always a welcome sight. For those curious, this is a chilled little factory-building game, where you set out to transform your rundown family home into a prime site for rocket construction. To do so, you'll have to lay down transport, delegate machinery, and make the most of your surrounding resources, all while keeping the locals happy. You'll find a brief rundown of the game's key features and a handful of screenshots below: Images: No More Robots The first half of December is looking particularly rammed at the moment, but if you're after something to kick back with between the stresses of Metroid Prime 4 and Assassin's Creed Shadows, this might just end up fitting the bill. View full article
-
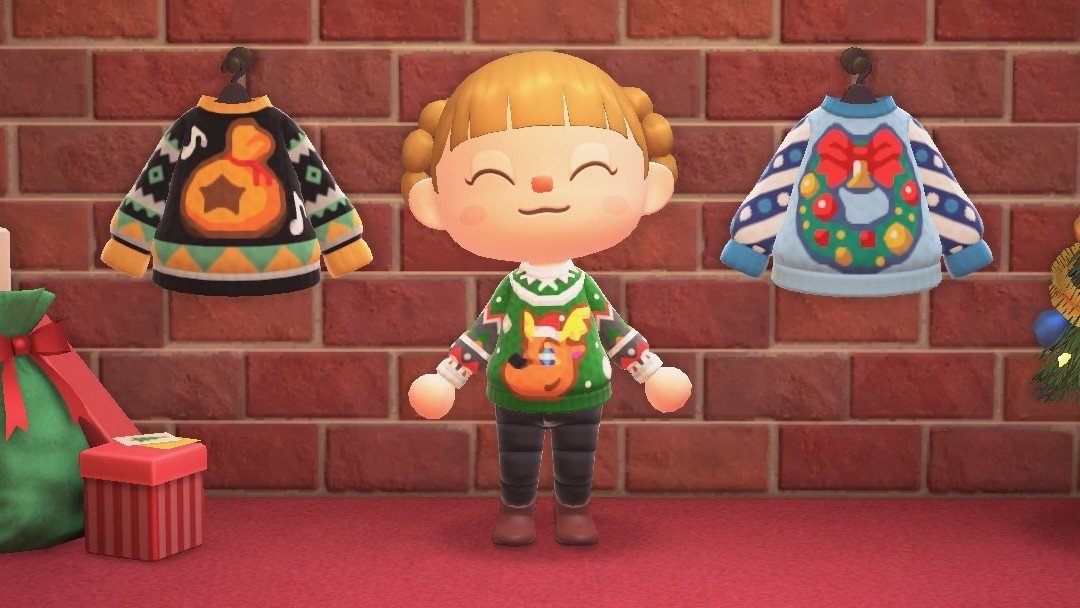 November might not be in the rear-view mirror yet, but Nintendo's already feeling festive with its new range of Animal Crossing: New Horizons in-game Christmas jumpers (or sweaters, if you'd prefer). If you want to deck out your New Horizons avatar in the holiday gear, you can pick up all three custom designs by heading to the company's official Ninten Island via Luna's Dream Address service (Island code: DA-6382-1459-4417), or by using the kiosk at the back of the Able Sisters' shop and entering the following Design-ID codes: Jingle Sweater: MO-T2XL-S43L-9JTW Image: Nintendo Bells Sweater: MO-5KL7-989R-MTP5 Image: Nintendo Wreath Sweater: MO-DP24-0WP7-6D2J Image: Nintendo Once you've saved the designs, you'll be able to bosh them on a sweater of your own via the Custom Designs app on your NookPhone. It sounds like the perfect way to ease yourself back into Animal Crossing: New Horizons before the game gets all manner of additions next year. As a reminder, the New Horizons - Nintendo Switch 2 Edition will arrive via a £4.19 / $4.99 upgrade path on 15th January, adding mouse mode and higher resolution alongside the chance to play online with more friends at once. On the same day, the free ver. 3.0 update will drop for Switch 1 and 2 users, including crossover content, a new hotel resort and more.
 -
November might not be in the rear-view mirror yet, but Nintendo's already feeling festive with its new range of Animal Crossing: New Horizons in-game Christmas jumpers (or sweaters, if you'd prefer). If you want to deck out your New Horizons avatar in the holiday gear, you can pick up all three custom designs by heading to the company's official Ninten Island via Luna's Dream Address service (Island code: DA-6382-1459-4417), or by using the kiosk at the back of the Able Sisters' shop and entering the following Design-ID codes: Jingle Sweater: MO-T2XL-S43L-9JTW Image: Nintendo Bells Sweater: MO-5KL7-989R-MTP5 Image: Nintendo Wreath Sweater: MO-DP24-0WP7-6D2J Image: Nintendo Once you've saved the designs, you'll be able to bosh them on a sweater of your own via the Custom Designs app on your NookPhone. It sounds like the perfect way to ease yourself back into Animal Crossing: New Horizons before the game gets all manner of additions next year. As a reminder, the New Horizons - Nintendo Switch 2 Edition will arrive via a £4.19 / $4.99 upgrade path on 15th January, adding mouse mode and higher resolution alongside the chance to play online with more friends at once. On the same day, the free ver. 3.0 update will drop for Switch 1 and 2 users, including crossover content, a new hotel resort and more. View full article
-
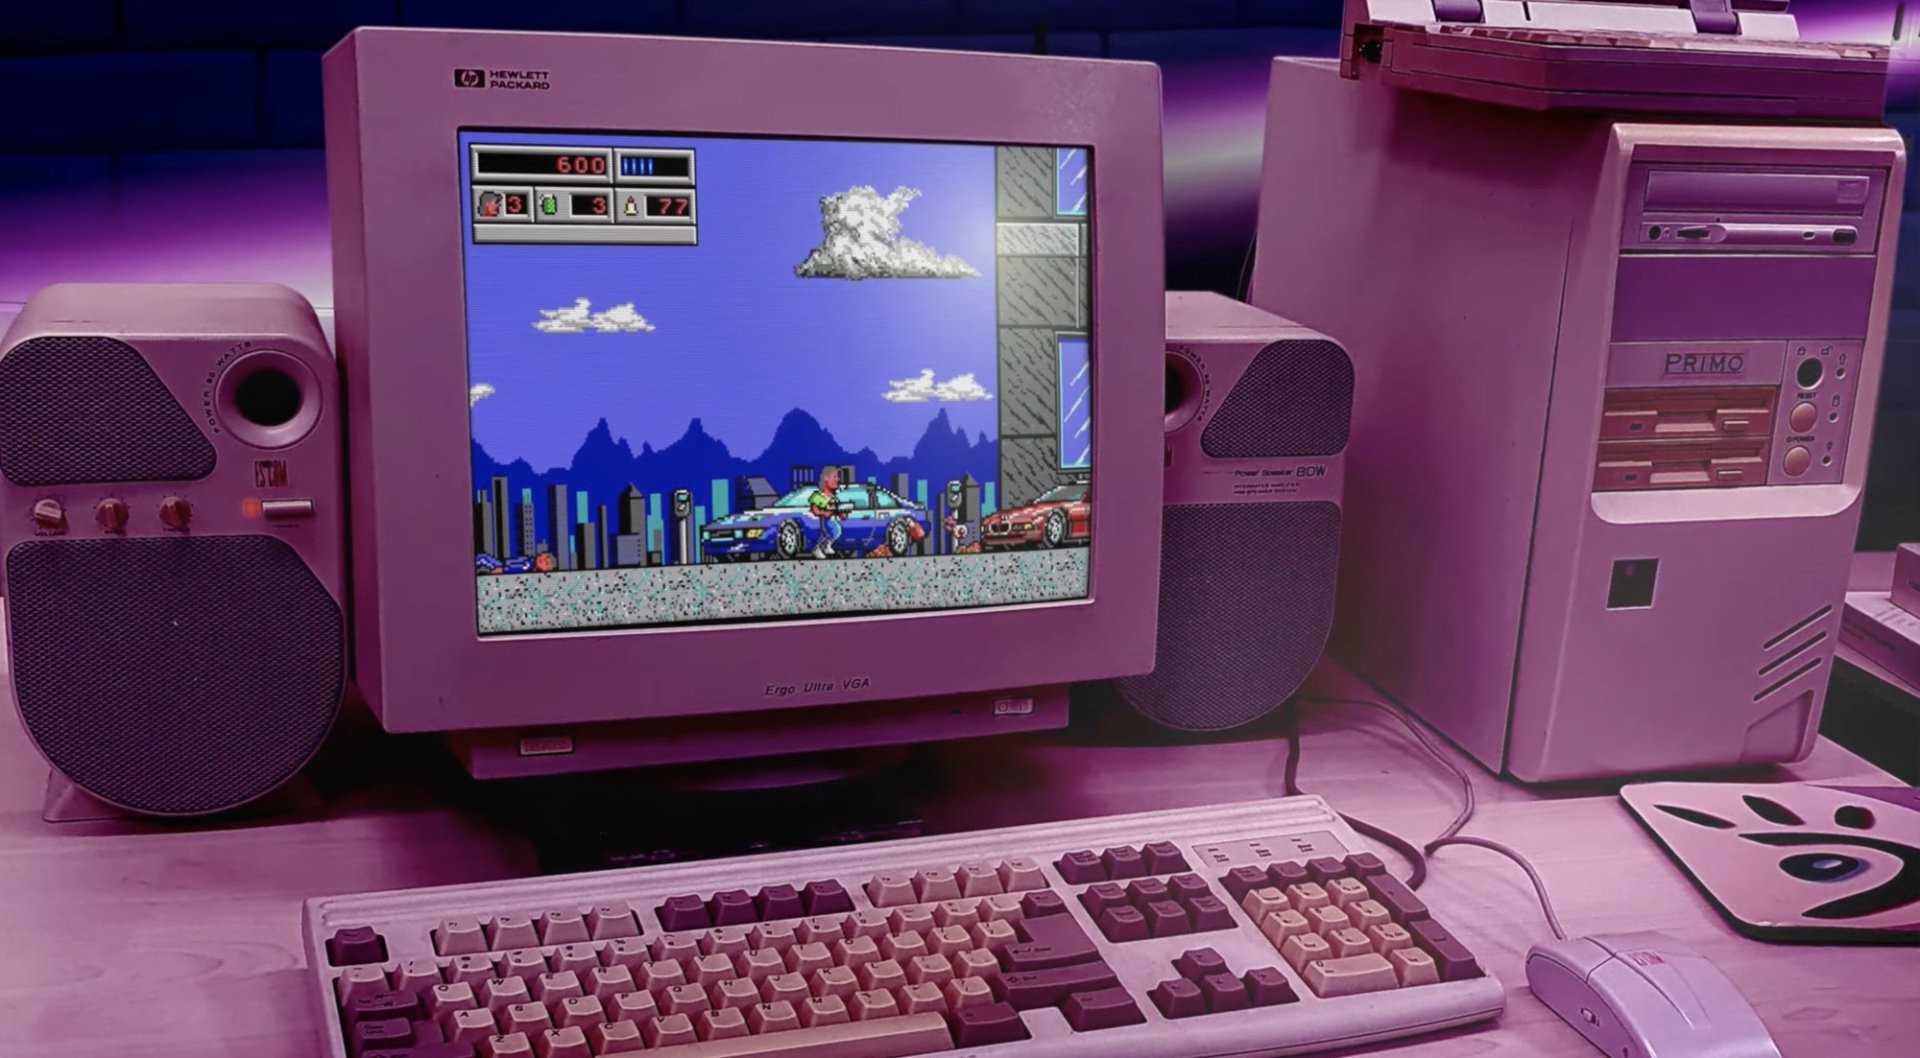 Update #2 [Fri 28th Nov 2025, 7am]: We now have a release date for Rigel Gameworks' BioMenace remaster. According to the developer and publisher, the game is now scheduled to launch on December 18th, 2025, and will be available to buy across both Steam and GOG. To coincide with this piece of news, a new trailer for the remaster has also been released, going over again what folks can expect from this new version of the 1993 Apogee title. This includes a better look at its newly improved graphics, parallax backgrounds, and controller support. You can watch the trailer below: Update #1 [Thu 10th Jul 2025, 2:30am]: Dosgamert has announced on social media that a demo for BioMenace Remastered is scheduled to drop tomorrow (Friday, July 11th). According to the trailer, the demo will include four levels from the finished game, allowing you to get "a feel" of what BioMenace Remastered is like, while the team continues working behind the scenes, producing Episode four of the game. This will be available to download from Steam, and interestingly, doesn't seem to be the only piece of news we've had about the project over the last two weeks or so. That's because the developer Rigel Gameworks has also recently produced a Q&A video and an FAQ, answering some of the common questions it has been getting about the project, such as why Apogee Entertainment aren't involved at all. In both of these, the developer states that they did approach Apogee to get involved, hoping to utilise the publisher's resources to bring the project to life, but that Apogee was simply too busy focusing on new IP. Nevertheless, Apogee did the team a solid, putting them in touch with the BioMenace creator Jim Norwood and agreeing to spread the word if he approved of the project. Norwood is the person who owns all the rights to the game today, and, according to the devs, has licensed the rights to the BioMenace Remastered team to go ahead with the project. The game is currently only scheduled for a Steam release, but Rigel Gameworks is also reportedly considering publishing on GOG, as well as other platforms like Nintendo Switch. The latter, however, will depend on the success of the PC release, as the team will need to invest in a devkit. Original Story: Apogee Software is a company that will probably be best known to most people for creating games like Duke Nukem and for publishing early Id Software titles like Commander Keen and Wolfenstein 3D. But that isn't all it had to offer the world of gaming. A fairly good example of this is 1993's BioMenace — a fun and colourful run 'n gun platformer that was built in Commander Keen's 'Keen Dreams' engine for MS-DOS and focused on a CIA operative, named Snake Logan, saving a city (and its residents) from an evil scientist named Dr. Mangle. Created by one of the future designers of Shadow Warrior James Norwood, and featuring music from the legendary composer Bobby Prince (of Wolfenstein 3D and Doom fame), the game has largely been confined to history in the decades since its release, becoming a footnote in the careers of those who worked on it. But that hasn't stopped a small cult following from developing around the title, especially among those who continue to fly the flag for the MS-DOS era of gaming. This likely explains why it was recently announced that the game is getting a remaster for Steam later this year. Images: Rigel Gameworks The new remaster was announced yesterday on social media by Dosgamert and is being developed by Rigel Gameworks. It will reportedly launch in Fall 2025 and will feature enhanced graphics and various other improvements, with the option also being included to switch between the original and remastered graphics for the purists among you. Here's are the features listed on its steam page: • Enhanced graphics including widescreen support, smooth scrolling & movement (60 FPS or higher), • and parallax scrolling backgrounds • Modernized HUD & UI • Switch between original and remastered graphics at any time • Controller support • Full Steam Deck support • Rebalanced difficulty • Gameplay tweaks and new mechanics, including weapon/grenade type switching and infinite lives • Mid-level saves and quick saving • Completion and stats tracking • Includes Bobby Prince's Original Soundtrack from the DOS version • Steam achievements If you want to wishlist the project ahead of its launch, the game is already has a Steam page, which you can visit here.
 -
Update #2 [Fri 28th Nov 2025, 7am]: We now have a release date for Rigel Gameworks' BioMenace remaster. According to the developer and publisher, the game is now scheduled to launch on December 18th, 2025, and will be available to buy across both Steam and GOG. To coincide with this piece of news, a new trailer for the remaster has also been released, going over again what folks can expect from this new version of the 1993 Apogee title. This includes a better look at its newly improved graphics, parallax backgrounds, and controller support. You can watch the trailer below: Update #1 [Thu 10th Jul 2025, 2:30am]: Dosgamert has announced on social media that a demo for BioMenace Remastered is scheduled to drop tomorrow (Friday, July 11th). According to the trailer, the demo will include four levels from the finished game, allowing you to get "a feel" of what BioMenace Remastered is like, while the team continues working behind the scenes, producing Episode four of the game. This will be available to download from Steam, and interestingly, doesn't seem to be the only piece of news we've had about the project over the last two weeks or so. That's because the developer Rigel Gameworks has also recently produced a Q&A video and an FAQ, answering some of the common questions it has been getting about the project, such as why Apogee Entertainment aren't involved at all. In both of these, the developer states that they did approach Apogee to get involved, hoping to utilise the publisher's resources to bring the project to life, but that Apogee was simply too busy focusing on new IP. Nevertheless, Apogee did the team a solid, putting them in touch with the BioMenace creator Jim Norwood and agreeing to spread the word if he approved of the project. Norwood is the person who owns all the rights to the game today, and, according to the devs, has licensed the rights to the BioMenace Remastered team to go ahead with the project. The game is currently only scheduled for a Steam release, but Rigel Gameworks is also reportedly considering publishing on GOG, as well as other platforms like Nintendo Switch. The latter, however, will depend on the success of the PC release, as the team will need to invest in a devkit. Original Story: Apogee Software is a company that will probably be best known to most people for creating games like Duke Nukem and for publishing early Id Software titles like Commander Keen and Wolfenstein 3D. But that isn't all it had to offer the world of gaming. A fairly good example of this is 1993's BioMenace — a fun and colourful run 'n gun platformer that was built in Commander Keen's 'Keen Dreams' engine for MS-DOS and focused on a CIA operative, named Snake Logan, saving a city (and its residents) from an evil scientist named Dr. Mangle. Created by one of the future designers of Shadow Warrior James Norwood, and featuring music from the legendary composer Bobby Prince (of Wolfenstein 3D and Doom fame), the game has largely been confined to history in the decades since its release, becoming a footnote in the careers of those who worked on it. But that hasn't stopped a small cult following from developing around the title, especially among those who continue to fly the flag for the MS-DOS era of gaming. This likely explains why it was recently announced that the game is getting a remaster for Steam later this year. Images: Rigel Gameworks The new remaster was announced yesterday on social media by Dosgamert and is being developed by Rigel Gameworks. It will reportedly launch in Fall 2025 and will feature enhanced graphics and various other improvements, with the option also being included to switch between the original and remastered graphics for the purists among you. Here's are the features listed on its steam page: • Enhanced graphics including widescreen support, smooth scrolling & movement (60 FPS or higher), • and parallax scrolling backgrounds • Modernized HUD & UI • Switch between original and remastered graphics at any time • Controller support • Full Steam Deck support • Rebalanced difficulty • Gameplay tweaks and new mechanics, including weapon/grenade type switching and infinite lives • Mid-level saves and quick saving • Completion and stats tracking • Includes Bobby Prince's Original Soundtrack from the DOS version • Steam achievements If you want to wishlist the project ahead of its launch, the game is already has a Steam page, which you can visit here. View full article
-
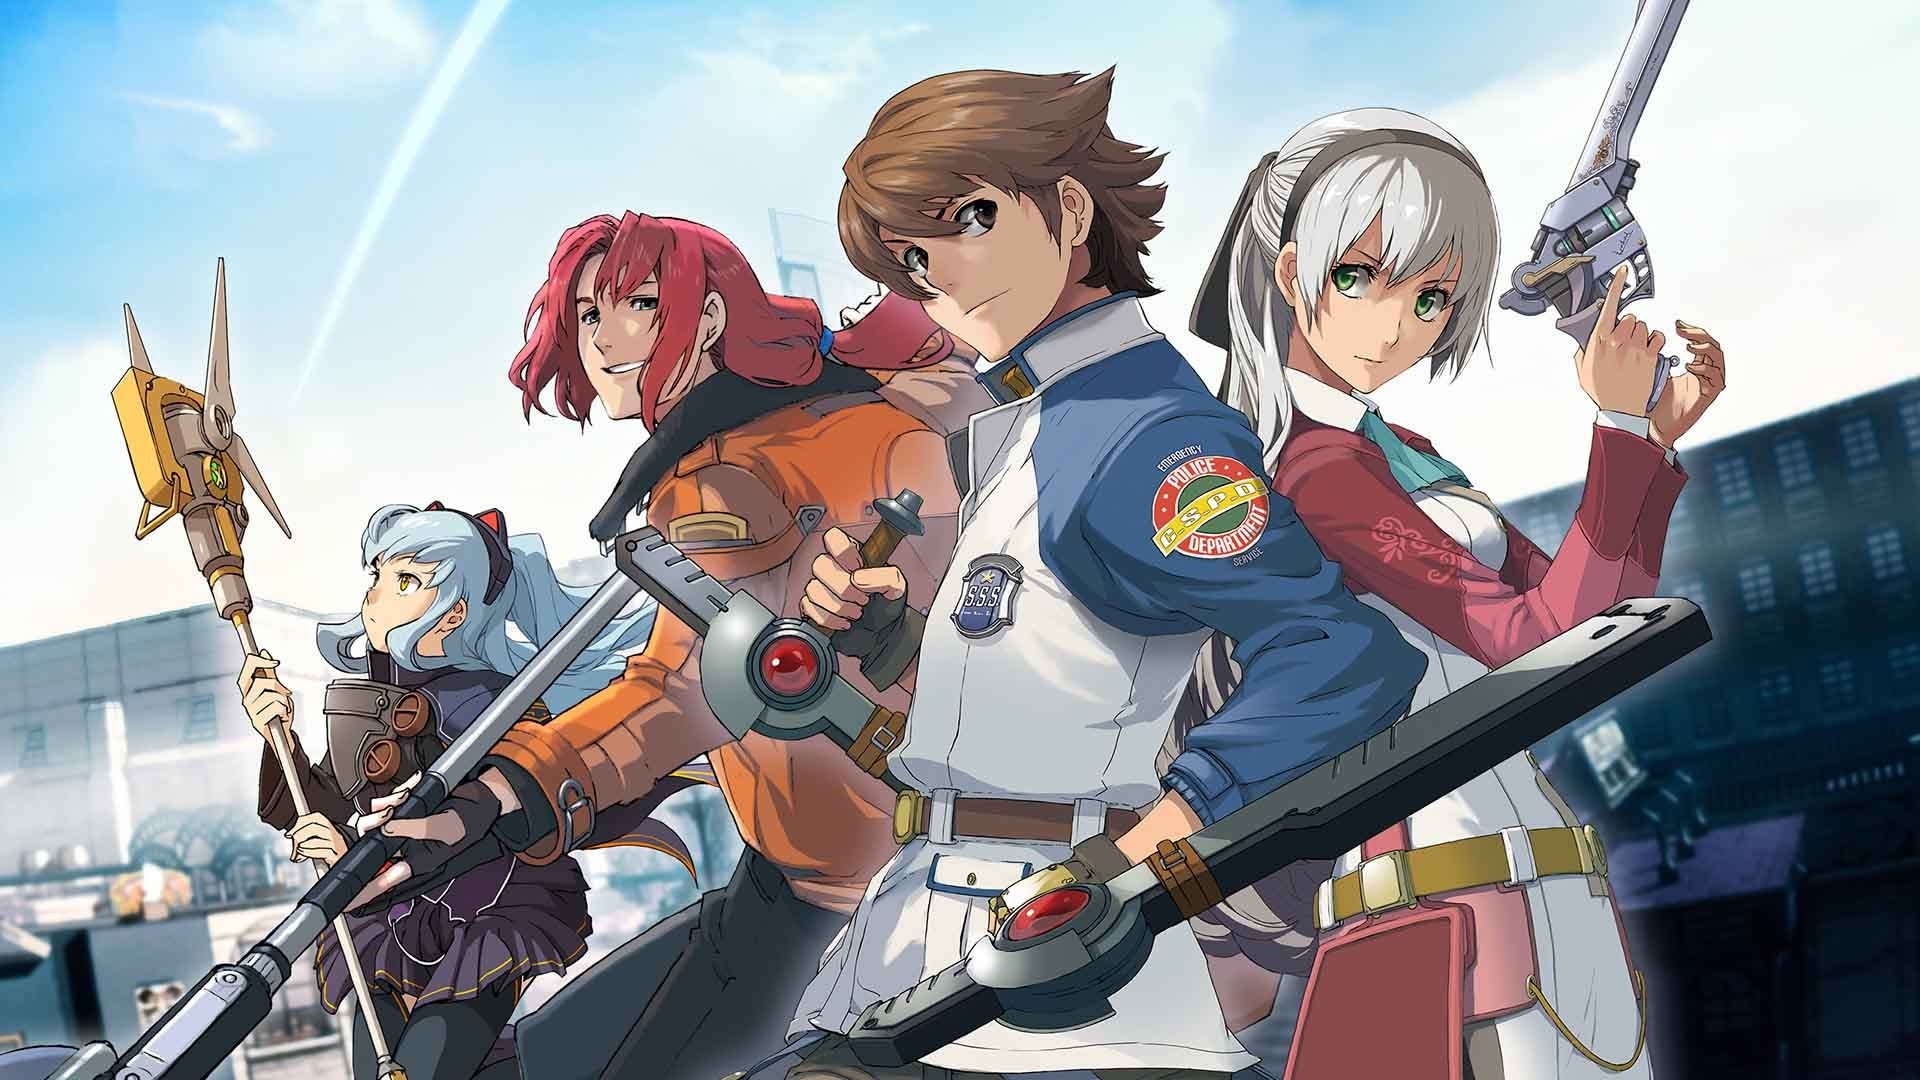 After the release of the near universally acclaimed Trails in the Sky 1st Chapter back in September, it was revealed that developer Falcom was already well into making another full-on remake with Trails in the Sky 2nd Chapter. Although we don't have an official release window for it, the remade sequel is expected to launch next year — and expectations are sky high (pun intended) given how beloved the original title is. But what happens after 2nd Chapter? Well, you'd think that Falcom's most obvious course of action would be to then remake the third game in the Sky trilogy — Trails in the Sky The 3rd. The name basically fits with the remakes and everything! Apparently, though, the situation isn't quite so clear cut. In a new interview with Dengeki Online (as translated by Automaton), Falcom CEO Toshihiro Kondo admits that the studio is actually divided on which classic Trails title they want to remake next. "We’re not sure whether to do Trails in the Sky The 3rd or Trails from Zero next – opinions are divided among us," he states. "Some of the members are saying that it would be better to do a remake of from Zero before The 3rd." Trails from Zero is the game that, chronologically, takes place after the Sky trilogy. It introduces a mostly fresh cast of characters and a different setting. At first glance, you might think that it makes zero (pun intended, again) sense to jump straight to the next saga in the franchise — but it sounds like the issue lies with The 3rd being a very unconventional Trails title. Without spoiling anything, The 3rd wraps a nice little bow around the Sky games and many of its surrounding plot points, but its unorthodox, dungeon-based structure makes it a bit of a black sheep. "I think we have to do a remake of The 3rd at some point, but there are many possible ideas for what form it could take," says Kondo, alluding to the possibility of reworking the game's design. And of course, these remakes aren't the only Trails projects that Falcom's cooking. The next game in the Daybreak saga — the title that comes after Trails beyond the Horizon, which launches in the West in January — is deep in development at this point. Falcom's only getting busier, then, and so it'll be fascinating to see how it tries to balance things out between these full-blown remakes and the titles that'll define the future of the series. What do you want next from Falcom? Is The Third the one? Would you want a remake to tweak its unique design? Overcome some barriers in the comments section below.
 -
After the release of the near universally acclaimed Trails in the Sky 1st Chapter back in September, it was revealed that developer Falcom was already well into making another full-on remake with Trails in the Sky 2nd Chapter. Although we don't have an official release window for it, the remade sequel is expected to launch next year — and expectations are sky high (pun intended) given how beloved the original title is. But what happens after 2nd Chapter? Well, you'd think that Falcom's most obvious course of action would be to then remake the third game in the Sky trilogy — Trails in the Sky The 3rd. The name basically fits with the remakes and everything! Apparently, though, the situation isn't quite so clear cut. In a new interview with Dengeki Online (as translated by Automaton), Falcom CEO Toshihiro Kondo admits that the studio is actually divided on which classic Trails title they want to remake next. "We’re not sure whether to do Trails in the Sky The 3rd or Trails from Zero next – opinions are divided among us," he states. "Some of the members are saying that it would be better to do a remake of from Zero before The 3rd." Trails from Zero is the game that, chronologically, takes place after the Sky trilogy. It introduces a mostly fresh cast of characters and a different setting. At first glance, you might think that it makes zero (pun intended, again) sense to jump straight to the next saga in the franchise — but it sounds like the issue lies with The 3rd being a very unconventional Trails title. Without spoiling anything, The 3rd wraps a nice little bow around the Sky games and many of its surrounding plot points, but its unorthodox, dungeon-based structure makes it a bit of a black sheep. "I think we have to do a remake of The 3rd at some point, but there are many possible ideas for what form it could take," says Kondo, alluding to the possibility of reworking the game's design. And of course, these remakes aren't the only Trails projects that Falcom's cooking. The next game in the Daybreak saga — the title that comes after Trails beyond the Horizon, which launches in the West in January — is deep in development at this point. Falcom's only getting busier, then, and so it'll be fascinating to see how it tries to balance things out between these full-blown remakes and the titles that'll define the future of the series. What do you want next from Falcom? Is The Third the one? Would you want a remake to tweak its unique design? Overcome some barriers in the comments section below. View full article
-
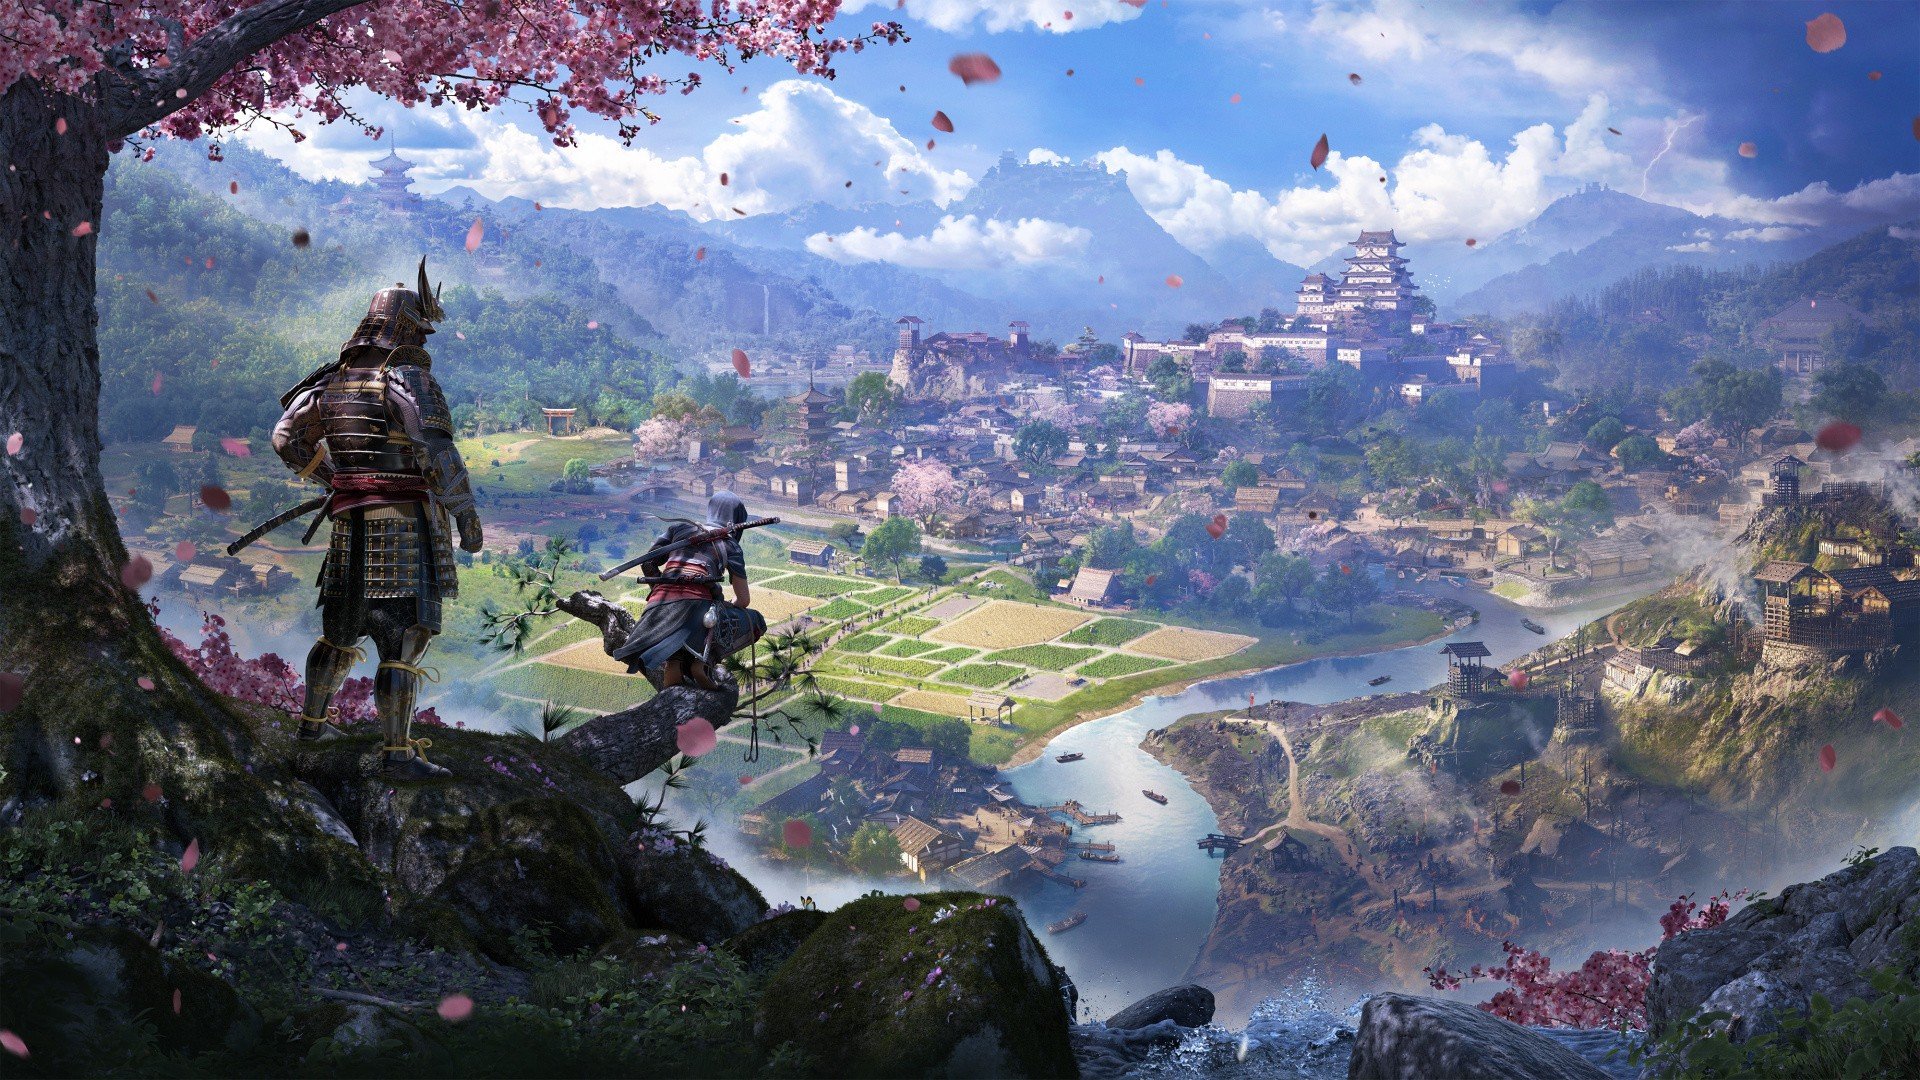 Ever since Assassin's Creed Origins, Ubisoft has pushed the series towards a live service model, opting to support each game over a long period of time with free updates and DLC. And to be fair, it's a model that's proven to be successful; Assassin's Creed Valhalla ended up being the franchise's most profitable instalment to date off the back of two whole years of support. But these major updates and DLCs do, of course, have a cost in terms of resources — and that's what Assassin's Creed Shadows director Simon Lemay-Comtois gets at in a new interview with YouTube channel Access the Animus. Ubisoft has explained its methods in the past, but Lemay-Comtois reiterates: "Microtransactions, for all the flak it gets, it allows us to do the Isu stuff, the quest stuff, the parkour updates, all of it." The idea is that each Assassin's Creed titles funds its own ongoing support through paid content. Shadows, for example, gets premium equipment packs on a regular basis, featuring themed weapons, armour, and cosmetics. We wouldn't call them microtransactions given that they're actually rather expensive, but again, it's apparently a model that works well for the franchise. It's not without issue, however — particularly in the case of Shadows. Just this week, the title received a new update that introduces an Attack on Titan crossover quest, of all things. The quest is entirely free for all players — but the rewards are meagre at best. Indeed, the update's marketing showcases cool Attack on Titan-themed outfits, but they're actually locked behind an accompanying paid DLC pack. The same thing happened with Shadows' Dead by Daylight crossover quest a few months back. So it's certainly not all sunshine and rainbows for dedicated players, but in a different interview with YouTube channel JorRaptor, Lemay-Comtois assures fans that bigger updates are in the pipeline, and the dev team's definitely not done with Shadows yet. "[We're working on] chunkier updates that shake things up," he says, although he does state that there are currently no plans to release a second, Claws of Awaji-style expansion in 2026. "As of now, at this moment for Year Two, there is no expansion on the size of [Claws of Awaji] that is planned, currently [...] We're still working on content for post-launch and supporting it, but it's not a full-on DLC the way a season pass would have had in previous years." So there you have it. It looks like Shadows will be getting a second year of support, and there's scope for larger content drops — but don't go expecting any big story-driven DLCs. What do you think of the modern approach of Assassin's Creed? Are you okay with microtransactions as long as they continue to fund free updates, or is Shadows leaning a little too far into the model? Equip some better gear in the comments section below.
 -
Ever since Assassin's Creed Origins, Ubisoft has pushed the series towards a live service model, opting to support each game over a long period of time with free updates and DLC. And to be fair, it's a model that's proven to be successful; Assassin's Creed Valhalla ended up being the franchise's most profitable instalment to date off the back of two whole years of support. But these major updates and DLCs do, of course, have a cost in terms of resources — and that's what Assassin's Creed Shadows director Simon Lemay-Comtois gets at in a new interview with YouTube channel Access the Animus. Ubisoft has explained its methods in the past, but Lemay-Comtois reiterates: "Microtransactions, for all the flak it gets, it allows us to do the Isu stuff, the quest stuff, the parkour updates, all of it." The idea is that each Assassin's Creed titles funds its own ongoing support through paid content. Shadows, for example, gets premium equipment packs on a regular basis, featuring themed weapons, armour, and cosmetics. We wouldn't call them microtransactions given that they're actually rather expensive, but again, it's apparently a model that works well for the franchise. It's not without issue, however — particularly in the case of Shadows. Just this week, the title received a new update that introduces an Attack on Titan crossover quest, of all things. The quest is entirely free for all players — but the rewards are meagre at best. Indeed, the update's marketing showcases cool Attack on Titan-themed outfits, but they're actually locked behind an accompanying paid DLC pack. The same thing happened with Shadows' Dead by Daylight crossover quest a few months back. So it's certainly not all sunshine and rainbows for dedicated players, but in a different interview with YouTube channel JorRaptor, Lemay-Comtois assures fans that bigger updates are in the pipeline, and the dev team's definitely not done with Shadows yet. "[We're working on] chunkier updates that shake things up," he says, although he does state that there are currently no plans to release a second, Claws of Awaji-style expansion in 2026. "As of now, at this moment for Year Two, there is no expansion on the size of [Claws of Awaji] that is planned, currently [...] We're still working on content for post-launch and supporting it, but it's not a full-on DLC the way a season pass would have had in previous years." So there you have it. It looks like Shadows will be getting a second year of support, and there's scope for larger content drops — but don't go expecting any big story-driven DLCs. What do you think of the modern approach of Assassin's Creed? Are you okay with microtransactions as long as they continue to fund free updates, or is Shadows leaning a little too far into the model? Equip some better gear in the comments section below. View full article
-
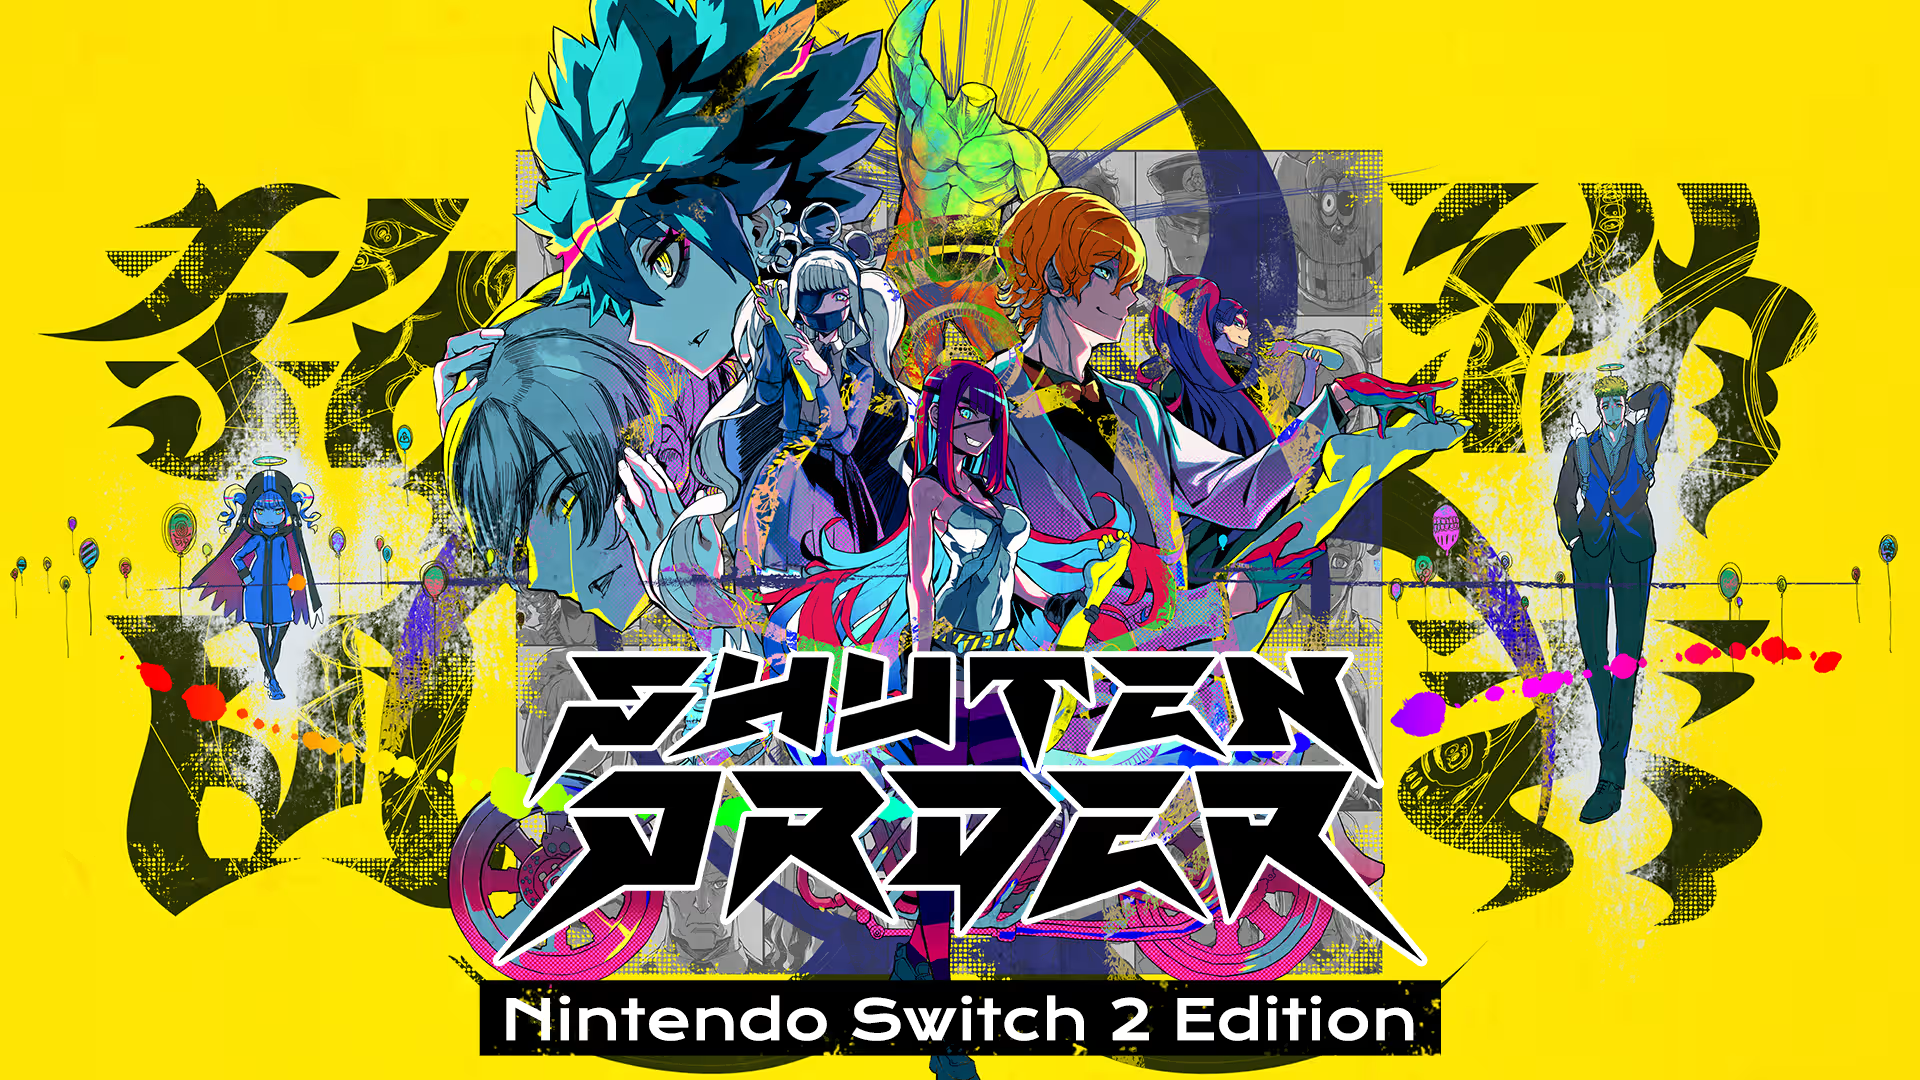 Update [Thu 27th Nov 2025, 5:30pm]: SHUTEN ORDER's Switch 2 Edition and upgrade is now available today. Once again, it supports a higher frame rate, including variable frame rate between 60 to 120 fps in docked and portable modes. There is also Joy-Con 2 mouse controls in areas of the game where it's supported. The Upgrade Pack for existing Switch owners will set you back $2.49 (or your regional equivalent). And the Switch 2 and Switch versions of the full game are currently on sale in select locations. Original Story: Following the release of SHUTEN ORDER on the Switch in September, a Switch 2 Edition has now been officially announced. It will arrive later this month on 27th November 2025 for the launch price of 6,579 yen. This 10% discount is available until 4th December 2025. Local pricing for the full game hasn't been confirmed just yet, but there will be a paid Upgrade Pack for existing Switch owners. Thankfully, it's only a small sum of 330 Yen (about $2). As for what you can expect, the Switch 2 Edition will support a higher frame rate, including variable frame rate between 60 to 120 fps in both docked and portable modes. There will also be Joy-Con 2 mouse controls in areas of the game where it's supported. Will you be checking out the Switch 2 version of this title? Have you already got the Switch version? Let us know in the comments.
 -
Update [Thu 27th Nov 2025, 5:30pm]: SHUTEN ORDER's Switch 2 Edition and upgrade is now available today. Once again, it supports a higher frame rate, including variable frame rate between 60 to 120 fps in docked and portable modes. There is also Joy-Con 2 mouse controls in areas of the game where it's supported. The Upgrade Pack for existing Switch owners will set you back $2.49 (or your regional equivalent). And the Switch 2 and Switch versions of the full game are currently on sale in select locations. Original Story: Following the release of SHUTEN ORDER on the Switch in September, a Switch 2 Edition has now been officially announced. It will arrive later this month on 27th November 2025 for the launch price of 6,579 yen. This 10% discount is available until 4th December 2025. Local pricing for the full game hasn't been confirmed just yet, but there will be a paid Upgrade Pack for existing Switch owners. Thankfully, it's only a small sum of 330 Yen (about $2). As for what you can expect, the Switch 2 Edition will support a higher frame rate, including variable frame rate between 60 to 120 fps in both docked and portable modes. There will also be Joy-Con 2 mouse controls in areas of the game where it's supported. Will you be checking out the Switch 2 version of this title? Have you already got the Switch version? Let us know in the comments. View full article
-
All the way back in 2019, before the Xbox Series X and Xbox Series S were even fully revealed, there was skepticism that Xbox would be ditching consoles and/or turning into a third-party publisher. The more things change, the more they stay the same! Xbox boss Phil Spencer was asked about this at the time in an interview with Kotaku, and as pointed out by the interviewee (Stephen Totilo) on Game File this week, it's a fascinating look back at a strategy that still remains very relevant here in 2025. For example, Phil spent a lot of time discussing the idea of playing "the games you want, with the people you want and on the devices [you want]", mentioning the team was "driven by that". He went on to explain that a lack of crossplay support between consoles was driving him "crazy" and he felt it needed to change to "grow gaming". Phil then talked about console and how "having the world’s most powerful console" was a "critical component" for the brand and growing the platform, but that ultimately the profits would come from selling software and services. Interestingly, he made a point that measuring console sales wasn't all that useful either: As part of this, he advised that the focus for Xbox was on the player and not the device: Phil was also asked multiple times about whether we could see the likes of Gears of War on the PlayStation 4 at some point, and he certainly didn't outright deny it. Instead, he chose to focus on how Xbox games needed to have a "connected ecosystem with the players, where people’s save game and their state and their friends list and their entitlements move seamlessly from every ecosystem", which wasn't possible on PS4 at the time. Nevertheless, he highlighted how Xbox valued its relationship with other companies and that everyone could assist with adding "cross-play, cross-buy, cross-progression" facilities in order to enhance that "play anywhere vision". There's a lot more in the full Kotaku interview if you want to check it out. From our standpoint, this is a fascinating look back at a vision that still rings very true six years later, despite all the changes we've witnessed at Xbox. This whole idea of "Play Anywhere" and "This is an Xbox" feels like it's only just been implemented, but it's actually existed for a long time now, and the marketing behind it has significantly ramped up over the past year-or-so. Some of the things Phil Spencer has said in the past have obviously changed a little bit to align with the modern-day strategy, but this is an important reminder that there's been plenty of consistency in Xbox's messaging as well. Go and have a look for yourself, and let us know your thoughts down in the comments below!
-
It's been an ambitious year for Xbox Game Pass in 2025, with so many incredible games joining the service over the past 11 months, and it's about to deliver another amazing slate of titles in 2026 as well. In fact, Microsoft is promising 75+ "day one" games on Xbox Game Pass Ultimate per-year moving forward, which is a massive step up on what we've been getting to date - it apparently represents a 50% increase altogether. With that in mind, they're going to need a lot of developers and publishers to remain on board. Fortunately it sounds like that's the case, as explained by the Xbox GM of Portfolio and Programmes (Chris Charla) in a recent interview. Chris, who's known primarily for his work with the ID@Xbox team, advised in the interview with GameReactor that "enthusiasm for game developers for Game Pass has never gone down", and the fact that many are returning for their second, third or even seventh games on the service shows that Team Xbox is doing something right. Now, to be fair, we have heard pockets of disgruntlement about Xbox Game Pass over the years and how it's potentially a bad deal for developers and even players, but we've also heard how it's been a massive benefit for other developers and publishers, particularly in the indie space. It's very true that some publishers have repeatedly put their titles on Game Pass as "day one" launches, to the point where basically everything in their catalogue is on there! And again, that figure of 75+ "day one" games per-year suggests that plenty of developers are on board with Xbox Game Pass going into 2026, which is set to benefit subscribers in a major way. We've already seen multiple Game of the Year candidates join XGP in 2025 alone, and we're expecting many more to land on the service next year. Is it worth the money now that prices have gone up? That's another question entirely, but you can bet that Team Xbox will be working extremely hard to bring as many quality titles to Xbox Game Pass throughout the next calendar year.
-
.jpg.2c236154b46337a651effddb03596799.jpg) Well, here's a welcome surprise! Hot off the back of Silent Hill 2 and Cronos: The New Dawn, Bloober Team has shared with us the next project that it's working on for Switch 2, and it's none other than an all-new Layers of Fear package. Layers of Fear: Final Masterpiece Edition will arrive on Switch 2 on 19th December, bundling together Layers of Fear, Layers of Fear 2, every DLC expansion, and brand-new chapters into one spooky edition fully optimised for the new system. There are the added bonuses of HDR, ray tracing, and dynamic lighting, too, and you have the option to play with motion controls or touchscreen inputs if you see fit. Here's the official blurb from Bloober Team and a handful of screenshots: Images: Bloober Team It all sounds like a pretty strong way to experience these psychological horror titles. The full Final Masterpiece Edition will be available on the eShop for $39.99 (or your regional equivalent) next month — because the holiday season really needs some more scares, right? For those curious, we had a perfectly good time with Cronos: The New Dawn when it arrived on Switch 2 back in September, describing it as "a celebration of survival horror, paying homage to all the genre greats effectively.
Well, here's a welcome surprise! Hot off the back of Silent Hill 2 and Cronos: The New Dawn, Bloober Team has shared with us the next project that it's working on for Switch 2, and it's none other than an all-new Layers of Fear package. Layers of Fear: Final Masterpiece Edition will arrive on Switch 2 on 19th December, bundling together Layers of Fear, Layers of Fear 2, every DLC expansion, and brand-new chapters into one spooky edition fully optimised for the new system. There are the added bonuses of HDR, ray tracing, and dynamic lighting, too, and you have the option to play with motion controls or touchscreen inputs if you see fit. Here's the official blurb from Bloober Team and a handful of screenshots: Images: Bloober Team It all sounds like a pretty strong way to experience these psychological horror titles. The full Final Masterpiece Edition will be available on the eShop for $39.99 (or your regional equivalent) next month — because the holiday season really needs some more scares, right? For those curious, we had a perfectly good time with Cronos: The New Dawn when it arrived on Switch 2 back in September, describing it as "a celebration of survival horror, paying homage to all the genre greats effectively. -
Well, here's a welcome surprise! Hot off the back of Silent Hill 2 and Cronos: The New Dawn, Bloober Team has shared with us the next project that it's working on for Switch 2, and it's none other than an all-new Layers of Fear package. Layers of Fear: Final Masterpiece Edition will arrive on Switch 2 on 19th December, bundling together Layers of Fear, Layers of Fear 2, every DLC expansion, and brand-new chapters into one spooky edition fully optimised for the new system. There are the added bonuses of HDR, ray tracing, and dynamic lighting, too, and you have the option to play with motion controls or touchscreen inputs if you see fit. Here's the official blurb from Bloober Team and a handful of screenshots: Images: Bloober Team It all sounds like a pretty strong way to experience these psychological horror titles. The full Final Masterpiece Edition will be available on the eShop for $39.99 (or your regional equivalent) next month — because the holiday season really needs some more scares, right? For those curious, we had a perfectly good time with Cronos: The New Dawn when it arrived on Switch 2 back in September, describing it as "a celebration of survival horror, paying homage to all the genre greats effectively. View full article