




Rockstar
Administrators
-
Joined
-
Last visited
-
Currently
Viewing GTA 6 Pre-Orders Are Running 148% Ahead of Any Major Game in Six Years in category Articles: Gaming News
Everything posted by Rockstar
-
 Rockstar Games has always played the long game. They don’t just make sequels — they study their own work like master chefs refining a signature dish, pulling out flavors that worked, tweaking what didn’t, and occasionally sneaking in an ingredient nobody saw coming. Now, a former insider is giving fans their clearest look yet at how that philosophy is playing out behind the scenes on Grand Theft Auto VI. In a candid new interview with the YouTube channel KIWI TALKZ, Rob Carr — a veteran audio designer who spent years at Rockstar contributing to GTA V, Red Dead Redemption 2, L.A. Noire, and the original Red Dead Redemption — shared some of the most grounded, believable speculation we’ve heard about GTA VI to date. Importantly, Carr left the studio before active development on the next GTA began, so he’s not spilling protected secrets. He’s simply speaking from deep institutional knowledge of how Rockstar actually builds its games. And according to Carr, the DNA of both GTA V and Red Dead Redemption 2 is going to be all over the next entry in the series. “I’m really, really quite keen to see what they do,” Carr told the interviewer, “because there will be things in GTA 5 that they will have in GTA 6 that you look at and go, ‘we should have seen that coming.’ That was oh man, that’s really clever.” He went further, suggesting that features or ideas that were introduced — or even left half-finished — in GTA V are almost certain to return in expanded, polished form. Some of them, he believes, could become core mechanics or even central plot drivers in GTA VI. “I’d be incredibly surprised if they don’t do anything like that,” Carr added. “I’d be very, very surprised. I’ll be surprised if they don’t use something from Red Dead 2.” This isn’t wild fan theory — it’s exactly how Rockstar has operated for years. Carr pointed to a perfect historical example: the bank heist mission “Three Leaf Clover” from GTA IV. That single set-piece, with its multi-character coordination and high-stakes pacing, became the structural blueprint for GTA V’s entire three-protagonist system. What started as one memorable mission evolved into the defining feature of the next game. Rockstar, Carr’s comments suggest, doesn’t throw ideas away. They file them, test them, and redeploy them when the technology and scope finally catch up. Red Dead Redemption 2 in particular looms large in this conversation. The 2018 open-world epic raised the bar for NPC behavior, environmental reactivity, and emotional storytelling in ways GTA V (released four years earlier) simply couldn’t match at the time. Many fans have long suspected that RDR2 served as a technological and philosophical dry run for GTA VI’s next-gen ambitions — richer worlds, deeper systems, and a living ecosystem that feels genuinely alive. Carr’s comments essentially confirm that instinct without giving away specifics. The lessons learned from Arthur Morgan’s slow-burn tragedy, the Honor system, the camp dynamics, and the painstaking attention to detail in everyday interactions are almost certainly informing how Rockstar is approaching Vice City and Leonida in 2025 (or whenever the game finally drops). What makes Carr’s perspective refreshing is how grounded it is. He isn’t hyping the game or promising revolutionary features. He’s talking like a guy who spent years inside the machine and understands its rhythms: Rockstar iterates. They evolve. And they almost never start from a blank page. For longtime fans who’ve been dissecting every trailer frame and every rumored leak, this interview feels like validation. GTA VI isn’t being built in a vacuum. It’s the next chapter in a story Rockstar has been writing across multiple games and multiple decades — a story where every heist, every horse ride, and every line of dialogue is potential raw material for something bigger down the road. Whether that means deeper character-switching mechanics, more sophisticated AI crowds, physics systems that finally feel as weighty as RDR2’s, or narrative threads that echo the emotional maturity of the Red Dead games, we’ll have to wait and see. But thanks to Rob Carr, we now have a much clearer sense of how Rockstar thinks about its own legacy. And if history is any guide, when GTA VI finally arrives, some of its most impressive moments will make us look back at GTA V and Red Dead Redemption 2 and say exactly what Carr predicted: “We should have seen that coming.” View full article
 -
.webp.988fe7558b2c6a0d0a7a3f1e6d1f35d4.webp) Rockstar Games has quietly pushed out a fresh update to its dedicated PC launcher, giving players a handful of meaningful tweaks designed to smooth out the experience for everyone logging in to play GTA, Red Dead Redemption, or any of the publisher’s other titles. The update, version 1.0.106.2850, rolled out on Tuesday and will automatically download the next time you launch the Rockstar Games Launcher. While the launcher has never been everyone’s favorite way to play Rockstar games (many still prefer Steam or Epic), the company continues to invest in it—especially with GTA VI on the horizon for PC. This latest patch focuses mostly on backend upgrades rather than flashy new features, but the changes should make the platform noticeably more reliable. Here’s the Full Official Patch NotesEmbedded web browser has been updated to Chromium 143 Discord Game SDK has been replaced with the Discord Social SDK Fixed an issue that resulted in desktop notifications appearing too frequently Fixed an issue that resulted in reduced download speeds on select titles Support has been added for Windows 11 26H1 and 26H2 Improvements have been made to the stability of the Rockstar Games Launcher The Chromium update is a big one under the hood. It brings the launcher’s built-in browser up to a much more recent and secure version, which should translate to snappier in-app web pages, better security, and fewer random glitches when browsing Rockstar’s store or account settings directly in the launcher. Swapping the Discord Game SDK for the newer Discord Social SDK likely improves integration with Discord features like rich presence, activity sharing, and overlays—something a lot of players rely on while squading up in GTA Online or Red Dead Online. The notification fix should be a welcome relief for anyone who’s been bombarded with repeated pop-ups about the same update or friend request. Similarly, the download-speed fix targets a bug that was slowing things down for certain games, which is always appreciated when you’re trying to grab a multi-gigabyte title on a tight schedule. Adding official support for the latest Windows 11 previews (26H1 and 26H2) shows Rockstar is staying ahead of Microsoft’s OS changes, ensuring the launcher won’t break for early adopters of future Windows updates. Finally, the general stability improvements are the classic “we made everything less crashy” note that every developer loves to include—and in this case, it should help reduce those random launcher hiccups that have frustrated players in the past. Why This Update Matters Right Now This launcher refresh comes at an interesting time. Just weeks ago, Rockstar had to block purchases inside the launcher for players in Brazil because of new regional laws. At the same time, the company finished migrating all account settings away from the old Social Club site and into the main Rockstar website. And last week, a quiet background update dropped for GTA Online that fixed several bugs ahead of new April content. Taken together, it’s clear Rockstar is quietly modernizing its entire PC ecosystem. The launcher isn’t going anywhere—especially once GTA VI arrives on PC—so these incremental improvements are their way of showing they’re listening and iterating. If you haven’t launched the Rockstar Games Launcher in a few days, you’ll probably see the update prompt as soon as you open it. Most of the changes are automatic and won’t require any extra steps from you. Have you noticed any of the old notification spam or slow downloads that this patch supposedly fixes? Drop your thoughts in the comments—especially if you’re a GTA VI PC hopeful waiting for the launcher to feel a little less clunky. RockstarINTEL will keep you posted on any follow-up patches or bigger launcher news as we head toward the next major Rockstar release.
Rockstar Games has quietly pushed out a fresh update to its dedicated PC launcher, giving players a handful of meaningful tweaks designed to smooth out the experience for everyone logging in to play GTA, Red Dead Redemption, or any of the publisher’s other titles. The update, version 1.0.106.2850, rolled out on Tuesday and will automatically download the next time you launch the Rockstar Games Launcher. While the launcher has never been everyone’s favorite way to play Rockstar games (many still prefer Steam or Epic), the company continues to invest in it—especially with GTA VI on the horizon for PC. This latest patch focuses mostly on backend upgrades rather than flashy new features, but the changes should make the platform noticeably more reliable. Here’s the Full Official Patch NotesEmbedded web browser has been updated to Chromium 143 Discord Game SDK has been replaced with the Discord Social SDK Fixed an issue that resulted in desktop notifications appearing too frequently Fixed an issue that resulted in reduced download speeds on select titles Support has been added for Windows 11 26H1 and 26H2 Improvements have been made to the stability of the Rockstar Games Launcher The Chromium update is a big one under the hood. It brings the launcher’s built-in browser up to a much more recent and secure version, which should translate to snappier in-app web pages, better security, and fewer random glitches when browsing Rockstar’s store or account settings directly in the launcher. Swapping the Discord Game SDK for the newer Discord Social SDK likely improves integration with Discord features like rich presence, activity sharing, and overlays—something a lot of players rely on while squading up in GTA Online or Red Dead Online. The notification fix should be a welcome relief for anyone who’s been bombarded with repeated pop-ups about the same update or friend request. Similarly, the download-speed fix targets a bug that was slowing things down for certain games, which is always appreciated when you’re trying to grab a multi-gigabyte title on a tight schedule. Adding official support for the latest Windows 11 previews (26H1 and 26H2) shows Rockstar is staying ahead of Microsoft’s OS changes, ensuring the launcher won’t break for early adopters of future Windows updates. Finally, the general stability improvements are the classic “we made everything less crashy” note that every developer loves to include—and in this case, it should help reduce those random launcher hiccups that have frustrated players in the past. Why This Update Matters Right Now This launcher refresh comes at an interesting time. Just weeks ago, Rockstar had to block purchases inside the launcher for players in Brazil because of new regional laws. At the same time, the company finished migrating all account settings away from the old Social Club site and into the main Rockstar website. And last week, a quiet background update dropped for GTA Online that fixed several bugs ahead of new April content. Taken together, it’s clear Rockstar is quietly modernizing its entire PC ecosystem. The launcher isn’t going anywhere—especially once GTA VI arrives on PC—so these incremental improvements are their way of showing they’re listening and iterating. If you haven’t launched the Rockstar Games Launcher in a few days, you’ll probably see the update prompt as soon as you open it. Most of the changes are automatic and won’t require any extra steps from you. Have you noticed any of the old notification spam or slow downloads that this patch supposedly fixes? Drop your thoughts in the comments—especially if you’re a GTA VI PC hopeful waiting for the launcher to feel a little less clunky. RockstarINTEL will keep you posted on any follow-up patches or bigger launcher news as we head toward the next major Rockstar release. -
Rockstar Games has quietly pushed out a fresh update to its dedicated PC launcher, giving players a handful of meaningful tweaks designed to smooth out the experience for everyone logging in to play GTA, Red Dead Redemption, or any of the publisher’s other titles. The update, version 1.0.106.2850, rolled out on Tuesday and will automatically download the next time you launch the Rockstar Games Launcher. While the launcher has never been everyone’s favorite way to play Rockstar games (many still prefer Steam or Epic), the company continues to invest in it—especially with GTA VI on the horizon for PC. This latest patch focuses mostly on backend upgrades rather than flashy new features, but the changes should make the platform noticeably more reliable. Here’s the Full Official Patch NotesEmbedded web browser has been updated to Chromium 143 Discord Game SDK has been replaced with the Discord Social SDK Fixed an issue that resulted in desktop notifications appearing too frequently Fixed an issue that resulted in reduced download speeds on select titles Support has been added for Windows 11 26H1 and 26H2 Improvements have been made to the stability of the Rockstar Games Launcher The Chromium update is a big one under the hood. It brings the launcher’s built-in browser up to a much more recent and secure version, which should translate to snappier in-app web pages, better security, and fewer random glitches when browsing Rockstar’s store or account settings directly in the launcher. Swapping the Discord Game SDK for the newer Discord Social SDK likely improves integration with Discord features like rich presence, activity sharing, and overlays—something a lot of players rely on while squading up in GTA Online or Red Dead Online. The notification fix should be a welcome relief for anyone who’s been bombarded with repeated pop-ups about the same update or friend request. Similarly, the download-speed fix targets a bug that was slowing things down for certain games, which is always appreciated when you’re trying to grab a multi-gigabyte title on a tight schedule. Adding official support for the latest Windows 11 previews (26H1 and 26H2) shows Rockstar is staying ahead of Microsoft’s OS changes, ensuring the launcher won’t break for early adopters of future Windows updates. Finally, the general stability improvements are the classic “we made everything less crashy” note that every developer loves to include—and in this case, it should help reduce those random launcher hiccups that have frustrated players in the past. Why This Update Matters Right Now This launcher refresh comes at an interesting time. Just weeks ago, Rockstar had to block purchases inside the launcher for players in Brazil because of new regional laws. At the same time, the company finished migrating all account settings away from the old Social Club site and into the main Rockstar website. And last week, a quiet background update dropped for GTA Online that fixed several bugs ahead of new April content. Taken together, it’s clear Rockstar is quietly modernizing its entire PC ecosystem. The launcher isn’t going anywhere—especially once GTA VI arrives on PC—so these incremental improvements are their way of showing they’re listening and iterating. If you haven’t launched the Rockstar Games Launcher in a few days, you’ll probably see the update prompt as soon as you open it. Most of the changes are automatic and won’t require any extra steps from you. Have you noticed any of the old notification spam or slow downloads that this patch supposedly fixes? Drop your thoughts in the comments—especially if you’re a GTA VI PC hopeful waiting for the launcher to feel a little less clunky. RockstarINTEL will keep you posted on any follow-up patches or bigger launcher news as we head toward the next major Rockstar release. View full article
-
 Rockstar Games has never been shy about pouring resources into its flagship titles, but new estimates based on the company's own public financial filings suggest that Grand Theft Auto VI is on track to become the most expensive video game ever made—by a very wide margin. According to detailed analysis of Rockstar's UK subsidiary records, the project's total budget has now surpassed the $3 billion mark, eclipsing earlier rumors that pegged it at around $2 billion. The eye-popping figure doesn't come from anonymous leaks or industry whispers. Instead, it's drawn straight from the kind of dry, mandatory corporate paperwork that UK limited companies are required to file. Rockstar Games UK Limited—which covers the studio's major operations in London, Edinburgh, Dundee, Leeds, and Lincoln—has to publicly disclose headcount, wage bills, pensions, and other overhead. Those documents, combined with some reasonable assumptions about additional costs like office leases and equipment, paint a picture of an absolutely colossal investment. How the Math Adds UpRockstar employed roughly 1,744 people across its UK offices as of 2025. Development on GTA 6 didn't truly kick into high gear until around 2019 or 2020, meaning the studio has been carrying this massive payroll for the better part of seven years leading up to the planned November 2026 launch. Back in 2019, the company reported paying a little over £90 million in wages. That number was later restated upward to more than £200 million, which analysts believe reflects a consolidation of worldwide salaries into the UK entity for reporting purposes. Projecting those kinds of annual costs forward across years of full-scale development, the wage and overhead bill alone climbs to nearly £2.7 billion (roughly $3.4 billion at current exchange rates). Layer on top the real-world expenses of running multiple high-end studios—rent, hardware, utilities, and everything else—and you're looking at a combined development tab hovering right around the $3 billion threshold. Importantly, this estimate doesn't even include marketing, music licensing, voice acting residuals, or inflation adjustments. It also spreads the payroll across everything Rockstar has been working on since 2019, including ongoing GTA Online updates, Red Dead Online support, next-gen ports of GTA V, and whatever else the team has quietly cooking. Still, the takeaway is crystal clear: just keeping the lights on and the talent paid has cost billions. Bigger Than GTA V… By an Order of Magnitude For context, Grand Theft Auto V famously cost around $250 million to develop and market back in 2013. Even the priciest Call of Duty releases, like Black Ops Cold War, topped out near $700 million. The $2 billion rumor that circulated for years already sounded insane; this new $3 billion-plus projection blows it out of the water and cements GTA 6 as a genuine entertainment industry outlier. A YouTuber named Saukko505 recently dug into the same public filings and walked through the numbers in detail, showing just how feasible—and frankly terrifying—the scale really is when you lay the actual data side by side. The Payoff? It Could Happen in DaysThe craziest part? Rockstar (and parent company Take-Two Interactive) almost certainly isn't sweating the price tag. GTA 5 has sold over 215 million copies and generated tens of billions in lifetime revenue. GTA Online alone prints money year after year. If even a fraction of that audience shows up for the next installment on day one—and early signs point to record-shattering pre-orders and hype—analysts expect the game to recoup its entire development budget in a matter of days, if not hours. That's the modern blockbuster math: spend like it's a Hollywood tentpole crossed with a tech megaproject, then watch the microtransactions, DLC, and cultural phenomenon status do the rest. Of course, none of this guarantees a perfect game. Development hell stories are common in this industry, and the long wait since the 2022 trailer has tested even the most patient fans. But if the financial filings are any indication, Rockstar has thrown every possible resource at making GTA 6 the biggest, most ambitious open-world experience ever created. November 2026 can't come soon enough. Whether the final product lives up to the hype or not, one thing is already certain: no one is playing video games at this financial scale right now. GTA 6 isn't just the next big Rockstar title—it's a billion-dollar bet on the future of the entire medium.
 -
Rockstar Games has never been shy about pouring resources into its flagship titles, but new estimates based on the company's own public financial filings suggest that Grand Theft Auto VI is on track to become the most expensive video game ever made—by a very wide margin. According to detailed analysis of Rockstar's UK subsidiary records, the project's total budget has now surpassed the $3 billion mark, eclipsing earlier rumors that pegged it at around $2 billion. The eye-popping figure doesn't come from anonymous leaks or industry whispers. Instead, it's drawn straight from the kind of dry, mandatory corporate paperwork that UK limited companies are required to file. Rockstar Games UK Limited—which covers the studio's major operations in London, Edinburgh, Dundee, Leeds, and Lincoln—has to publicly disclose headcount, wage bills, pensions, and other overhead. Those documents, combined with some reasonable assumptions about additional costs like office leases and equipment, paint a picture of an absolutely colossal investment. How the Math Adds UpRockstar employed roughly 1,744 people across its UK offices as of 2025. Development on GTA 6 didn't truly kick into high gear until around 2019 or 2020, meaning the studio has been carrying this massive payroll for the better part of seven years leading up to the planned November 2026 launch. Back in 2019, the company reported paying a little over £90 million in wages. That number was later restated upward to more than £200 million, which analysts believe reflects a consolidation of worldwide salaries into the UK entity for reporting purposes. Projecting those kinds of annual costs forward across years of full-scale development, the wage and overhead bill alone climbs to nearly £2.7 billion (roughly $3.4 billion at current exchange rates). Layer on top the real-world expenses of running multiple high-end studios—rent, hardware, utilities, and everything else—and you're looking at a combined development tab hovering right around the $3 billion threshold. Importantly, this estimate doesn't even include marketing, music licensing, voice acting residuals, or inflation adjustments. It also spreads the payroll across everything Rockstar has been working on since 2019, including ongoing GTA Online updates, Red Dead Online support, next-gen ports of GTA V, and whatever else the team has quietly cooking. Still, the takeaway is crystal clear: just keeping the lights on and the talent paid has cost billions. Bigger Than GTA V… By an Order of Magnitude For context, Grand Theft Auto V famously cost around $250 million to develop and market back in 2013. Even the priciest Call of Duty releases, like Black Ops Cold War, topped out near $700 million. The $2 billion rumor that circulated for years already sounded insane; this new $3 billion-plus projection blows it out of the water and cements GTA 6 as a genuine entertainment industry outlier. A YouTuber named Saukko505 recently dug into the same public filings and walked through the numbers in detail, showing just how feasible—and frankly terrifying—the scale really is when you lay the actual data side by side. The Payoff? It Could Happen in DaysThe craziest part? Rockstar (and parent company Take-Two Interactive) almost certainly isn't sweating the price tag. GTA 5 has sold over 215 million copies and generated tens of billions in lifetime revenue. GTA Online alone prints money year after year. If even a fraction of that audience shows up for the next installment on day one—and early signs point to record-shattering pre-orders and hype—analysts expect the game to recoup its entire development budget in a matter of days, if not hours. That's the modern blockbuster math: spend like it's a Hollywood tentpole crossed with a tech megaproject, then watch the microtransactions, DLC, and cultural phenomenon status do the rest. Of course, none of this guarantees a perfect game. Development hell stories are common in this industry, and the long wait since the 2022 trailer has tested even the most patient fans. But if the financial filings are any indication, Rockstar has thrown every possible resource at making GTA 6 the biggest, most ambitious open-world experience ever created. November 2026 can't come soon enough. Whether the final product lives up to the hype or not, one thing is already certain: no one is playing video games at this financial scale right now. GTA 6 isn't just the next big Rockstar title—it's a billion-dollar bet on the future of the entire medium. View full article
-
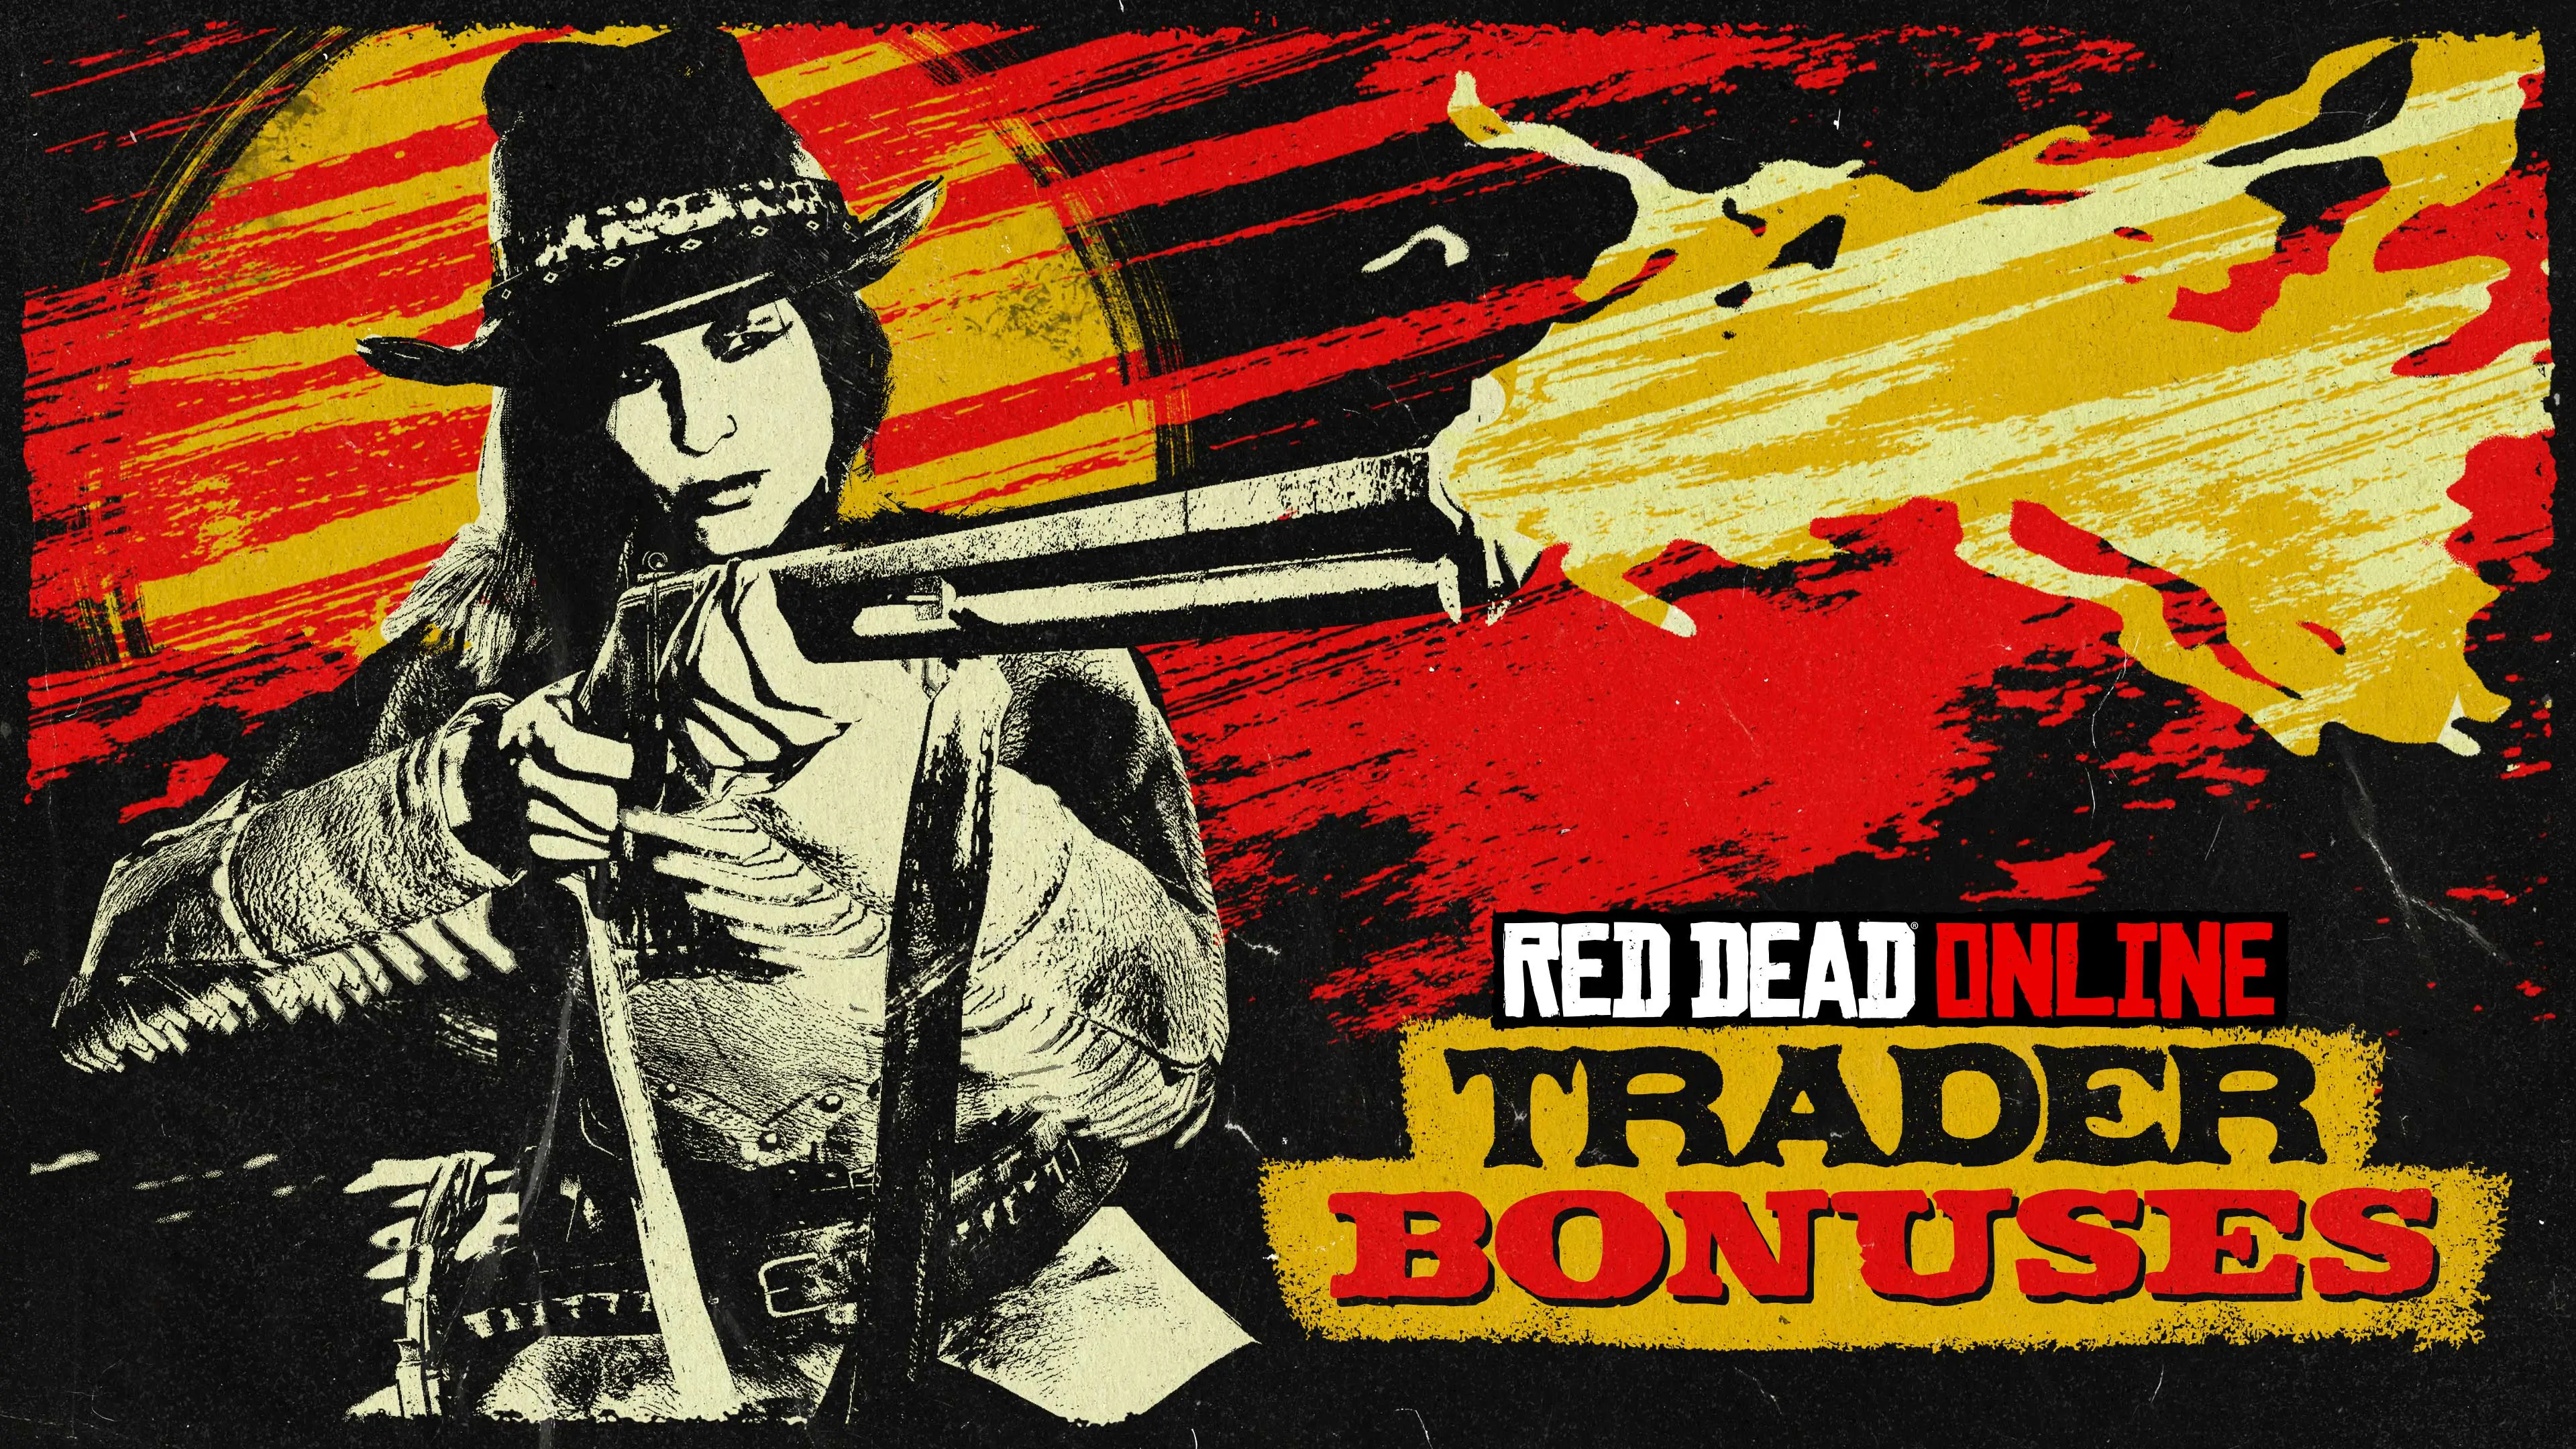 Rockstar has dropped the details for the next Red Dead Online Event Month, and it’s all about the Trader role. Running from March 31 through May 4, this month-long celebration gives players who love hauling goods across the frontier a serious boost in cash, XP, and exclusive rewards. Whether you’re a seasoned Trader or just getting started, there’s plenty here to keep you logging in every week.Rockstarintel Triple the Profits: Core BonusesThe headline of this event is the 3X RDO,RoleXP,andregularXPonallTraderSales∗∗.Thatmeanseverywagonyousuccessfullydeliverisnowworththreetimestheusualpayout.Ontopofthat,∗∗CalltoArms∗∗isrunningat∗∗3XRDO , Role XP, and regular XP on all Trader Sales**. That means every wagon you successfully deliver is now worth three times the usual payout. On top of that, Call to Arms is running at **3X RDO ,RoleXP,andregularXPonallTraderSales∗∗.Thatmeanseverywagonyousuccessfullydeliverisnowworththreetimestheusualpayout.Ontopofthat,∗∗CalltoArms∗∗isrunningat∗∗3XRDO, Gold, and XP, making it the perfect time to jump into those defensive waves if you need a break from the trading life. Fishing fans aren’t left out either. The Fishing Challenge Free Roam Event is paying out 5X RDO$ and XP, and straight fish sales to the Butcher are also at 5X RDO$. Grab your rod and head to the water—those big hauls just got a lot more profitable. Login Rewards and Monthly MilestonesLog in during the event and you’ll walk away with some free cosmetics right off the bat: Players ranked 50 or higher receive the tan Carbow Double Bandolier. Trader role players at Level 20 or above get the Burdall Hat (originally from Outlaw Pass 3). There are also milestone rewards tied directly to the Trader role: Complete all Trader Daily Challenges for the Tennessee Walker Camp Flag (Quick Draw Club 2). Finish at least 5 Trader Sales to unlock the Fortune Buckle (Outlaw Pass 1). Reach Wave 4 in Call to Arms for the Larkin Gloves (Outlaw Pass 1). Weekly Rotating Rewards (March 31 – May 4) Each week brings a fresh incentive to stay active: March 31 – April 6: Complete one Trader Sale → Red Dillehay Hat April 7 – 13: Reach Wave 5 in Call to Arms → Blue Prieto Poncho April 14 – 20: Play 2 Free Roam Events → 50% off any Weapon offer April 21 – 27: Craft any item at Gus’ Shop → North Tumbleweed Treasure Map April 28 – May 4: Log in on two separate days → Gray Shaffer Chaps Discounts That Make Building Your Empire EasierRockstar is slashing prices across the board to help players upgrade their camps and gear: Free – Fast Travel, Fishing Rod, Camp Setup, and Camp Relocation 5 Gold Bars off – Butcher’s Table (perfect for new Traders) 50% off – Novice and Promising Trader Role items, Camp Flags, Camp Themes, Camp Dogs, Fishing Lures, Melee Weapons, Hunting Knife styles, and Sniper Rifles 40% off – Mustang and Ardennes horses 30% off – Boots, Gloves, Hats, and Ammo Returning Outfits and Community SpotlightTwo classic outfits are back in the catalog: The Danube and The Tasman, along with the Chambliss Corset, Charro Jacket, and Fernwater Coat. This month’s Community-Inspired Outfit, created by player coyotekidd, includes: Fine Leather Suspenders Workshirt (Male) / Western Shirtwaist (Female) Neckerchief Preacher’s Pride Boots McCrum Pants (Male) / Padded Saddle Work Pants (Female) It’s a sharp, rugged look that many players will want to mix into their wardrobes. Featured Series ScheduleThe event also rotates special series each week: March 31 – April 6: Hardcore Takeover Series April 7 – 13: New Hanover Series April 14 – 20: Bow and Arrow Series April 21 – 27: Hardcore Public Enemy April 28 – May 4: Hardcore Saint Denis Series If you’re into competitive Free Roam action, there’s always something fresh to jump into. Time to Saddle UpThis Trader-focused Event Month is one of the most generous Red Dead Online has run in a while. Between the triple payouts on sales, stacked weekly rewards, free camp upgrades, and deep discounts on role gear, there’s never been a better time to dive back into the trading life—or finally start one.Rockstarintel Load up your wagon, call your posse, and make the most of these five weeks. The frontier is paying out big right now—don’t miss it.
 -
Rockstar has dropped the details for the next Red Dead Online Event Month, and it’s all about the Trader role. Running from March 31 through May 4, this month-long celebration gives players who love hauling goods across the frontier a serious boost in cash, XP, and exclusive rewards. Whether you’re a seasoned Trader or just getting started, there’s plenty here to keep you logging in every week.Rockstarintel Triple the Profits: Core BonusesThe headline of this event is the 3X RDO,RoleXP,andregularXPonallTraderSales∗∗.Thatmeanseverywagonyousuccessfullydeliverisnowworththreetimestheusualpayout.Ontopofthat,∗∗CalltoArms∗∗isrunningat∗∗3XRDO , Role XP, and regular XP on all Trader Sales**. That means every wagon you successfully deliver is now worth three times the usual payout. On top of that, Call to Arms is running at **3X RDO ,RoleXP,andregularXPonallTraderSales∗∗.Thatmeanseverywagonyousuccessfullydeliverisnowworththreetimestheusualpayout.Ontopofthat,∗∗CalltoArms∗∗isrunningat∗∗3XRDO, Gold, and XP, making it the perfect time to jump into those defensive waves if you need a break from the trading life. Fishing fans aren’t left out either. The Fishing Challenge Free Roam Event is paying out 5X RDO$ and XP, and straight fish sales to the Butcher are also at 5X RDO$. Grab your rod and head to the water—those big hauls just got a lot more profitable. Login Rewards and Monthly MilestonesLog in during the event and you’ll walk away with some free cosmetics right off the bat: Players ranked 50 or higher receive the tan Carbow Double Bandolier. Trader role players at Level 20 or above get the Burdall Hat (originally from Outlaw Pass 3). There are also milestone rewards tied directly to the Trader role: Complete all Trader Daily Challenges for the Tennessee Walker Camp Flag (Quick Draw Club 2). Finish at least 5 Trader Sales to unlock the Fortune Buckle (Outlaw Pass 1). Reach Wave 4 in Call to Arms for the Larkin Gloves (Outlaw Pass 1). Weekly Rotating Rewards (March 31 – May 4) Each week brings a fresh incentive to stay active: March 31 – April 6: Complete one Trader Sale → Red Dillehay Hat April 7 – 13: Reach Wave 5 in Call to Arms → Blue Prieto Poncho April 14 – 20: Play 2 Free Roam Events → 50% off any Weapon offer April 21 – 27: Craft any item at Gus’ Shop → North Tumbleweed Treasure Map April 28 – May 4: Log in on two separate days → Gray Shaffer Chaps Discounts That Make Building Your Empire EasierRockstar is slashing prices across the board to help players upgrade their camps and gear: Free – Fast Travel, Fishing Rod, Camp Setup, and Camp Relocation 5 Gold Bars off – Butcher’s Table (perfect for new Traders) 50% off – Novice and Promising Trader Role items, Camp Flags, Camp Themes, Camp Dogs, Fishing Lures, Melee Weapons, Hunting Knife styles, and Sniper Rifles 40% off – Mustang and Ardennes horses 30% off – Boots, Gloves, Hats, and Ammo Returning Outfits and Community SpotlightTwo classic outfits are back in the catalog: The Danube and The Tasman, along with the Chambliss Corset, Charro Jacket, and Fernwater Coat. This month’s Community-Inspired Outfit, created by player coyotekidd, includes: Fine Leather Suspenders Workshirt (Male) / Western Shirtwaist (Female) Neckerchief Preacher’s Pride Boots McCrum Pants (Male) / Padded Saddle Work Pants (Female) It’s a sharp, rugged look that many players will want to mix into their wardrobes. Featured Series ScheduleThe event also rotates special series each week: March 31 – April 6: Hardcore Takeover Series April 7 – 13: New Hanover Series April 14 – 20: Bow and Arrow Series April 21 – 27: Hardcore Public Enemy April 28 – May 4: Hardcore Saint Denis Series If you’re into competitive Free Roam action, there’s always something fresh to jump into. Time to Saddle UpThis Trader-focused Event Month is one of the most generous Red Dead Online has run in a while. Between the triple payouts on sales, stacked weekly rewards, free camp upgrades, and deep discounts on role gear, there’s never been a better time to dive back into the trading life—or finally start one.Rockstarintel Load up your wagon, call your posse, and make the most of these five weeks. The frontier is paying out big right now—don’t miss it. View full article
-
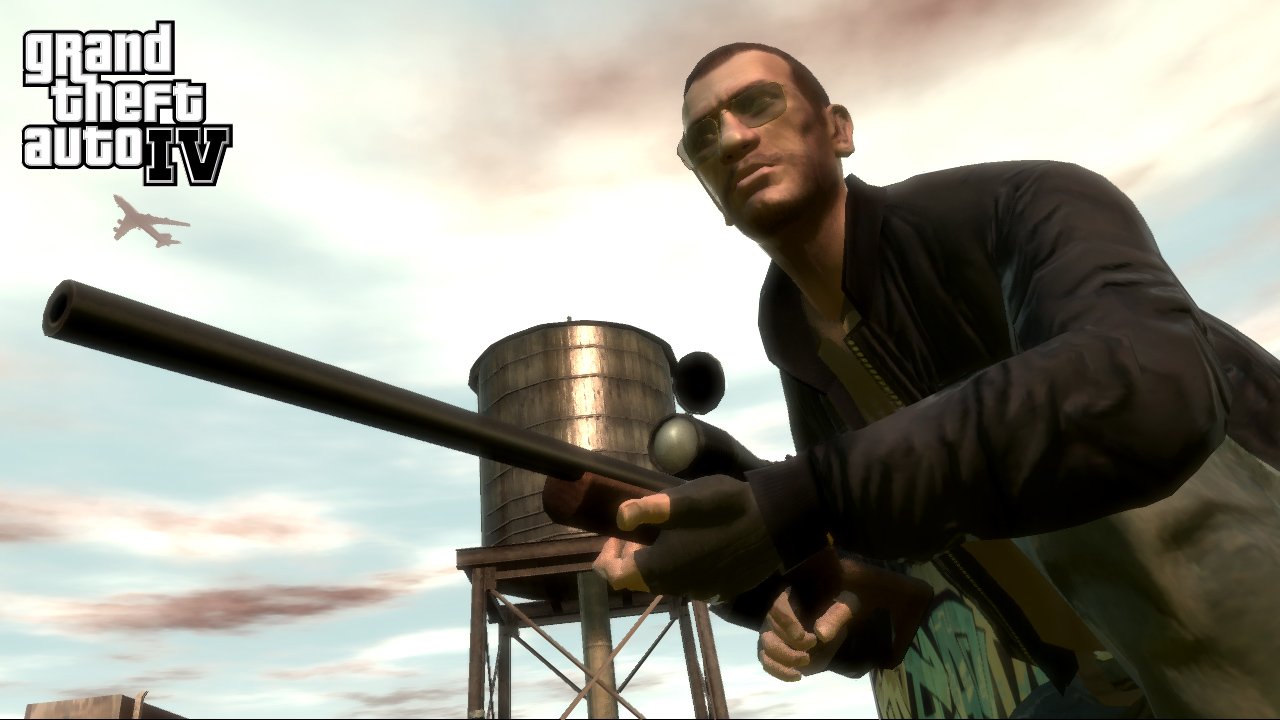 GTA IV fans just got one of the biggest holiday gifts in years—literally called “Christmas” by some in the community. A massive pre-release build of Grand Theft Auto IV from late 2007 has leaked online, and dataminers are already uncovering a treasure trove of features Rockstar almost shipped but ultimately cut. From fully modeled working ferries to zombie minigame assets and altered radio tracks, this leak is giving us a rare peek behind the curtain of one of gaming’s most beloved titles. Xbox 360 devkit bought for $5 at car boot sale came with 2007 beta build of GTA IV with unreleased assets — Version includes cut ferry system, zombies, and more | Tom's Hardware The story starts with an unassuming car boot sale in Edinburgh. GTA Forums user janmatant scored a white “phat” Xbox 360 development kit (XDK) for just £5 from a scrapyard seller. It still had the original Rockstar North sticker on it. He dumped the entire hard drive—around 118GB of files—onto the Internet Archive, and the beta hunting community went into overdrive. The build dates back to roughly November 2007, just months before the game’s April 2008 launch. It’s playable with debug tools on real hardware, and the files are now being dissected in detail. Working Ferries That Almost Made It Into Liberty CityOne of the coolest discoveries? The Liberty Ferries were actually functional in this build. Remember seeing those big green-and-white boats chugging across the water in GTA IV’s very first trailer? They were supposed to move back and forth like the in-game trains, complete with proper models and textures. Dataminers like HeySlickThatsMe pulled the assets straight from the files. Former Rockstar North technical director Obbe Vermeij confirmed on X (formerly Twitter) that the ferries were cut late in development. The main issues? Collision problems galore—NPCs and vehicles kept clipping or stacking on top of each other in weird ways. It was just too buggy to keep in the final game, even though the models were basically done. Seeing them here really drives home how much Rockstar experimented with Liberty City’s liveliness right up until launch. Zombies? Yes, Rockstar Toyed With a MinigameWe’ve heard whispers for years about zombie assets hidden in GTA IV files, but this leak takes it to another level. Researchers Lukakion and HeySlickThatsMe found a bunch of files with “Zomb” in the naming convention—straight-up references to a zombie minigame. There are unused pickups, animations, and even hospital-style gurneys that scream undead survival mode. Obbe Vermeij chimed in again, saying the artists were always sneaking zombies into prototypes (“artists were always trying to put zombies in things”), but it never got very far. Still, these leftover assets prove Rockstar at least played around with the idea of a bonus undead mode, maybe something arcade-style like the later GTA Online heists or club missions. It’s wild to think how different the game could have felt with a zombie twist. Radio Stations, Cut Dialogue, and Tons of Tiny TweaksThe audio side of the leak is equally fascinating. Over two dozen songs across 11 radio stations were swapped out or changed compared to the final release. Some placeholder tracks and intro voiceovers are still in there too. Cutscenes got a major overhaul as well—different camera angles, extended scenes, and alternate dialogue takes. One standout example: Niko and his ULP contact refer to the “FBI” instead of the in-game “FIB” in several lines. Minor visual tweaks pop up everywhere. Some vehicles have slightly different details, NPCs sport alternate clothing, and even a few story characters look a little different in their beta models. It all adds up to a version of Liberty City that feels just a bit more raw and experimental than the polished final product we got. This leak is still fresh, and the community is far from done digging. More details are popping up by the hour on GTA Forums, and fans are already talking about trying to make the beta build fully playable again. Whether you’re a die-hard GTA IV fan who’s logged hundreds of hours in Liberty City or just love behind-the-scenes dev stories, this one feels special. What’s your favorite cut feature from the leak so far—the ferries, the zombie hints, or something else entirely? Drop your thoughts below, and keep an eye on RockstarINTEL for more updates as the beta hunt continues. Rockstar games never stop surprising us, even 18 years later.
 -
GTA IV fans just got one of the biggest holiday gifts in years—literally called “Christmas” by some in the community. A massive pre-release build of Grand Theft Auto IV from late 2007 has leaked online, and dataminers are already uncovering a treasure trove of features Rockstar almost shipped but ultimately cut. From fully modeled working ferries to zombie minigame assets and altered radio tracks, this leak is giving us a rare peek behind the curtain of one of gaming’s most beloved titles. Xbox 360 devkit bought for $5 at car boot sale came with 2007 beta build of GTA IV with unreleased assets — Version includes cut ferry system, zombies, and more | Tom's Hardware The story starts with an unassuming car boot sale in Edinburgh. GTA Forums user janmatant scored a white “phat” Xbox 360 development kit (XDK) for just £5 from a scrapyard seller. It still had the original Rockstar North sticker on it. He dumped the entire hard drive—around 118GB of files—onto the Internet Archive, and the beta hunting community went into overdrive. The build dates back to roughly November 2007, just months before the game’s April 2008 launch. It’s playable with debug tools on real hardware, and the files are now being dissected in detail. Working Ferries That Almost Made It Into Liberty CityOne of the coolest discoveries? The Liberty Ferries were actually functional in this build. Remember seeing those big green-and-white boats chugging across the water in GTA IV’s very first trailer? They were supposed to move back and forth like the in-game trains, complete with proper models and textures. Dataminers like HeySlickThatsMe pulled the assets straight from the files. Former Rockstar North technical director Obbe Vermeij confirmed on X (formerly Twitter) that the ferries were cut late in development. The main issues? Collision problems galore—NPCs and vehicles kept clipping or stacking on top of each other in weird ways. It was just too buggy to keep in the final game, even though the models were basically done. Seeing them here really drives home how much Rockstar experimented with Liberty City’s liveliness right up until launch. Zombies? Yes, Rockstar Toyed With a MinigameWe’ve heard whispers for years about zombie assets hidden in GTA IV files, but this leak takes it to another level. Researchers Lukakion and HeySlickThatsMe found a bunch of files with “Zomb” in the naming convention—straight-up references to a zombie minigame. There are unused pickups, animations, and even hospital-style gurneys that scream undead survival mode. Obbe Vermeij chimed in again, saying the artists were always sneaking zombies into prototypes (“artists were always trying to put zombies in things”), but it never got very far. Still, these leftover assets prove Rockstar at least played around with the idea of a bonus undead mode, maybe something arcade-style like the later GTA Online heists or club missions. It’s wild to think how different the game could have felt with a zombie twist. Radio Stations, Cut Dialogue, and Tons of Tiny TweaksThe audio side of the leak is equally fascinating. Over two dozen songs across 11 radio stations were swapped out or changed compared to the final release. Some placeholder tracks and intro voiceovers are still in there too. Cutscenes got a major overhaul as well—different camera angles, extended scenes, and alternate dialogue takes. One standout example: Niko and his ULP contact refer to the “FBI” instead of the in-game “FIB” in several lines. Minor visual tweaks pop up everywhere. Some vehicles have slightly different details, NPCs sport alternate clothing, and even a few story characters look a little different in their beta models. It all adds up to a version of Liberty City that feels just a bit more raw and experimental than the polished final product we got. This leak is still fresh, and the community is far from done digging. More details are popping up by the hour on GTA Forums, and fans are already talking about trying to make the beta build fully playable again. Whether you’re a die-hard GTA IV fan who’s logged hundreds of hours in Liberty City or just love behind-the-scenes dev stories, this one feels special. What’s your favorite cut feature from the leak so far—the ferries, the zombie hints, or something else entirely? Drop your thoughts below, and keep an eye on RockstarINTEL for more updates as the beta hunt continues. Rockstar games never stop surprising us, even 18 years later. View full article
-
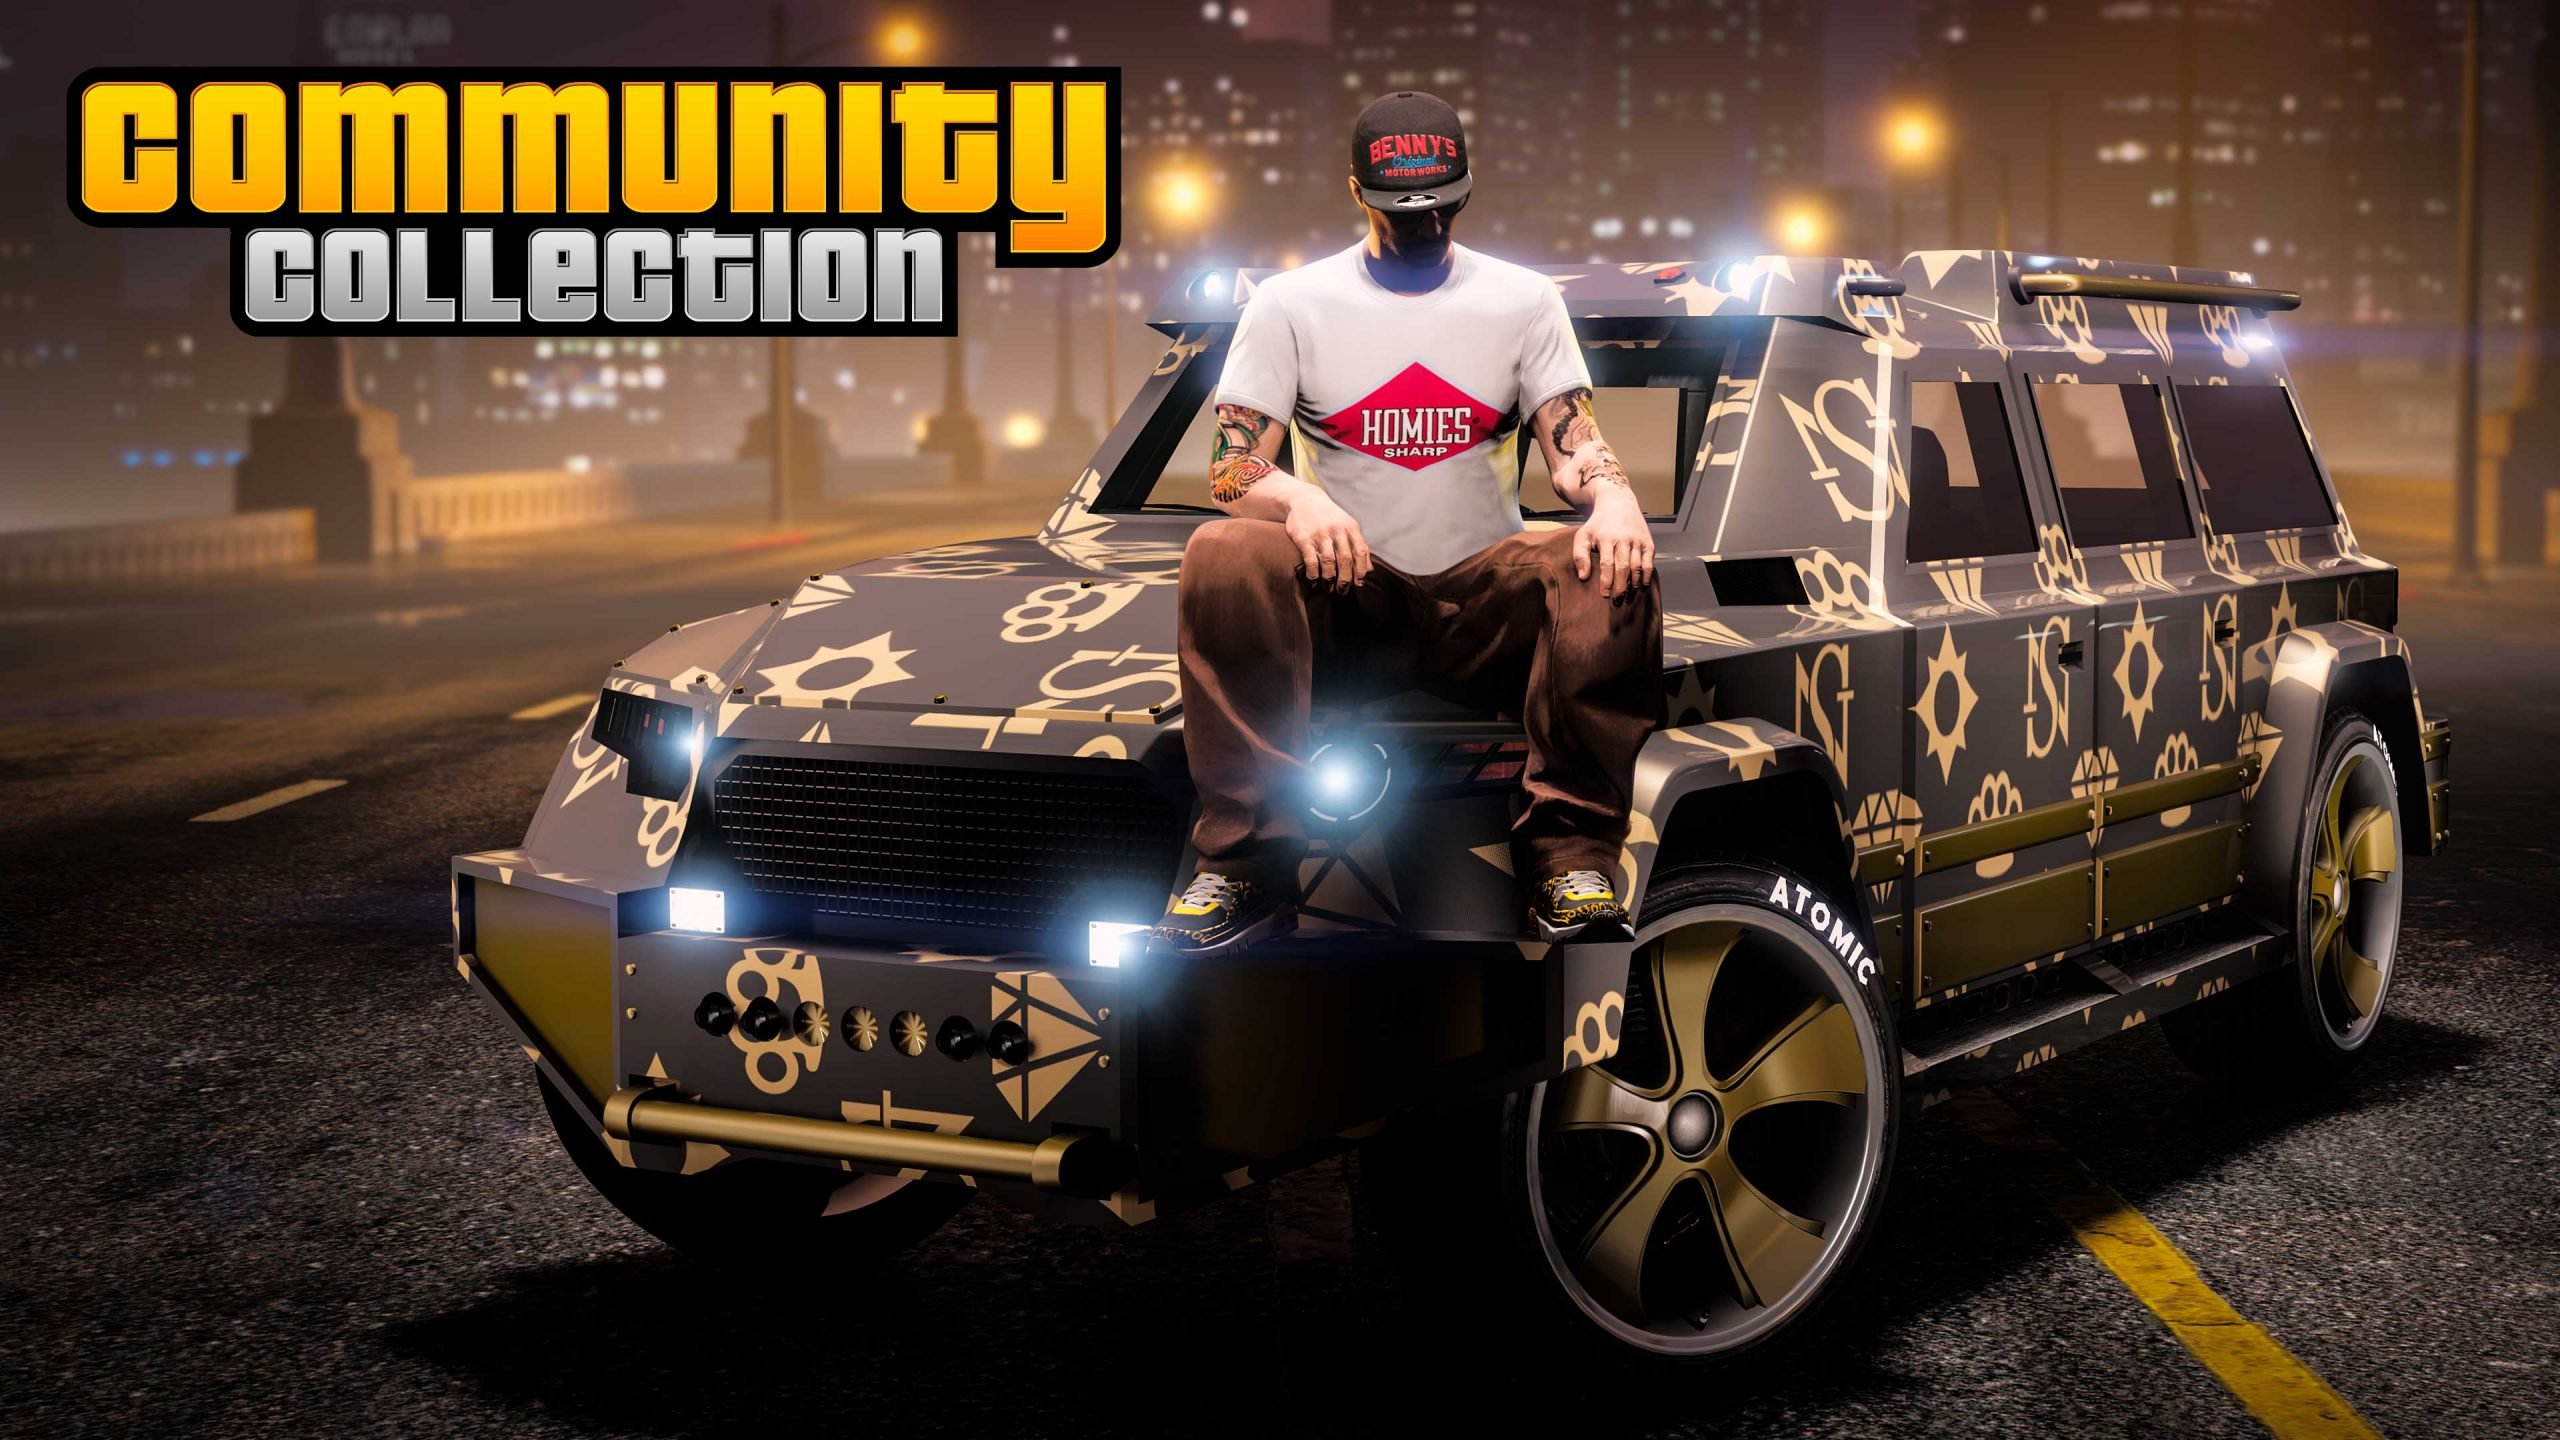 Rockstar Games is celebrating player creativity like never before with the launch of the Community Series Showcase — the first event of its kind in GTA Online. Running from March 26th through April 1st, this week-long event delivers triple rewards on community jobs, huge login bonuses, exclusive unlocks, and massive vehicle discounts. Whether you're grinding for cash or hunting rare liveries, there's something for every player in Los Santos this week. Massive Login & Weekly RewardsLog in anytime during the event and you'll automatically receive GTA$1,000,000 (deposited within 72 hours). Complete just five Community Series Jobs each week to earn an extra GTA$500,000. Stick with the Weekly Challenges across the next three weeks and you'll unlock the full Community Collection — featuring the stylish Homies Sharp Tee, Benny’s Fitted Cap, and a brand-new Knuckleduster livery for the HVY Nightshark. 3x GTA$ and RP is active on all Community Series jobs, making this the perfect time to jump into player-created races, deathmatches, and missions. Triple & Double Reward HotspotsThe event is loaded with multipliers to boost your earnings: 3x GTA$ & RP on Special Vehicle Work 3x GTA$ & RP on Money Laundering Missions 2x GTA$ & RP on Mr. Faber Work (4x for GTA+ members) 2x Research Progress on Laundered Income 2x Hands On Car Wash Safe Income This Week’s Salvage Yard Robberies & Racing ActionMcTony Robbery: Target the Överflöd Entity MT Podium Robbery: Target the Karin Everon Gangbanger Robbery: Target the Weeny Issi Rally Spin the Lucky Wheel daily for your shot at the Grotti Stinger TT (normally $2,380,000). GTA+ members get two spins per 24 hours. Win any LS Car Meet Series race to claim the Enus Paragon S as this week’s Prize Ride (normally $2,010,000). Premium Test Ride this week is the Vapid FMJ MK V (next-gen platforms), while the Test Track features the Dinka Enduro, Hijak Ruston, and Lampadati Michelli GT. Vehicle Discounts & FreebiesHead to Luxury Autos in Rockford Hills for the Annis Hardy Way (new Grass Roots livery) and Karin Everon RS. Simeon’s Premium Deluxe Motorsport showroom has the BF Bifta, Bravado Verlierer, Canis Kalahari, Lampadati Pigalle, and Ocelot Lynx ready to test drive. Big savings this week: FREE – LSIA Vehicle Warehouse + JoBuilt Phantom Wedge 50% off – Hands On Car Wash Property 30% off – Annis Euros, Dinka Vindicator, HVY Nightshark, Karin Everon RS, Karin Previon, Mammoth Patriot Stretch, Nagasaki Blazer Aqua, Överflöd Suzume, Principe Lectro, Übermacht Rebla GTS Quick Weekly Challenges & ExtrasWeekly Challenge: Win three Races → GTA$100,000 reward HSW Time Trial: Del Perro Beach Standard Time Trial: LSIA Premium Race: Taking Off The Gun Van is stocked with discounted weapons (Railgun, Compact EMP Launcher, etc.) — GTA+ members get even better prices. This Community Series Showcase is Rockstar’s way of spotlighting the incredible creativity of the GTA Online community while giving everyone a chance to stack cash and unlock exclusive gear. Log in today, fire up some Community Series jobs, and make the most of these limited-time bonuses before they disappear on April 1st.
 -
Rockstar Games is celebrating player creativity like never before with the launch of the Community Series Showcase — the first event of its kind in GTA Online. Running from March 26th through April 1st, this week-long event delivers triple rewards on community jobs, huge login bonuses, exclusive unlocks, and massive vehicle discounts. Whether you're grinding for cash or hunting rare liveries, there's something for every player in Los Santos this week. Massive Login & Weekly RewardsLog in anytime during the event and you'll automatically receive GTA$1,000,000 (deposited within 72 hours). Complete just five Community Series Jobs each week to earn an extra GTA$500,000. Stick with the Weekly Challenges across the next three weeks and you'll unlock the full Community Collection — featuring the stylish Homies Sharp Tee, Benny’s Fitted Cap, and a brand-new Knuckleduster livery for the HVY Nightshark. 3x GTA$ and RP is active on all Community Series jobs, making this the perfect time to jump into player-created races, deathmatches, and missions. Triple & Double Reward HotspotsThe event is loaded with multipliers to boost your earnings: 3x GTA$ & RP on Special Vehicle Work 3x GTA$ & RP on Money Laundering Missions 2x GTA$ & RP on Mr. Faber Work (4x for GTA+ members) 2x Research Progress on Laundered Income 2x Hands On Car Wash Safe Income This Week’s Salvage Yard Robberies & Racing ActionMcTony Robbery: Target the Överflöd Entity MT Podium Robbery: Target the Karin Everon Gangbanger Robbery: Target the Weeny Issi Rally Spin the Lucky Wheel daily for your shot at the Grotti Stinger TT (normally $2,380,000). GTA+ members get two spins per 24 hours. Win any LS Car Meet Series race to claim the Enus Paragon S as this week’s Prize Ride (normally $2,010,000). Premium Test Ride this week is the Vapid FMJ MK V (next-gen platforms), while the Test Track features the Dinka Enduro, Hijak Ruston, and Lampadati Michelli GT. Vehicle Discounts & FreebiesHead to Luxury Autos in Rockford Hills for the Annis Hardy Way (new Grass Roots livery) and Karin Everon RS. Simeon’s Premium Deluxe Motorsport showroom has the BF Bifta, Bravado Verlierer, Canis Kalahari, Lampadati Pigalle, and Ocelot Lynx ready to test drive. Big savings this week: FREE – LSIA Vehicle Warehouse + JoBuilt Phantom Wedge 50% off – Hands On Car Wash Property 30% off – Annis Euros, Dinka Vindicator, HVY Nightshark, Karin Everon RS, Karin Previon, Mammoth Patriot Stretch, Nagasaki Blazer Aqua, Överflöd Suzume, Principe Lectro, Übermacht Rebla GTS Quick Weekly Challenges & ExtrasWeekly Challenge: Win three Races → GTA$100,000 reward HSW Time Trial: Del Perro Beach Standard Time Trial: LSIA Premium Race: Taking Off The Gun Van is stocked with discounted weapons (Railgun, Compact EMP Launcher, etc.) — GTA+ members get even better prices. This Community Series Showcase is Rockstar’s way of spotlighting the incredible creativity of the GTA Online community while giving everyone a chance to stack cash and unlock exclusive gear. Log in today, fire up some Community Series jobs, and make the most of these limited-time bonuses before they disappear on April 1st. View full article
-
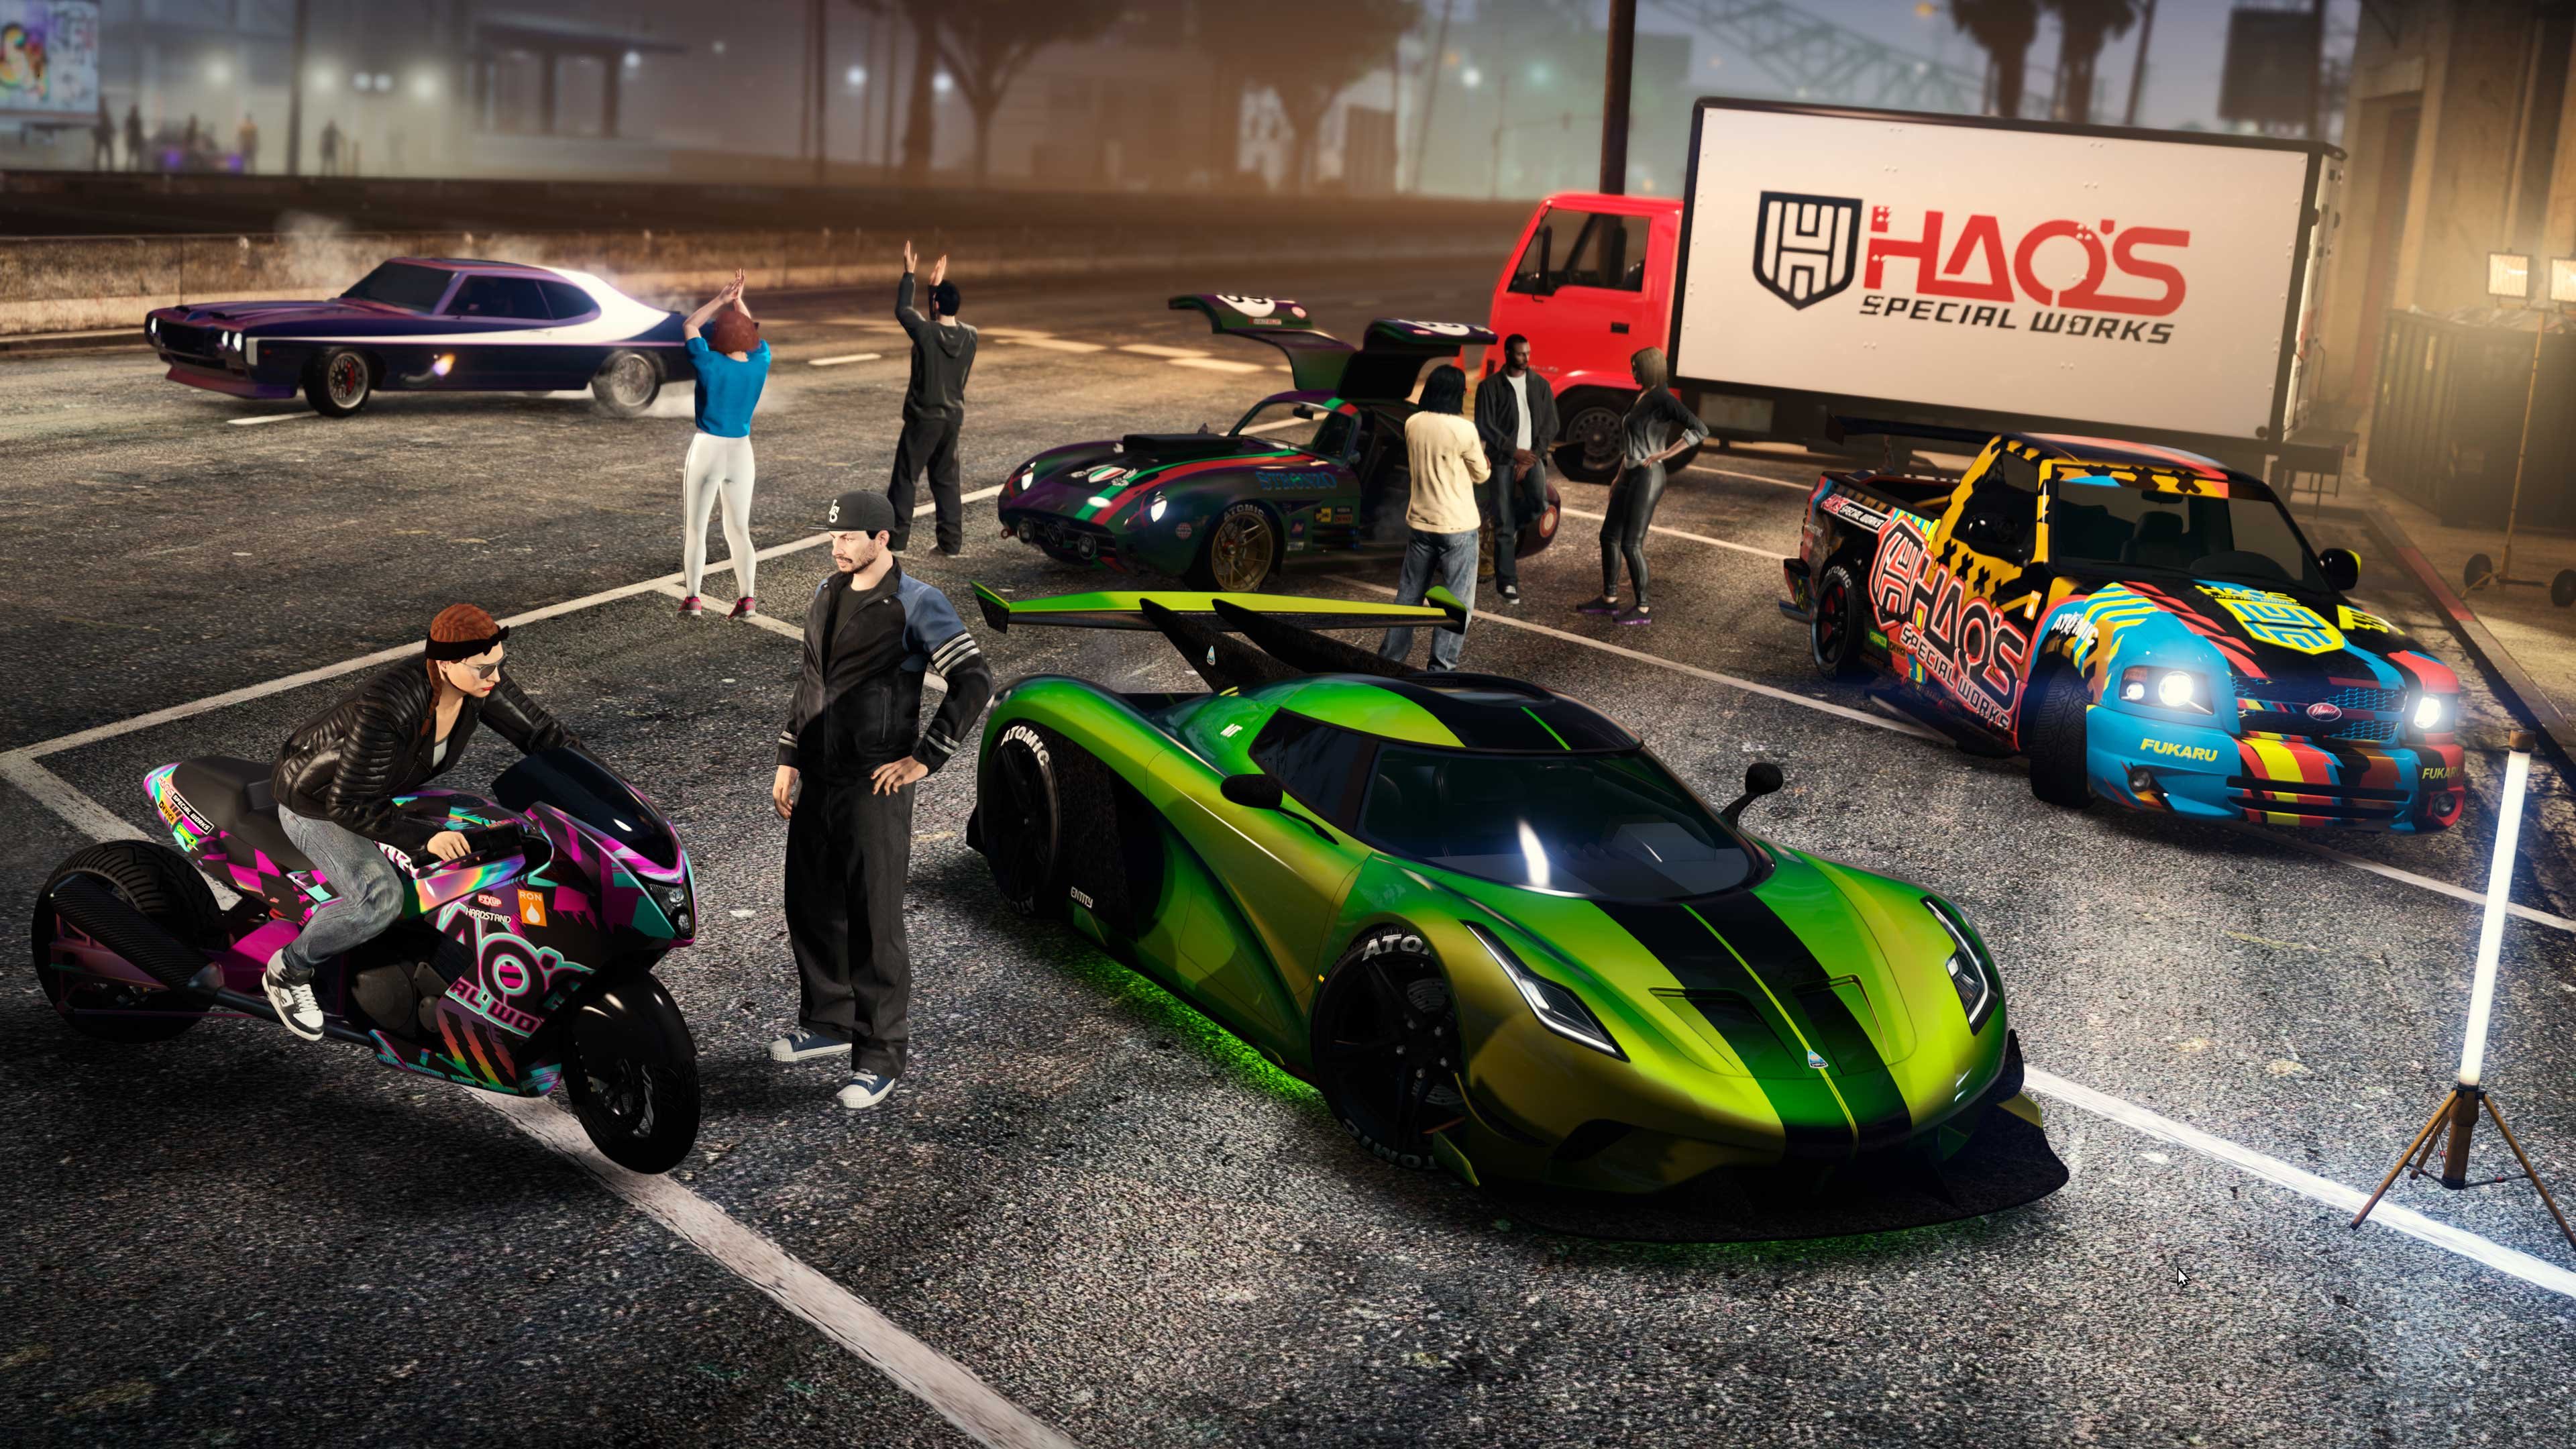 Rockstar Games just quietly slipped a new background update into GTA Online, and while it’s small on paper, it’s doing some important housekeeping while also winking at what’s coming next month. The patch went live on March 24, 2026, right on the heels of last week’s downloadable PC update that only mentioned vague “stability and security” fixes. Unlike big title updates that force you to download gigabytes, this one is a true server-side background patch. You don’t have to do anything — the next time you load into GTA Online, the changes are already there. Rockstar has been dropping these quiet fixes regularly since the A Safehouse in the Hills update dropped, showing they’re staying on top of things without making a huge fuss. Here’s exactly what the new patch tweaks: Vehicle actor glitch fixed: Players can now actually hop into and drive any vehicle that an NPC actor exits during player-created missions. Before this, you’d sometimes be left staring at an empty car you couldn’t touch. Mission creators everywhere just breathed a sigh of relief. Hunting Pack (Get Lamar) voting skip: The game will now automatically skip the voting screen for this popular Adversary Mode across four different maps. Three were already in rotation; the fourth one is brand-new and is clearly being prepped for the big 4/20 event in April. Smoother matchmaking, less waiting around — everyone wins. PC-only Apartment Trade-In glitch patched: That annoying exploit letting some players cheese the apartment trade-in system on PC has been squashed. Community dataminer and insider Tex2 was the first to spot and share the patch notes on X, and the details line up perfectly with Rockstar’s usual low-key approach to these background updates. But the real story isn’t just the bug fixes — it’s the not-so-subtle hint at what’s dropping in April. The new fourth Hunting Pack (Get Lamar) map is obviously timed for the 4/20 celebrations, and dataminers have already uncovered an unreleased “Stoner Survival” mode that’s expected to roll out in the coming weeks with its own set of unlockable rewards. It all points to Rockstar pre-loading content so everything runs smoothly when the drip-feed hits. GTA Online players have gotten used to this pattern: a bunch of small background patches, then a wave of fresh modes, vehicles, and events that keep the game feeling alive years after launch. This latest one is classic Rockstar — fix what’s broken, streamline what’s clunky, and quietly get the servers ready for the next party. So if you log in today and notice smoother mission flow or faster Adversary Mode queues, you know why. And if you’re already counting down to 4/20… well, Rockstar just gave you another reason to keep the calendar marked. Expect more of these little updates in the next few weeks as April’s content gets closer. In the meantime, happy grinding — and try not to trade in too many apartments on PC until you’re sure the glitch is fully gone.
 -
Rockstar Games just quietly slipped a new background update into GTA Online, and while it’s small on paper, it’s doing some important housekeeping while also winking at what’s coming next month. The patch went live on March 24, 2026, right on the heels of last week’s downloadable PC update that only mentioned vague “stability and security” fixes. Unlike big title updates that force you to download gigabytes, this one is a true server-side background patch. You don’t have to do anything — the next time you load into GTA Online, the changes are already there. Rockstar has been dropping these quiet fixes regularly since the A Safehouse in the Hills update dropped, showing they’re staying on top of things without making a huge fuss. Here’s exactly what the new patch tweaks: Vehicle actor glitch fixed: Players can now actually hop into and drive any vehicle that an NPC actor exits during player-created missions. Before this, you’d sometimes be left staring at an empty car you couldn’t touch. Mission creators everywhere just breathed a sigh of relief. Hunting Pack (Get Lamar) voting skip: The game will now automatically skip the voting screen for this popular Adversary Mode across four different maps. Three were already in rotation; the fourth one is brand-new and is clearly being prepped for the big 4/20 event in April. Smoother matchmaking, less waiting around — everyone wins. PC-only Apartment Trade-In glitch patched: That annoying exploit letting some players cheese the apartment trade-in system on PC has been squashed. Community dataminer and insider Tex2 was the first to spot and share the patch notes on X, and the details line up perfectly with Rockstar’s usual low-key approach to these background updates. But the real story isn’t just the bug fixes — it’s the not-so-subtle hint at what’s dropping in April. The new fourth Hunting Pack (Get Lamar) map is obviously timed for the 4/20 celebrations, and dataminers have already uncovered an unreleased “Stoner Survival” mode that’s expected to roll out in the coming weeks with its own set of unlockable rewards. It all points to Rockstar pre-loading content so everything runs smoothly when the drip-feed hits. GTA Online players have gotten used to this pattern: a bunch of small background patches, then a wave of fresh modes, vehicles, and events that keep the game feeling alive years after launch. This latest one is classic Rockstar — fix what’s broken, streamline what’s clunky, and quietly get the servers ready for the next party. So if you log in today and notice smoother mission flow or faster Adversary Mode queues, you know why. And if you’re already counting down to 4/20… well, Rockstar just gave you another reason to keep the calendar marked. Expect more of these little updates in the next few weeks as April’s content gets closer. In the meantime, happy grinding — and try not to trade in too many apartments on PC until you’re sure the glitch is fully gone. View full article
-
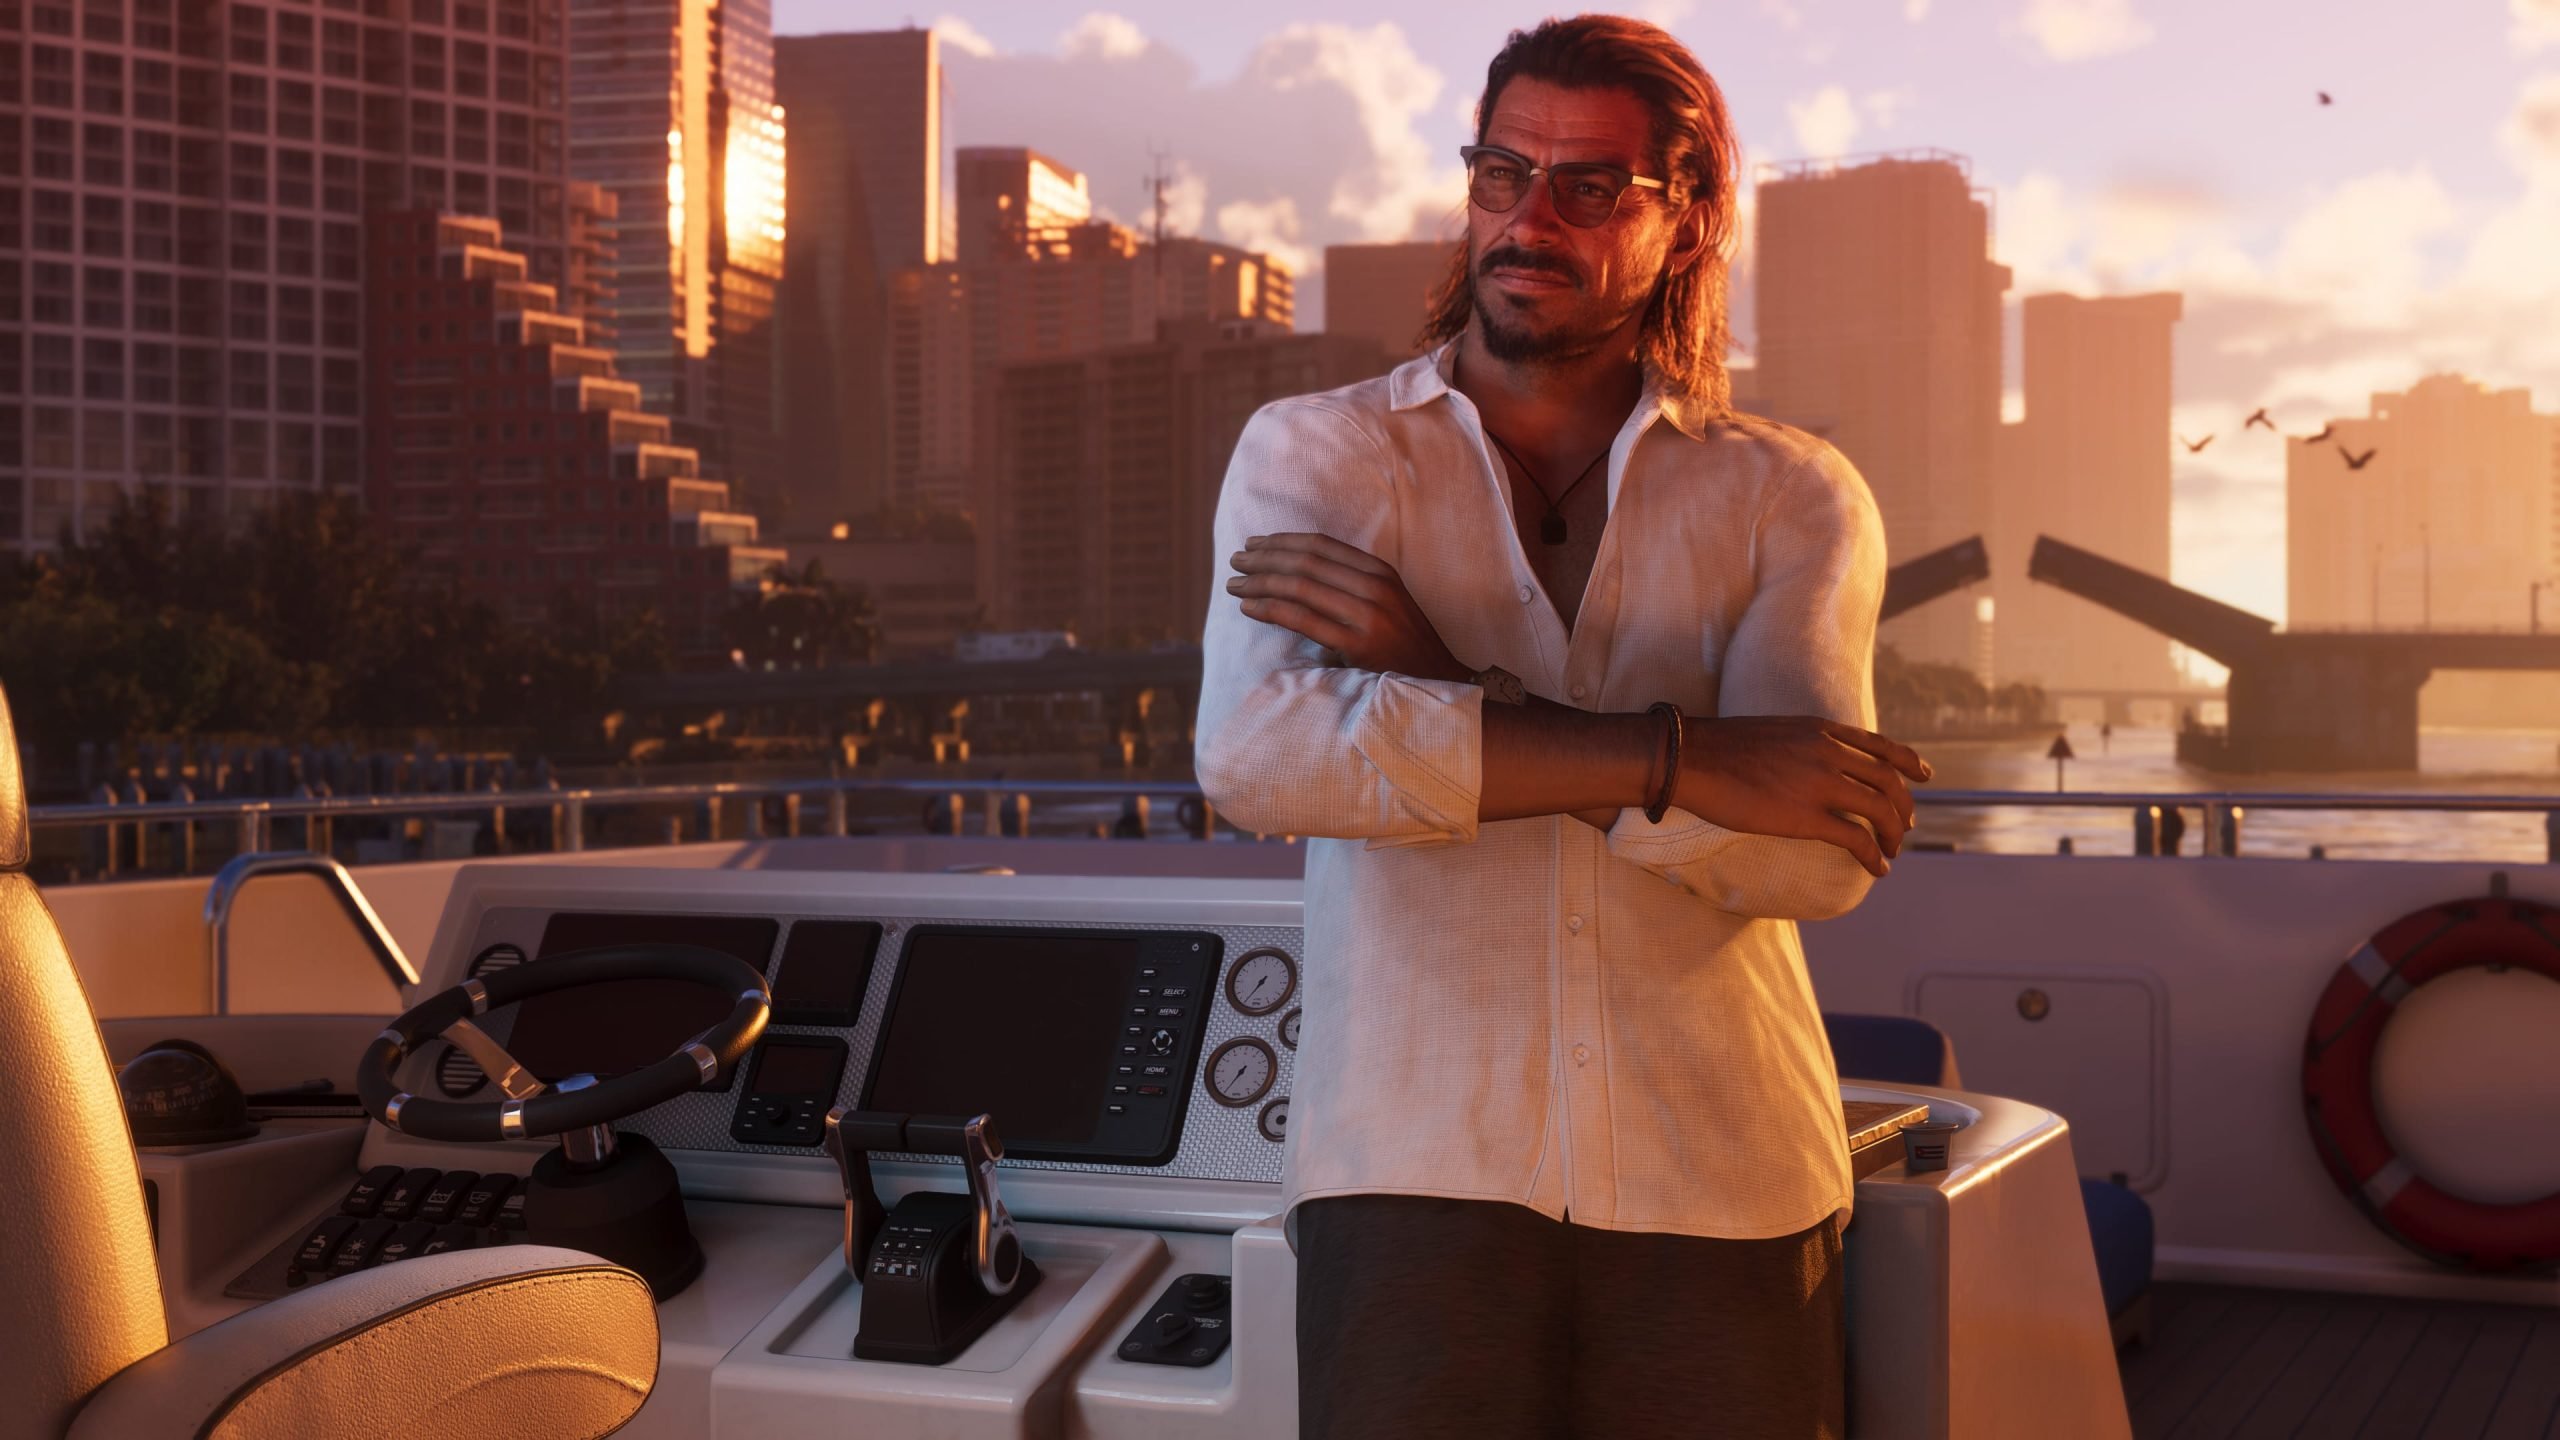 Rockstar Games has kept GTA 6 under wraps tighter than a high-stakes heist, but every so often a genuine crumb slips through from inside the studio. Today’s leak isn’t some blurry screenshot or anonymous forum post — it comes straight from a former Graphics Programmer who spent three years on the game. And what they casually listed on their LinkedIn profile has fans buzzing about one of the most overlooked (yet wildly immersive) features in any open-world title: breakable glass. The detail was first spotted by Reddit user esketitethan, who shared a screenshot of the developer’s now-deleted work history. Between February 2020 and April 2023, this Rockstar veteran was explicitly credited with leading “the next generation procedural breakable glass system for vehicles and props.” That single line says more than most official trailers have so far. Think back to GTA V. Those shattering windshields and side mirrors were already impressive for 2013 tech — realistic cracks, flying shards, the way sunlight caught the edges mid-explosion. Rockstar clearly didn’t just want to one-up that; they wanted to redefine it. A “procedural” system means the glass won’t be pre-baked animations or simple physics. Every pane, every car window, every storefront could behave differently based on angle, force, material thickness, and even weather. Rain-streaked glass might fracture one way; bulletproof limo glass another. In a game set in the neon-drenched, chaotic streets of Vice City and Leonida, this isn’t just eye candy — it’s going to make every crash, every shootout, every accidental baseball bat swing feel brand new. The same developer also mentioned designing specialized tools for the team to capture in-game footage with “extra details from their rendering system.” Translation: the cinematic trailers we’ve all been obsessing over (and the ones still to come) are getting an even bigger polish behind the scenes. They reportedly fixed and improved various rendering systems too, which lines up with everything we’ve heard about Rockstar pushing the RAGE engine into truly next-gen territory. Of course, the info didn’t stay up long. Once the Reddit post started circulating, the LinkedIn section quietly vanished — a classic move we’ve seen before from Rockstar alumni who accidentally (or not-so-accidentally) spill the beans. Remember the animator who dropped work-in-progress clips a few months ago? Same energy. These aren’t random hackers; they’re people who actually shipped code on the game and can’t help flexing their portfolio a little. Fans have been starving for concrete details since Trailer 2 dropped last year. We know Lucia and Jason are coming, we know the map is massive, and we know Rockstar is aiming for 2026. But graphics talk always hits different. GTA 6 isn’t just supposed to look better than Red Dead Redemption 2 — it’s supposed to feel like the leap from GTA IV to V all over again. A next-gen glass system might sound niche, but it’s the kind of small-but-huge upgrade that makes the whole world feel alive. Picture a high-speed chase through downtown Vice City at dusk: taillights reflecting in cracked windshields, bullets spider-webbing shop windows, shards raining down as you drift around a corner. That’s not just prettier — it’s the kind of tactile chaos that makes GTA unforgettable. Rockstar has a history of under-promising and over-delivering on tech. If a single ex-employee’s LinkedIn brag is already this exciting, imagine what the final game is hiding. The studio has been radio silent since the last trailer, but leaks like this keep the hype train rolling at full speed. One thing’s for sure: when GTA 6 finally drops, smashing a car window is never going to feel the same again. And we can’t wait to see (and hear) every single shard fly.
 -
Rockstar Games has kept GTA 6 under wraps tighter than a high-stakes heist, but every so often a genuine crumb slips through from inside the studio. Today’s leak isn’t some blurry screenshot or anonymous forum post — it comes straight from a former Graphics Programmer who spent three years on the game. And what they casually listed on their LinkedIn profile has fans buzzing about one of the most overlooked (yet wildly immersive) features in any open-world title: breakable glass. The detail was first spotted by Reddit user esketitethan, who shared a screenshot of the developer’s now-deleted work history. Between February 2020 and April 2023, this Rockstar veteran was explicitly credited with leading “the next generation procedural breakable glass system for vehicles and props.” That single line says more than most official trailers have so far. Think back to GTA V. Those shattering windshields and side mirrors were already impressive for 2013 tech — realistic cracks, flying shards, the way sunlight caught the edges mid-explosion. Rockstar clearly didn’t just want to one-up that; they wanted to redefine it. A “procedural” system means the glass won’t be pre-baked animations or simple physics. Every pane, every car window, every storefront could behave differently based on angle, force, material thickness, and even weather. Rain-streaked glass might fracture one way; bulletproof limo glass another. In a game set in the neon-drenched, chaotic streets of Vice City and Leonida, this isn’t just eye candy — it’s going to make every crash, every shootout, every accidental baseball bat swing feel brand new. The same developer also mentioned designing specialized tools for the team to capture in-game footage with “extra details from their rendering system.” Translation: the cinematic trailers we’ve all been obsessing over (and the ones still to come) are getting an even bigger polish behind the scenes. They reportedly fixed and improved various rendering systems too, which lines up with everything we’ve heard about Rockstar pushing the RAGE engine into truly next-gen territory. Of course, the info didn’t stay up long. Once the Reddit post started circulating, the LinkedIn section quietly vanished — a classic move we’ve seen before from Rockstar alumni who accidentally (or not-so-accidentally) spill the beans. Remember the animator who dropped work-in-progress clips a few months ago? Same energy. These aren’t random hackers; they’re people who actually shipped code on the game and can’t help flexing their portfolio a little. Fans have been starving for concrete details since Trailer 2 dropped last year. We know Lucia and Jason are coming, we know the map is massive, and we know Rockstar is aiming for 2026. But graphics talk always hits different. GTA 6 isn’t just supposed to look better than Red Dead Redemption 2 — it’s supposed to feel like the leap from GTA IV to V all over again. A next-gen glass system might sound niche, but it’s the kind of small-but-huge upgrade that makes the whole world feel alive. Picture a high-speed chase through downtown Vice City at dusk: taillights reflecting in cracked windshields, bullets spider-webbing shop windows, shards raining down as you drift around a corner. That’s not just prettier — it’s the kind of tactile chaos that makes GTA unforgettable. Rockstar has a history of under-promising and over-delivering on tech. If a single ex-employee’s LinkedIn brag is already this exciting, imagine what the final game is hiding. The studio has been radio silent since the last trailer, but leaks like this keep the hype train rolling at full speed. One thing’s for sure: when GTA 6 finally drops, smashing a car window is never going to feel the same again. And we can’t wait to see (and hear) every single shard fly. View full article
-
 Rockstar Games, the studio behind the massively anticipated Grand Theft Auto 6, has found itself in the spotlight once again — this time not for a trailer or release date, but for a government ruling on worker pay. On March 19, 2026, His Majesty’s Revenue and Customs (HMRC) published its latest list of employers who failed to pay the National Minimum Wage. Among the 389 companies named and shamed was Rockstar Games UK Limited, the legal entity that runs all of Rockstar’s UK operations, including the flagship Rockstar North studio in Edinburgh. The details are straightforward but telling: the company underpaid five staff members a total of £1,396.73 — roughly £279 per person. HMRC has ordered Rockstar to repay every penny owed, on top of penalties that form part of a broader £12.6 million in fines issued across the UK. For context, this crackdown recovered more than £7.3 million for around 60,000 workers nationwide. The affected employees work at Rockstar North’s Holyrood Road office in Edinburgh — the same studio leading development on GTA 6, the game expected to dominate 2026 when it launches later this year. While £1,396.73 is pocket change for a company that routinely brings in billions, it’s real money to the people who spent long hours (and often late nights) building what many hope will be the biggest entertainment release of the decade. A Small Violation in a Bigger Picture This isn’t the first time Rockstar North has faced scrutiny in the UK. Last year the studio made headlines after firing dozens of employees, with unions accusing the company of union-busting tactics. Politicians have also questioned Rockstar’s use of taxpayer support while generating huge profits without a new major release until now. Still, the latest incident stands out for its simplicity. Unlike high-profile disputes or leaks, this was a straightforward payroll error caught during HMRC’s routine enforcement. The government’s message is clear: no company — not even one developing the most hyped video game in history — is above the rules. Business Secretary Peter Kyle put it bluntly in the official announcement: “A good employer doesn’t build their business on the back of unpaid wages.” Employment Rights Minister Kate Dearden added that nobody should finish a week’s work and discover they’ve been short-changed. Rockstar’s Silence and What Comes NextAs of March 23, 2026, Rockstar has not issued any public comment on the underpayments. That silence echoes the company’s approach to previous labor controversies at the studio. For fans, the story lands at a sensitive time. GTA 6 is in the final stretch of development, with the entire industry watching. Many developers have praised the creative freedom at Rockstar, but stories like this remind people that even the biggest studios can stumble on basic workplace standards. The good news? The five affected staff will soon receive what they’re owed, and the public naming may push Rockstar (and others on the list) to tighten payroll processes. For an industry still wrestling with crunch culture, overtime disputes, and fair compensation, every enforcement action like this matters. In the end, this is less about one small payroll slip and more about the principle that even giants have to play by the same rules as everyone else. GTA 6 fans will keep counting down the days to November 2026 — but they’ll also be watching how the studio behind it treats the people actually building the game.
 -
Rockstar Games, the studio behind the massively anticipated Grand Theft Auto 6, has found itself in the spotlight once again — this time not for a trailer or release date, but for a government ruling on worker pay. On March 19, 2026, His Majesty’s Revenue and Customs (HMRC) published its latest list of employers who failed to pay the National Minimum Wage. Among the 389 companies named and shamed was Rockstar Games UK Limited, the legal entity that runs all of Rockstar’s UK operations, including the flagship Rockstar North studio in Edinburgh. The details are straightforward but telling: the company underpaid five staff members a total of £1,396.73 — roughly £279 per person. HMRC has ordered Rockstar to repay every penny owed, on top of penalties that form part of a broader £12.6 million in fines issued across the UK. For context, this crackdown recovered more than £7.3 million for around 60,000 workers nationwide. The affected employees work at Rockstar North’s Holyrood Road office in Edinburgh — the same studio leading development on GTA 6, the game expected to dominate 2026 when it launches later this year. While £1,396.73 is pocket change for a company that routinely brings in billions, it’s real money to the people who spent long hours (and often late nights) building what many hope will be the biggest entertainment release of the decade. A Small Violation in a Bigger Picture This isn’t the first time Rockstar North has faced scrutiny in the UK. Last year the studio made headlines after firing dozens of employees, with unions accusing the company of union-busting tactics. Politicians have also questioned Rockstar’s use of taxpayer support while generating huge profits without a new major release until now. Still, the latest incident stands out for its simplicity. Unlike high-profile disputes or leaks, this was a straightforward payroll error caught during HMRC’s routine enforcement. The government’s message is clear: no company — not even one developing the most hyped video game in history — is above the rules. Business Secretary Peter Kyle put it bluntly in the official announcement: “A good employer doesn’t build their business on the back of unpaid wages.” Employment Rights Minister Kate Dearden added that nobody should finish a week’s work and discover they’ve been short-changed. Rockstar’s Silence and What Comes NextAs of March 23, 2026, Rockstar has not issued any public comment on the underpayments. That silence echoes the company’s approach to previous labor controversies at the studio. For fans, the story lands at a sensitive time. GTA 6 is in the final stretch of development, with the entire industry watching. Many developers have praised the creative freedom at Rockstar, but stories like this remind people that even the biggest studios can stumble on basic workplace standards. The good news? The five affected staff will soon receive what they’re owed, and the public naming may push Rockstar (and others on the list) to tighten payroll processes. For an industry still wrestling with crunch culture, overtime disputes, and fair compensation, every enforcement action like this matters. In the end, this is less about one small payroll slip and more about the principle that even giants have to play by the same rules as everyone else. GTA 6 fans will keep counting down the days to November 2026 — but they’ll also be watching how the studio behind it treats the people actually building the game. View full article
-
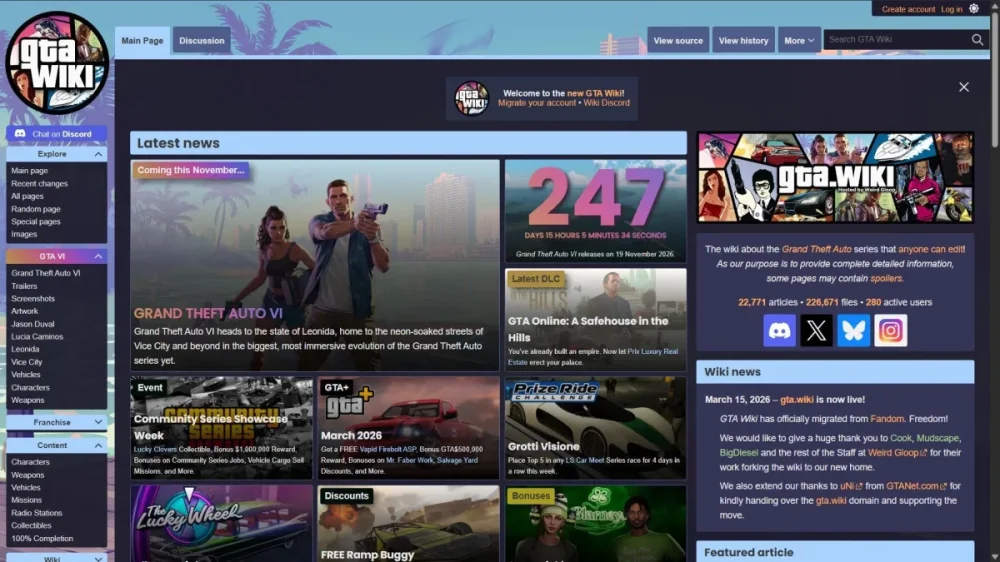
If you’ve ever lost hours diving into the Grand Theft Auto universe — chasing down every vehicle variant, mission detail, or hidden Easter egg — you know the GTA Wiki is basically the bible of the series. Today, March 20, 2026, that bible just got a massive upgrade. According to an exclusive report, the entire GTA Wiki team has broken free from Fandom’s corporate grip and launched a sleek, independent new home at gta.wiki, hosted by Weird Gloop (the same crew behind the Minecraft and RuneScape wikis). And right on the heels of the site’s 20th anniversary, they’re already in full GTA 6 prep mode. GTA Wiki opens new website after cutting ties with Fandom The migration was no small feat. Every single one of the 22,000+ pages and 226,000+ files (images, sound clips, the works) was backed up and transferred without a single loss. That’s two decades of community knowledge safely preserved, and fans can breathe easy knowing nothing disappeared in the move. But the real headline? The team isn’t just sitting back — they’re treating GTA VI like the historic launch it is. Placeholder pages are already live for mystery content, including a dedicated entry for an Unnamed GTA VI Pegassi sports car that eagle-eyed fans spotted in early footage. There’s a bustling Discord with dedicated channels for editors to coordinate, and a revamped “Project VI” document that will track every pre-release detail, from characters and weapons to tiny world-building bits like fictional companies and street names. The wiki even has ties to the excellent State of Leonida mapping project for that extra layer of immersion. Unnamed GTA VI Pegassi sports car | GTA Wiki | Fandom What about the old Fandom version that still pops up in Google searches? It’s still technically online, but it’s basically on maintenance mode. Only two staffers are keeping vandalism at bay — the vast majority of active editors (15 core staff plus a dozen regulars) have already jumped ship to the new domain. New GTA 6 content will live exclusively at gta.wiki from here on out. The team is asking the community for one simple thing: help them grow. Update your bookmarks, stop visiting the old Fandom site (it hurts their traffic and keeps ads alive), and install the free Indie Wiki Buddy browser extension. That handy tool automatically redirects you to the independent version and hides Fandom results in searches. Every click and share counts as we head into what promises to be the biggest year in GTA history. With GTA 6 officially locked in for November 19, 2026, the new GTA Wiki is positioning itself to be the ultimate companion — spoiler-tagged, deeply detailed, and completely ad-light. Whether you’re theory-crafting about Lucia and Jason’s story or just want to know every radio station in Leonida on day one, this independent rebirth feels like the perfect send-off to two decades of fandom passion. The GTA community has always been unstoppable. Now the wiki that documents it is free, focused, and ready for the next chapter. Bookmark gta.wiki, join the Discord, and get hyped — because when that trailer 2 drops and the game finally lands, this place is going to be the busiest corner of the internet.
-
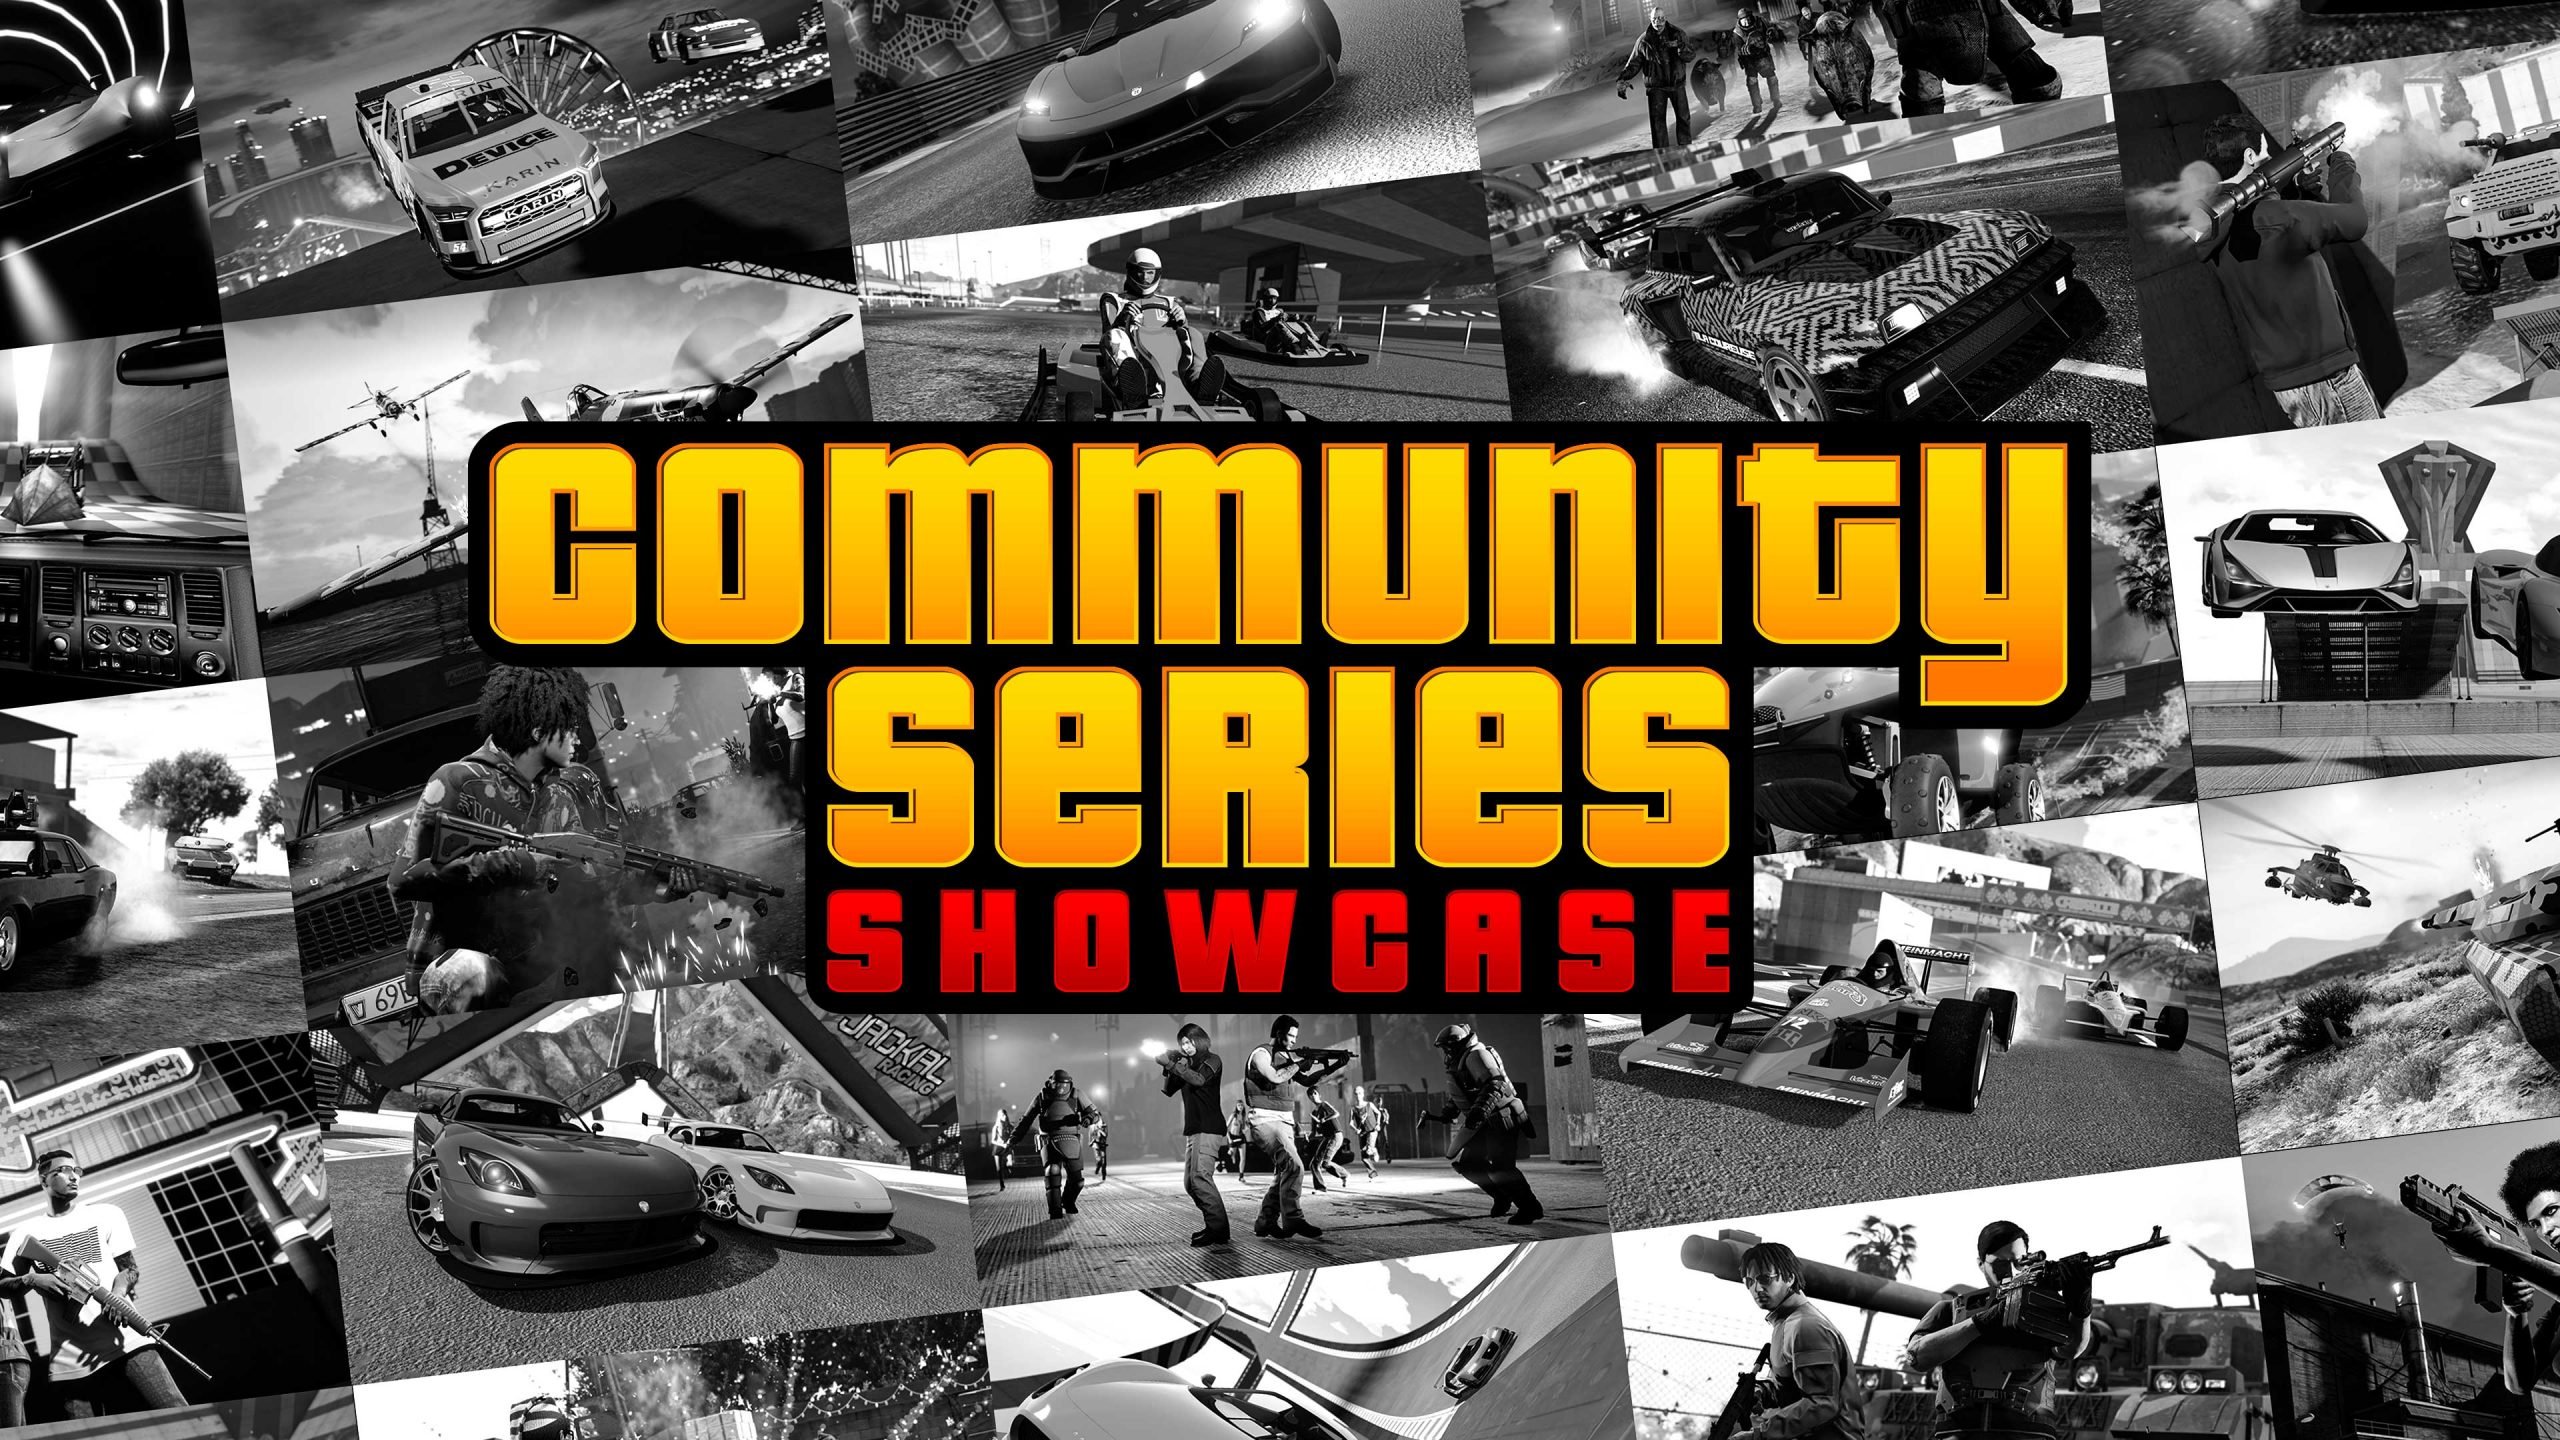 Rockstar Games has dropped another packed weekly update for GTA Online, running from March 19 through March 25, 2026. This week’s theme is the Showcase Special, headlined by the very first Community Series Showcase alongside festive St. Patrick’s Day content, triple payouts, free vehicles, and deep discounts. Whether you’re grinding for cash, hunting collectibles, or spinning the Lucky Wheel, there’s something for every Los Santos hustler. St. Patrick’s Day Festivities Kick Things OffLog in this week (on PS5, Xbox Series X|S, or PC Enhanced versions) and you’ll automatically receive the Blarneys Festive Beer Hat — the perfect accessory for your Irish-inspired crime spree. Everyone else can grab the Blarneys Stout Tee just for playing. Plus, new Lucky Clovers and Golden Clover Collectibles have been scattered across the map — hunt them down for extra rewards and festive flair. First-Ever Community Series Showcase – The Big New FeatureRockstar is spotlighting player-created content like never before with the Community Series Showcase, running now through April 1st. Here’s what you get: Log in once this week → GTA$1,000,000 (deposited within 72 hours) Complete five Community Series Jobs each week → another GTA$500,000 3x GTA$ & RP on all Community Series jobs Finish the Weekly Challenges over the next three weeks to unlock the Community Collection: Homies Sharp Tee, Benny’s Fitted Cap, and a brand-new Knuckleduster livery for the HVY Nightshark This is Rockstar’s way of celebrating the creativity of the GTA Online community — and paying players handsomely for it. Double & Triple Payouts Across the Board3x GTA$ & RP on Gerald Contact Missions 2x GTA$ & RP on Document Forgery Office Sales 2x Research Progress on Bunker Research Missions This week’s FIB Priority File (“The Black Box File”) pays double rewards Salvage Yard Robberies This WeekHead to the Salvage Yard for three fresh targets: The Duggan Robbery → Annis S80RR The McTony Robbery → Karin Hotring Everon The Gangbanger Robbery → Karin Boor Casino & Car Meet HighlightsPodium Vehicle at The Diamond Casino & Resort: Benefactor Schlagen GT (normally GTA$1,300,000 at Legendary Motorsport). GTA+ members get two spins per day! Prize Ride Challenge: Win any LS Car Meet Series race to claim the Albany Cavalcade XL (normally GTA$1,665,000 at Southern San Andreas Super Autos). Premium Test Ride (Enhanced versions only): Annis Euros X32 — take it for a spin at the Test Track. Other Test Track vehicles this week: Grotti Carbonizzare, Karin 190z, and Lampadati Furore GT. Luxury Autos Showroom & Simeon’s DealershipLuxury Autos (Rockford Hills): Dewbauchee Rapid GT X and Progen Luiva Premium Deluxe Motorsport (Simeon’s): Benefactor Feltzer, Dewbauchee Rapid GT, Invetero Coquette, Überflöd Entity XF, and Western Daemon (Custom) Time Trials & ChallengesHSW Time Trial: East Vinewood Standard Time Trial: Route 68 Premium Race: “A Sign of Things to Come” Weekly Challenge: Win three Deathmatches → GTA$100,000 payout Discounts & FreebiesFREE: LSIA Vehicle Warehouse + JoBuilt Phantom Wedge 50% off: Document Forgery Offices (and upgrades) + all Mk II Weapon Conversions 30% off: Annis Savestra, BF Raptor, Declasse Bugstars Burrito, Declasse Draugur, Enus Windsor Drop, Pfister Astron Custom, Vapid Clique Wagon, Vapid Ratel, Western Company Besra Gun Van inventory is also loaded with discounted weapons and armor (even better deals for GTA+ members). How to Get StartedSimply log in between March 19–25, 2026, complete the easy login rewards, and dive into Community Series jobs for the biggest payouts. GTA+ subscribers get extra perks this month as well. This Showcase Special is one of the most generous weeks in recent memory — especially with the new Community Series spotlight and free million-dollar bonuses. Whether you’re a veteran grinder or a casual player, now’s the perfect time to load up Los Santos and cash in. Happy hunting, and may the luck of the Irish (and Rockstar’s wallets) be with you!
 -
Rockstar Games has dropped another packed weekly update for GTA Online, running from March 19 through March 25, 2026. This week’s theme is the Showcase Special, headlined by the very first Community Series Showcase alongside festive St. Patrick’s Day content, triple payouts, free vehicles, and deep discounts. Whether you’re grinding for cash, hunting collectibles, or spinning the Lucky Wheel, there’s something for every Los Santos hustler. St. Patrick’s Day Festivities Kick Things OffLog in this week (on PS5, Xbox Series X|S, or PC Enhanced versions) and you’ll automatically receive the Blarneys Festive Beer Hat — the perfect accessory for your Irish-inspired crime spree. Everyone else can grab the Blarneys Stout Tee just for playing. Plus, new Lucky Clovers and Golden Clover Collectibles have been scattered across the map — hunt them down for extra rewards and festive flair. First-Ever Community Series Showcase – The Big New FeatureRockstar is spotlighting player-created content like never before with the Community Series Showcase, running now through April 1st. Here’s what you get: Log in once this week → GTA$1,000,000 (deposited within 72 hours) Complete five Community Series Jobs each week → another GTA$500,000 3x GTA$ & RP on all Community Series jobs Finish the Weekly Challenges over the next three weeks to unlock the Community Collection: Homies Sharp Tee, Benny’s Fitted Cap, and a brand-new Knuckleduster livery for the HVY Nightshark This is Rockstar’s way of celebrating the creativity of the GTA Online community — and paying players handsomely for it. Double & Triple Payouts Across the Board3x GTA$ & RP on Gerald Contact Missions 2x GTA$ & RP on Document Forgery Office Sales 2x Research Progress on Bunker Research Missions This week’s FIB Priority File (“The Black Box File”) pays double rewards Salvage Yard Robberies This WeekHead to the Salvage Yard for three fresh targets: The Duggan Robbery → Annis S80RR The McTony Robbery → Karin Hotring Everon The Gangbanger Robbery → Karin Boor Casino & Car Meet HighlightsPodium Vehicle at The Diamond Casino & Resort: Benefactor Schlagen GT (normally GTA$1,300,000 at Legendary Motorsport). GTA+ members get two spins per day! Prize Ride Challenge: Win any LS Car Meet Series race to claim the Albany Cavalcade XL (normally GTA$1,665,000 at Southern San Andreas Super Autos). Premium Test Ride (Enhanced versions only): Annis Euros X32 — take it for a spin at the Test Track. Other Test Track vehicles this week: Grotti Carbonizzare, Karin 190z, and Lampadati Furore GT. Luxury Autos Showroom & Simeon’s DealershipLuxury Autos (Rockford Hills): Dewbauchee Rapid GT X and Progen Luiva Premium Deluxe Motorsport (Simeon’s): Benefactor Feltzer, Dewbauchee Rapid GT, Invetero Coquette, Überflöd Entity XF, and Western Daemon (Custom) Time Trials & ChallengesHSW Time Trial: East Vinewood Standard Time Trial: Route 68 Premium Race: “A Sign of Things to Come” Weekly Challenge: Win three Deathmatches → GTA$100,000 payout Discounts & FreebiesFREE: LSIA Vehicle Warehouse + JoBuilt Phantom Wedge 50% off: Document Forgery Offices (and upgrades) + all Mk II Weapon Conversions 30% off: Annis Savestra, BF Raptor, Declasse Bugstars Burrito, Declasse Draugur, Enus Windsor Drop, Pfister Astron Custom, Vapid Clique Wagon, Vapid Ratel, Western Company Besra Gun Van inventory is also loaded with discounted weapons and armor (even better deals for GTA+ members). How to Get StartedSimply log in between March 19–25, 2026, complete the easy login rewards, and dive into Community Series jobs for the biggest payouts. GTA+ subscribers get extra perks this month as well. This Showcase Special is one of the most generous weeks in recent memory — especially with the new Community Series spotlight and free million-dollar bonuses. Whether you’re a veteran grinder or a casual player, now’s the perfect time to load up Los Santos and cash in. Happy hunting, and may the luck of the Irish (and Rockstar’s wallets) be with you! View full article
-
 After nearly a year of radio silence that left fans both anxious and frustrated, the highly anticipated FiveM update for Grand Theft Auto V Enhanced is finally inching closer to reality. On Wednesday, the Cfx.re development team released a comprehensive blog post detailing the project's progress, and it's clear that the wait will be well worth it. Rather than delivering a straightforward port to the new version of GTA V, the team has taken a much more ambitious route. According to the update, core parts of the FiveM platform have been completely rebuilt from scratch. This ground-up approach allows for a much tighter integration with both Grand Theft Auto V and the Rockstar Games Launcher, ultimately paving the way for a smoother, more optimized experience. Massive Performance Improvements One of the most significant overhauls in this enhanced version of FiveM is its network synchronization. These under-the-hood changes bring fantastic news for both server owners and players alike: For Server Owners: The new framework promises a noticeable reduction in bandwidth, CPU, and memory consumption, even while maintaining equivalent player counts. For Players: End-users can look forward to increased stability, lower CPU usage, and the potential for higher overall framerates. Additionally, long-standing synchronization issues—such as dead bodies and bullet holes not appearing correctly across different clients—have been successfully fixed. Seamless Script Support—With a Catch Server developers will be relieved to hear that upgrading to GTAV Enhanced won't break their hard work. Cfx.re has ensured backward compatibility for existing scripts. All current features and natives built using Lua, JavaScript, or C# will function seamlessly in the latest version. However, a major shift is coming to FiveM's development philosophy: parts of the platform will no longer be fully open source. The Cfx.re team announced that certain segments of the FiveM codebase will be locked down going forward. While this may disappoint open-source purists, the developers explained that the decision was made to ensure a "more stable and maintainable implementation and a stronger long-term foundation for the platform." When Can We Play It? While a concrete release date hasn't been etched in stone, Cfx.re confirmed that GTA V Enhanced support for FiveM will arrive "in the coming months." The team plans a staggered release, kicking off with an early access period specifically for server owners. This will allow developers to gather vital feedback and iron out any remaining bugs. Following this testing phase, FiveM compatibility for GTAV Enhanced will become available to anyone looking to utilize it for their servers. After a year of waiting, the horizon is finally clear for the GTA roleplay and modding community. With major performance boosts, enhanced stability, and unbroken script support, the next generation of FiveM is shaping up to be a game-changer.
 -
After nearly a year of radio silence that left fans both anxious and frustrated, the highly anticipated FiveM update for Grand Theft Auto V Enhanced is finally inching closer to reality. On Wednesday, the Cfx.re development team released a comprehensive blog post detailing the project's progress, and it's clear that the wait will be well worth it. Rather than delivering a straightforward port to the new version of GTA V, the team has taken a much more ambitious route. According to the update, core parts of the FiveM platform have been completely rebuilt from scratch. This ground-up approach allows for a much tighter integration with both Grand Theft Auto V and the Rockstar Games Launcher, ultimately paving the way for a smoother, more optimized experience. Massive Performance Improvements One of the most significant overhauls in this enhanced version of FiveM is its network synchronization. These under-the-hood changes bring fantastic news for both server owners and players alike: For Server Owners: The new framework promises a noticeable reduction in bandwidth, CPU, and memory consumption, even while maintaining equivalent player counts. For Players: End-users can look forward to increased stability, lower CPU usage, and the potential for higher overall framerates. Additionally, long-standing synchronization issues—such as dead bodies and bullet holes not appearing correctly across different clients—have been successfully fixed. Seamless Script Support—With a Catch Server developers will be relieved to hear that upgrading to GTAV Enhanced won't break their hard work. Cfx.re has ensured backward compatibility for existing scripts. All current features and natives built using Lua, JavaScript, or C# will function seamlessly in the latest version. However, a major shift is coming to FiveM's development philosophy: parts of the platform will no longer be fully open source. The Cfx.re team announced that certain segments of the FiveM codebase will be locked down going forward. While this may disappoint open-source purists, the developers explained that the decision was made to ensure a "more stable and maintainable implementation and a stronger long-term foundation for the platform." When Can We Play It? While a concrete release date hasn't been etched in stone, Cfx.re confirmed that GTA V Enhanced support for FiveM will arrive "in the coming months." The team plans a staggered release, kicking off with an early access period specifically for server owners. This will allow developers to gather vital feedback and iron out any remaining bugs. Following this testing phase, FiveM compatibility for GTAV Enhanced will become available to anyone looking to utilize it for their servers. After a year of waiting, the horizon is finally clear for the GTA roleplay and modding community. With major performance boosts, enhanced stability, and unbroken script support, the next generation of FiveM is shaping up to be a game-changer. View full article
-
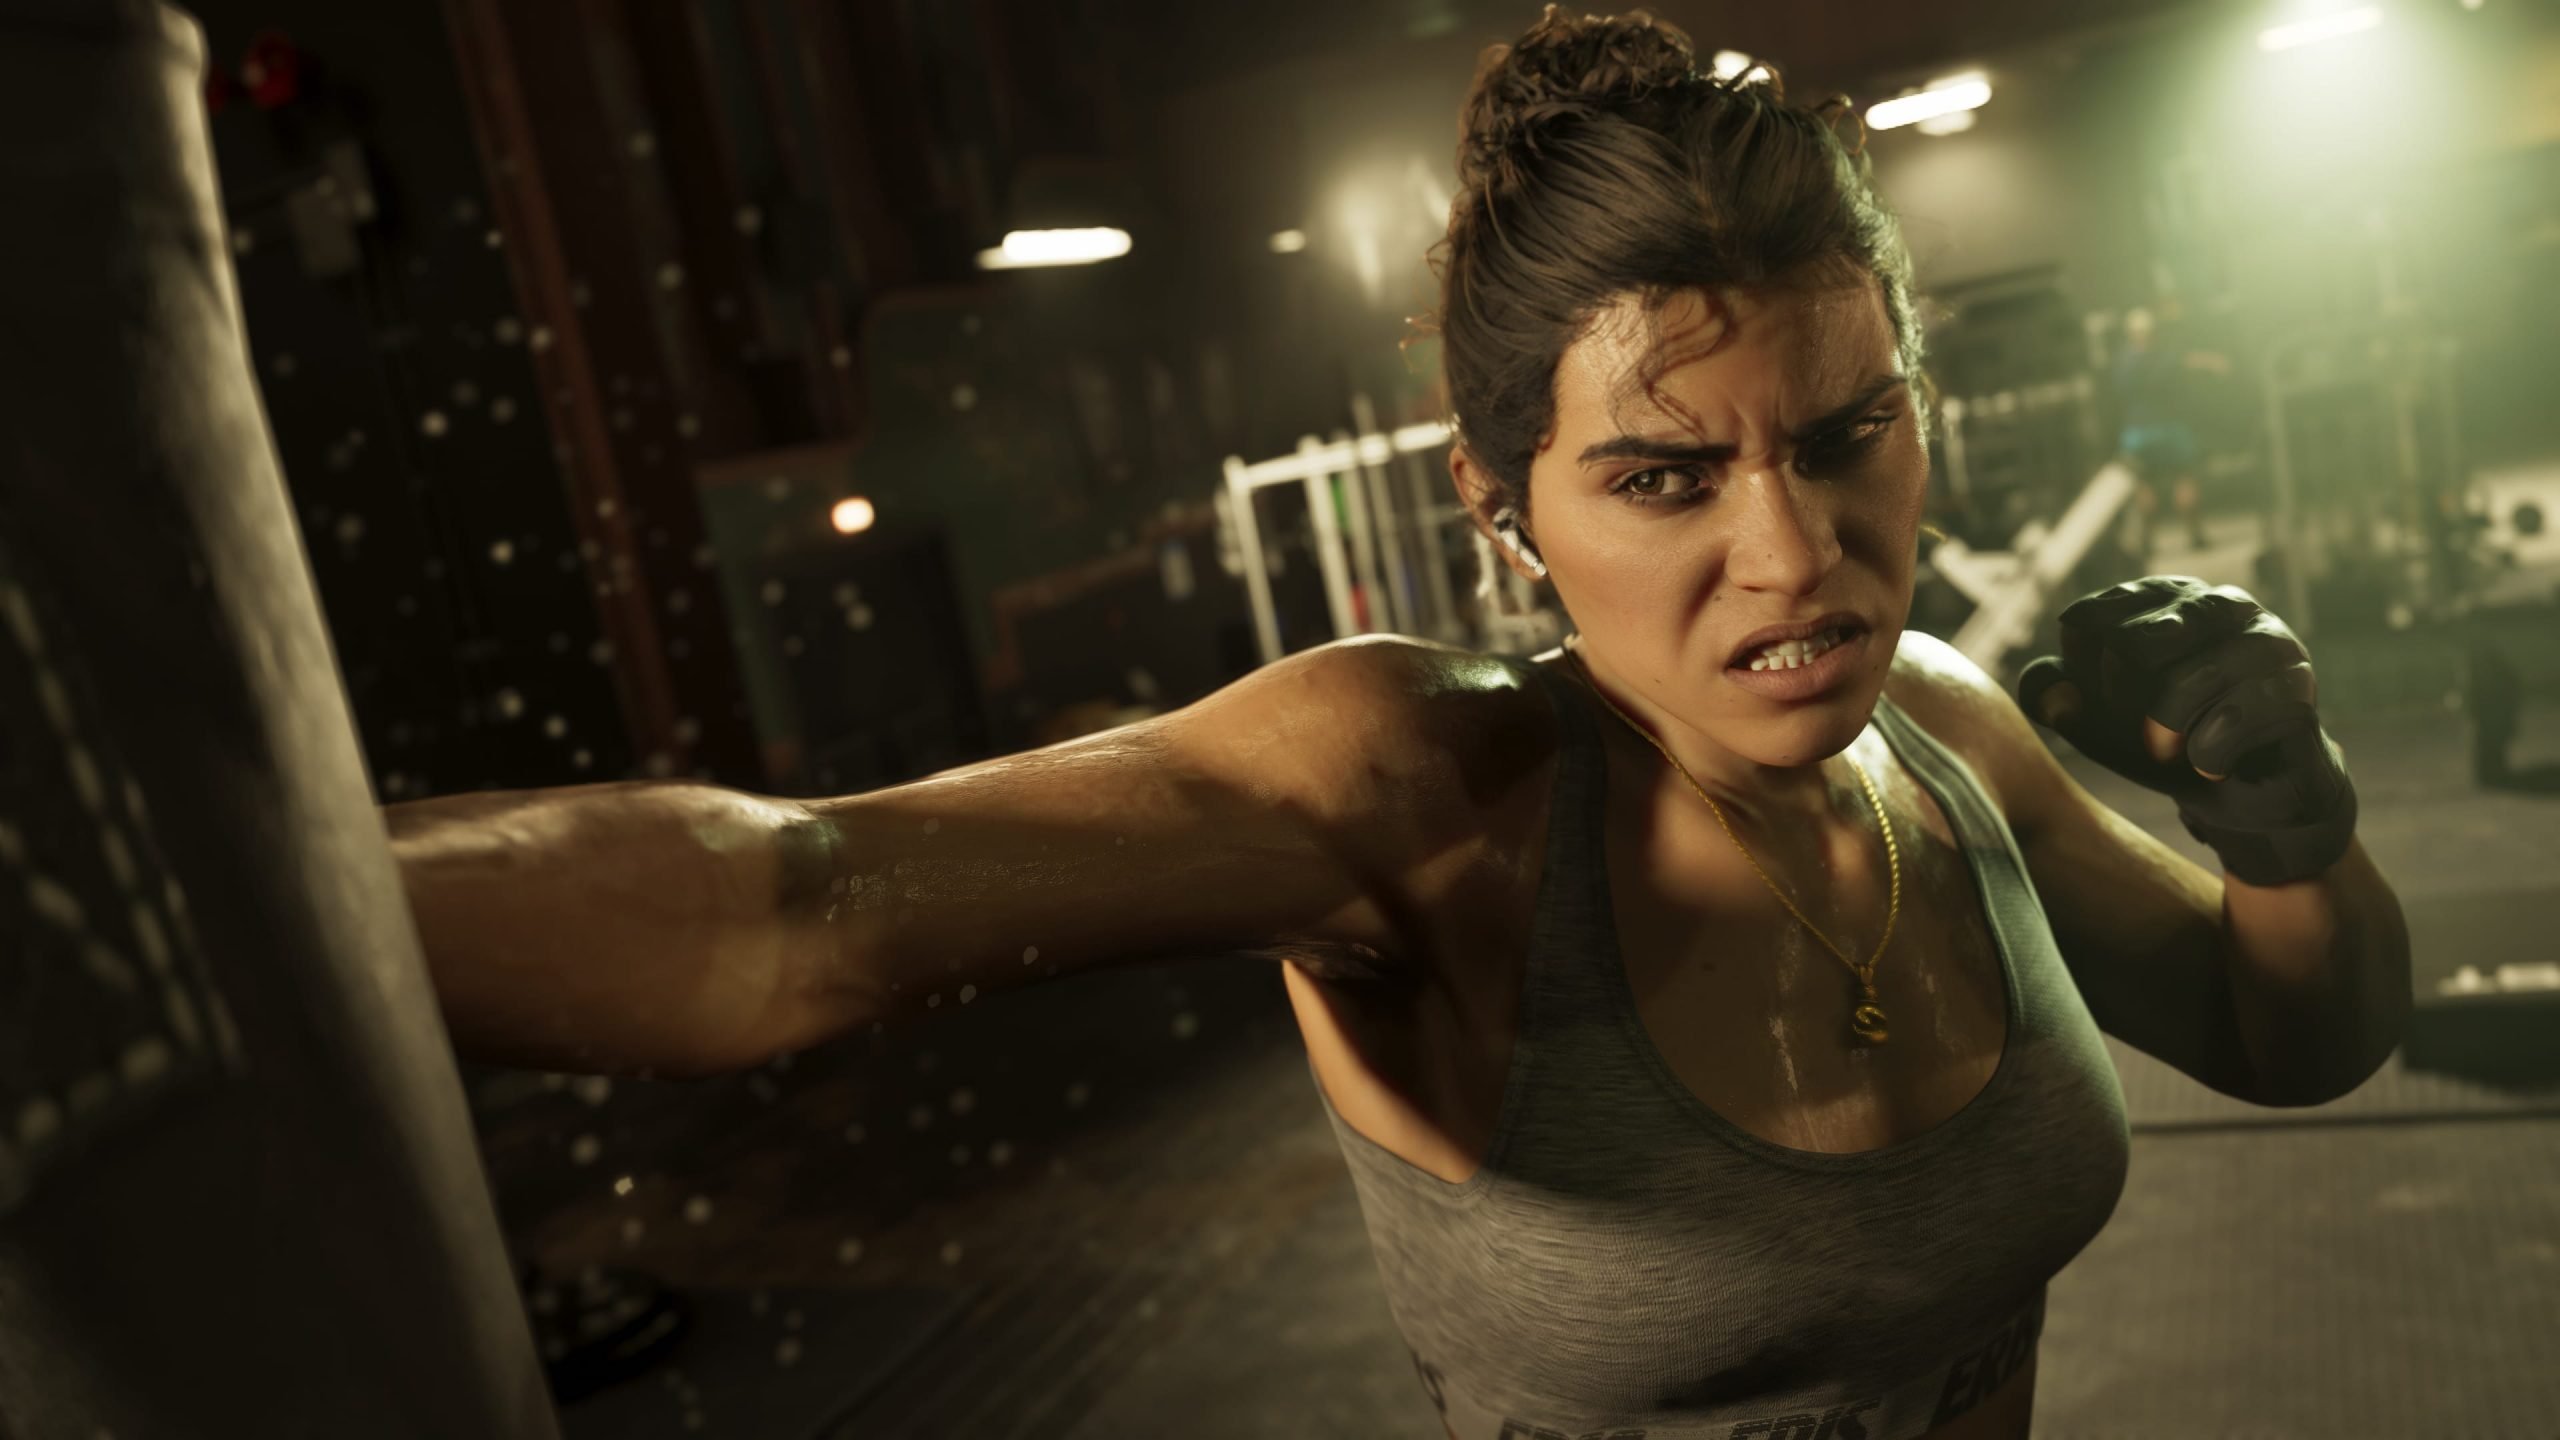 In a wide-ranging new interview, Strauss Zelnick, CEO of Take-Two Interactive (the parent company of Rockstar Games), delivered a clear message to fans and investors worried about artificial intelligence: AI is not coming for GTA 6. Instead, it will act as a powerful creative tool to make development faster and more efficient — while the real magic of a Rockstar hit will always come from human genius. The comments were made during an interview with The Game Business host Chris Dring on Tuesday, just days before GTA 6's long-awaited Fall 2026 launch window. Zelnick addressed everything from the game's massive player base to in-game advertising, but the standout remarks focused on AI — a topic that has rattled Wall Street and sparked heated debates across the industry. AI Can Build Assets — But Only Humans Build HitsZelnick was blunt about the limits of the technology. He acknowledged that AI creation tools are “quite obvious[ly]… beneficial for our industry,” yet he pushed back hard against the idea that they could replace the creative soul of a game like Grand Theft Auto VI or Red Dead Redemption. “These tools may help you create assets, but that won’t help you create hits,” he explained. “There are loads of assets out there now. It doesn’t matter if you push a button to create an asset, or it takes you six weeks… at the end of the day, you have an asset. And thousands of mobile games are launched every year, and there are only a handful of hits.” He went even further: “Equally, sure, you can create assets that might look like a big release… but creating a hit of that magnitude is a completely different animal and does require human engagement. It does require human creativity.” Zelnick stressed that “technology cannot and will never” produce the best entertainment on the planet — that remains Take-Two’s core mission. He called the notion of one person simply “push[ing] a button” to generate, market, and sell a mega-hit “a laughable notion” that has never been true in entertainment history. AI in Game Development Is Changing Everything You Know About Gameplay - Innovecs Games AI’s Real Role: Efficiency, Not ReplacementRather than fearing AI, Zelnick sees it as a game-changer for the boring stuff. He believes the technology will have an “enormous impact across all industries in terms of making mundane office work essentially more efficient or unnecessary.” For Rockstar’s massive teams, that means faster prototyping, quicker asset generation, and more time for the creative minds to focus on storytelling, gameplay, and the iconic open-world detail fans expect from GTA. This stance is consistent with Zelnick’s previous comments over the past year. He has repeatedly emphasized that while AI tools are already being used at Take-Two, the “creative genius is human.” GTA 6 Will Still Draw the Crowd — With or Without AIZelnick also brushed aside other concerns. On player demographics, he joked that the 13-year gap since GTA V won’t be a problem: “Oh, I think we’re gonna have a lot of 17 year olds playing GTA 6.” He quipped that anyone with a console over 17 who skips the game would be hard to imagine. He also shut down speculation about real-world ads flooding the game. Full-price titles shouldn’t feel like free-to-play experiences, he said: “Very difficult for me to believe that we would want to have interstitial advertising in a game that someone paid 70 or 80 bucks for would seem unfair.” What This Means for FansFor the millions eagerly counting down to GTA 6, Zelnick’s words are reassuring. The game that Rockstar has been meticulously crafting for over a decade won’t be rushed or diluted by AI. Instead, the technology is likely helping the studio polish Vice City, refine Lucia and Jason’s story, and deliver the level of detail that has defined the series. As Zelnick put it, AI won’t level the playing field for creating cultural phenomena — it will simply give the best teams even better tools to do what they already do best. The full interview is available on The Game Business’ YouTube channel. With GTA 6 on the horizon, these comments from the top of Take-Two suggest the future of Rockstar’s masterpiece is in very human hands — supercharged by AI, but never replaced by it.
 -
In a wide-ranging new interview, Strauss Zelnick, CEO of Take-Two Interactive (the parent company of Rockstar Games), delivered a clear message to fans and investors worried about artificial intelligence: AI is not coming for GTA 6. Instead, it will act as a powerful creative tool to make development faster and more efficient — while the real magic of a Rockstar hit will always come from human genius. The comments were made during an interview with The Game Business host Chris Dring on Tuesday, just days before GTA 6's long-awaited Fall 2026 launch window. Zelnick addressed everything from the game's massive player base to in-game advertising, but the standout remarks focused on AI — a topic that has rattled Wall Street and sparked heated debates across the industry. AI Can Build Assets — But Only Humans Build HitsZelnick was blunt about the limits of the technology. He acknowledged that AI creation tools are “quite obvious[ly]… beneficial for our industry,” yet he pushed back hard against the idea that they could replace the creative soul of a game like Grand Theft Auto VI or Red Dead Redemption. “These tools may help you create assets, but that won’t help you create hits,” he explained. “There are loads of assets out there now. It doesn’t matter if you push a button to create an asset, or it takes you six weeks… at the end of the day, you have an asset. And thousands of mobile games are launched every year, and there are only a handful of hits.” He went even further: “Equally, sure, you can create assets that might look like a big release… but creating a hit of that magnitude is a completely different animal and does require human engagement. It does require human creativity.” Zelnick stressed that “technology cannot and will never” produce the best entertainment on the planet — that remains Take-Two’s core mission. He called the notion of one person simply “push[ing] a button” to generate, market, and sell a mega-hit “a laughable notion” that has never been true in entertainment history. AI in Game Development Is Changing Everything You Know About Gameplay - Innovecs Games AI’s Real Role: Efficiency, Not ReplacementRather than fearing AI, Zelnick sees it as a game-changer for the boring stuff. He believes the technology will have an “enormous impact across all industries in terms of making mundane office work essentially more efficient or unnecessary.” For Rockstar’s massive teams, that means faster prototyping, quicker asset generation, and more time for the creative minds to focus on storytelling, gameplay, and the iconic open-world detail fans expect from GTA. This stance is consistent with Zelnick’s previous comments over the past year. He has repeatedly emphasized that while AI tools are already being used at Take-Two, the “creative genius is human.” GTA 6 Will Still Draw the Crowd — With or Without AIZelnick also brushed aside other concerns. On player demographics, he joked that the 13-year gap since GTA V won’t be a problem: “Oh, I think we’re gonna have a lot of 17 year olds playing GTA 6.” He quipped that anyone with a console over 17 who skips the game would be hard to imagine. He also shut down speculation about real-world ads flooding the game. Full-price titles shouldn’t feel like free-to-play experiences, he said: “Very difficult for me to believe that we would want to have interstitial advertising in a game that someone paid 70 or 80 bucks for would seem unfair.” What This Means for FansFor the millions eagerly counting down to GTA 6, Zelnick’s words are reassuring. The game that Rockstar has been meticulously crafting for over a decade won’t be rushed or diluted by AI. Instead, the technology is likely helping the studio polish Vice City, refine Lucia and Jason’s story, and deliver the level of detail that has defined the series. As Zelnick put it, AI won’t level the playing field for creating cultural phenomena — it will simply give the best teams even better tools to do what they already do best. The full interview is available on The Game Business’ YouTube channel. With GTA 6 on the horizon, these comments from the top of Take-Two suggest the future of Rockstar’s masterpiece is in very human hands — supercharged by AI, but never replaced by it. View full article
-
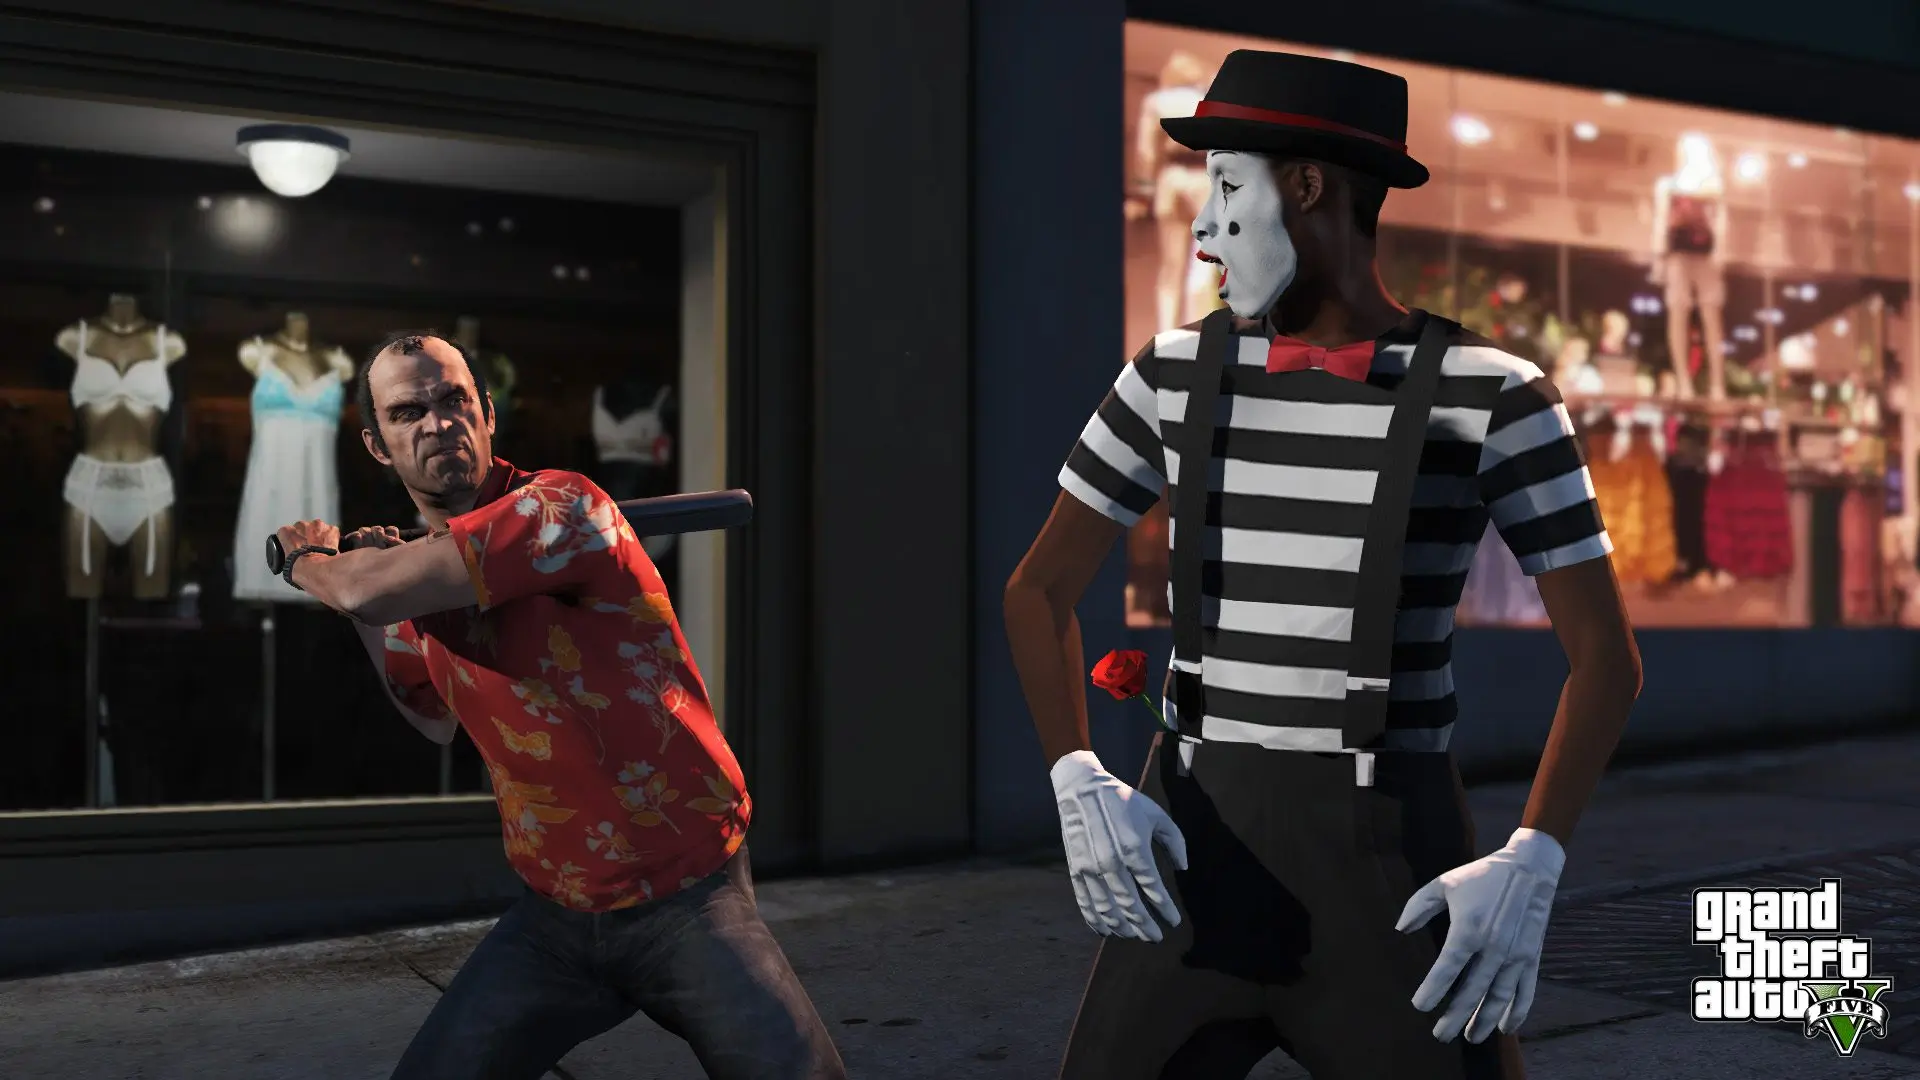 In a significant development for gamers in Brazil, Rockstar Games has stopped selling its digital titles directly through the Rockstar Games Store and Launcher starting March 16, 2026. The move complies with the country’s newly effective Digital Statute of the Child and Adolescent (Digital ECA), a sweeping law designed to safeguard minors online. Rockstar Games confirmed the change in an official support article titled “Latest information on the Digital ECA for Brazilian players.” The statement reads: “Following the passing of the Brazilian Digital Statute of the Child and Adolescent (‘Digital ECA’), Rockstar Games digital titles are no longer purchasable from the Rockstar Games Store or Rockstar Games Launcher by our Brazilian players as of March 16, 2026.” The news first surfaced when Brazilian community member Tex2 shared a screenshot on X (formerly Twitter), quickly spreading through Rockstar fan circles and prompting the company’s public clarification. What the Digital ECA ChangesBrazil’s Digital ECA updates the long-standing Statute of the Child and Adolescent for the online era. Its core provisions include: Strict bans on using children’s personal data in ways that violate privacy. Prohibition of targeted advertising and profiling aimed at minors. Mandatory age-restriction measures for games featuring loot boxes or randomized in-game purchases, limiting access to players 18 and older. These rules appear to have created compliance challenges for Rockstar’s own storefront, which sells titles like Grand Theft Auto V, Red Dead Redemption 2, and upcoming releases directly to consumers. Rather than overhaul its launcher to meet the new requirements, the company has chosen to pause direct sales in the region. What Brazilian Players Can (and Cannot) DoThe restrictions are narrow but clear: New game purchases on the Rockstar Games Launcher or Store are now blocked for users in Brazil. Existing purchases remain fully playable with no changes. In-game currencies such as Shark Cards (GTA Online) and Gold Bars (Red Dead Online) can still be bought through Rockstar’s platforms. Rockstar titles continue to be available on third-party storefronts, including Steam, Epic Games Store, PlayStation Store, and the Xbox/Microsoft Store. This means Brazilian fans can still legally acquire and play new Rockstar games — they simply must use alternative platforms instead of the official launcher. Why This Matters The Digital ECA stems from growing concerns over children’s online safety in Brazil. A 2024 Human Rights Watch report highlighted alarming cases in which children’s personal photos were scraped and misused to train AI models and generate deepfakes, underscoring the urgency behind the legislation. For Rockstar Games — whose titles often include mature content and monetization features — the law introduces new hurdles around age verification and data handling. By shifting sales to established third-party stores (which already have robust regional compliance systems), the company avoids potential legal risks while keeping its games accessible. Community Reaction and Next StepsEarly reactions from Brazilian players have been mixed. Many expressed frustration at losing the convenience of the Rockstar Launcher, while others appreciated the clarification that games remain available elsewhere. RockstarINTEL and GTA communities are monitoring the situation closely, with some speculating that further adjustments to in-game features could follow if the law is enforced more broadly. Rockstar has not announced any plans to resume direct sales or modify its launcher for Brazil at this time. Players affected by the change are encouraged to check the official support page for the latest updates. As the Digital ECA continues to reshape the gaming landscape in Latin America’s largest market, this case may serve as a precedent for how global publishers adapt to stricter child-protection regulations worldwide. For now, Brazilian gamers will need to route their purchases through Steam, Epic, PlayStation, or Xbox — a minor inconvenience to keep Rockstar’s blockbuster titles in reach.