


Rockstar
Administrators
-
Joined
-
Last visited
Everything posted by Rockstar
-

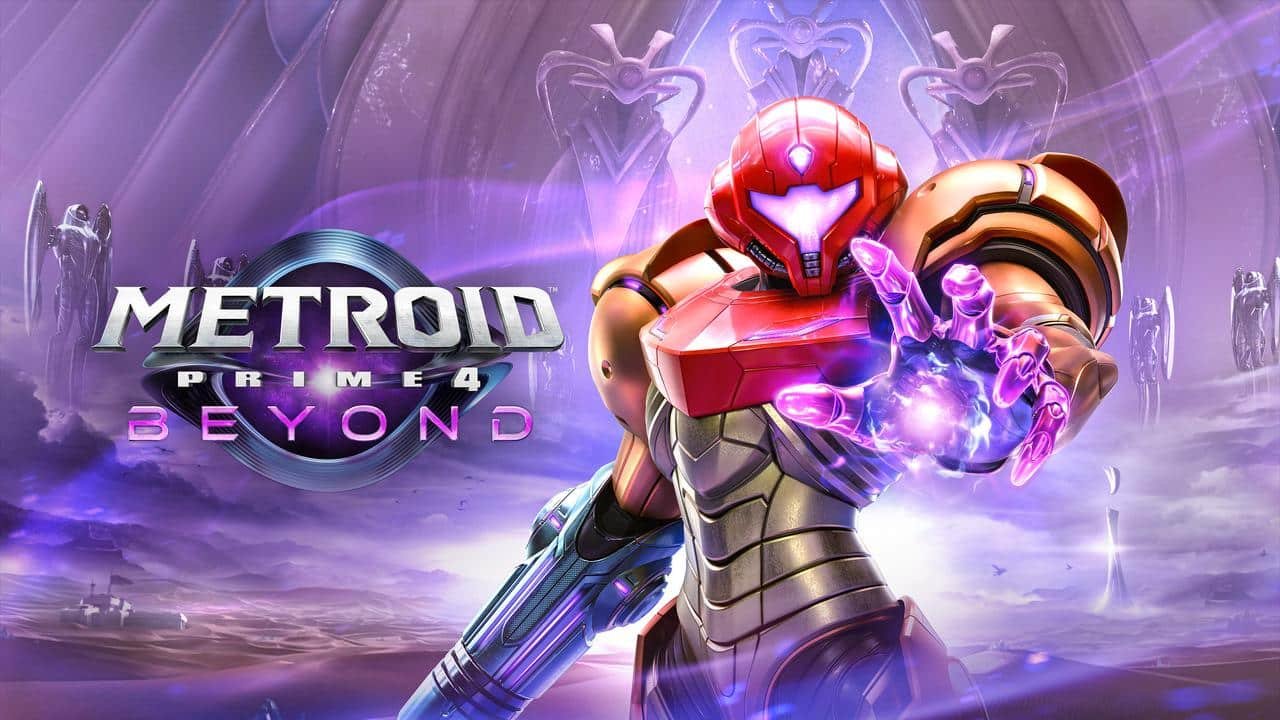
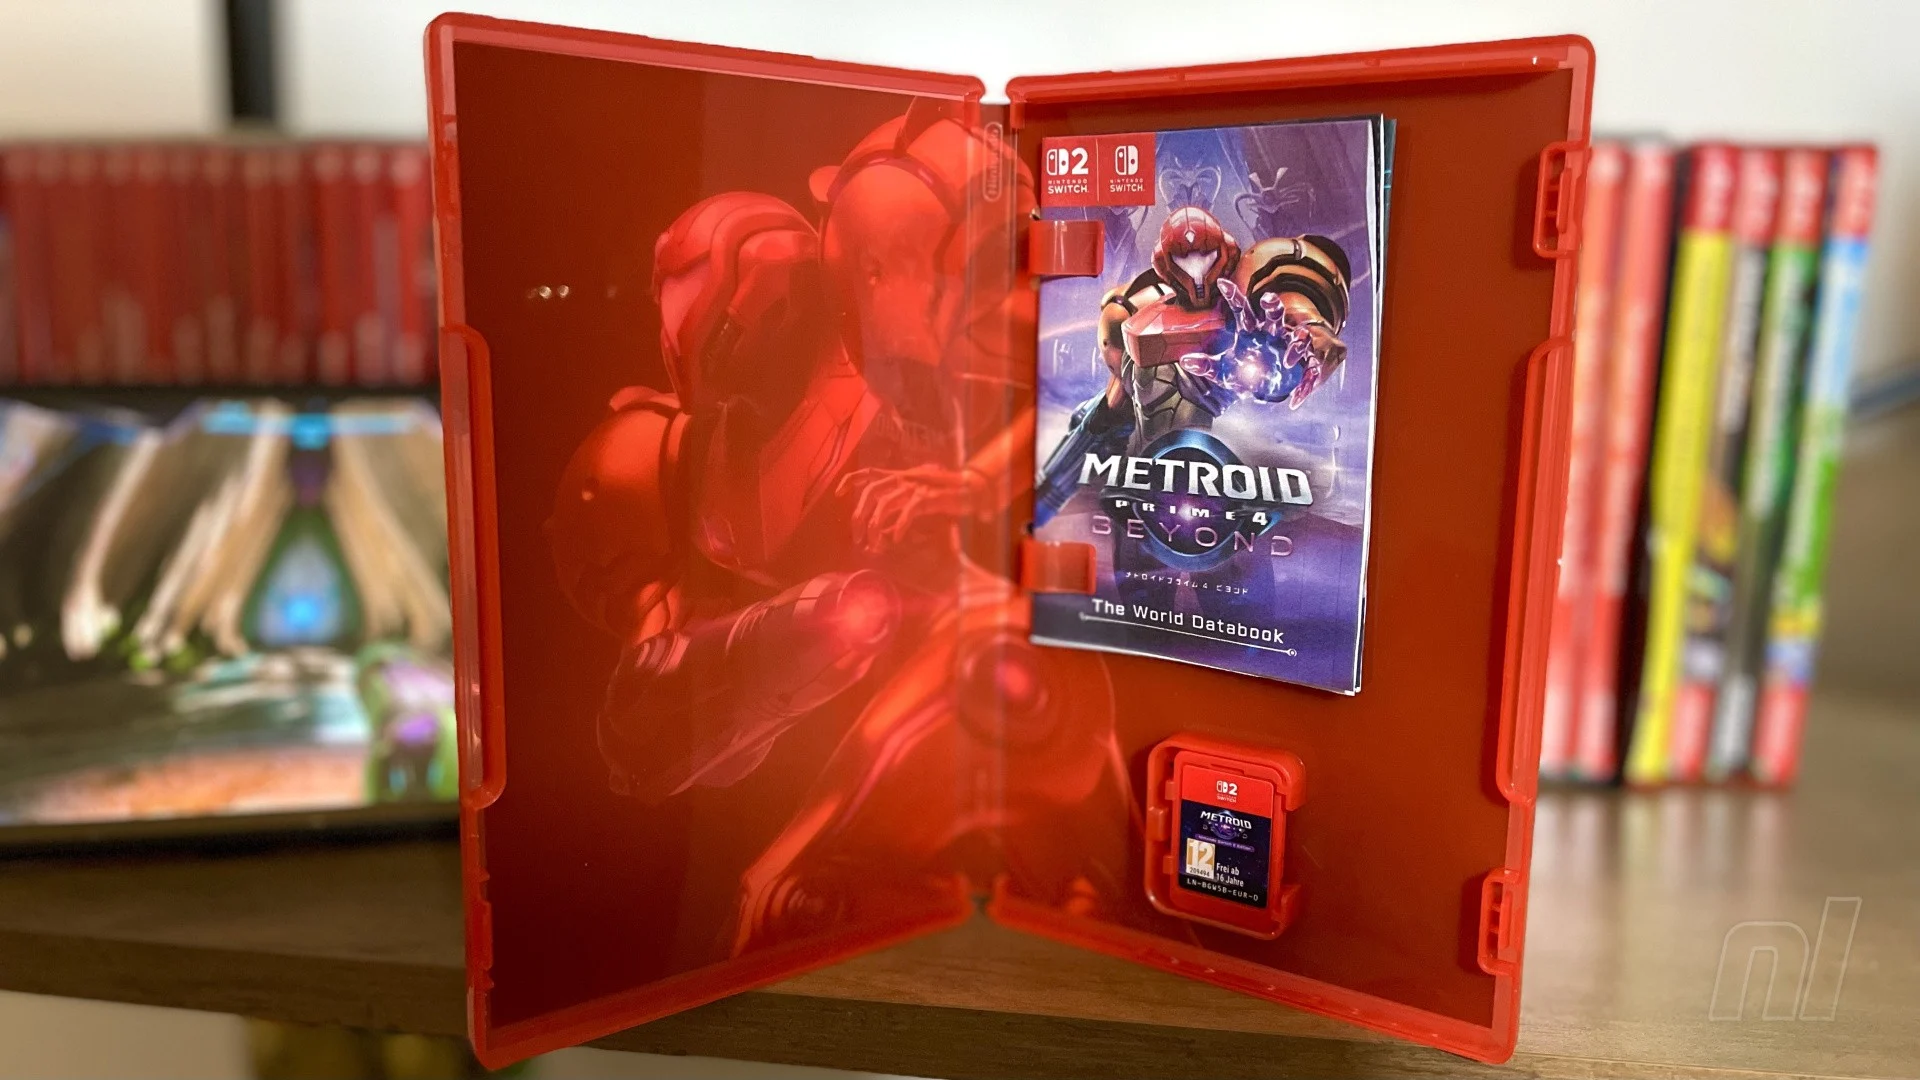 Bar a few exceptions, the days of opening your boxed copy of a new game and eagerly flipping through the instruction booklet are behind us. But it looks like Nintendo isn't ready to give up on the nostalgia just yet, as it has released a printable 'databook' for Metroid Prime 4: Beyond, that just makes our hearts sing (thanks for the heads up, @ninpatentswatch). The booklet is only available on the Japanese Nintendo website at the time of writing — with all of the text in Japanese, natch — but it scratches such a retro itch for us that we're amazed the big N doesn't do something similar for all its releases. The 24-page 'World Databook', to give it its official title, is full of a lot of things you would expect from a classic instruction manual, including game controls and character introductions, but there are also rundowns of the game's main locales and mechanics, with a sneaky bit of lore peppered in there, too. Here's a couple of pages, so you can get a taste for what's inside: Images: Nintendo The full PDF has instructions for how to print and fold the booklet, so you can rest easy knowing that it'll slot nicely into those under-utilised plastic clips that occupy the top half of all modern game cases. Would opening the in-game menu and looking up the controls that way be an awful lot easier? Sure it would. But come on, where's the fun in that?
 -
Bar a few exceptions, the days of opening your boxed copy of a new game and eagerly flipping through the instruction booklet are behind us. But it looks like Nintendo isn't ready to give up on the nostalgia just yet, as it has released a printable 'databook' for Metroid Prime 4: Beyond, that just makes our hearts sing (thanks for the heads up, @ninpatentswatch). The booklet is only available on the Japanese Nintendo website at the time of writing — with all of the text in Japanese, natch — but it scratches such a retro itch for us that we're amazed the big N doesn't do something similar for all its releases. The 24-page 'World Databook', to give it its official title, is full of a lot of things you would expect from a classic instruction manual, including game controls and character introductions, but there are also rundowns of the game's main locales and mechanics, with a sneaky bit of lore peppered in there, too. Here's a couple of pages, so you can get a taste for what's inside: Images: Nintendo The full PDF has instructions for how to print and fold the booklet, so you can rest easy knowing that it'll slot nicely into those under-utilised plastic clips that occupy the top half of all modern game cases. Would opening the in-game menu and looking up the controls that way be an awful lot easier? Sure it would. But come on, where's the fun in that? View full article
-
Romeo Is A Dead Man is the first brand-new IP from Grasshopper Manufacture Inc., Goichi ‘Suda51’ Suda's new studio. The developer announced that the game will release early next year and aired a new trailer: “Now we've won our game of chicken against cough a certain twice-delayed 2026 release, we can reveal our cards and confirm we never intended to launch in May in the first place,” Executive Director/Scenario Writer/Producer, Grasshopper Manufacture, Goichi ‘Suda51’ Suda, said. “We're warping space-time to put the finishing touches to ROMEO IS A DEAD MAN ahead of its launch next February.” Romeo Is A Dead Manwill launch on 11th February 2026 on PlayStation 5, Xbox Series X|S, and Steam.
-
Sad Cat Studios and Thunderful are finally able to provide a firm release date for their cyberpunk action platformer, Replaced. To accompany the announcement, they aired a new trailer: Replacedwill be releasing on PC and Xbox Series X|S on March 12th.
-
One of the great classics from the original Build Engine FPS era got a brand new re-release today, by the hands of none other than the remaster veterans from Nightdive Studios. This brand new re-release adds an incredible amount of polish and quality of life features to the original game, making this the definitive way to experience one of the great classics from the early FPS days "Blood", alongside its brethren Duke Nukem 3D and Shadow Warrior made a trifecta of Build Engine games back in the late 90s. Nightdive's remaster of Blood includes many new things and enhancements: Includes the original Blood and its Cryptic Passage add-ons. Rebuilt from the original source code. New Vault with dozens of playable cut-content levels, concept art, behind-the-scenes photos, and unused sprites. Remastered Cutscenes. Expanded options for improved enemy behavior, weather effects (a previously cut feature), and other enhancements. Bug fixes for the original levels. Includes new Marrow scenario (available at launch) and Death Wish scenario (planned future update) High-resolution support, including 4K monitors Unlocked framerates Customizable keyboard and controller gamepad support Extended modding support, including existing mods Rewritten netcode supporting up to 8 players Local split-screen and online co-op CD and MIDI music support "Blood: Refreshed Supply" is now available for PC through Steam, GOG and Epic, and gaming consoles PlayStation 4/PlayStation 5, Xbox One and Xbox Series, as well as Nintendo Switch 1. It's still unknown if the game runs on a Switch 2 under Switch 1 compatibility.
-
PlayStation's Dreams may not be receiving the same amount of excitement that it garnered during its launch in 2020, but there are some dedicated users still creating impressive fan content with it. A team of three creators managed to make a short fan-game based on Banjo-Kazooie, titled Banjo-Kazooie: Mumbomania. It plays much like the classic entries in the franchise, featuring platforming and collectibles. The game is available to download and play on Dreams for PS4 or PS5, and even has a trailer showcasing some gameplay.
-
.jpg.0d8df57b6289c01dbc8dc357ad791c41.jpg) Avatar: Frontiers of Pandora - From the Ashes is a bigger deal than we initially thought. The third paid DLC for Massive Entertainment’s 2023 movie tie-in offers up a 25-hour campaign, a new region, and the highly requested third-person mode. But what really struck us was a greater sense of what was described as “brand synergy”. That’s what Lightstorm Entertainment’s executive vice president of multimedia development, Joshua Izzo, said when we flew out to Lightstorm’s HQ in LA. There, we got a sneak peek at James Cameron’s upcoming Avatar: Fire And Ash, which was about as visually mindblowing as you’d expect, as well as some hands-on time with this new DLC. The standalone pack, which will cost £21.99/$32,99, focuses on the previous side character So’Lek, as he tries to take down the villainous Na’Vi Ash clan – the big bads in the upcoming film. It’s clear that Ubisoft and Disney are aiming for a more cohesive brand experience, so players will be able to take on the Ash Clan in-game the very same day that Fire and Ash drops in cinemas, on December 19th. In addition, mentions of specific characters, events, and even the supposed presence of full clans from the new movie make this DLC feel like a much bigger event. It’s not quite winks and nods anymore; it’s now a cog in the Pandora machine. As Avatar fans, we loved this sense of narrative cohesion. However, lore and movie tie-ins aside, the thing we were most amped to try was the long-requested third-person mode. Available now as a free update, this third-person mode can be played in the main game, on top of From The Ashes. Simply put, third-person reinvents the game. Massive Entertainment has gone above and beyond to implement a third-person mode that feels cinematic, immersive, and most importantly, it doesn't feel like a tack-on. Combat is incredibly sharp, especially with its unique kill animations that let you take out RDA mechs in style. And since you can also play the base game in third-person, too, you can finally check out your customisable Na'Vi attire, which was previously only noticeable in third-person flying. It's not entirely cohesive, however, as some interactions, like soothing a direhorse, will thrust you back into first-person. And if you play the base game again, you'll transition to its first-person cutscenes with a brief black screen, shattering some immersion. There are still some reminders that this was a first-person game first. From The Ashes solves some of these issues with far more immersive third-person cutscenes, however, which are a noted improvement over the base campaign. But the main thing is traversal, combat, and the immersion factor are all top-tier with the new third-person mode, and if you don't like it, you can switch back to first-person whenever you please. That leads us into the story of From The Ashes. We enjoyed moments of Frontier’s campaign, but this is a definite leg up that we think Avatar fans are really going to dig. It’s got those typical hallmarks – bad humans trying to pillage Pandora of its resources – but So’Lek is a much more compelling protagonist, and the story actually sets up three big bad Na’Vi that must be taken down, giving the whole thing a bit more direction. With the new perspective and new style of cutscene, From The Ashes has much more cinematic appeal, and we often felt the urge to stop and gawk at the expansive vistas. The Kinglor Forest, an area from the base game, is now scarred, as broken branches and tire-treaded dirt tracks replace the once vibrant woodlands. Ubisoft says that the map will steadily evolve across the From The Ashes campaign. A surprising new addition in From The Ashes is boss fights, which were strangely absent from Frontiers. During our session – roughly 90 minutes early on in the DLC – we fought giant creatures and even other Na’Vi. While a big deal was made out of this by the Massive Entertainment developers, boss fights were a bit of a letdown. We can’t speak for all of them, of course, but those we did fight were rather rinse and repeat, with abnormally strong bullet (and arrow) sponge enemies. The biggest letdown was the Ash clan enemies. We hoped that these would be introduced to the regular roster of enemies, but they seem to be exclusively reserved for boss types. If nothing else, it feels like a missed opportunity. There are other attempts to spice up the combat, however. So’Lek comes with his own set of skills to unlock, which aid him in battle, and he is also equipped with a sort of berserk mode. This allows So’Lek to massively increase damage output and defence for a short time, which can be great fun as you tear through armoured RDA mechs. There are also new mech variants and a sort of robot dog to shake things up a little more. In conjunction with the third-person mode, we still really enjoyed enemy encounters as we jumped around, weaving in and out of stealth, and switching through the arsenal of weaponry at hand. The big “but” of this preview is that the whole thing was played on PC, so the jury is still out on how this will pan out on PS5. We did use a DualSense controller, so we can say that the haptics are still as excellent as they are in the base game. While we never had any performance or visual issues on PS5 before (outside of a sketchy PS5 Pro update), we’ll need to wait for the full release to check back on performance. Avatar Frontiers of Pandora - From The Ashes is a sneakily ambitious DLC. It’s got an expansive campaign that feels more tied to the wider world than ever before, with meaningful changes to combat, albeit missed opportunities with its Na’Vi enemies. The icing on the cake is the third-person mode, which for us just massively improves the experience — we wouldn’t play the game any other way now. There are a lot of ifs and buts to address with the full release, like how the narrative unfolds, how it runs on PS5, and there’s even a whole new area in the DLC that we didn’t get to see. But, as it stands, From the Ashes is an exciting next step in an ever-expanding and evolving sci-fi world that's a delight to explore on PS5, and the new third-person mode is the perfect excuse to check out the base game, if you haven’t already. Avatar: Frontiers of Pandora - From the Ashes drops on PS5 on December 19th, and the third-person update is available now. Will you be checking them out? Let us know in the comments below.
Avatar: Frontiers of Pandora - From the Ashes is a bigger deal than we initially thought. The third paid DLC for Massive Entertainment’s 2023 movie tie-in offers up a 25-hour campaign, a new region, and the highly requested third-person mode. But what really struck us was a greater sense of what was described as “brand synergy”. That’s what Lightstorm Entertainment’s executive vice president of multimedia development, Joshua Izzo, said when we flew out to Lightstorm’s HQ in LA. There, we got a sneak peek at James Cameron’s upcoming Avatar: Fire And Ash, which was about as visually mindblowing as you’d expect, as well as some hands-on time with this new DLC. The standalone pack, which will cost £21.99/$32,99, focuses on the previous side character So’Lek, as he tries to take down the villainous Na’Vi Ash clan – the big bads in the upcoming film. It’s clear that Ubisoft and Disney are aiming for a more cohesive brand experience, so players will be able to take on the Ash Clan in-game the very same day that Fire and Ash drops in cinemas, on December 19th. In addition, mentions of specific characters, events, and even the supposed presence of full clans from the new movie make this DLC feel like a much bigger event. It’s not quite winks and nods anymore; it’s now a cog in the Pandora machine. As Avatar fans, we loved this sense of narrative cohesion. However, lore and movie tie-ins aside, the thing we were most amped to try was the long-requested third-person mode. Available now as a free update, this third-person mode can be played in the main game, on top of From The Ashes. Simply put, third-person reinvents the game. Massive Entertainment has gone above and beyond to implement a third-person mode that feels cinematic, immersive, and most importantly, it doesn't feel like a tack-on. Combat is incredibly sharp, especially with its unique kill animations that let you take out RDA mechs in style. And since you can also play the base game in third-person, too, you can finally check out your customisable Na'Vi attire, which was previously only noticeable in third-person flying. It's not entirely cohesive, however, as some interactions, like soothing a direhorse, will thrust you back into first-person. And if you play the base game again, you'll transition to its first-person cutscenes with a brief black screen, shattering some immersion. There are still some reminders that this was a first-person game first. From The Ashes solves some of these issues with far more immersive third-person cutscenes, however, which are a noted improvement over the base campaign. But the main thing is traversal, combat, and the immersion factor are all top-tier with the new third-person mode, and if you don't like it, you can switch back to first-person whenever you please. That leads us into the story of From The Ashes. We enjoyed moments of Frontier’s campaign, but this is a definite leg up that we think Avatar fans are really going to dig. It’s got those typical hallmarks – bad humans trying to pillage Pandora of its resources – but So’Lek is a much more compelling protagonist, and the story actually sets up three big bad Na’Vi that must be taken down, giving the whole thing a bit more direction. With the new perspective and new style of cutscene, From The Ashes has much more cinematic appeal, and we often felt the urge to stop and gawk at the expansive vistas. The Kinglor Forest, an area from the base game, is now scarred, as broken branches and tire-treaded dirt tracks replace the once vibrant woodlands. Ubisoft says that the map will steadily evolve across the From The Ashes campaign. A surprising new addition in From The Ashes is boss fights, which were strangely absent from Frontiers. During our session – roughly 90 minutes early on in the DLC – we fought giant creatures and even other Na’Vi. While a big deal was made out of this by the Massive Entertainment developers, boss fights were a bit of a letdown. We can’t speak for all of them, of course, but those we did fight were rather rinse and repeat, with abnormally strong bullet (and arrow) sponge enemies. The biggest letdown was the Ash clan enemies. We hoped that these would be introduced to the regular roster of enemies, but they seem to be exclusively reserved for boss types. If nothing else, it feels like a missed opportunity. There are other attempts to spice up the combat, however. So’Lek comes with his own set of skills to unlock, which aid him in battle, and he is also equipped with a sort of berserk mode. This allows So’Lek to massively increase damage output and defence for a short time, which can be great fun as you tear through armoured RDA mechs. There are also new mech variants and a sort of robot dog to shake things up a little more. In conjunction with the third-person mode, we still really enjoyed enemy encounters as we jumped around, weaving in and out of stealth, and switching through the arsenal of weaponry at hand. The big “but” of this preview is that the whole thing was played on PC, so the jury is still out on how this will pan out on PS5. We did use a DualSense controller, so we can say that the haptics are still as excellent as they are in the base game. While we never had any performance or visual issues on PS5 before (outside of a sketchy PS5 Pro update), we’ll need to wait for the full release to check back on performance. Avatar Frontiers of Pandora - From The Ashes is a sneakily ambitious DLC. It’s got an expansive campaign that feels more tied to the wider world than ever before, with meaningful changes to combat, albeit missed opportunities with its Na’Vi enemies. The icing on the cake is the third-person mode, which for us just massively improves the experience — we wouldn’t play the game any other way now. There are a lot of ifs and buts to address with the full release, like how the narrative unfolds, how it runs on PS5, and there’s even a whole new area in the DLC that we didn’t get to see. But, as it stands, From the Ashes is an exciting next step in an ever-expanding and evolving sci-fi world that's a delight to explore on PS5, and the new third-person mode is the perfect excuse to check out the base game, if you haven’t already. Avatar: Frontiers of Pandora - From the Ashes drops on PS5 on December 19th, and the third-person update is available now. Will you be checking them out? Let us know in the comments below. -
Avatar: Frontiers of Pandora - From the Ashes is a bigger deal than we initially thought. The third paid DLC for Massive Entertainment’s 2023 movie tie-in offers up a 25-hour campaign, a new region, and the highly requested third-person mode. But what really struck us was a greater sense of what was described as “brand synergy”. That’s what Lightstorm Entertainment’s executive vice president of multimedia development, Joshua Izzo, said when we flew out to Lightstorm’s HQ in LA. There, we got a sneak peek at James Cameron’s upcoming Avatar: Fire And Ash, which was about as visually mindblowing as you’d expect, as well as some hands-on time with this new DLC. The standalone pack, which will cost £21.99/$32,99, focuses on the previous side character So’Lek, as he tries to take down the villainous Na’Vi Ash clan – the big bads in the upcoming film. It’s clear that Ubisoft and Disney are aiming for a more cohesive brand experience, so players will be able to take on the Ash Clan in-game the very same day that Fire and Ash drops in cinemas, on December 19th. In addition, mentions of specific characters, events, and even the supposed presence of full clans from the new movie make this DLC feel like a much bigger event. It’s not quite winks and nods anymore; it’s now a cog in the Pandora machine. As Avatar fans, we loved this sense of narrative cohesion. However, lore and movie tie-ins aside, the thing we were most amped to try was the long-requested third-person mode. Available now as a free update, this third-person mode can be played in the main game, on top of From The Ashes. Simply put, third-person reinvents the game. Massive Entertainment has gone above and beyond to implement a third-person mode that feels cinematic, immersive, and most importantly, it doesn't feel like a tack-on. Combat is incredibly sharp, especially with its unique kill animations that let you take out RDA mechs in style. And since you can also play the base game in third-person, too, you can finally check out your customisable Na'Vi attire, which was previously only noticeable in third-person flying. It's not entirely cohesive, however, as some interactions, like soothing a direhorse, will thrust you back into first-person. And if you play the base game again, you'll transition to its first-person cutscenes with a brief black screen, shattering some immersion. There are still some reminders that this was a first-person game first. From The Ashes solves some of these issues with far more immersive third-person cutscenes, however, which are a noted improvement over the base campaign. But the main thing is traversal, combat, and the immersion factor are all top-tier with the new third-person mode, and if you don't like it, you can switch back to first-person whenever you please. That leads us into the story of From The Ashes. We enjoyed moments of Frontier’s campaign, but this is a definite leg up that we think Avatar fans are really going to dig. It’s got those typical hallmarks – bad humans trying to pillage Pandora of its resources – but So’Lek is a much more compelling protagonist, and the story actually sets up three big bad Na’Vi that must be taken down, giving the whole thing a bit more direction. With the new perspective and new style of cutscene, From The Ashes has much more cinematic appeal, and we often felt the urge to stop and gawk at the expansive vistas. The Kinglor Forest, an area from the base game, is now scarred, as broken branches and tire-treaded dirt tracks replace the once vibrant woodlands. Ubisoft says that the map will steadily evolve across the From The Ashes campaign. A surprising new addition in From The Ashes is boss fights, which were strangely absent from Frontiers. During our session – roughly 90 minutes early on in the DLC – we fought giant creatures and even other Na’Vi. While a big deal was made out of this by the Massive Entertainment developers, boss fights were a bit of a letdown. We can’t speak for all of them, of course, but those we did fight were rather rinse and repeat, with abnormally strong bullet (and arrow) sponge enemies. The biggest letdown was the Ash clan enemies. We hoped that these would be introduced to the regular roster of enemies, but they seem to be exclusively reserved for boss types. If nothing else, it feels like a missed opportunity. There are other attempts to spice up the combat, however. So’Lek comes with his own set of skills to unlock, which aid him in battle, and he is also equipped with a sort of berserk mode. This allows So’Lek to massively increase damage output and defence for a short time, which can be great fun as you tear through armoured RDA mechs. There are also new mech variants and a sort of robot dog to shake things up a little more. In conjunction with the third-person mode, we still really enjoyed enemy encounters as we jumped around, weaving in and out of stealth, and switching through the arsenal of weaponry at hand. The big “but” of this preview is that the whole thing was played on PC, so the jury is still out on how this will pan out on PS5. We did use a DualSense controller, so we can say that the haptics are still as excellent as they are in the base game. While we never had any performance or visual issues on PS5 before (outside of a sketchy PS5 Pro update), we’ll need to wait for the full release to check back on performance. Avatar Frontiers of Pandora - From The Ashes is a sneakily ambitious DLC. It’s got an expansive campaign that feels more tied to the wider world than ever before, with meaningful changes to combat, albeit missed opportunities with its Na’Vi enemies. The icing on the cake is the third-person mode, which for us just massively improves the experience — we wouldn’t play the game any other way now. There are a lot of ifs and buts to address with the full release, like how the narrative unfolds, how it runs on PS5, and there’s even a whole new area in the DLC that we didn’t get to see. But, as it stands, From the Ashes is an exciting next step in an ever-expanding and evolving sci-fi world that's a delight to explore on PS5, and the new third-person mode is the perfect excuse to check out the base game, if you haven’t already. Avatar: Frontiers of Pandora - From the Ashes drops on PS5 on December 19th, and the third-person update is available now. Will you be checking them out? Let us know in the comments below. View full article
-
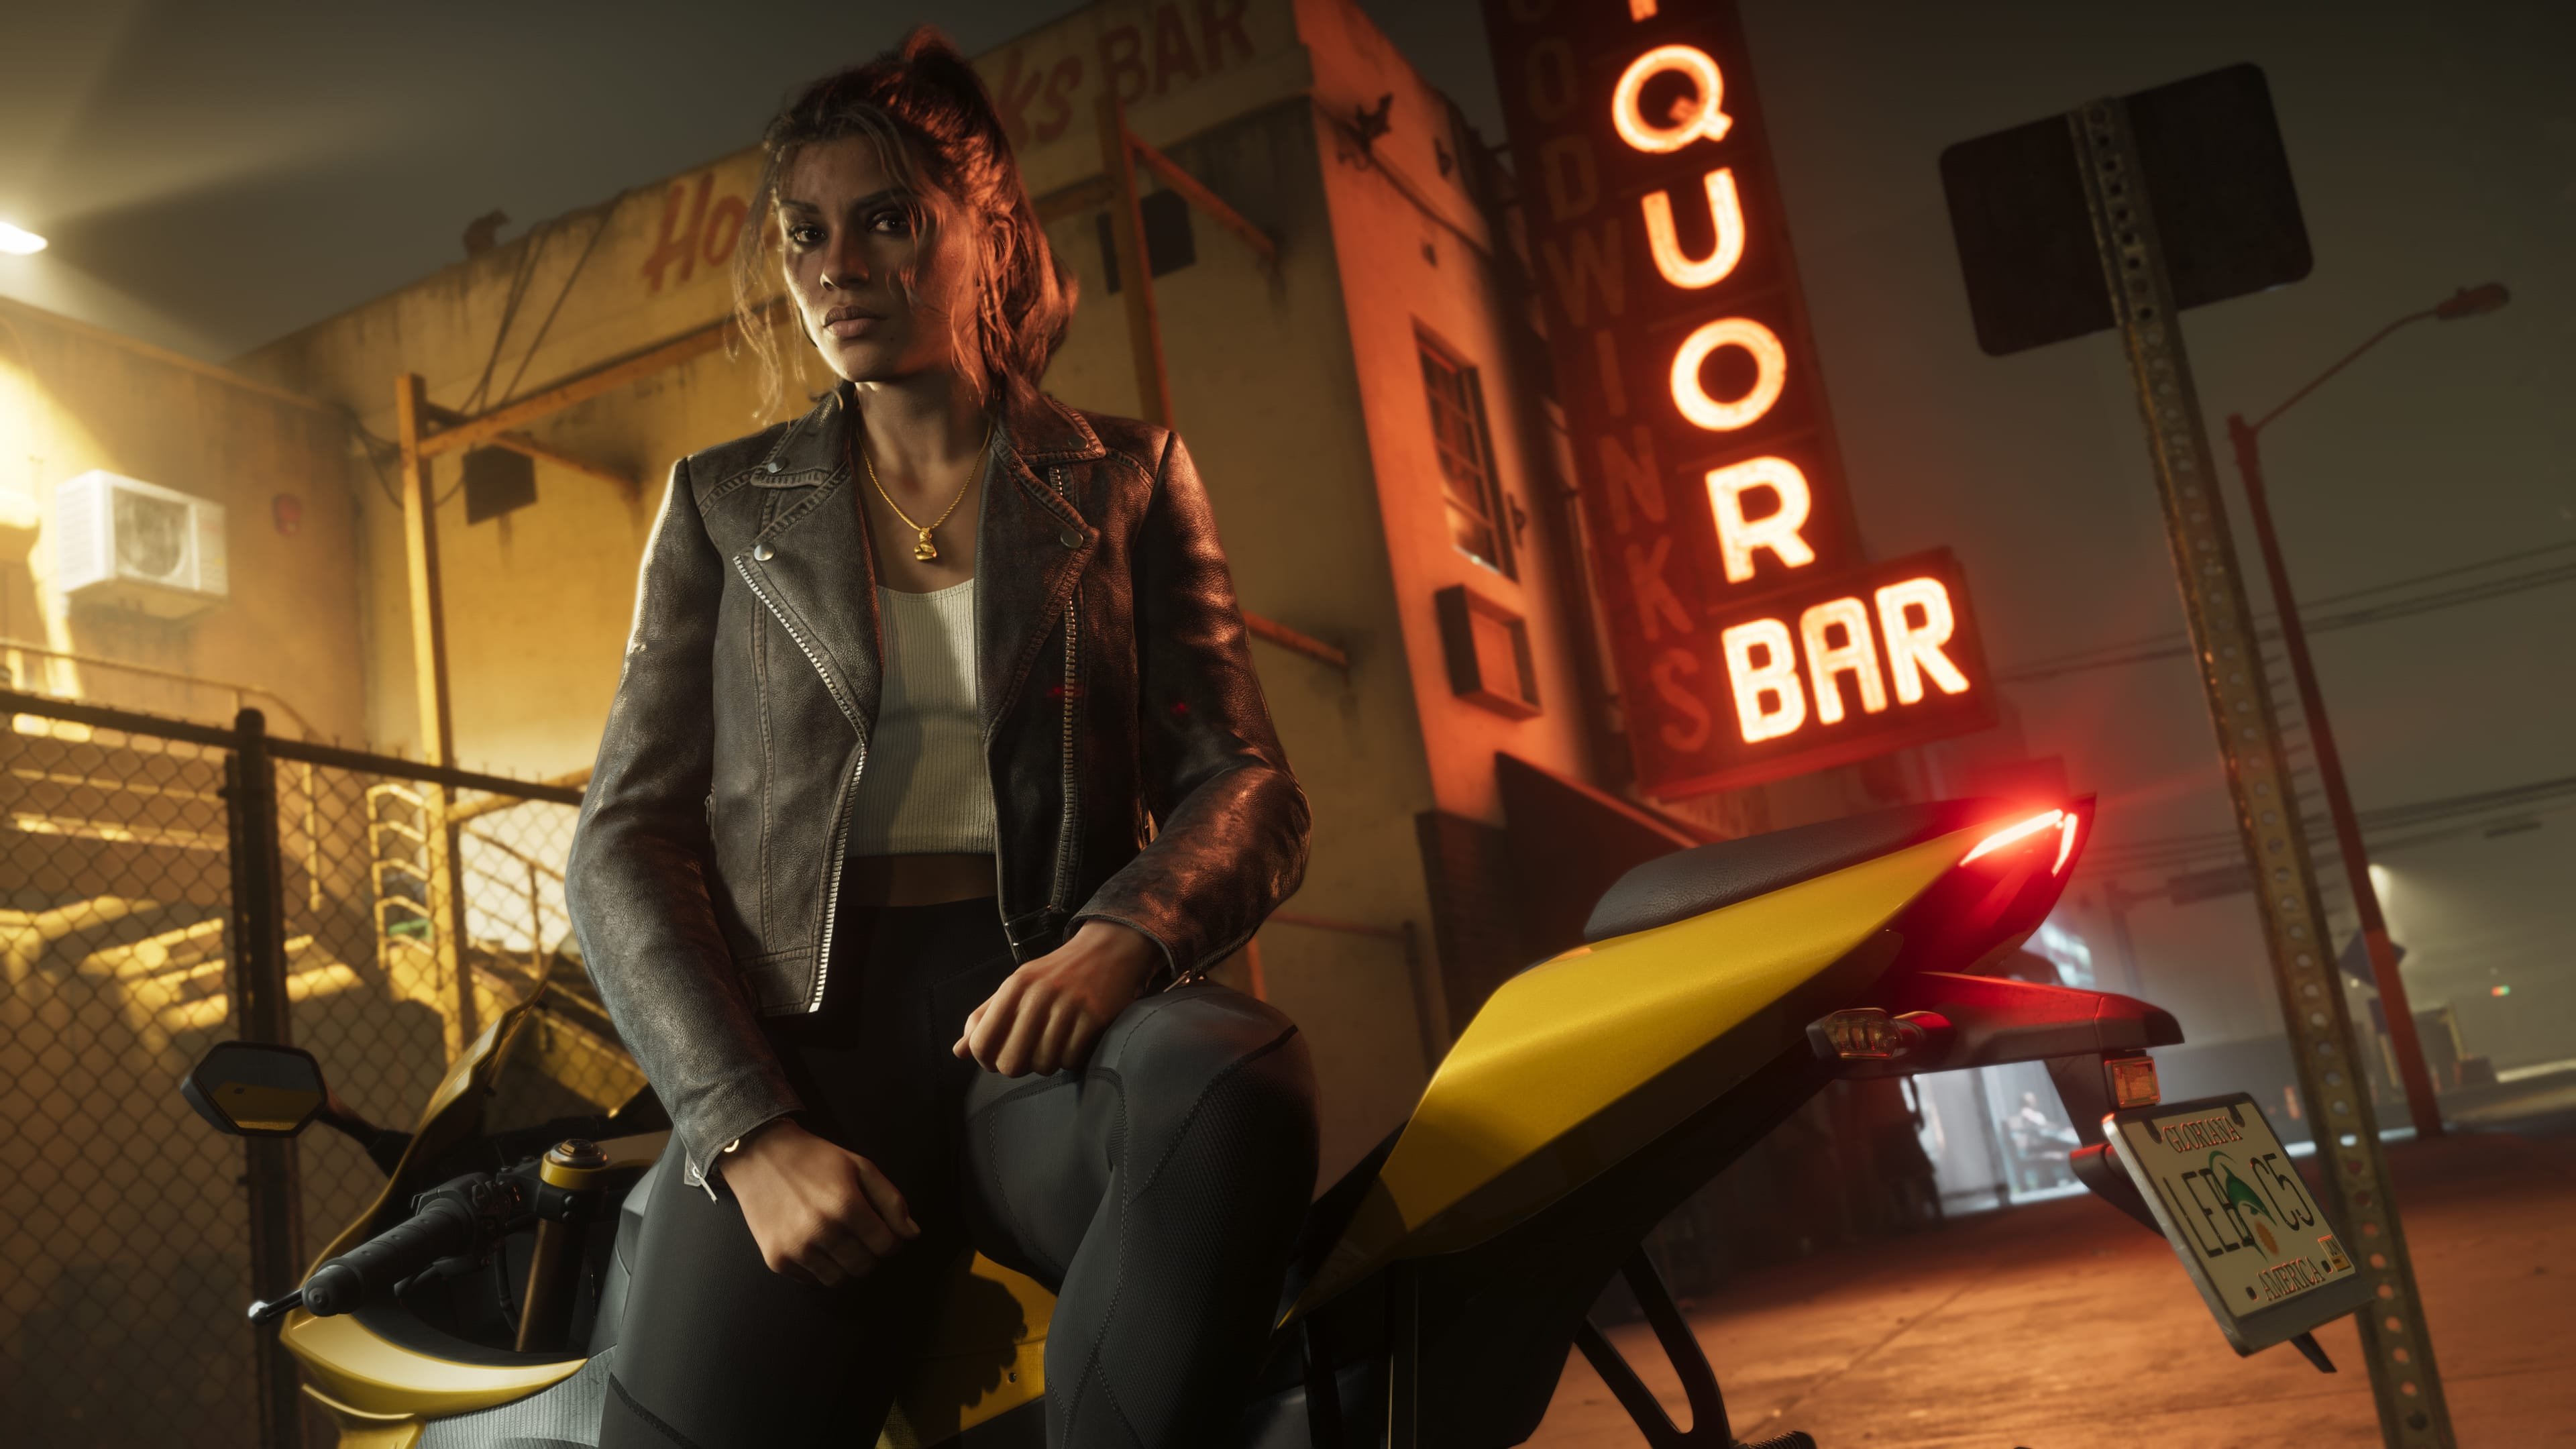
.jpg.9a06ee827f4fc42ce68f9a40b136d0e5.jpg) Michael, one of the three main characters from the single player story in GTA 5, will return to the GTA Online part of the experience next week in a free update. You can get a bit of visual context in the trailer above. Across a new series of missions featuring the protagonist, you shall work towards earning your very own mansion. "For those who have reached the highest rungs of the criminal ladder, celebrate your triumph with a painstakingly crafted palace in one of Los Santos’ most exclusive neighborhoods, complete with breathtaking views, the finest amenities, and countless ways to customize and make it your own." The free update is called A Safehouse in the Hills, and it'll become part of GTA Online for free on 10th December 2025. There'll be three mansions you can buy for your custom character, and they all include an AI assistant, pets, a huge garage for your cars, trophy cabinets, a private salon, an armory, and more. For where Michael is present, voice actor Ned Luke reprises his role as the character. Also included in the patch will be a new mission creator feature, which has been rumored to be coming for a number of years now. In it, you can "design and publish your own Missions using sophisticated game mechanics, custom objectives, placeable actors, and much more".
Michael, one of the three main characters from the single player story in GTA 5, will return to the GTA Online part of the experience next week in a free update. You can get a bit of visual context in the trailer above. Across a new series of missions featuring the protagonist, you shall work towards earning your very own mansion. "For those who have reached the highest rungs of the criminal ladder, celebrate your triumph with a painstakingly crafted palace in one of Los Santos’ most exclusive neighborhoods, complete with breathtaking views, the finest amenities, and countless ways to customize and make it your own." The free update is called A Safehouse in the Hills, and it'll become part of GTA Online for free on 10th December 2025. There'll be three mansions you can buy for your custom character, and they all include an AI assistant, pets, a huge garage for your cars, trophy cabinets, a private salon, an armory, and more. For where Michael is present, voice actor Ned Luke reprises his role as the character. Also included in the patch will be a new mission creator feature, which has been rumored to be coming for a number of years now. In it, you can "design and publish your own Missions using sophisticated game mechanics, custom objectives, placeable actors, and much more". -
Michael, one of the three main characters from the single player story in GTA 5, will return to the GTA Online part of the experience next week in a free update. You can get a bit of visual context in the trailer above. Across a new series of missions featuring the protagonist, you shall work towards earning your very own mansion. "For those who have reached the highest rungs of the criminal ladder, celebrate your triumph with a painstakingly crafted palace in one of Los Santos’ most exclusive neighborhoods, complete with breathtaking views, the finest amenities, and countless ways to customize and make it your own." The free update is called A Safehouse in the Hills, and it'll become part of GTA Online for free on 10th December 2025. There'll be three mansions you can buy for your custom character, and they all include an AI assistant, pets, a huge garage for your cars, trophy cabinets, a private salon, an armory, and more. For where Michael is present, voice actor Ned Luke reprises his role as the character. Also included in the patch will be a new mission creator feature, which has been rumored to be coming for a number of years now. In it, you can "design and publish your own Missions using sophisticated game mechanics, custom objectives, placeable actors, and much more". View full article
-
.jpg.50ed868131334fac1b4962fef805044e.jpg) Tiny Bookshop, a highly acclaimed indie title that released earlier this year on PC and Switch, is confirmed for release on PS5. The cute and cozy adventure trundles onto Sony's console on 10th April 2026, both physically and digitally. In the game, you run a mobile bookshop you can take to different areas, setting up shop and recommending books to your customers. It's a stress-free management game about stocking different genres to satisfy different people, getting to know characters through interactions, and making your little bookshop your own with all kinds of decorations. Tiny Bookshop has garnered very positive player feedback, and did very well critically too, so it seems this is something of a hidden gem. It's still a little while before the game is available on PS5, but as mentioned, it's coming to physical retail as well. The boxed copy comes with the digital soundtrack and a physical bookmark, which is pretty nice. Are you interested in Tiny Bookshop? Tell us in the comments section below.
Tiny Bookshop, a highly acclaimed indie title that released earlier this year on PC and Switch, is confirmed for release on PS5. The cute and cozy adventure trundles onto Sony's console on 10th April 2026, both physically and digitally. In the game, you run a mobile bookshop you can take to different areas, setting up shop and recommending books to your customers. It's a stress-free management game about stocking different genres to satisfy different people, getting to know characters through interactions, and making your little bookshop your own with all kinds of decorations. Tiny Bookshop has garnered very positive player feedback, and did very well critically too, so it seems this is something of a hidden gem. It's still a little while before the game is available on PS5, but as mentioned, it's coming to physical retail as well. The boxed copy comes with the digital soundtrack and a physical bookmark, which is pretty nice. Are you interested in Tiny Bookshop? Tell us in the comments section below. -
Tiny Bookshop, a highly acclaimed indie title that released earlier this year on PC and Switch, is confirmed for release on PS5. The cute and cozy adventure trundles onto Sony's console on 10th April 2026, both physically and digitally. In the game, you run a mobile bookshop you can take to different areas, setting up shop and recommending books to your customers. It's a stress-free management game about stocking different genres to satisfy different people, getting to know characters through interactions, and making your little bookshop your own with all kinds of decorations. Tiny Bookshop has garnered very positive player feedback, and did very well critically too, so it seems this is something of a hidden gem. It's still a little while before the game is available on PS5, but as mentioned, it's coming to physical retail as well. The boxed copy comes with the digital soundtrack and a physical bookmark, which is pretty nice. Are you interested in Tiny Bookshop? Tell us in the comments section below. View full article
-
.jpg.01a004570dbd9b6401a11ee8a3efd245.jpg) Earlier this week saw the announcement of Postal: Bullet Paradise, a Vampire Survivors-esque "bullet heaven" title based on the longstanding shooter franchise. However, before you get too excited, know that the PS5/PS4 game has been cancelled — just two days following its official announcement. This is because the game saw an "overwhelmingly negative" response from the community, all revolving around accusations of heavy generative AI usage. For reference, here's the announce trailer: The video does appear to have some AI elements — the voice work is suspect, as is the art in the non-gameplay segments. The game was due to be published by Running with Scissors and developed by Goonswarm Games, but after the intense reaction from the public, the publisher has cancelled and distanced itself from the project. Here's the full statement from Running with Scissors founder, Vince Desi: Generative AI has been a major point of contention over the last couple of years, including within game development. This year, games like Call of Duty: Black Ops 7 and ARC Raiders, among others, have been criticised for utilising these tools for certain aspects of production. What are your thoughts on this situation? Was Running with Scissors right to kill the game after the negative response from fans? Tell us in the comments section below.
Earlier this week saw the announcement of Postal: Bullet Paradise, a Vampire Survivors-esque "bullet heaven" title based on the longstanding shooter franchise. However, before you get too excited, know that the PS5/PS4 game has been cancelled — just two days following its official announcement. This is because the game saw an "overwhelmingly negative" response from the community, all revolving around accusations of heavy generative AI usage. For reference, here's the announce trailer: The video does appear to have some AI elements — the voice work is suspect, as is the art in the non-gameplay segments. The game was due to be published by Running with Scissors and developed by Goonswarm Games, but after the intense reaction from the public, the publisher has cancelled and distanced itself from the project. Here's the full statement from Running with Scissors founder, Vince Desi: Generative AI has been a major point of contention over the last couple of years, including within game development. This year, games like Call of Duty: Black Ops 7 and ARC Raiders, among others, have been criticised for utilising these tools for certain aspects of production. What are your thoughts on this situation? Was Running with Scissors right to kill the game after the negative response from fans? Tell us in the comments section below. -
Earlier this week saw the announcement of Postal: Bullet Paradise, a Vampire Survivors-esque "bullet heaven" title based on the longstanding shooter franchise. However, before you get too excited, know that the PS5/PS4 game has been cancelled — just two days following its official announcement. This is because the game saw an "overwhelmingly negative" response from the community, all revolving around accusations of heavy generative AI usage. For reference, here's the announce trailer: The video does appear to have some AI elements — the voice work is suspect, as is the art in the non-gameplay segments. The game was due to be published by Running with Scissors and developed by Goonswarm Games, but after the intense reaction from the public, the publisher has cancelled and distanced itself from the project. Here's the full statement from Running with Scissors founder, Vince Desi: Generative AI has been a major point of contention over the last couple of years, including within game development. This year, games like Call of Duty: Black Ops 7 and ARC Raiders, among others, have been criticised for utilising these tools for certain aspects of production. What are your thoughts on this situation? Was Running with Scissors right to kill the game after the negative response from fans? Tell us in the comments section below. View full article
-
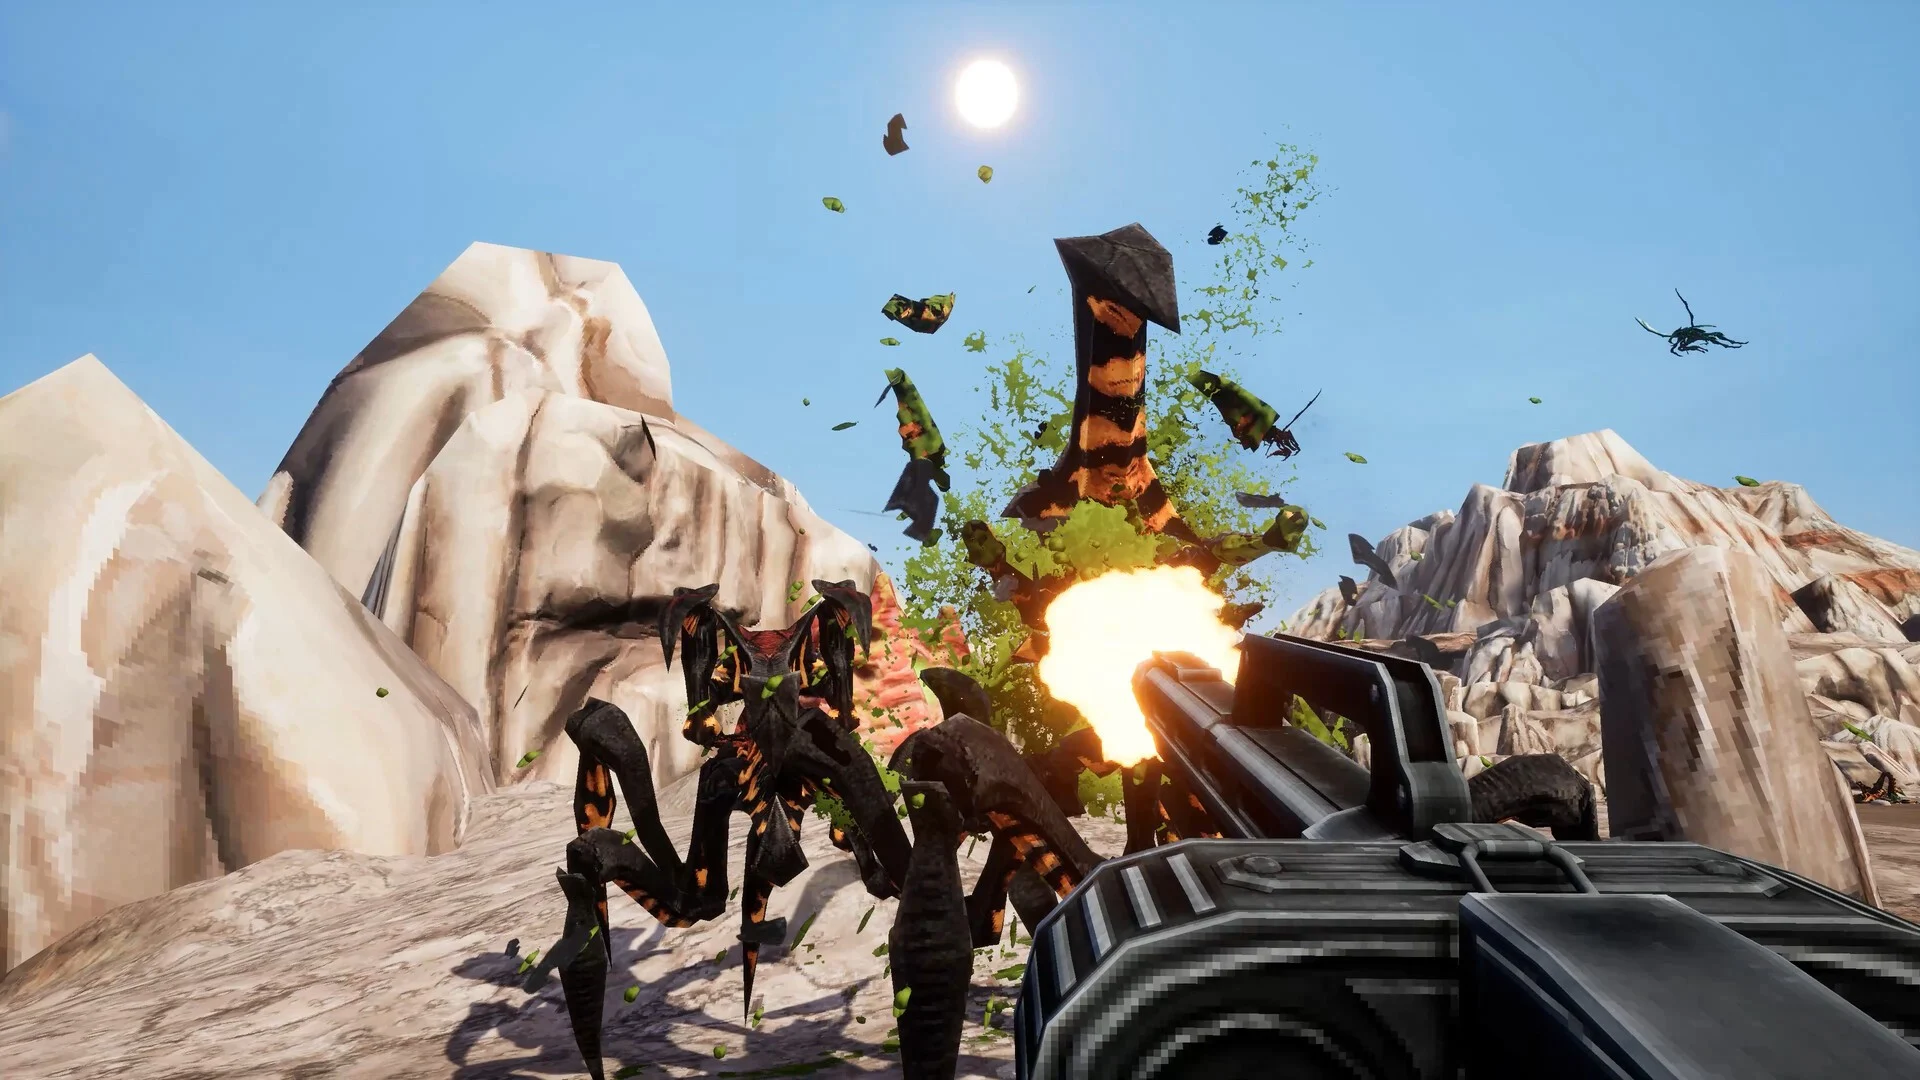 Satirical sci-fi is in at the moment, with Helldivers 2 taking off massively last year, and its direct inspiration, Starship Troopers, is getting in on the action. Starship Troopers: Ultimate Bug War is a freshly announced single player first-person shooter set within the universe of the much-loved sci-fi action movie. It's not exactly what you might expect; it winds back the clock to 1997 — the year of the film's release — and presents us with a retro FPS, as you can see in this trailer: We reckon this looks more like a PS2-era shooter than a PS1 one, but the effect is the same; it's intentionally old school, with low poly counts and flat textures everywhere. The game even features FMV cutscenes, with General Johnny Rico himself (Casper Van Dien) issuing commands to the troops. It honestly looks like a lot of fun, and for many it'll certainly be a nostalgic reminder of a simpler time. It's due for release on PS5 next year. The game is in development at Auroch Digital, the studio Warhammer 40,000: Boltgun, so it's a team that's made retro FPS titles before. An interesting one, this, but what do you make of it? Are you interested in Starship Troopers: Ultimate Bug War? Tell us in the comments section below.
 -
Satirical sci-fi is in at the moment, with Helldivers 2 taking off massively last year, and its direct inspiration, Starship Troopers, is getting in on the action. Starship Troopers: Ultimate Bug War is a freshly announced single player first-person shooter set within the universe of the much-loved sci-fi action movie. It's not exactly what you might expect; it winds back the clock to 1997 — the year of the film's release — and presents us with a retro FPS, as you can see in this trailer: We reckon this looks more like a PS2-era shooter than a PS1 one, but the effect is the same; it's intentionally old school, with low poly counts and flat textures everywhere. The game even features FMV cutscenes, with General Johnny Rico himself (Casper Van Dien) issuing commands to the troops. It honestly looks like a lot of fun, and for many it'll certainly be a nostalgic reminder of a simpler time. It's due for release on PS5 next year. The game is in development at Auroch Digital, the studio Warhammer 40,000: Boltgun, so it's a team that's made retro FPS titles before. An interesting one, this, but what do you make of it? Are you interested in Starship Troopers: Ultimate Bug War? Tell us in the comments section below. View full article
-
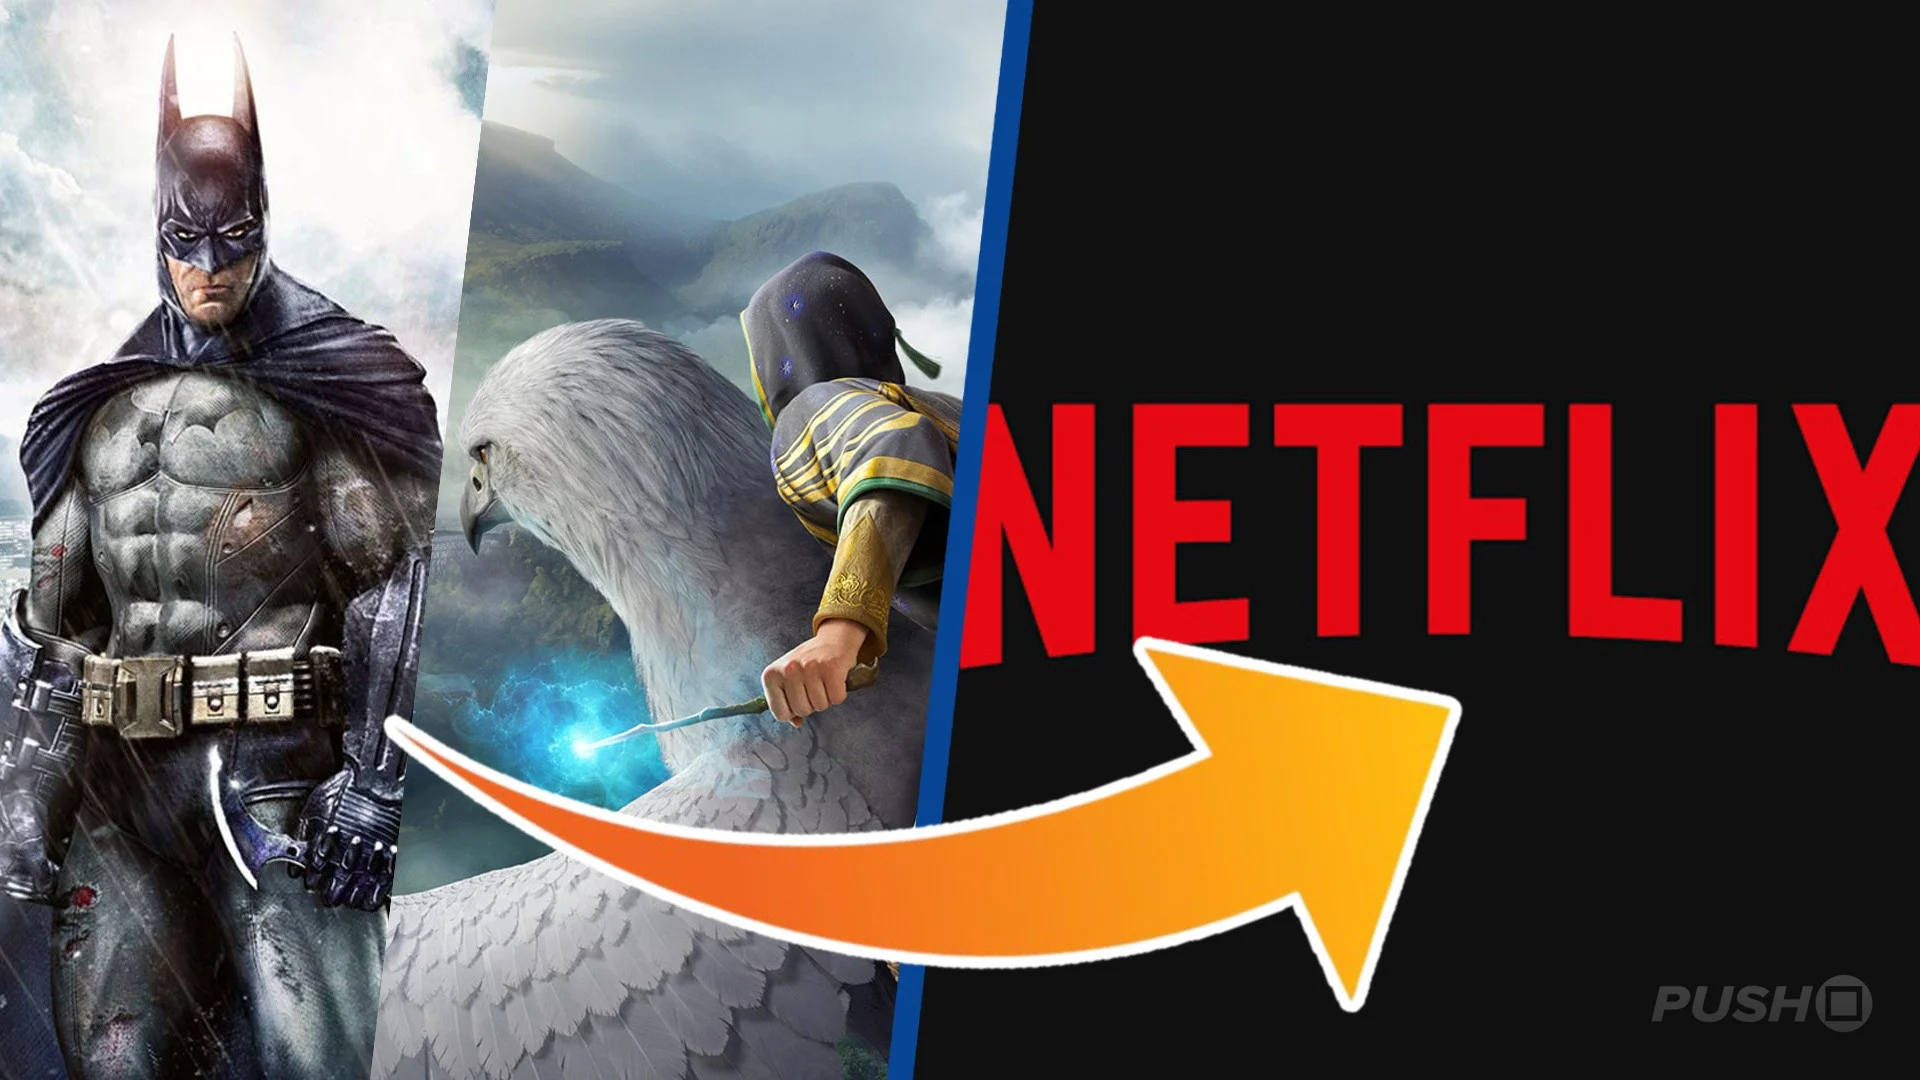 Netflix has entered into an agreement to acquire Warner Bros Discovery for $82.7 billion, which includes the publisher's video game developers and IPs. This means that, should the deal go through, the ownership of Mortal Kombat team NetherRealm Studios, the Hogwarts Legacy developer Avalanche, and other outfits like TT Games and Rocksteady will be transferred to Netflix. IPs such as Harry Potter, DC, and Game of Thrones are all included in the deal. In a statement posted to the Netflix website, it is said the acquisition will bring "together two pioneering entertainment businesses, combining Netflix’s innovation, global reach and best-in-class streaming service with Warner Bros.’ century-long legacy of world-class storytelling". Netflix co-CEO Ted Sarandos added: "By combining Warner Bros.’ incredible library of shows and movies—from timeless classics like Casablanca and Citizen Kane to modern favorites like Harry Potter and Friends—with our culture-defining titles like Stranger Things, KPop Demon Hunters and Squid Game, we'll be able to do that even better. Together, we can give audiences more of what they love and help define the next century of storytelling." From a video games perspective, there's no mention of what will happen to the developers currently under Warner Bros' wing. Despite the success of Hogwarts Legacy, the publisher's video game efforts haven't been all that successful, with notable failures to its name like Suicide Squad. There are rumours Rocksteady has returned to the Batman: Arkham universe, while the Wonder Woman game was cancelled earlier this year. A sequel to Hogwarts Legacy is expected in the next handful of years. Warner Bros president and CEO David Zaslav concluded: "Today’s announcement combines two of the greatest storytelling companies in the world to bring to even more people the entertainment they love to watch the most." You can learn more about the two companies' intentions through the link.
 -
Netflix has entered into an agreement to acquire Warner Bros Discovery for $82.7 billion, which includes the publisher's video game developers and IPs. This means that, should the deal go through, the ownership of Mortal Kombat team NetherRealm Studios, the Hogwarts Legacy developer Avalanche, and other outfits like TT Games and Rocksteady will be transferred to Netflix. IPs such as Harry Potter, DC, and Game of Thrones are all included in the deal. In a statement posted to the Netflix website, it is said the acquisition will bring "together two pioneering entertainment businesses, combining Netflix’s innovation, global reach and best-in-class streaming service with Warner Bros.’ century-long legacy of world-class storytelling". Netflix co-CEO Ted Sarandos added: "By combining Warner Bros.’ incredible library of shows and movies—from timeless classics like Casablanca and Citizen Kane to modern favorites like Harry Potter and Friends—with our culture-defining titles like Stranger Things, KPop Demon Hunters and Squid Game, we'll be able to do that even better. Together, we can give audiences more of what they love and help define the next century of storytelling." From a video games perspective, there's no mention of what will happen to the developers currently under Warner Bros' wing. Despite the success of Hogwarts Legacy, the publisher's video game efforts haven't been all that successful, with notable failures to its name like Suicide Squad. There are rumours Rocksteady has returned to the Batman: Arkham universe, while the Wonder Woman game was cancelled earlier this year. A sequel to Hogwarts Legacy is expected in the next handful of years. Warner Bros president and CEO David Zaslav concluded: "Today’s announcement combines two of the greatest storytelling companies in the world to bring to even more people the entertainment they love to watch the most." You can learn more about the two companies' intentions through the link. View full article
-
 Update [Fri 5th Dec 2025, 7:45am]: We have an update on this coming from Game Developer, where a Warner Bros. spokesperson confirms that its video game division will be included in the sale to Netflix. We'll throw a quick quote from the site on this confirmation down below: Original Story: In an announcement that's sending shockwaves throughout the entertainment world, streaming giant Netflix has announced its intentions to buy Warner Bros. - for a whopping $72 billion (or $82.7 billion as a "total enterprise value"). Going off Netflix's statement on this, the move doesn't mention Warner Bros.' gaming studios - although the finer detail on this deal is still a little hazy at the minute, especially because it's not completed yet. All we know for sure is that Netflix has "entered into a definitive agreement under which Netflix will acquire Warner Bros., including its film and television studios, HBO Max and HBO." Of course, the bit that's standing out to us right now is the sheer size and scope of this acquisition. Throughout 2022 and 2023, Microsoft fought tooth and nail to acquire Activision Blizzard at a cost of roughly $70 billion - and we all know how that went down within the realm of gaming. We suppose we'll have to see how things go for Netflix, and how hard the company has to fight to get this deal done. We'll also be keeping our eye on any potential news regarding the Warner Bros. gaming division, but as things stand, this deal seems to focus on film and TV streaming - which makes sense given the nature of Netflix's current business. In terms of timing, the two companies believe that "the transaction is expected to close in 12-18 months".
 -
Update [Fri 5th Dec 2025, 7:45am]: We have an update on this coming from Game Developer, where a Warner Bros. spokesperson confirms that its video game division will be included in the sale to Netflix. We'll throw a quick quote from the site on this confirmation down below: Original Story: In an announcement that's sending shockwaves throughout the entertainment world, streaming giant Netflix has announced its intentions to buy Warner Bros. - for a whopping $72 billion (or $82.7 billion as a "total enterprise value"). Going off Netflix's statement on this, the move doesn't mention Warner Bros.' gaming studios - although the finer detail on this deal is still a little hazy at the minute, especially because it's not completed yet. All we know for sure is that Netflix has "entered into a definitive agreement under which Netflix will acquire Warner Bros., including its film and television studios, HBO Max and HBO." Of course, the bit that's standing out to us right now is the sheer size and scope of this acquisition. Throughout 2022 and 2023, Microsoft fought tooth and nail to acquire Activision Blizzard at a cost of roughly $70 billion - and we all know how that went down within the realm of gaming. We suppose we'll have to see how things go for Netflix, and how hard the company has to fight to get this deal done. We'll also be keeping our eye on any potential news regarding the Warner Bros. gaming division, but as things stand, this deal seems to focus on film and TV streaming - which makes sense given the nature of Netflix's current business. In terms of timing, the two companies believe that "the transaction is expected to close in 12-18 months". View full article
-
 Apparently, something is happening over in Nintendo land this week. There's some kind of long-awaited sequel that's been in the works for 18 years? "Metroid"..."Prime"... they call it? That's a new one to us! Seriously though, the new release of Metroid Prime 4: Beyond actually has a connection to Xbox, and specifically the Halo series. When the reviews and latest gameplay footage started doing the rounds this week, many people were making the comparison to Halo, and it seems there's a very good reason for that. Taking to social media, VGC's Andy Robinson confirmed that there are "lots" of former 343 Industries developers on the Retro Studios team (studio behind Metroid Prime 4), with reporter Rebs Gaming highlighting that it's a "significant" amount of people that worked on Halo 4, Halo 5 and Halo Infinite. We haven't come across a full list of names yet, but looking back to a VGC article from 2024, various people with Halo history were listed in the development credits for Metroid Prime 4. At the time, the following names were mentioned: Jessica Spence, senior producer (Donkey Kong Country: Tropical Freeze, Halo 4) Chris Lewis, senior environment / material artist (Halo 4, Halo 5, Halo Infinite) Kyle Hefley, lead character artist (Halo 4, 5 & Infinite, Call of Duty: Black Ops, DJ Hero) Brandon Habib, lighting artist (Halo Infinite) Bobby Arlauskas, sound designer (Metroid Prime 3, Donkey Kong Country Returns & Tropical Freeze, Call of Duty: Advanced Warfare, Halo 4) Robert Walker, gameplay engineer (Halo 2L Anniversary, Doom 2016, Call of Duty 4: Modern Warfare Remastered) In particular, Kyle Hefley is someone who made headlines when joining Retro Studios back in 2019, having served as the senior character modeler for Halo 4, Halo 5 and Halo Infinite before taking on a lead character role for Metroid Prime. Many have pointed out in the comments of the above Twitter post that Metroid developers have jumped to Halo in the past as well, so it's no surprise the two series' look quite similar. Of course, it's not like everyone on the Metroid Prime 4: Beyond team has worked on Halo before — there's a ridiculous number of people who have developed all sorts of major games across the industry (including many Bethesda and Activision titles that are now owned by Xbox) — but it's fun to see a crossover like this all the same. We'll leave you with a review of Metroid Prime 4 from Nintendo Life, just in case you own one of those "Switch" thingies!
 -
Apparently, something is happening over in Nintendo land this week. There's some kind of long-awaited sequel that's been in the works for 18 years? "Metroid"..."Prime"... they call it? That's a new one to us! Seriously though, the new release of Metroid Prime 4: Beyond actually has a connection to Xbox, and specifically the Halo series. When the reviews and latest gameplay footage started doing the rounds this week, many people were making the comparison to Halo, and it seems there's a very good reason for that. Taking to social media, VGC's Andy Robinson confirmed that there are "lots" of former 343 Industries developers on the Retro Studios team (studio behind Metroid Prime 4), with reporter Rebs Gaming highlighting that it's a "significant" amount of people that worked on Halo 4, Halo 5 and Halo Infinite. We haven't come across a full list of names yet, but looking back to a VGC article from 2024, various people with Halo history were listed in the development credits for Metroid Prime 4. At the time, the following names were mentioned: Jessica Spence, senior producer (Donkey Kong Country: Tropical Freeze, Halo 4) Chris Lewis, senior environment / material artist (Halo 4, Halo 5, Halo Infinite) Kyle Hefley, lead character artist (Halo 4, 5 & Infinite, Call of Duty: Black Ops, DJ Hero) Brandon Habib, lighting artist (Halo Infinite) Bobby Arlauskas, sound designer (Metroid Prime 3, Donkey Kong Country Returns & Tropical Freeze, Call of Duty: Advanced Warfare, Halo 4) Robert Walker, gameplay engineer (Halo 2L Anniversary, Doom 2016, Call of Duty 4: Modern Warfare Remastered) In particular, Kyle Hefley is someone who made headlines when joining Retro Studios back in 2019, having served as the senior character modeler for Halo 4, Halo 5 and Halo Infinite before taking on a lead character role for Metroid Prime. Many have pointed out in the comments of the above Twitter post that Metroid developers have jumped to Halo in the past as well, so it's no surprise the two series' look quite similar. Of course, it's not like everyone on the Metroid Prime 4: Beyond team has worked on Halo before — there's a ridiculous number of people who have developed all sorts of major games across the industry (including many Bethesda and Activision titles that are now owned by Xbox) — but it's fun to see a crossover like this all the same. We'll leave you with a review of Metroid Prime 4 from Nintendo Life, just in case you own one of those "Switch" thingies! View full article
-
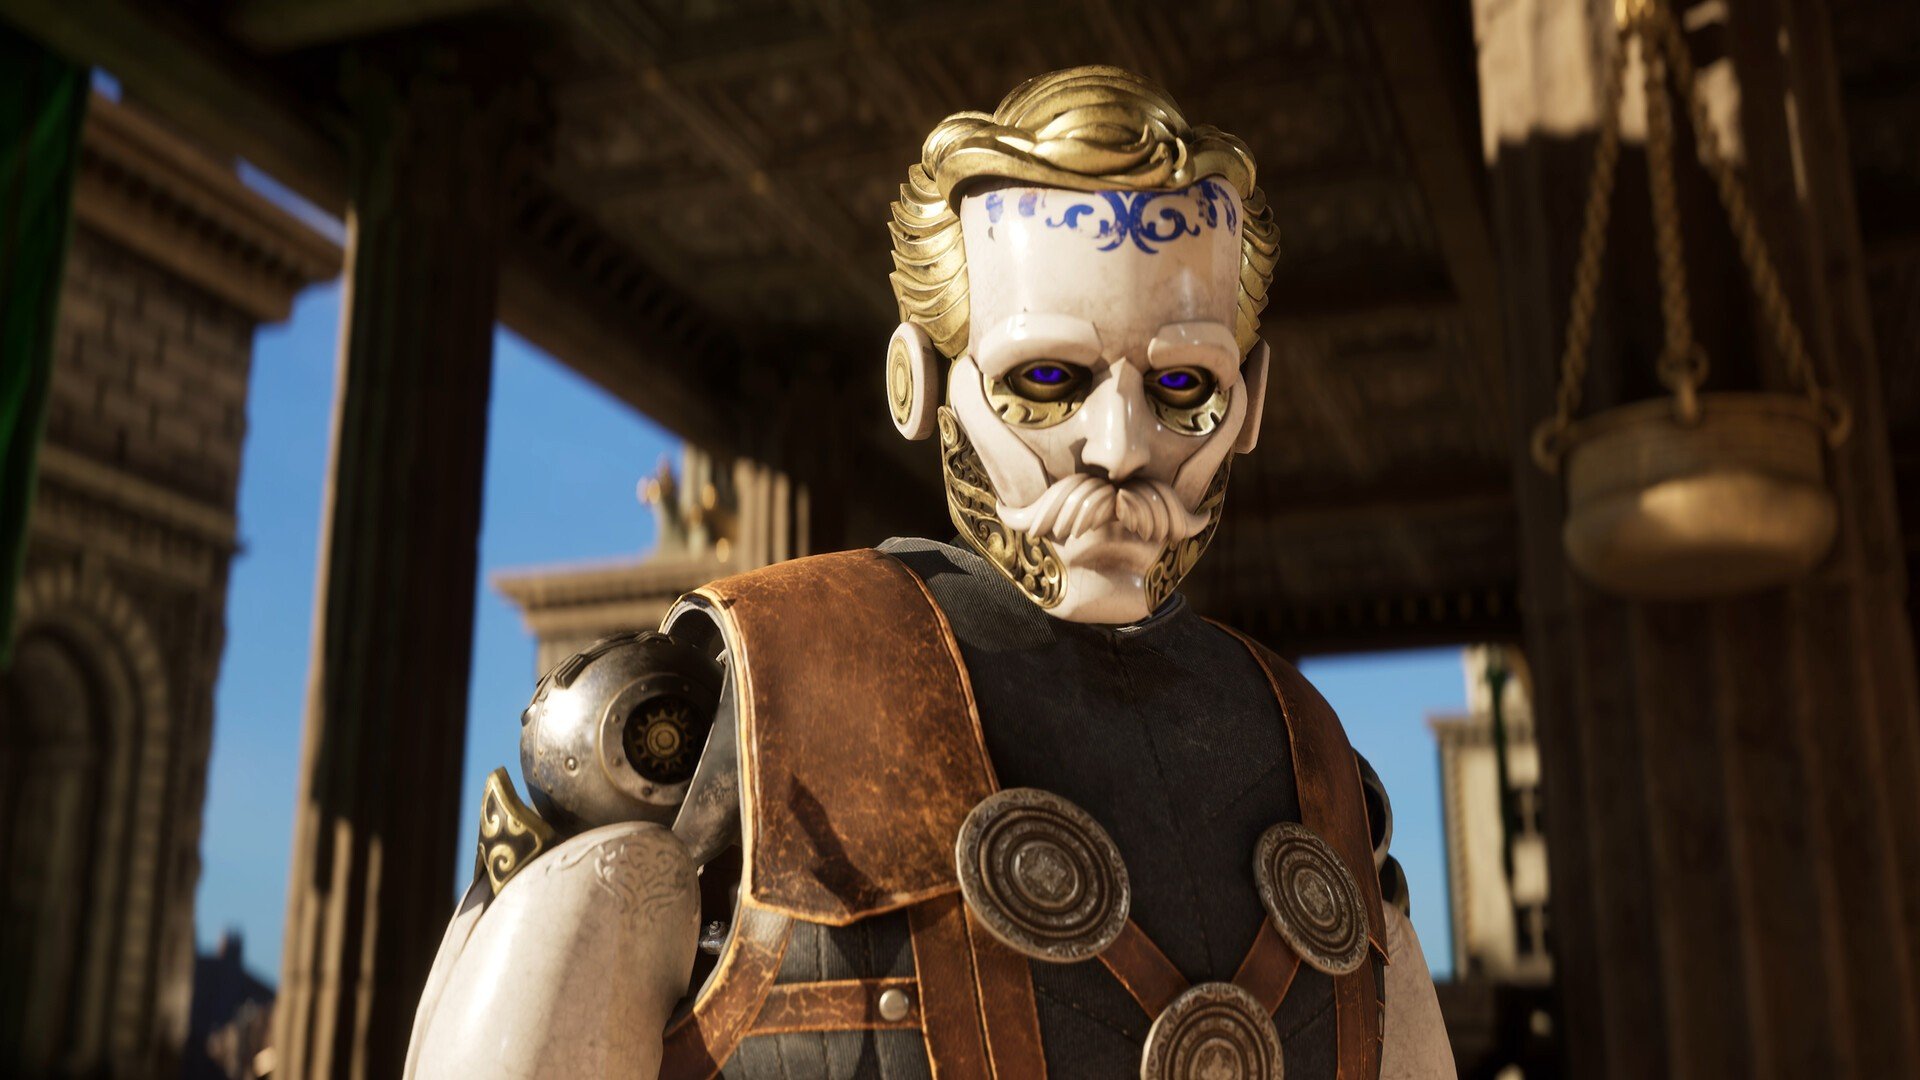 Clockwork Revolution has a bit of hype behind it within the Xbox fanbase - heck, even boss Phil Spencer sounds pretty excited about what inXile is cooking up. And, while info on the title remains scarce, the team has delivered a new message about the game as part of the latest PC Gaming Show. The upcoming Xbox RPG was named amongst the showcase's 'Most Wanted' titles, and so, Brian Fargo & co. gave us a quick update on how it's progressing over at Microsoft HQ. We'll share the video message down below: Everything the team is saying sounds rather exciting, from this being Fargo's "most complex game" to date, to the Clockwork Revolution dev "taking visual reactivity to an entirely new level" with its time-travelling mechanics. Visually it's very striking too; something that's no doubt grabbing fans' attention right now. Finally, Fargo teases that they've "only shown a tiny glimpse" of the game so far, before again leaving us hanging with its "in due time" release window. We've got a feeling this one will get a date when it's really closed to being finished - and all we can say is, bring it on!
 -
Clockwork Revolution has a bit of hype behind it within the Xbox fanbase - heck, even boss Phil Spencer sounds pretty excited about what inXile is cooking up. And, while info on the title remains scarce, the team has delivered a new message about the game as part of the latest PC Gaming Show. The upcoming Xbox RPG was named amongst the showcase's 'Most Wanted' titles, and so, Brian Fargo & co. gave us a quick update on how it's progressing over at Microsoft HQ. We'll share the video message down below: Everything the team is saying sounds rather exciting, from this being Fargo's "most complex game" to date, to the Clockwork Revolution dev "taking visual reactivity to an entirely new level" with its time-travelling mechanics. Visually it's very striking too; something that's no doubt grabbing fans' attention right now. Finally, Fargo teases that they've "only shown a tiny glimpse" of the game so far, before again leaving us hanging with its "in due time" release window. We've got a feeling this one will get a date when it's really closed to being finished - and all we can say is, bring it on! View full article
-
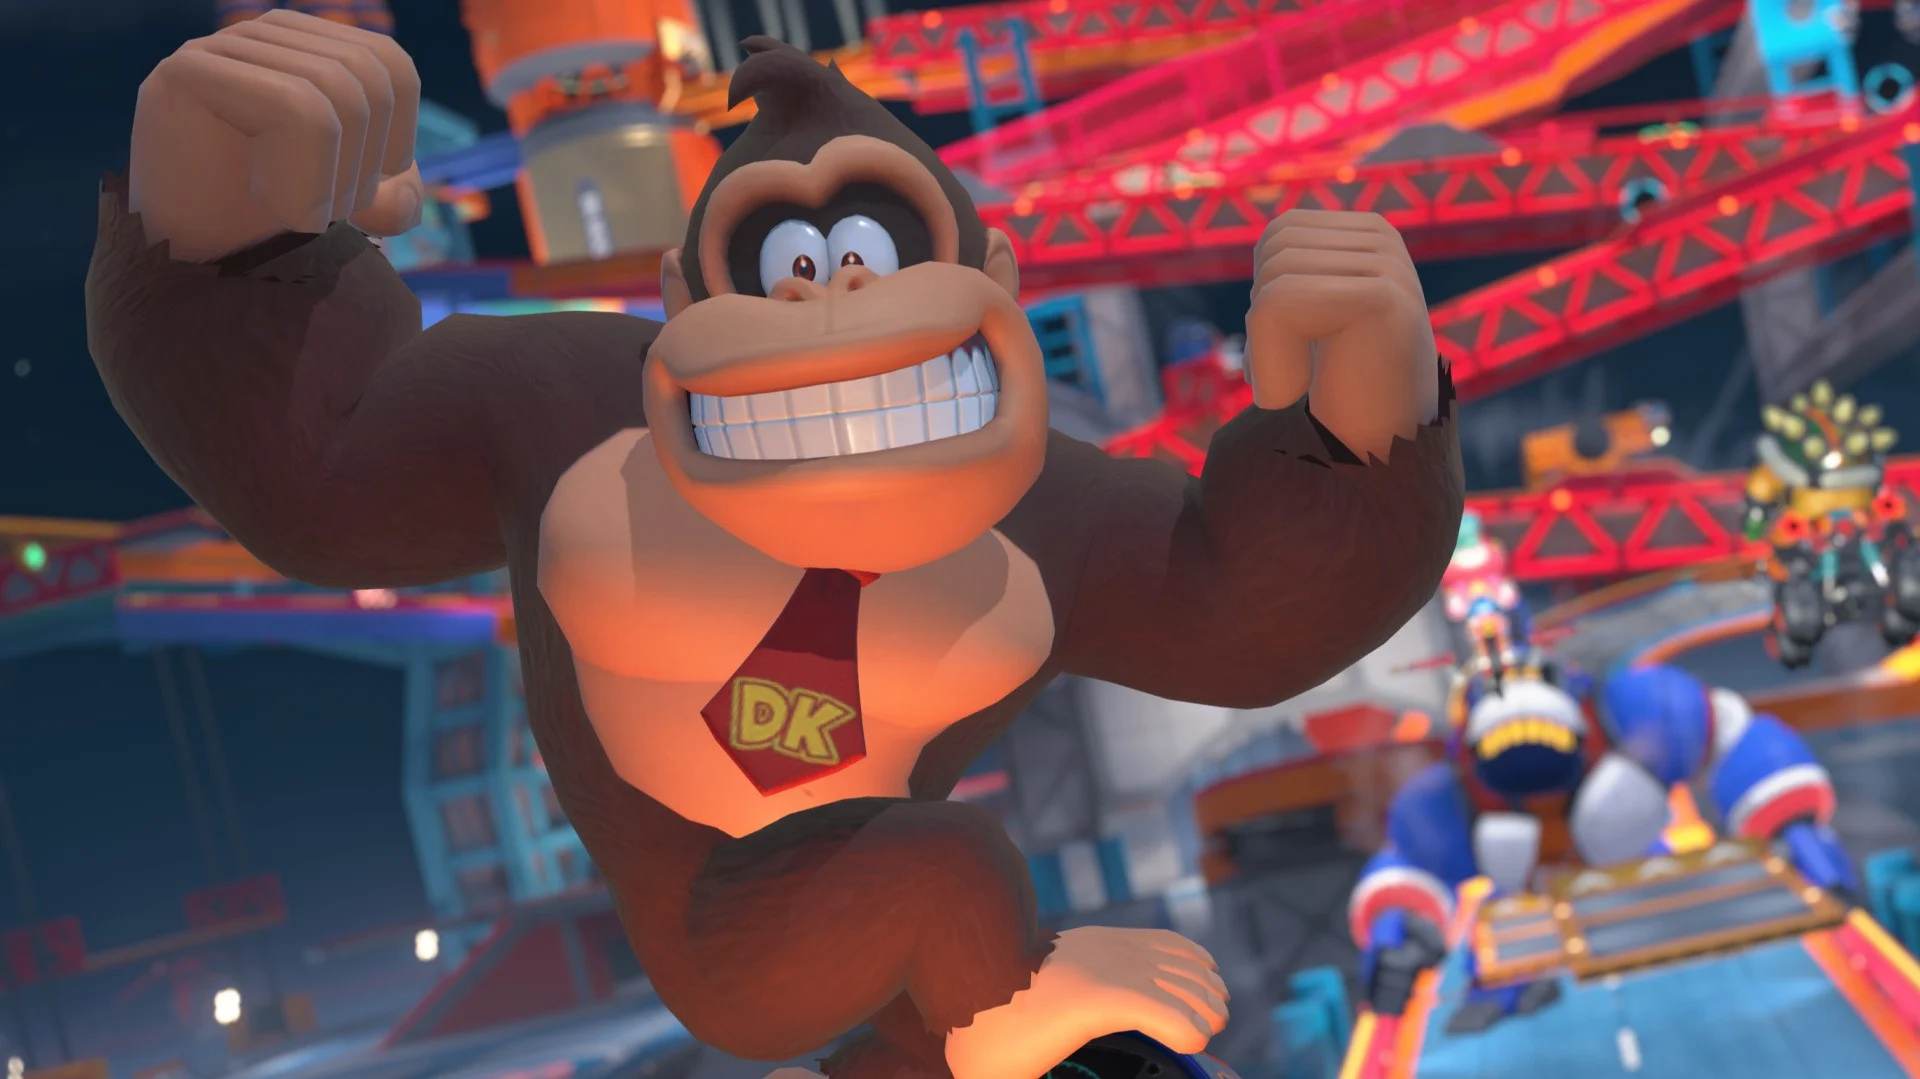 While Mario Kart World may have just received a rather hefty update, fans of the Switch 2 launch game have been eagerly anticipating any potential DLC that will come to the racer. And a recent datamine of Nintendo Today! has brought all of those hopes and dreams to the surface (thanks, IGN!). So, some context: earlier this week, Nintendo updated its news app with a suite of Donkey Kong themes, with many of them seemingly inspired by Donkey Kong Bananza. Fans decided to datamine the themes and see which Kong characters would be appearing in the future and over on Famiboards, user MondoMega shared the results, and there were a few surprises. Now, beyond this point, we'll be going into big Donkey Kong Bananza spoilers, so if you haven't beaten the game yet and want to be surprised, then stop reading right now; the spoilers will be after the image. It turns out, none other than King K. Rool will be featuring on the app on 15th December. Nintendo has rarely acknowledged the villainous croc in recent years, besides his appearance in Super Smash Bros. Ultimate, and Donkey Kong Bananza's endgame — and his role as the final boss — was a huge surprise to many. Kritters will also be appearing a few days prior, on 9th. Now, why would Nintendo have K. Rool pop up on the calendar on 15th December? Honestly, it may well be a harmless bit of promotion. Nintendo features multiple characters unrelated to game releases on the app. But the timing of this update, and all of the assets coming from Bananza (you can see all of the datamined animations on Mario Wiki - beware of spoilers, obviously) has people fervently speculating; will King K. Rool be added to Mario Kart World? It's not just baseless speculation, either; shortly after Bananza launched, eagle-eyed players noticed that both King K. Rool and Void Kong's voices were listed in Mario Kart World's credits, but neither character was in the game. So will we be getting some DLC news soon? The Game Awards are next week, but Nintendo rarely makes an appearance at the ceremony, with its biggest announcements there being Bayonetta Origins and a variety of Smash Bros. DLC. Could the Big N buck the trend in 2025? We'll have to wait and see. For now, take this with a pinch of salt. We'd love to see K. Rool in a kart, but we won't get our hopes up just yet.