


Welcome to the next part of the Metroid Prime 4: Beyond walkthrough. Here, we'll be making our way through the game's first major area: Fury Green.
This is kind of the equivalent of the Tallon IV Overworld from the original Prime; a lush forest filled with creatures big and small, so there will be plenty of things to scan and really kickstart your journey to 100% completion.
Chrono Tower Walkthrough
Before we touch down in Fury Green, we’ll need to get through a bit of plot in Chrono Tower. You’ll be getting much more acquainted with this place later on.
When you gain control of Samus, follow the 343-Guilty-Spark-inspired floating robot (don’t worry, there are no items or logbook scans in this area). Let it open doors for you, then follow the stairs around in the Central Chamber and descend into the lower chamber. Wait for Mr. Floaty, then head up to the door directly above.
Head over the next bridge. Samus will then be transported to a seemingly empty, dream-like realm. Walk forwards until you reach the purple gem. A cutscene will commence to show Samus gaining her Psychic Powers.
Regaining control, scan the circular device on the opposite wall to activate the bridge. Now head into the middle of the Central Chamber and scan the hologram to activate the elevator.
When you’re at the top, scan the statue to trigger another cutscene - here, you're told you need to locate and obtain five Master Teleporter Keys from major regions on Viewros.
When it’s over, touch the ball of light to transport to Fury Green.
Fury Green Walkthrough
You’ll find yourself in the Quiet Overlook, so take your time to look around and admire your surroundings. Nothing in this initial area can hurt you, at least not deliberately.
Scan Entry: Lamorn Lore 'The First Steps'
There are a few things to scan here, too. First up, to your immediate right is the Lamorn Lore ‘The First Steps’, so scan it.

Image: Nintendo
Scan Entry: Empress Aleu
Next, you’ll see a couple of flying creatures ahead. The first is the buttlerfly-like Empress Aleu, so scan this before it flies off.
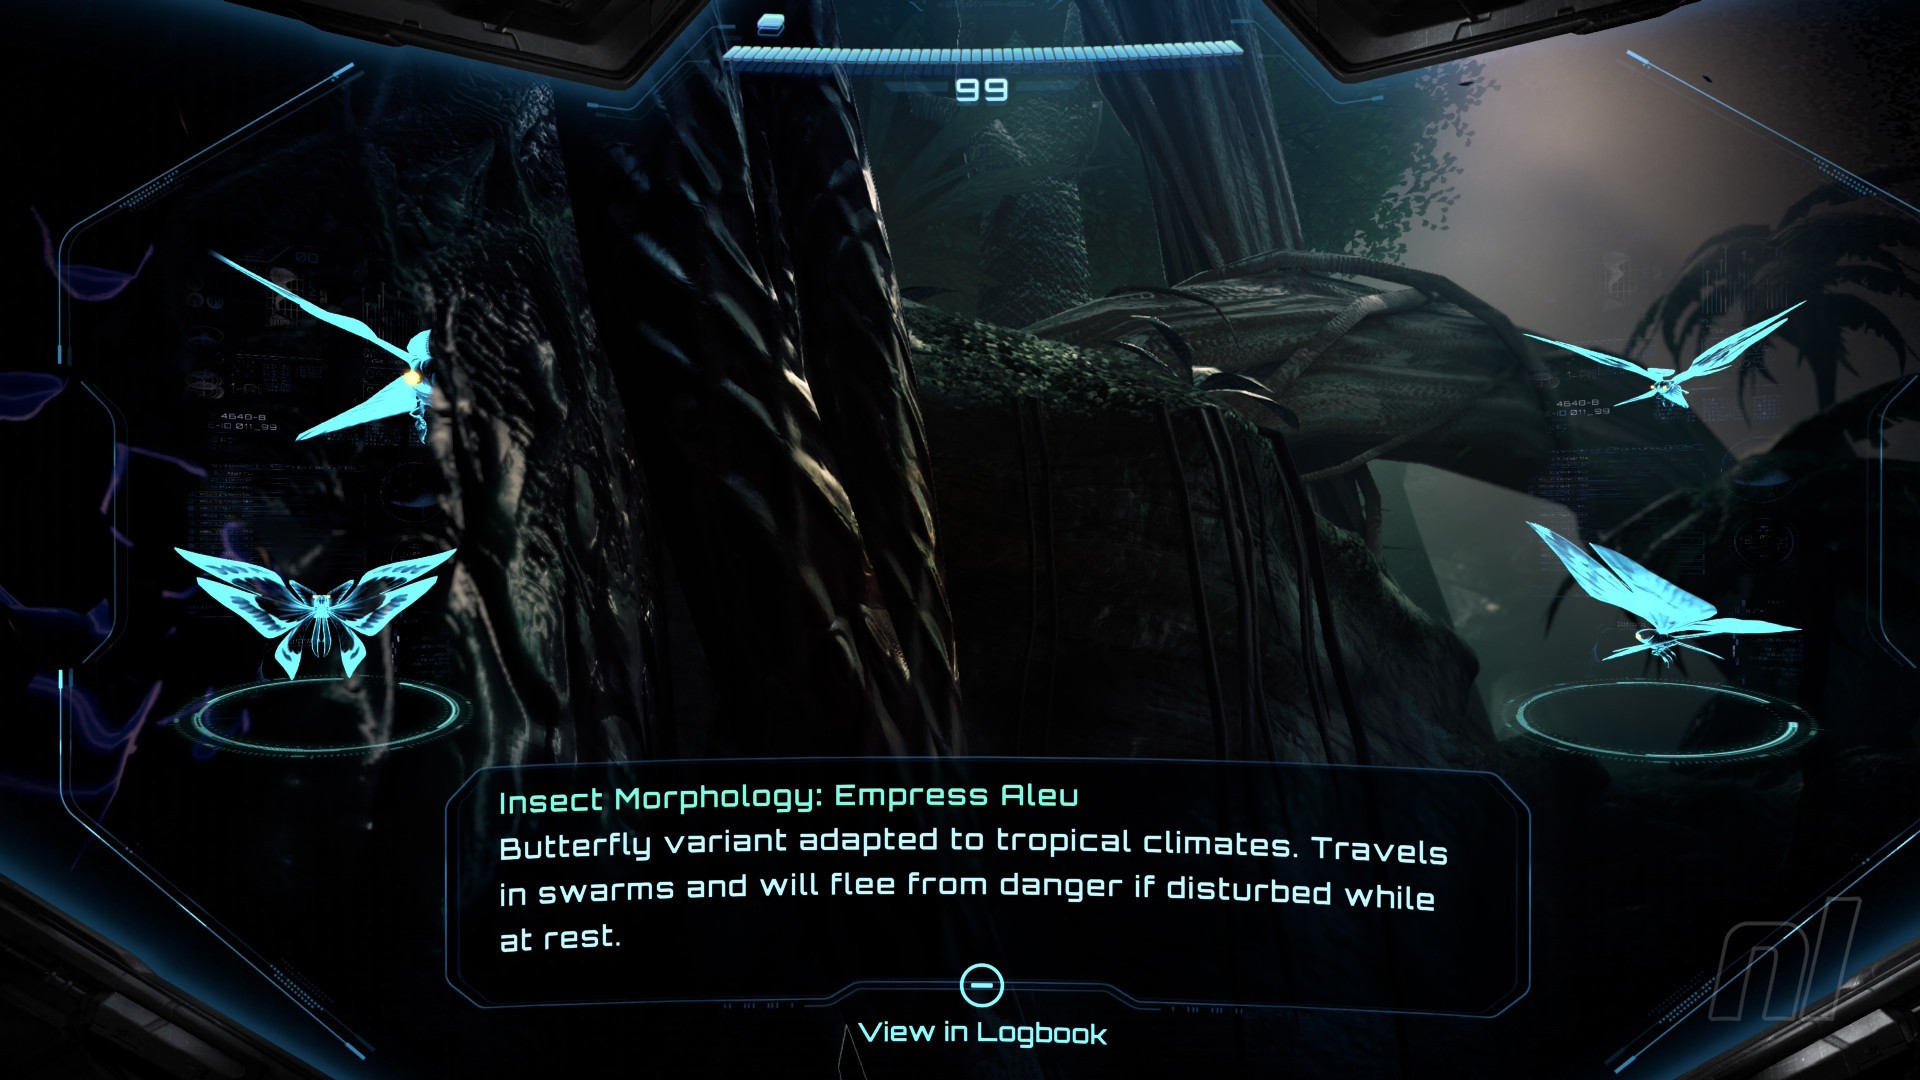
Image: Nintendo
Scan Entry: Sicklefly
Next to this is the Sicklefly, which fly around in clusters. If you miss this, it’ll simply circle the area, so don’t worry too much.
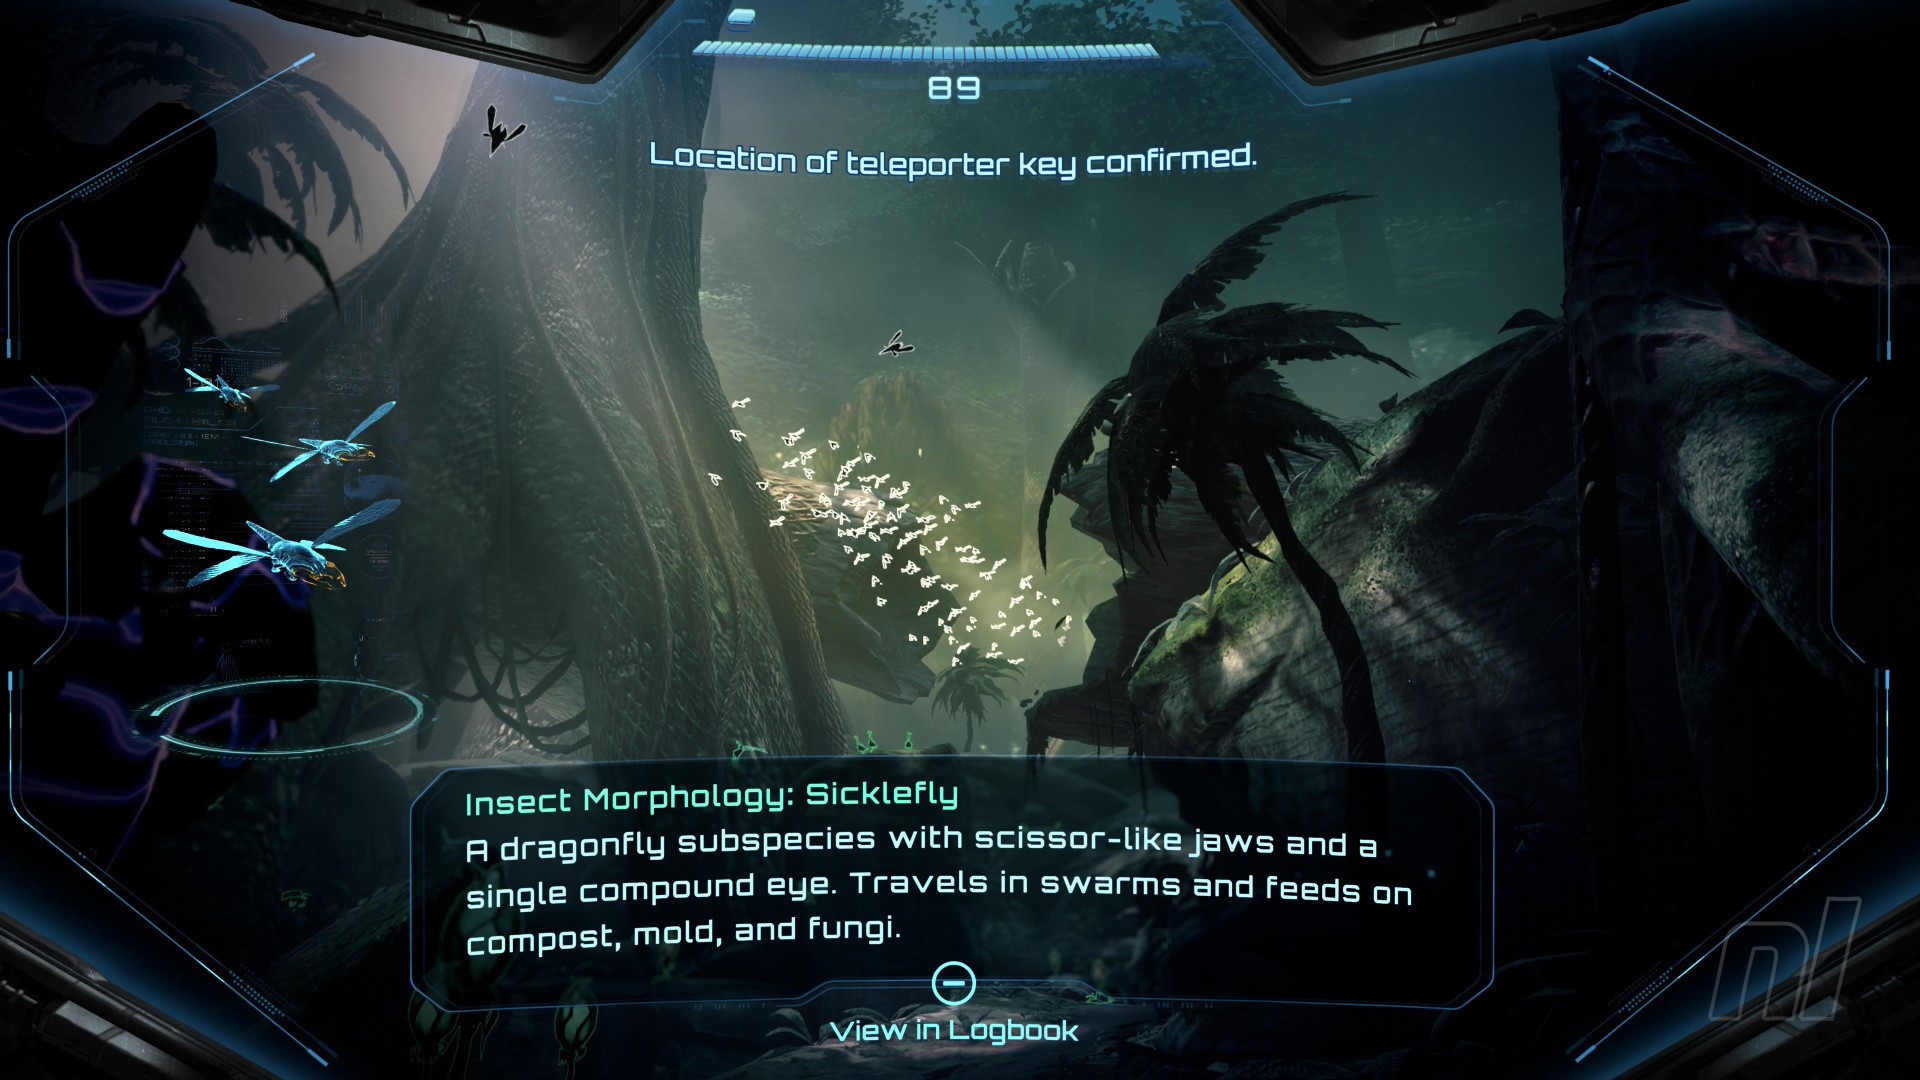
Image: Nintendo
Scan Entry: Mireworm
In the water, you’ll see large worm-like creatures poking their heads out. These are the Mireworms, so scan them.
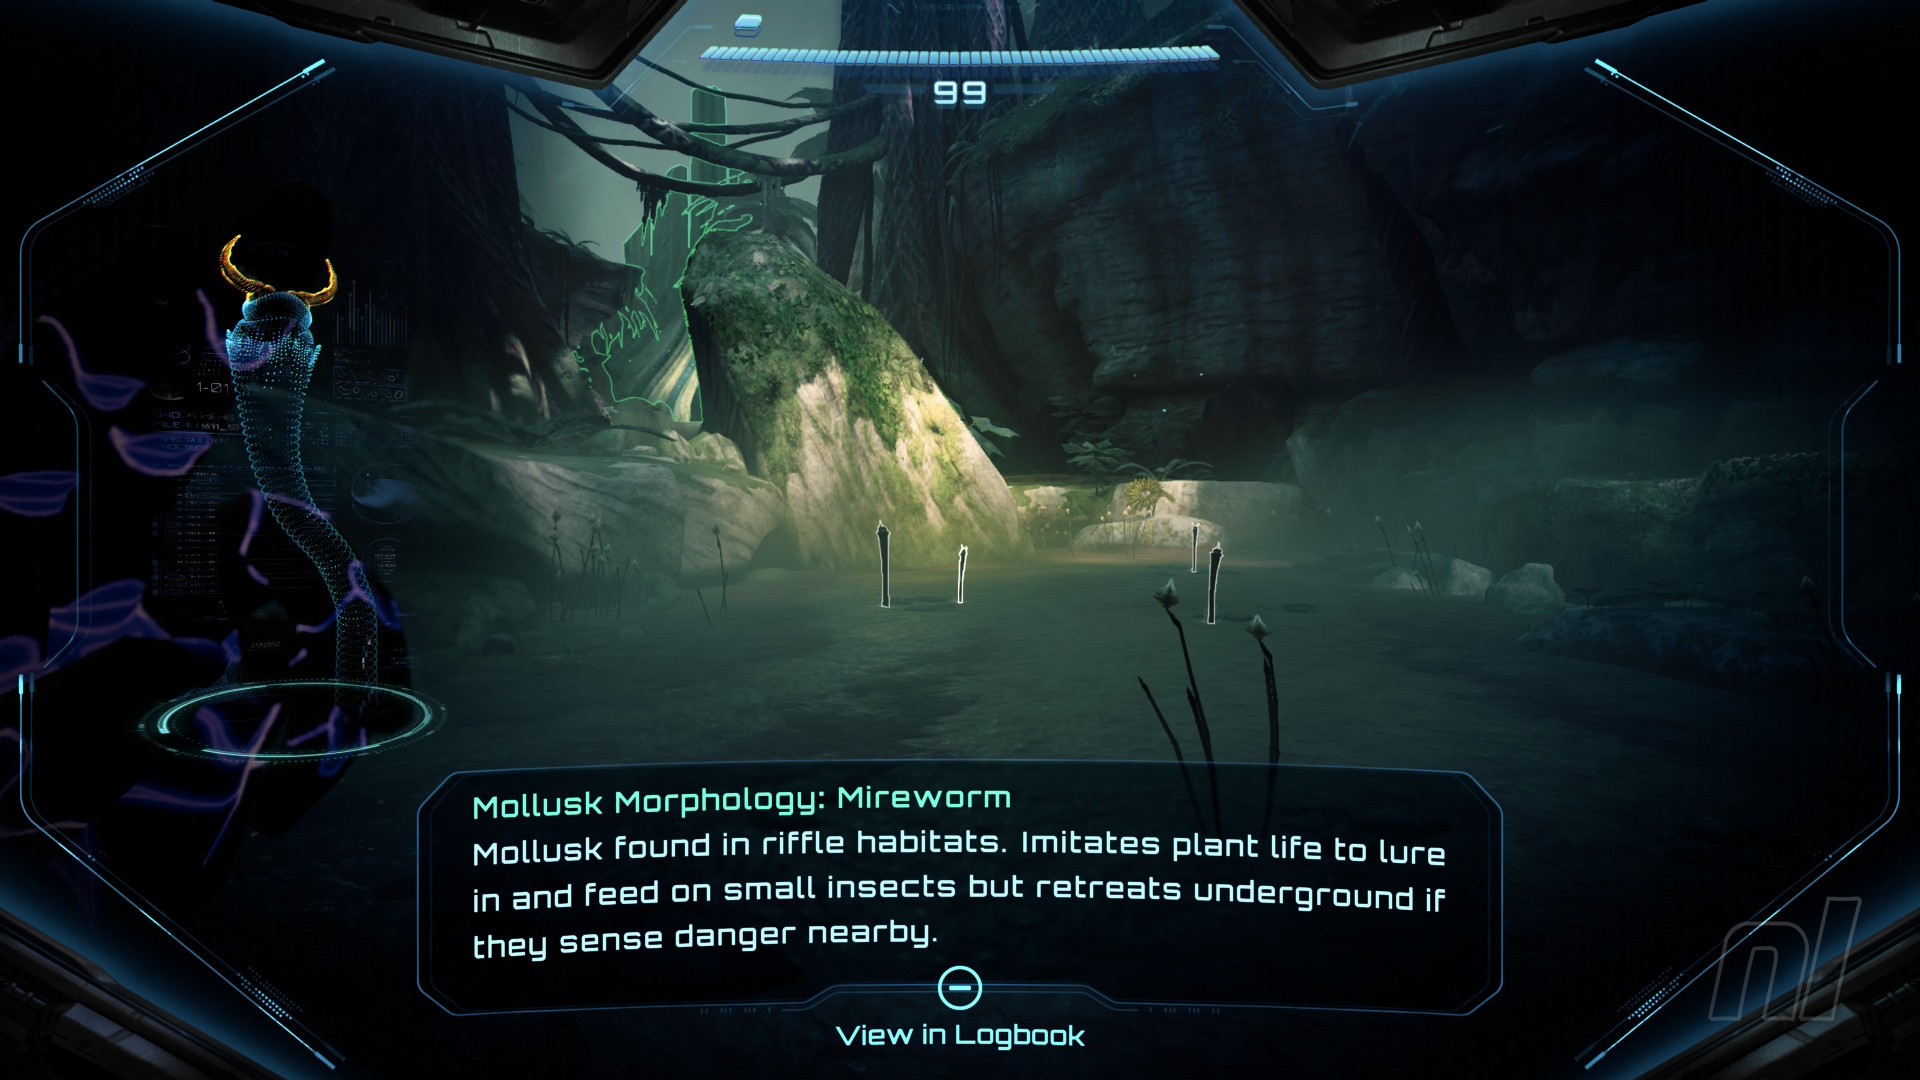
Image: Nintendo
Scan Entry: Aurengh Crane
Head around to the right and you should see the Aurengh Crane flying past. Don’t worry if you miss it here; you'll easily spot on in Ravine Outlook shortly.

Image: Nintendo
Scan Entry: Red Relic Ants
And finally, trotting along the top of a log is a bunch of Red Relic Ants, so scan one of these.
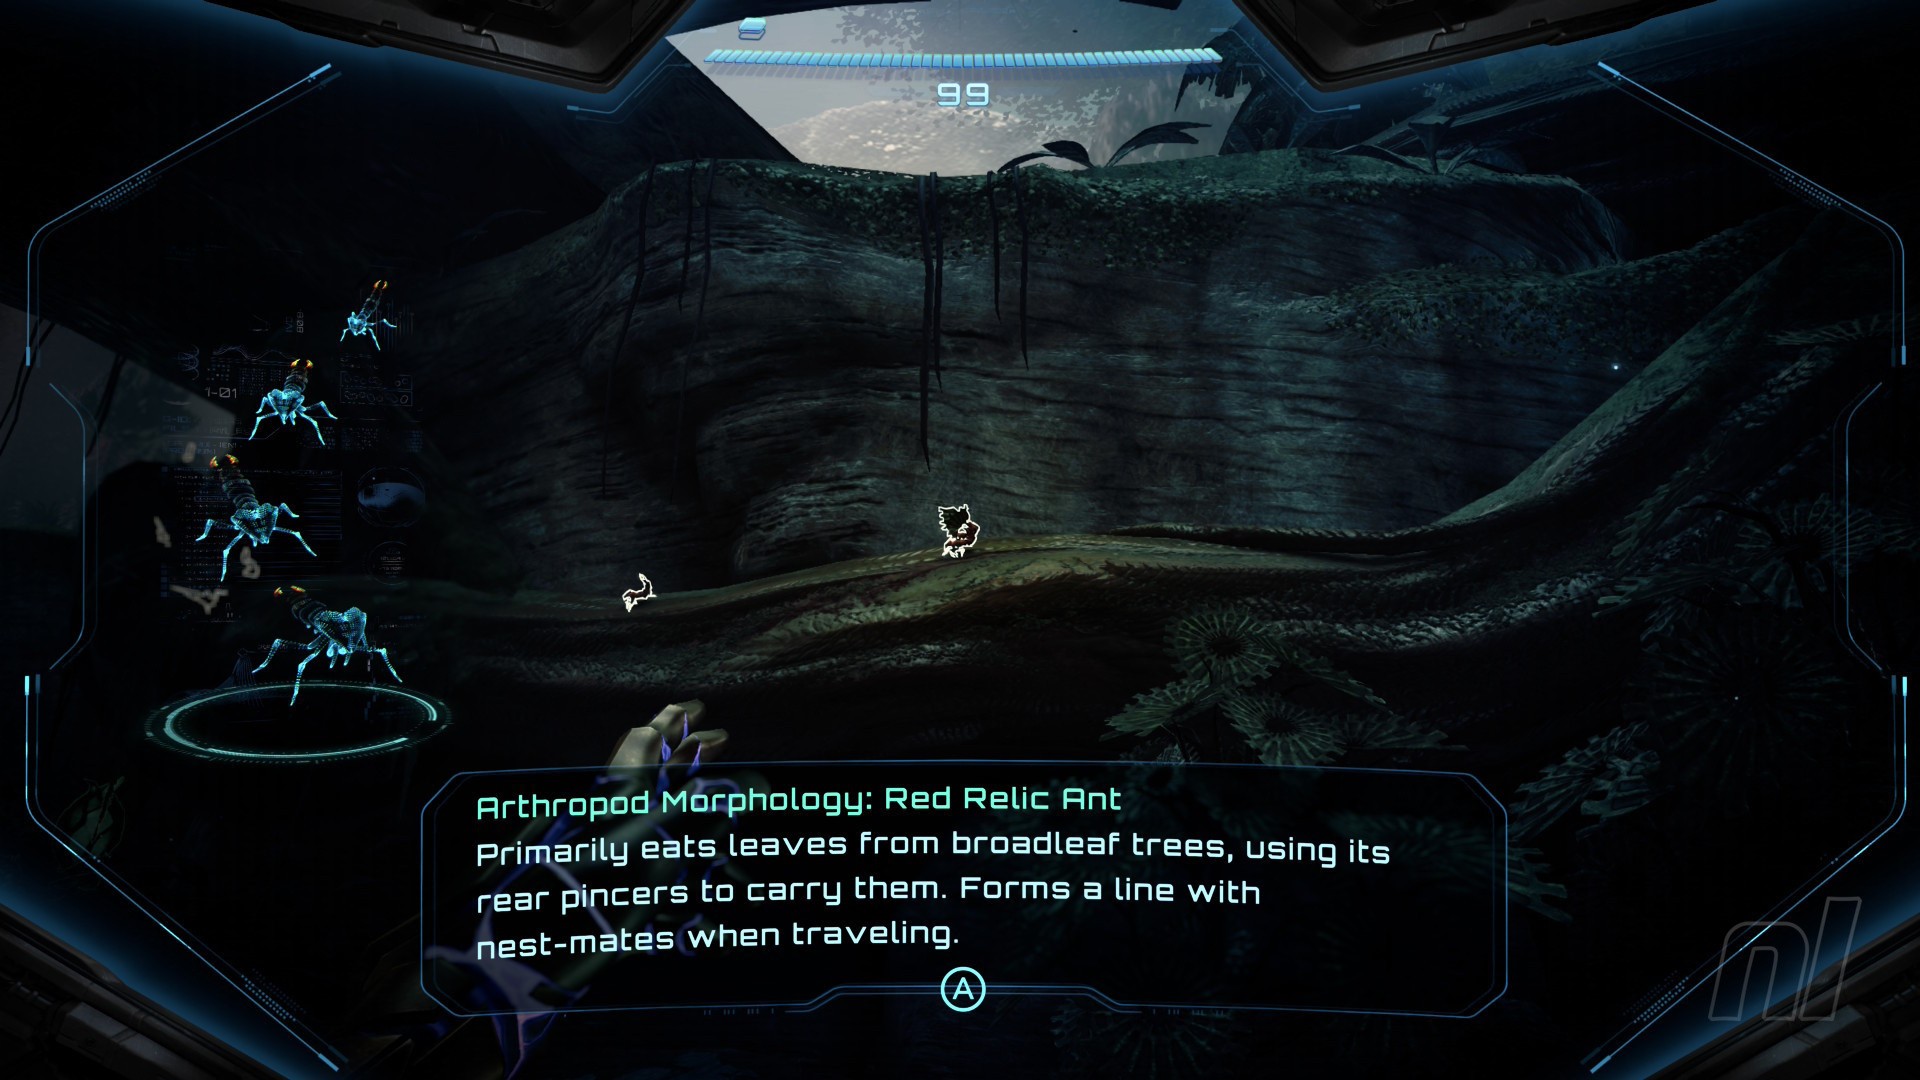
Image: Nintendo
When you’re done, head on through the door to the Hollow Log area.
Scan Entry: Glister Beetle
More scans! In here, you’ll see a bunch of Glister Beetles on the wall to the left. Scan one of these.
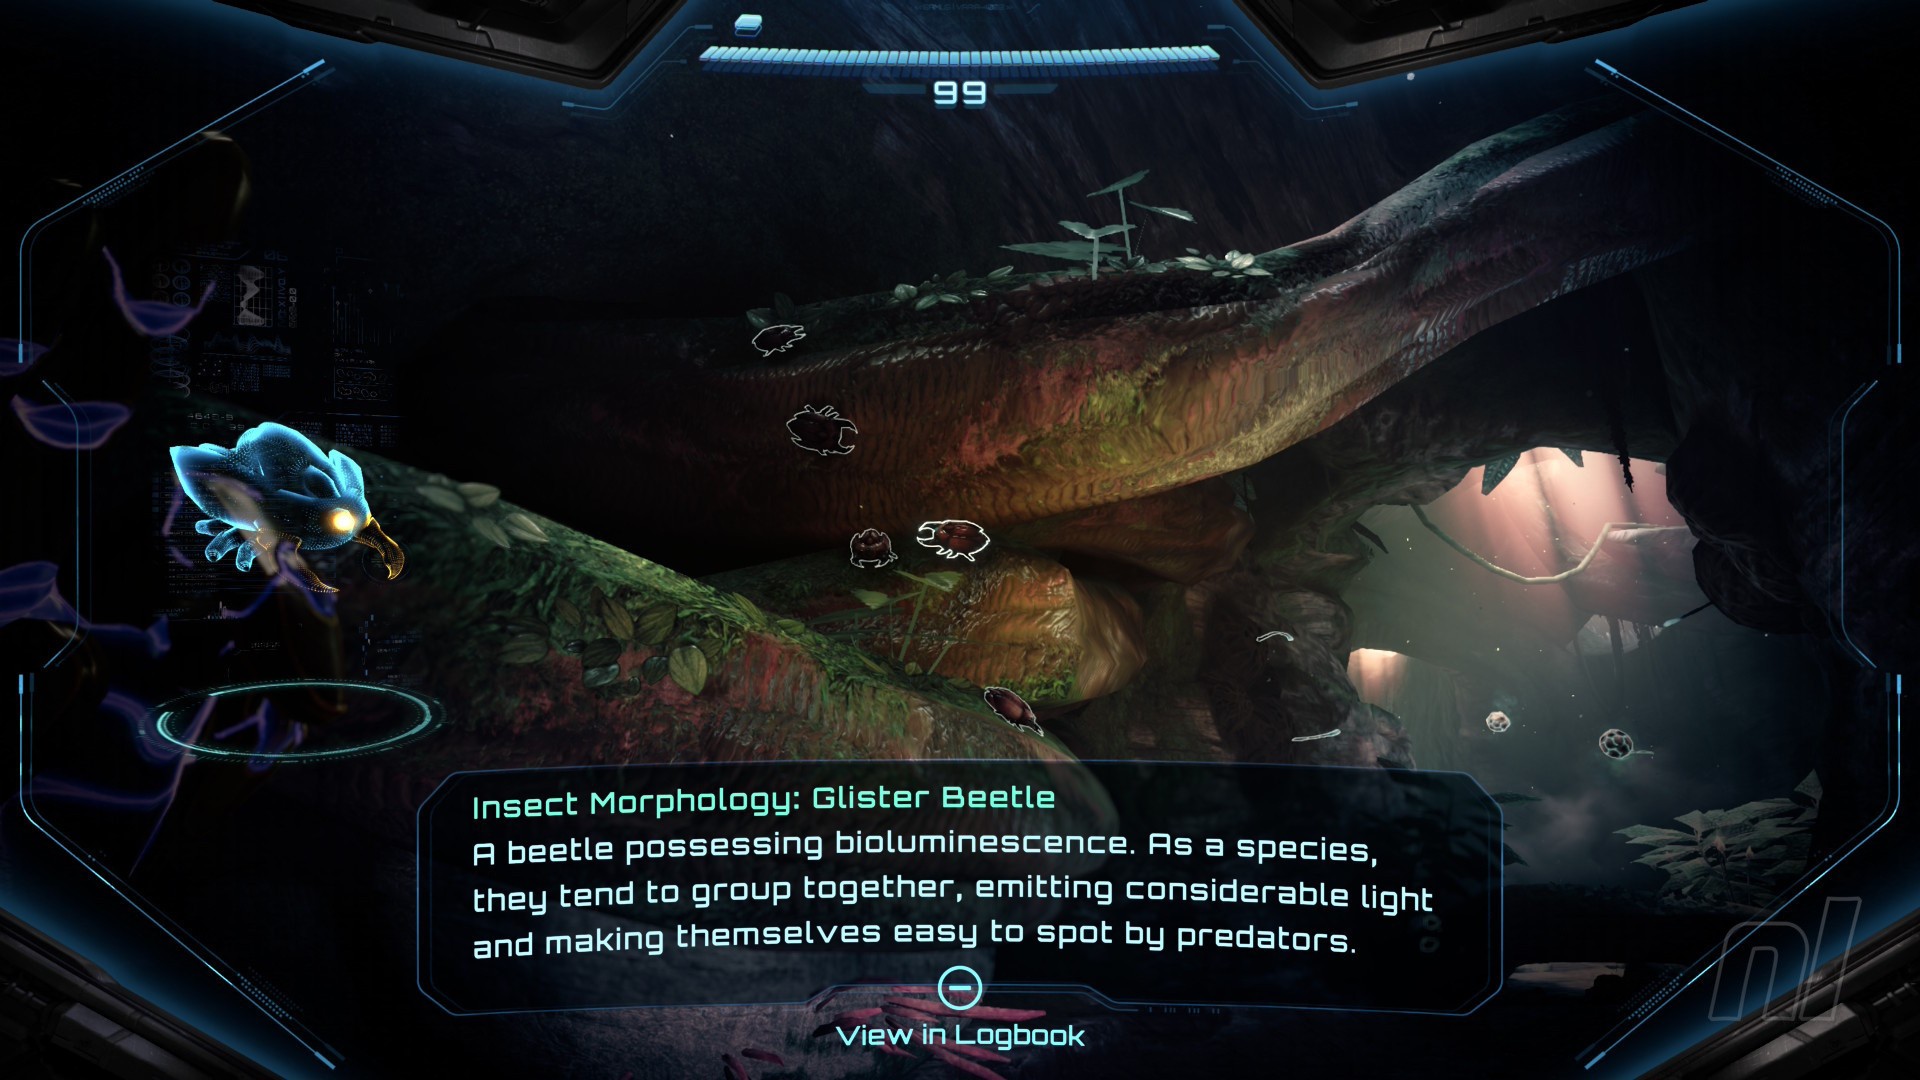
Image: Nintendo
Scan Entry: Shummerstraps
Next, Shimmerstraps will poke their heads out of the walls on either side. These look like smaller Mireworms, and can be easy to miss.
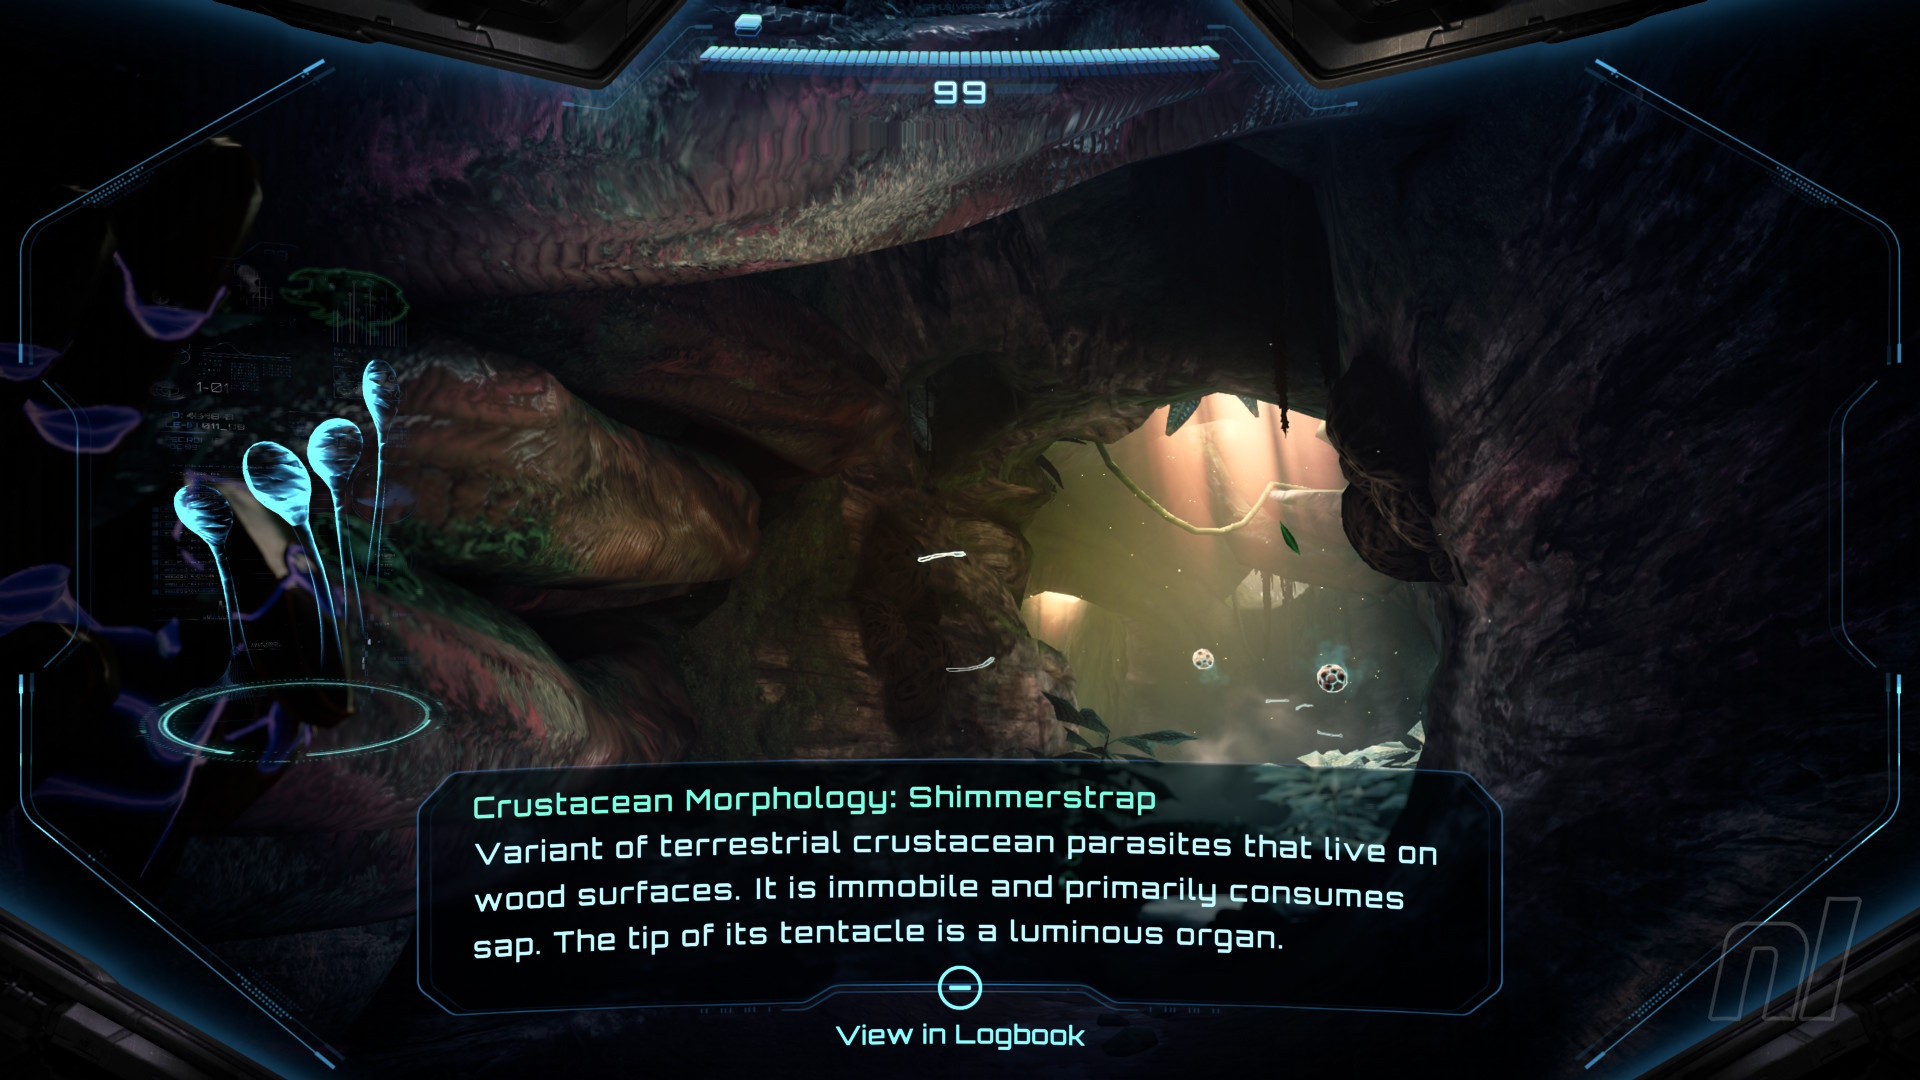
Image: Nintendo
Scan Entry: Homing Spore
Up ahead, you’ll spot a Homing Spore floating about. Scan it, then shoot it before it gets too close.

Image: Nintendo
Okay, you’re good to go now. Follow the path around, shoot a couple more Homing Spores, then head through to Ravine Outlook.
Scan Entry: Lamorn Lore - 'The Sacred Tree'
Scan the Aurengh Crane if you missed it earlier. Just before this, you'll also see Lamorn Lore 'The Sacred Tree', so make sure you scan this one.

Image: Nintendo
Scan Entry: Glottagropper
You'll now come across your first 'enemies' (i.e. the first creatures that will actively try to kill you). Scan the Glottagropper (what a name!) and get rid of them. Dash to the sides to avoid any projectile attacks.

Image: Nintendo
Take note of the webbing to the right. Is that an item in there..? Yes, you'll need to come back here later.
For now, that's about it for this area, so move on through to Forgotten Lagoon.
Scan Entry: Rootspur
In this watery area, a large root-like being will shoot out of the ground and flail about. Appropriately called Rootspur, you'll need to scan this before shooting it into oblivion.
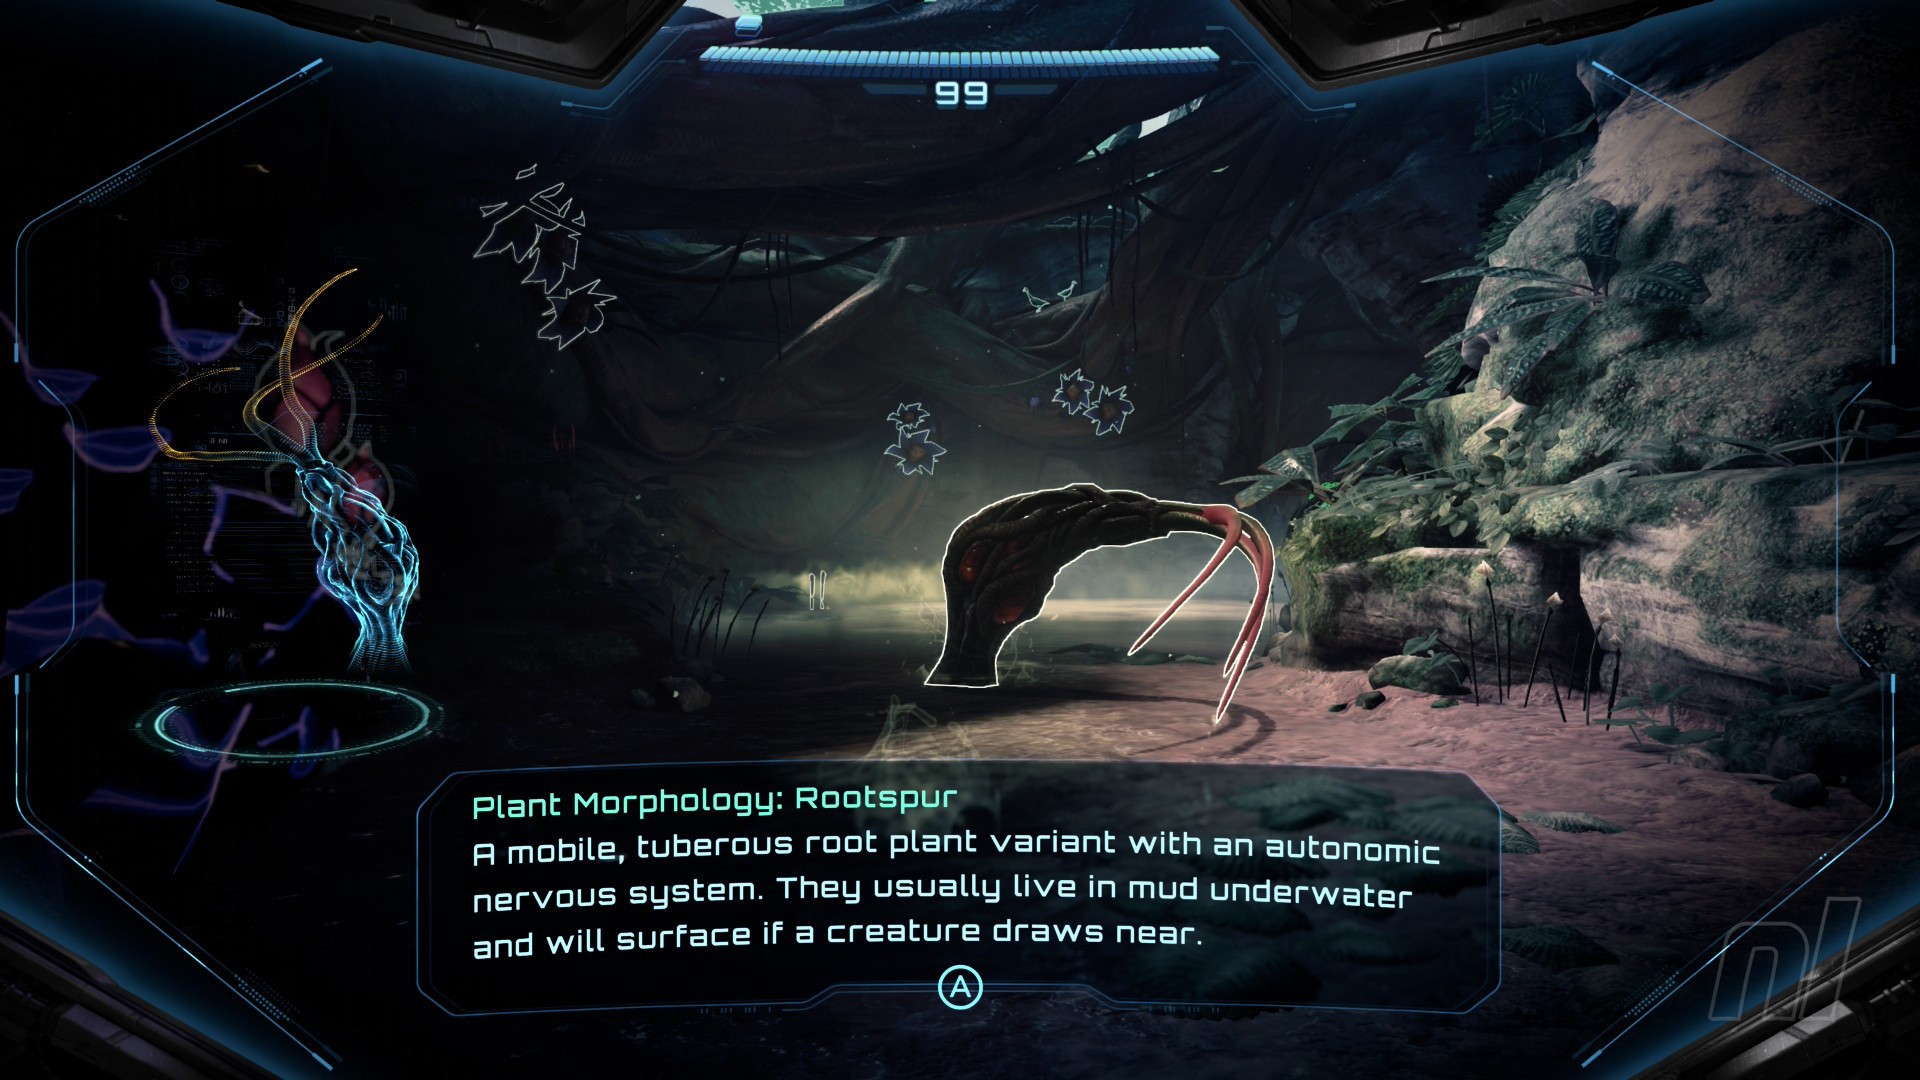
Image: Nintendo
There's another Rootspur to get rid of here, but once that's done, go straight on through to Gliffside Gate.
Scan Entry: Ghaspore
To the left, you'll see some more Homing Spores, but you can now also see where they're coming from. Up on the wall is a Ghaspore, so scan it and then shoot it while it's opening up to release spores.

Image: Nintendo
Scan Entry: Lamorn Lore - 'The Ablution'
On the ground to the left of the Ghaspore, leaning against a wall, is Lamorn Lore 'The Ablution'. Scan it!

Image: Nintendo
Move over to the right. You'll see a large door with a Psychic Lock and two Mote Sockets. Ignore this for now.
Scan Entry: Psychic Platforms
Directly behind, you'll see some shimmer purple lights floating in the air. Scan these to reveal the Psychic Platforms. Now scan one again to add it to your logbook. You can't stand on them yet, so you'll need to come back later.
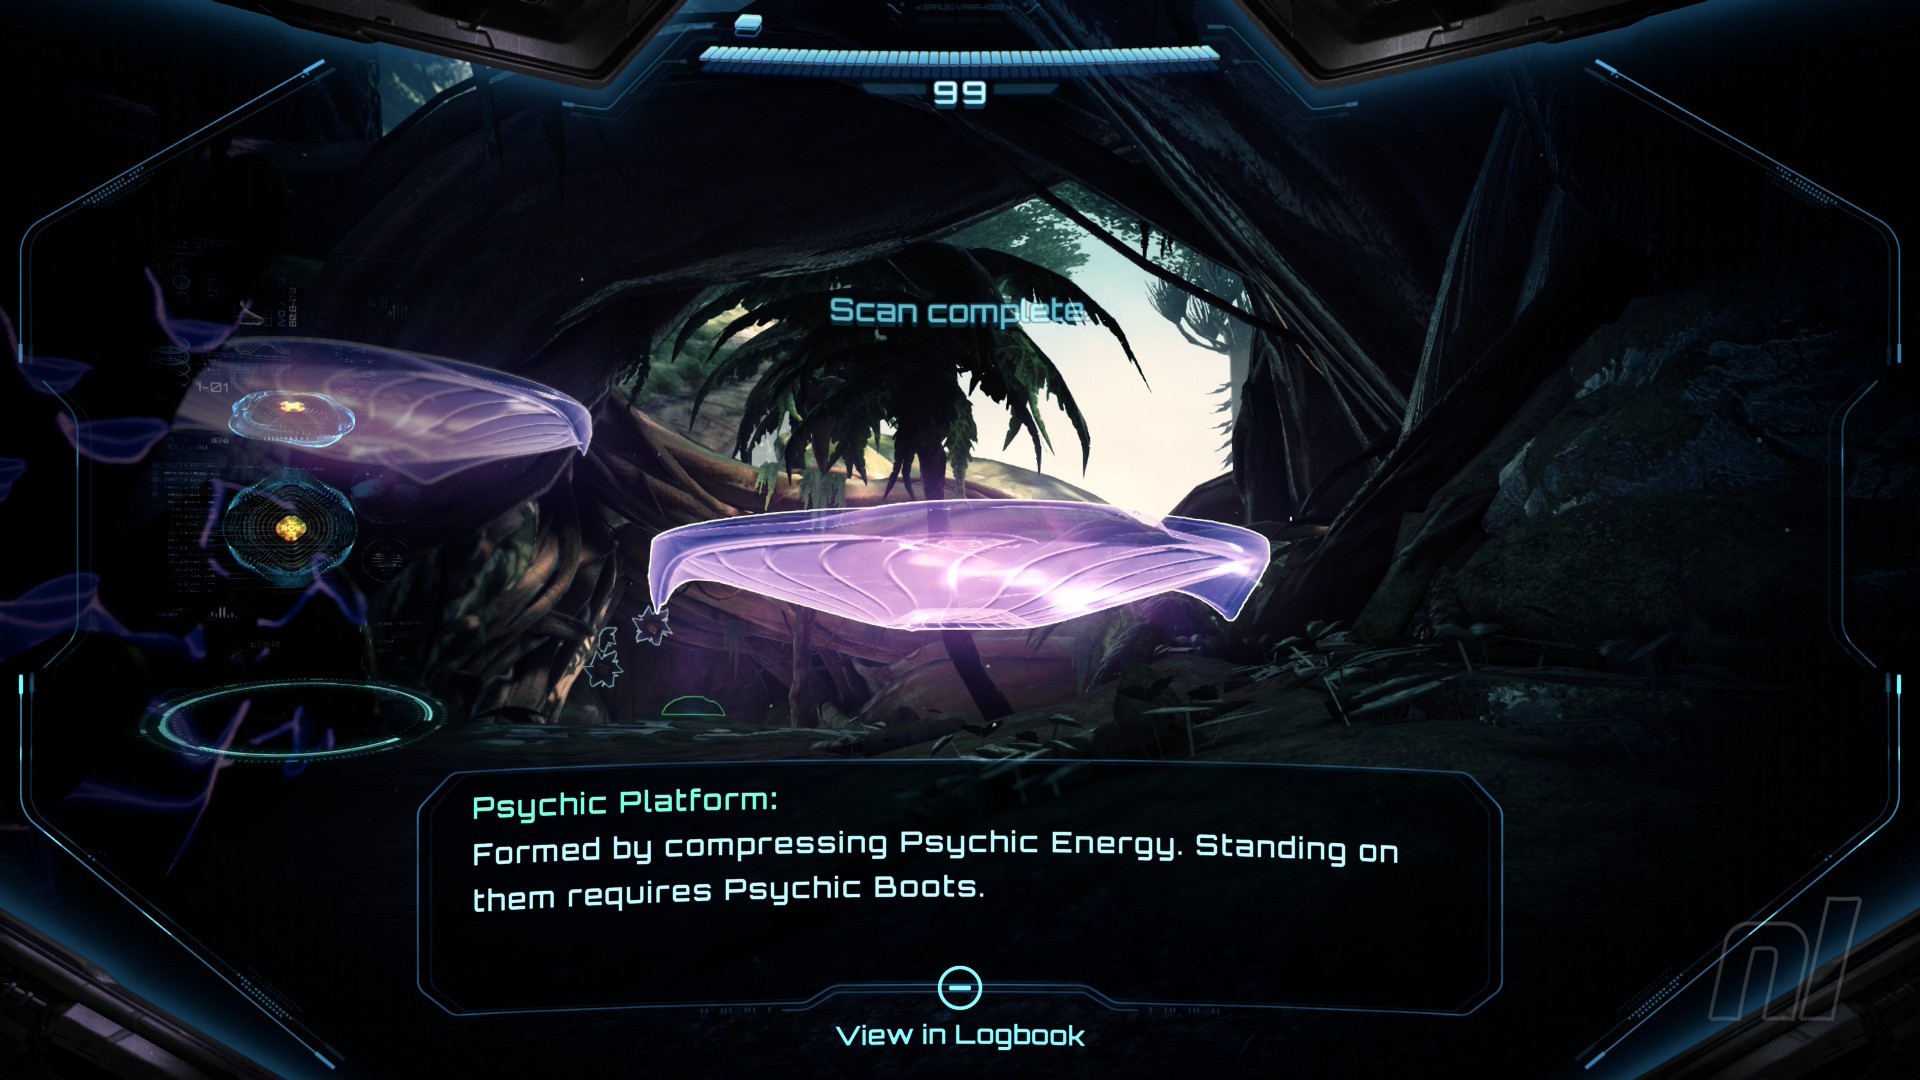
Image: Nintendo
Head through the door to the right and into Ancient Path.
Scan Entry: Scout Bot
Directly ahead on the ground is a Scout Bot. You'll need to scan this. Also take note of its location. The scan description implies that the Scout Bot will have a much greater use later in the game.

Image: Nintendo
Now move on through to Arboreal Chapel.
Scan Entry: Bristlewort
Ahead of you is a Bristlewort. Scan it, and then shoot when it opens up to spray needles everywhere.
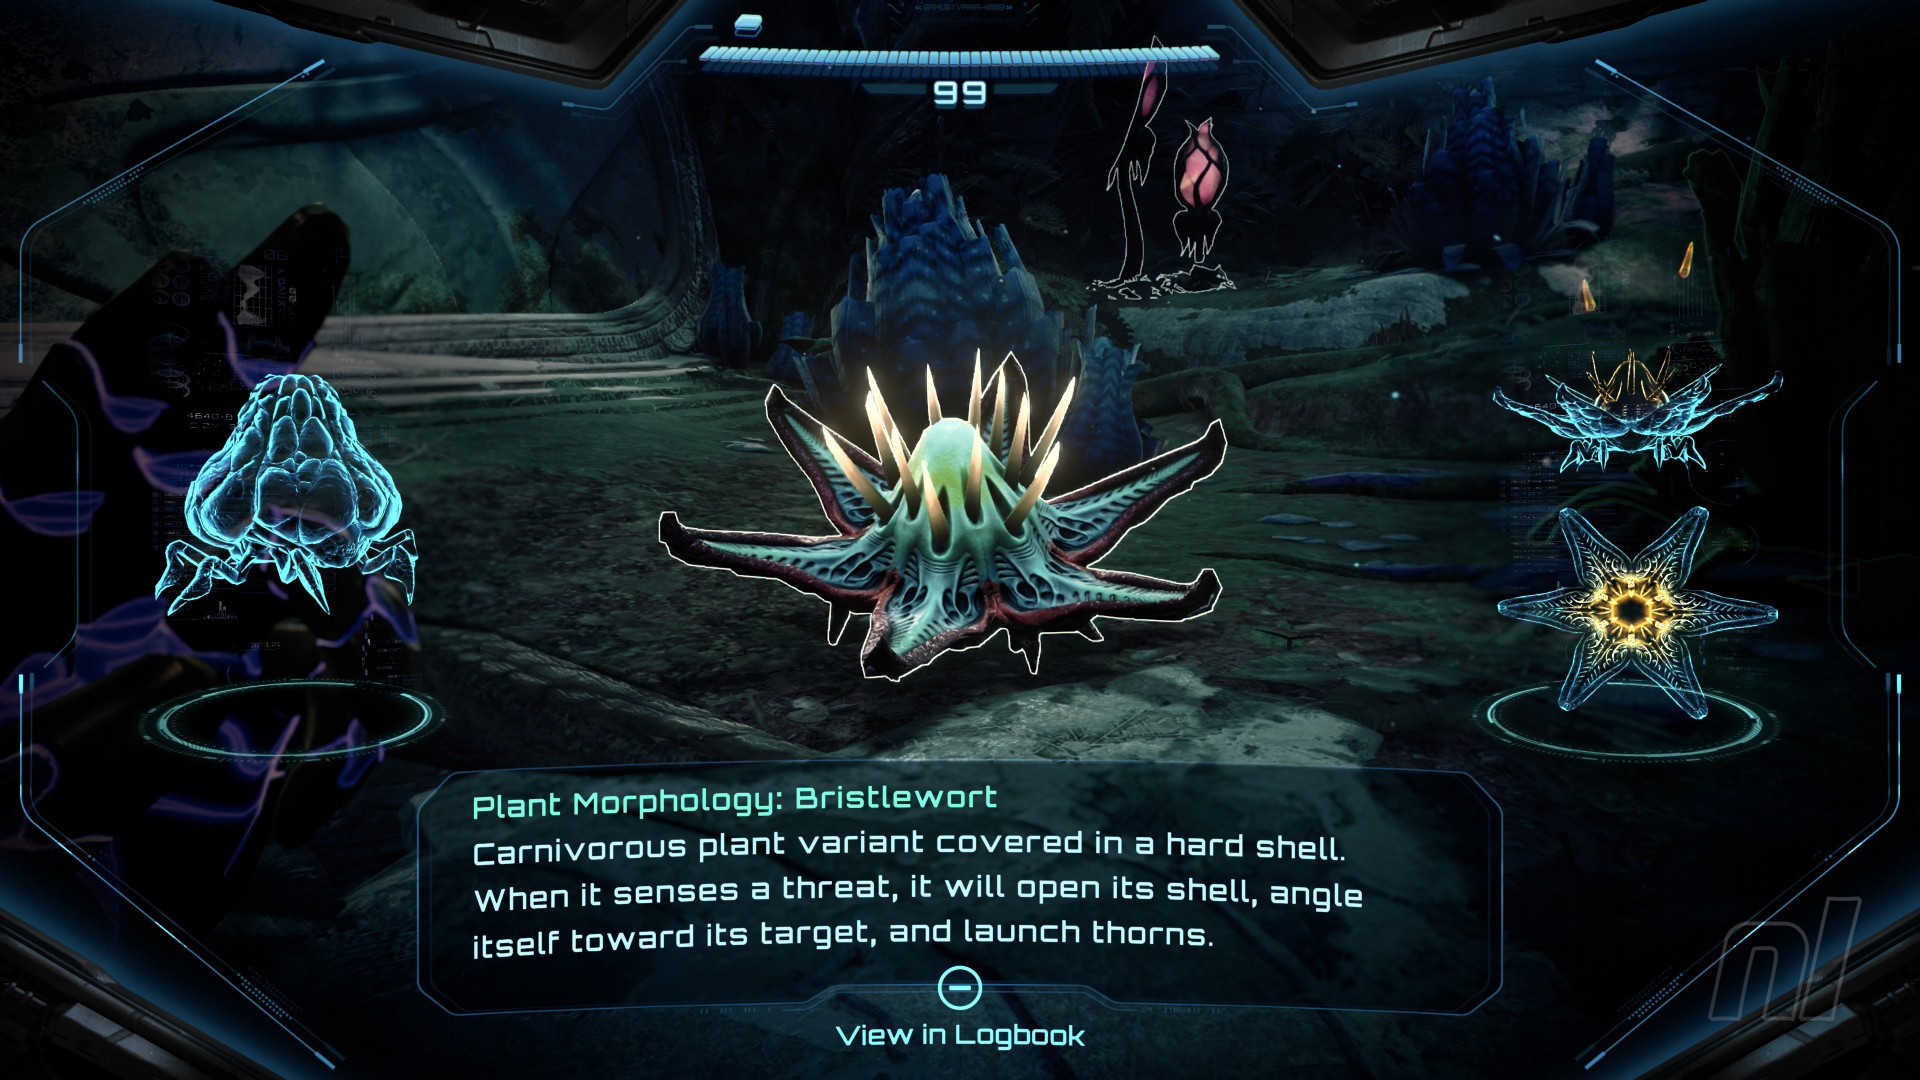
Image: Nintendo
Now head to the left and morph ball through the small gap. Follow the path around (another Bristewort will try to cause trouble) and then scan the Psychic Sensor to open the door.
Scan Entry: Lamorn Lore - 'Sacred Relic'
Before you grab the item ahead of you (don't worry, you don't need to scan it), make sure to scan the Lamorn Lore 'Sacred Relic' over to the right.
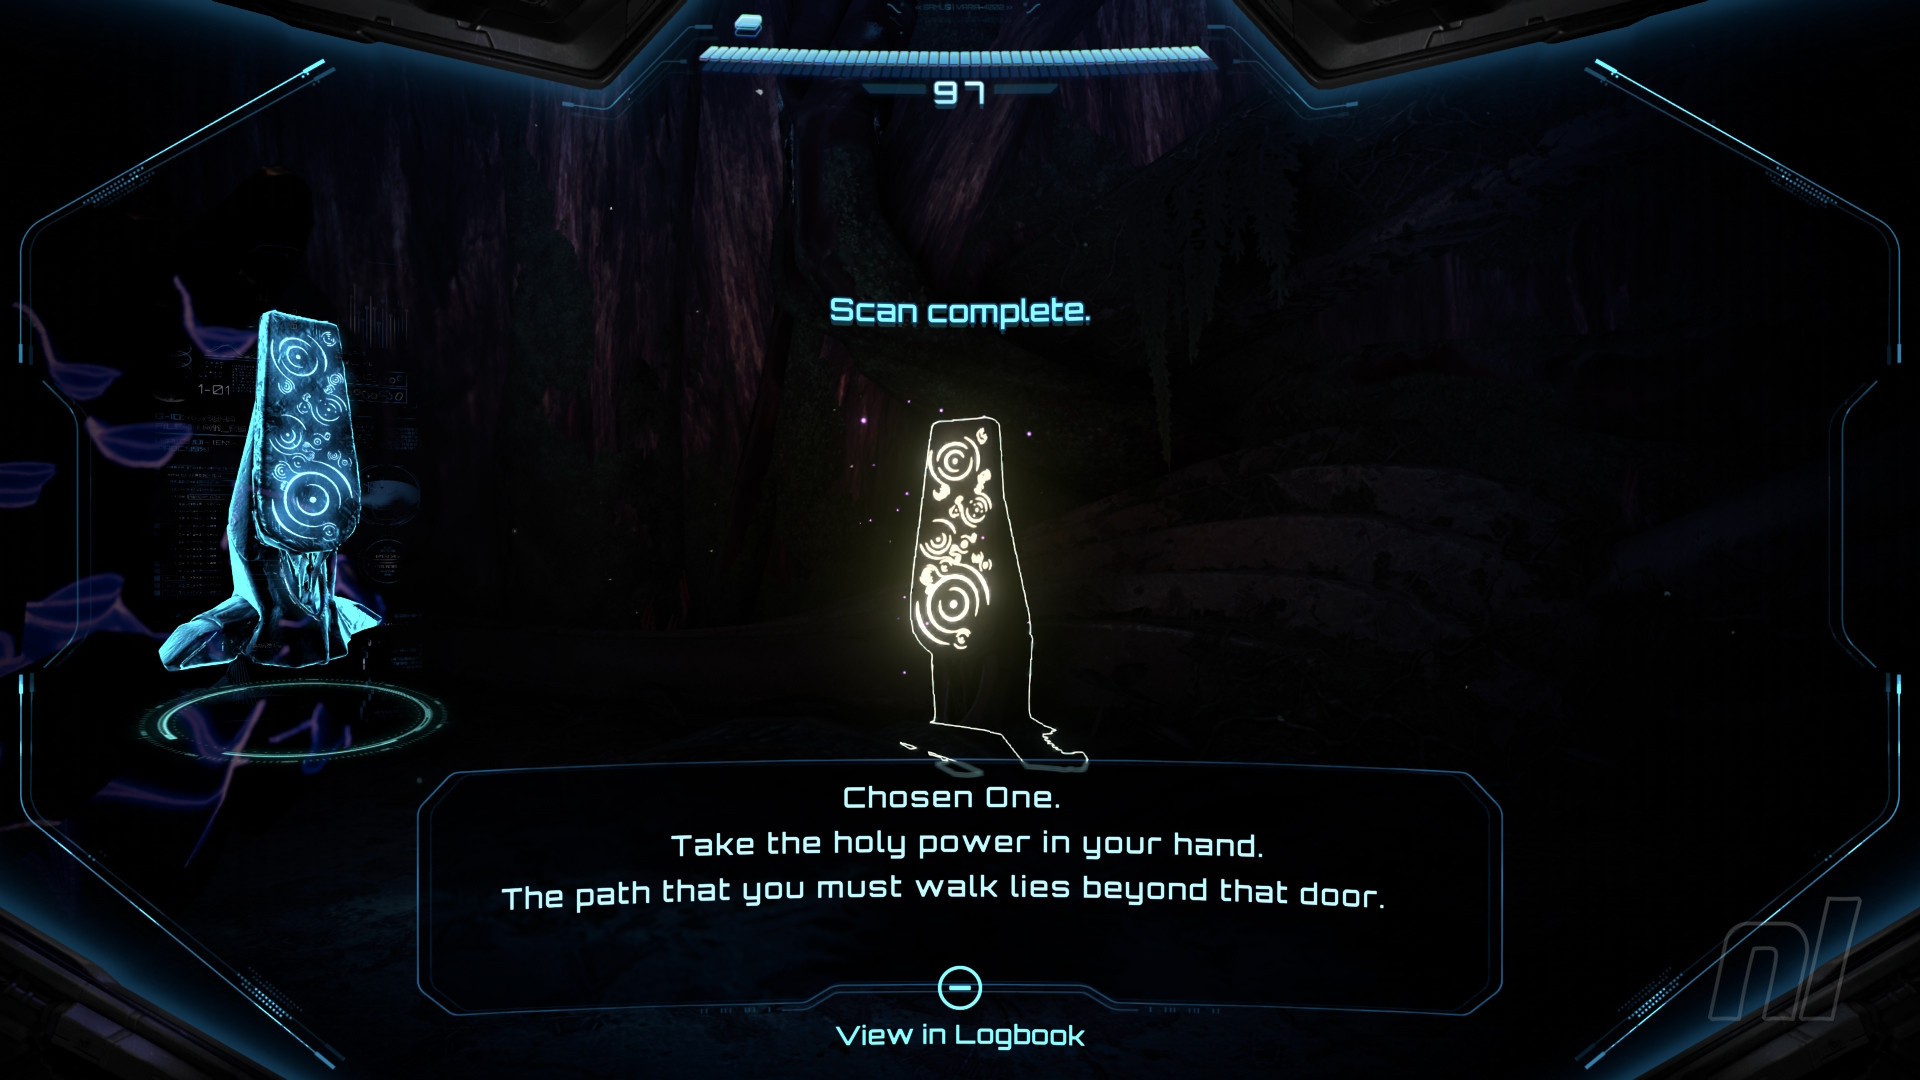
Image: Nintendo
Power Suit Upgrade: Psychic Glove
Okay, now go ahead and grab the Psychic Glove.

Image: Nintendo
Now you can test out your Psychic Glove properly. Hold 'L' and lock on to the mote in front of you. Samus will 'grab' it, by which point you can aim at the Mote Socket on the door ahead. Let go of 'L' and the mote will fly into its socket, opening the door.
Head back to the Cliffside Gate. The big door from earlier? You can now open it by inserting the two motes from the statues on either side by using your Psychic Glove.
Scan Entry: Psychic Container
When it opens, move on through to the small room ahead and scan the Psychic Container.

Image: Nintendo
Now hold 'L' to lock on to the purple light on the container. Move the analogue stick to follow the glowing path to unlock it.
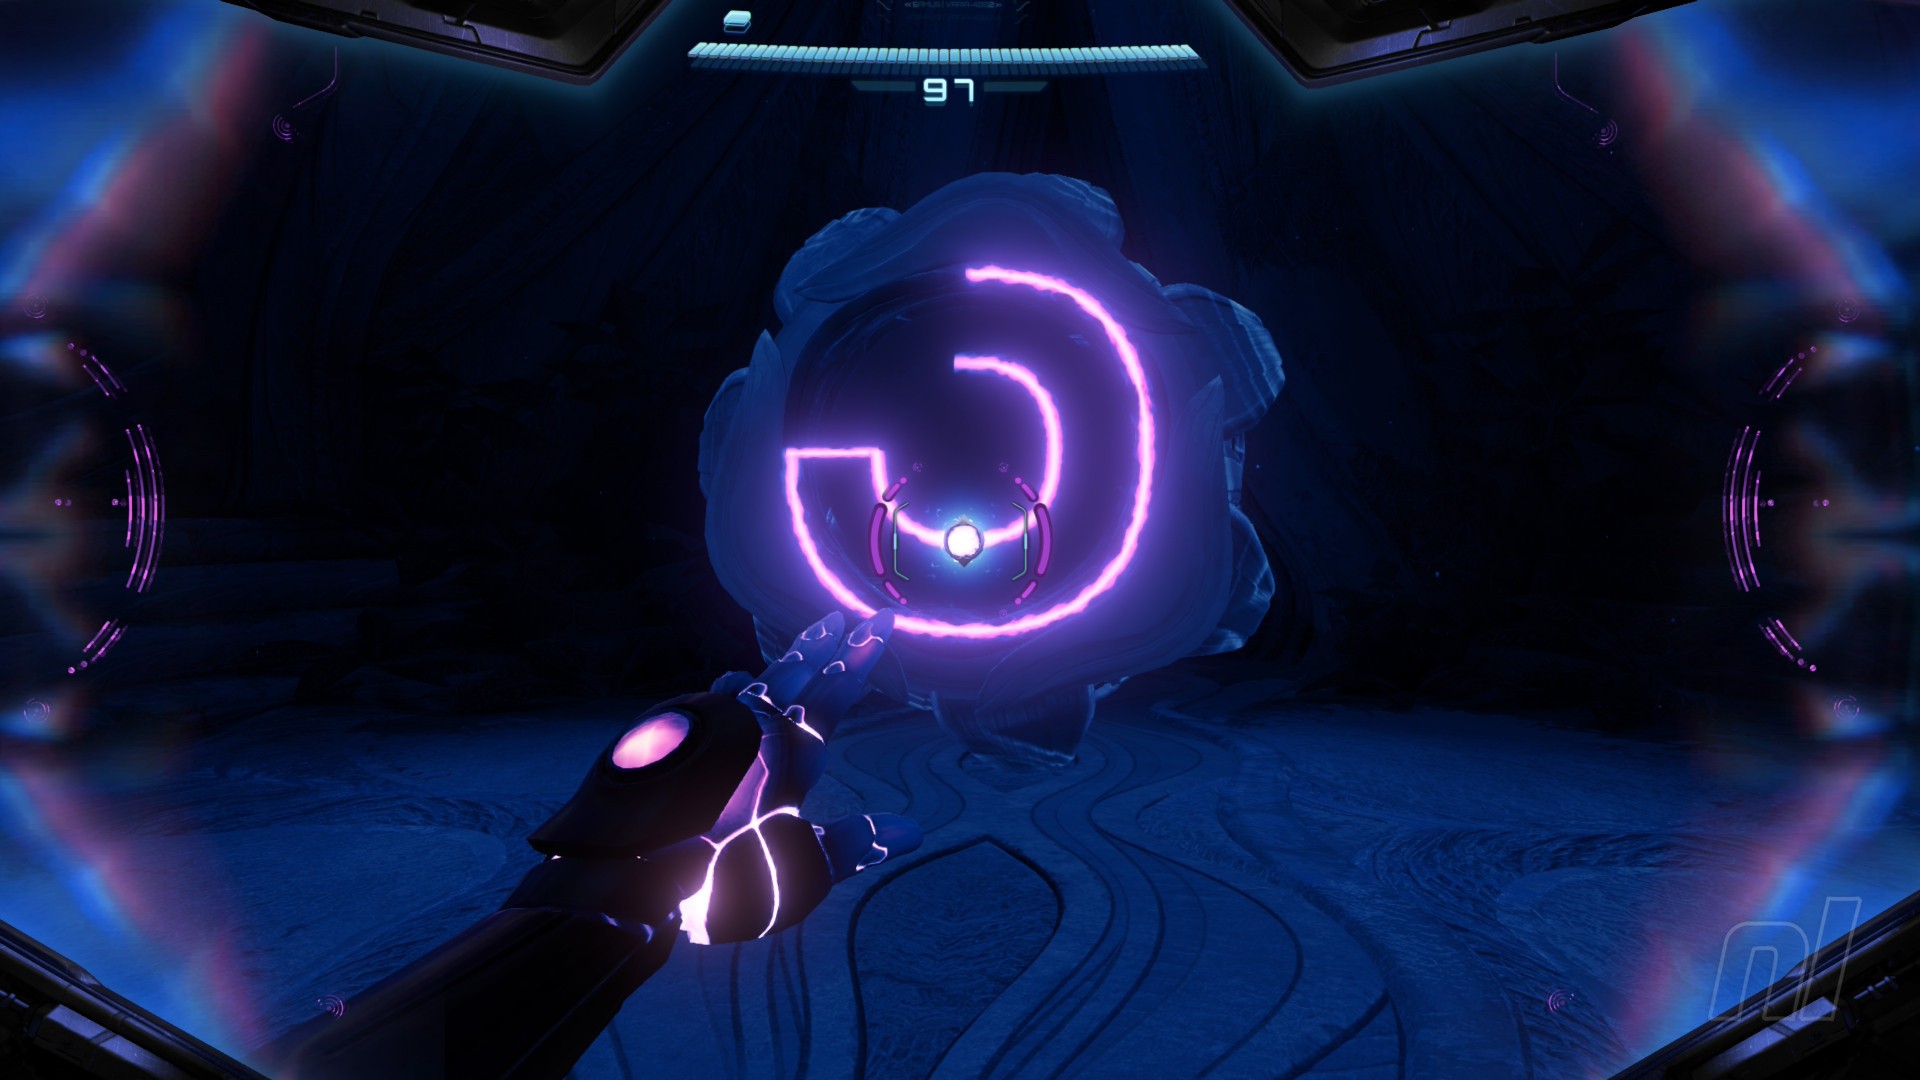
Image: Nintendo
Energy Tank #2
When the container opens (or disappears completely, to be exact), you'll find your second Energy Tank.

Image: Nintendo
Move on through to Guiding Roots.
Scan Entry: Shren
The sole creature you'll need to scan in here is the flying Shren, an inset-like being that spits at you. Rude.

Image: Nintendo
Now walk ahead and into the Grove of the Sacred Tree.
You'll receive a Galactic Federation distress signal. Who could this be..? Your destination is the Sinkhole. First, head through the door on the right and into Resin Creek. To your right, you'll see a semi-circular device. Use your Psychic Glove to move the mote from left to right to open it up.
Scan Entry: Save Station
Hurrah! You've found your first Save Station. Scan it, then save your game if you wish. Your health (and later your ammo) will be replenished here. On Hard difficulty – unlocked after completion of the game – only your health will be replenished.
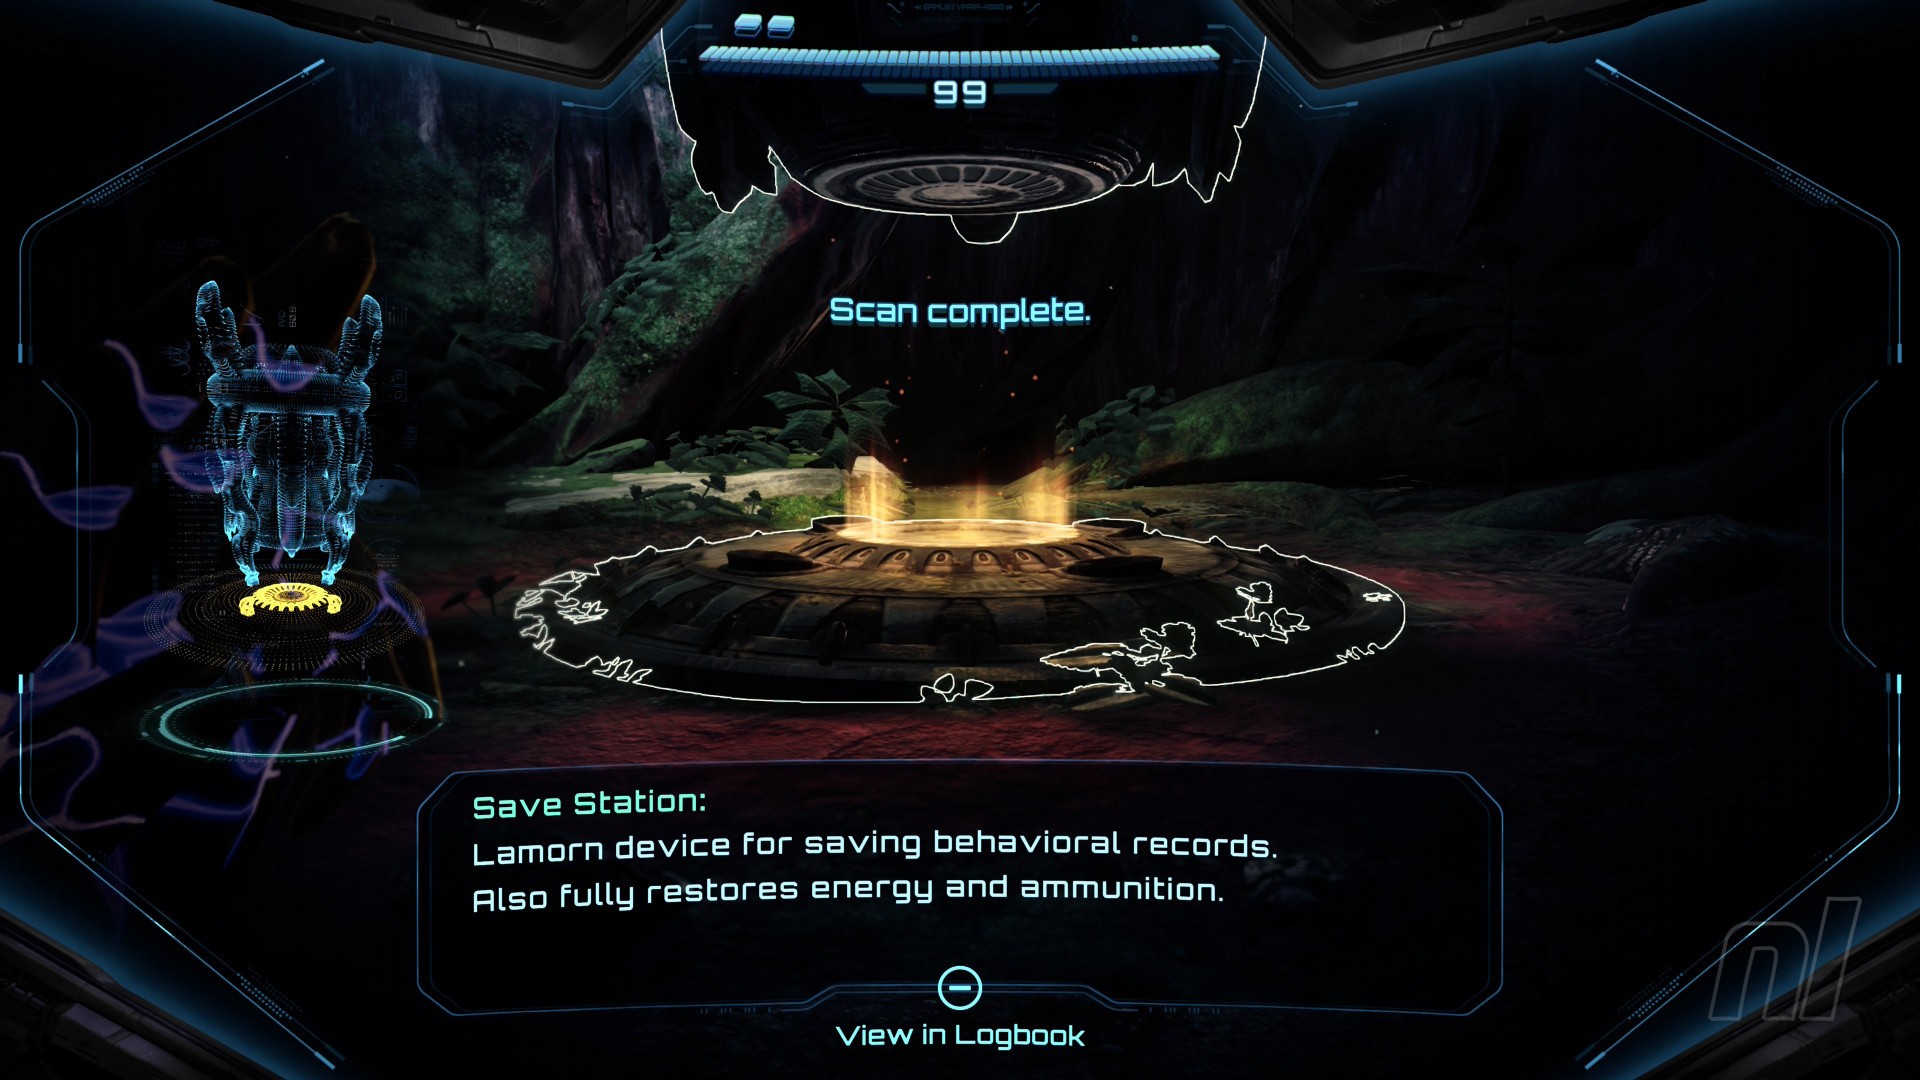
Image: Nintendo
Go back to the Grove of the Sacred Tree and explore until you find a small opening big enough for your morph ball. Head on through. As you work your way through the path, you'll see an Isopod slithering across the ground. Scan it if you want, but this thing won't count toward your logbook.
A short cutscene will trigger to show the Isopod snatched up by a mysterious creature. Move on through to the next area, then use charged shots to destroy any beetle nests blocking your path.
Keep moving through until you reach the Sinkhole. A cutscene will play to introduce Myles Mackenzie, after which you'll need to shoot the vine growths to free him from his elevated prison.
While you're doing this, some nasty creatures will disturb you...
Scan Entry: Jungle Griever
Yes, the Jungle Grievers arrive to ruin your day, so scan one of them before dispatching them all. You'll see a lot of variations of these creatures throughout the rest of the game, so get used to their presence.
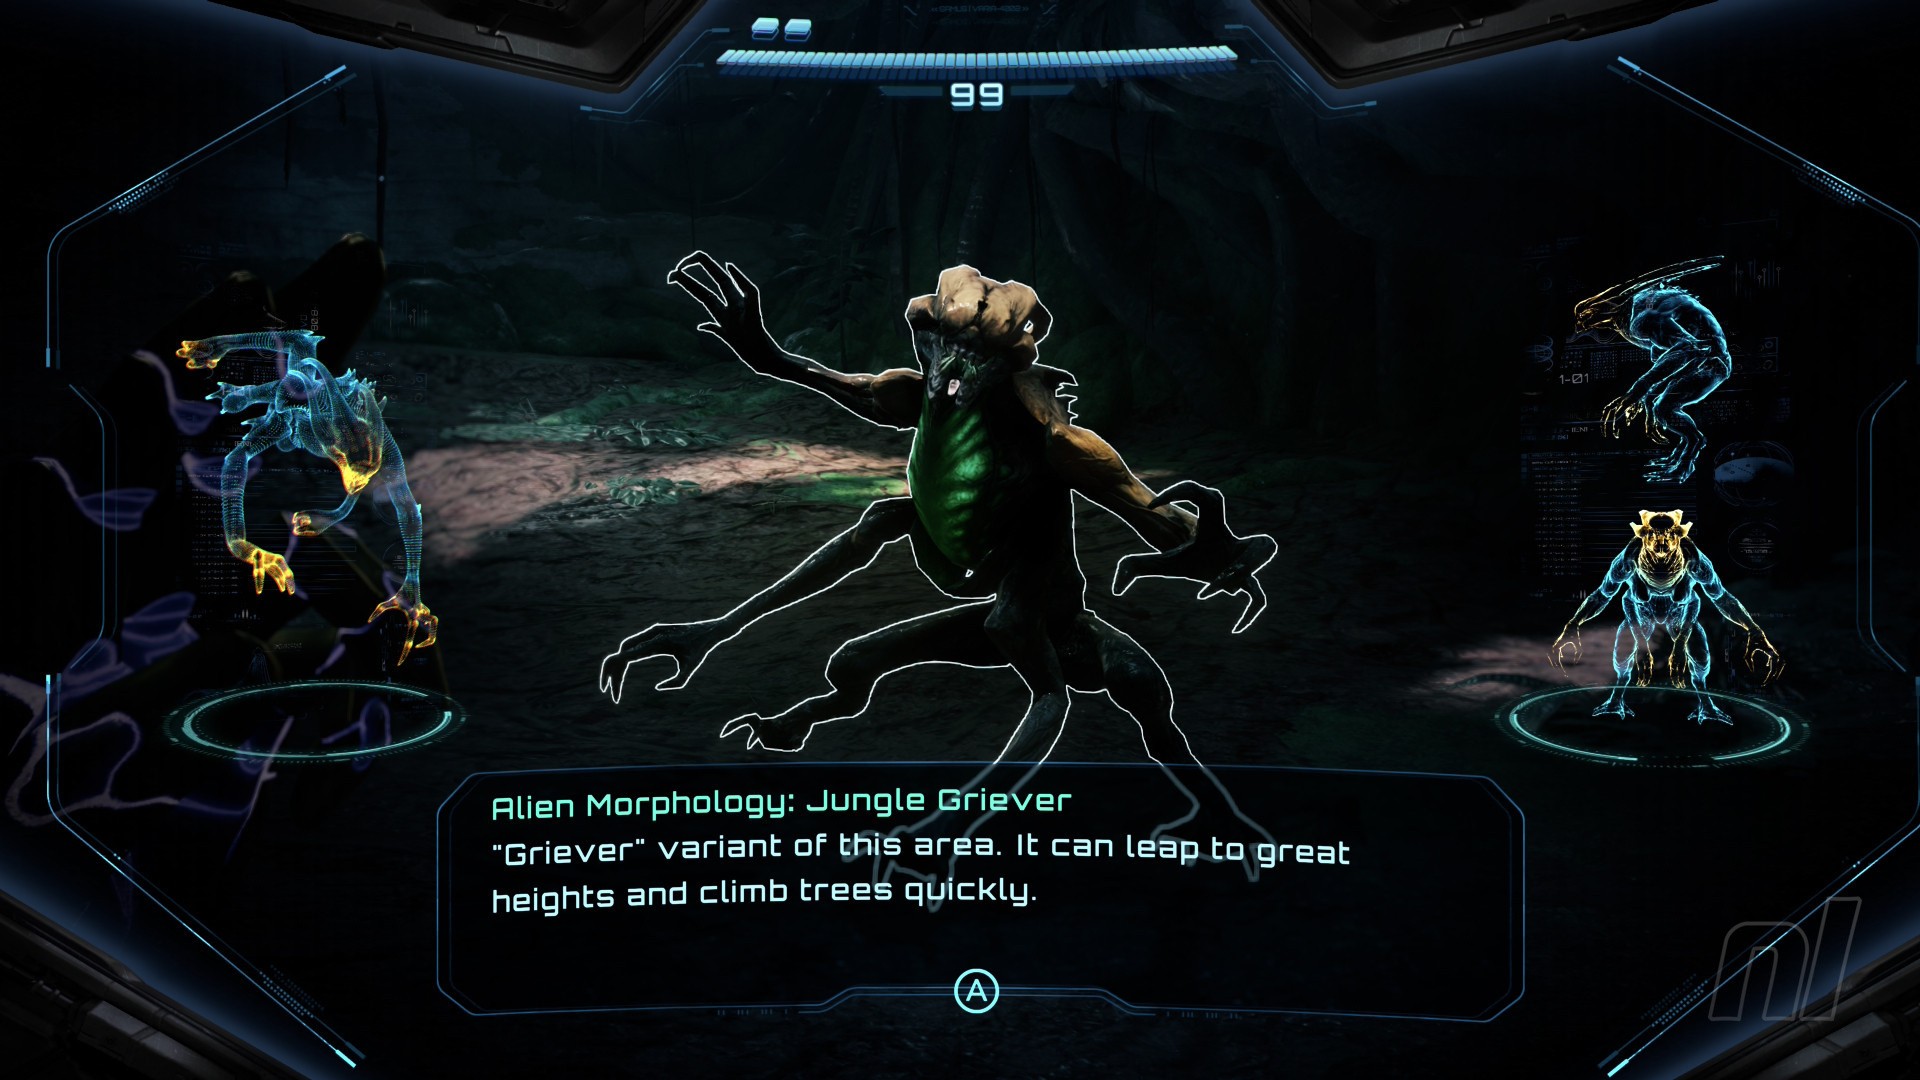
Image: Nintendo
Scan Entry: Myles Mackenzie
After the next cutscene, Myles will try to open the door to the large transport unit. While he's hanging there like a lemon, use this opportunity to scan him.
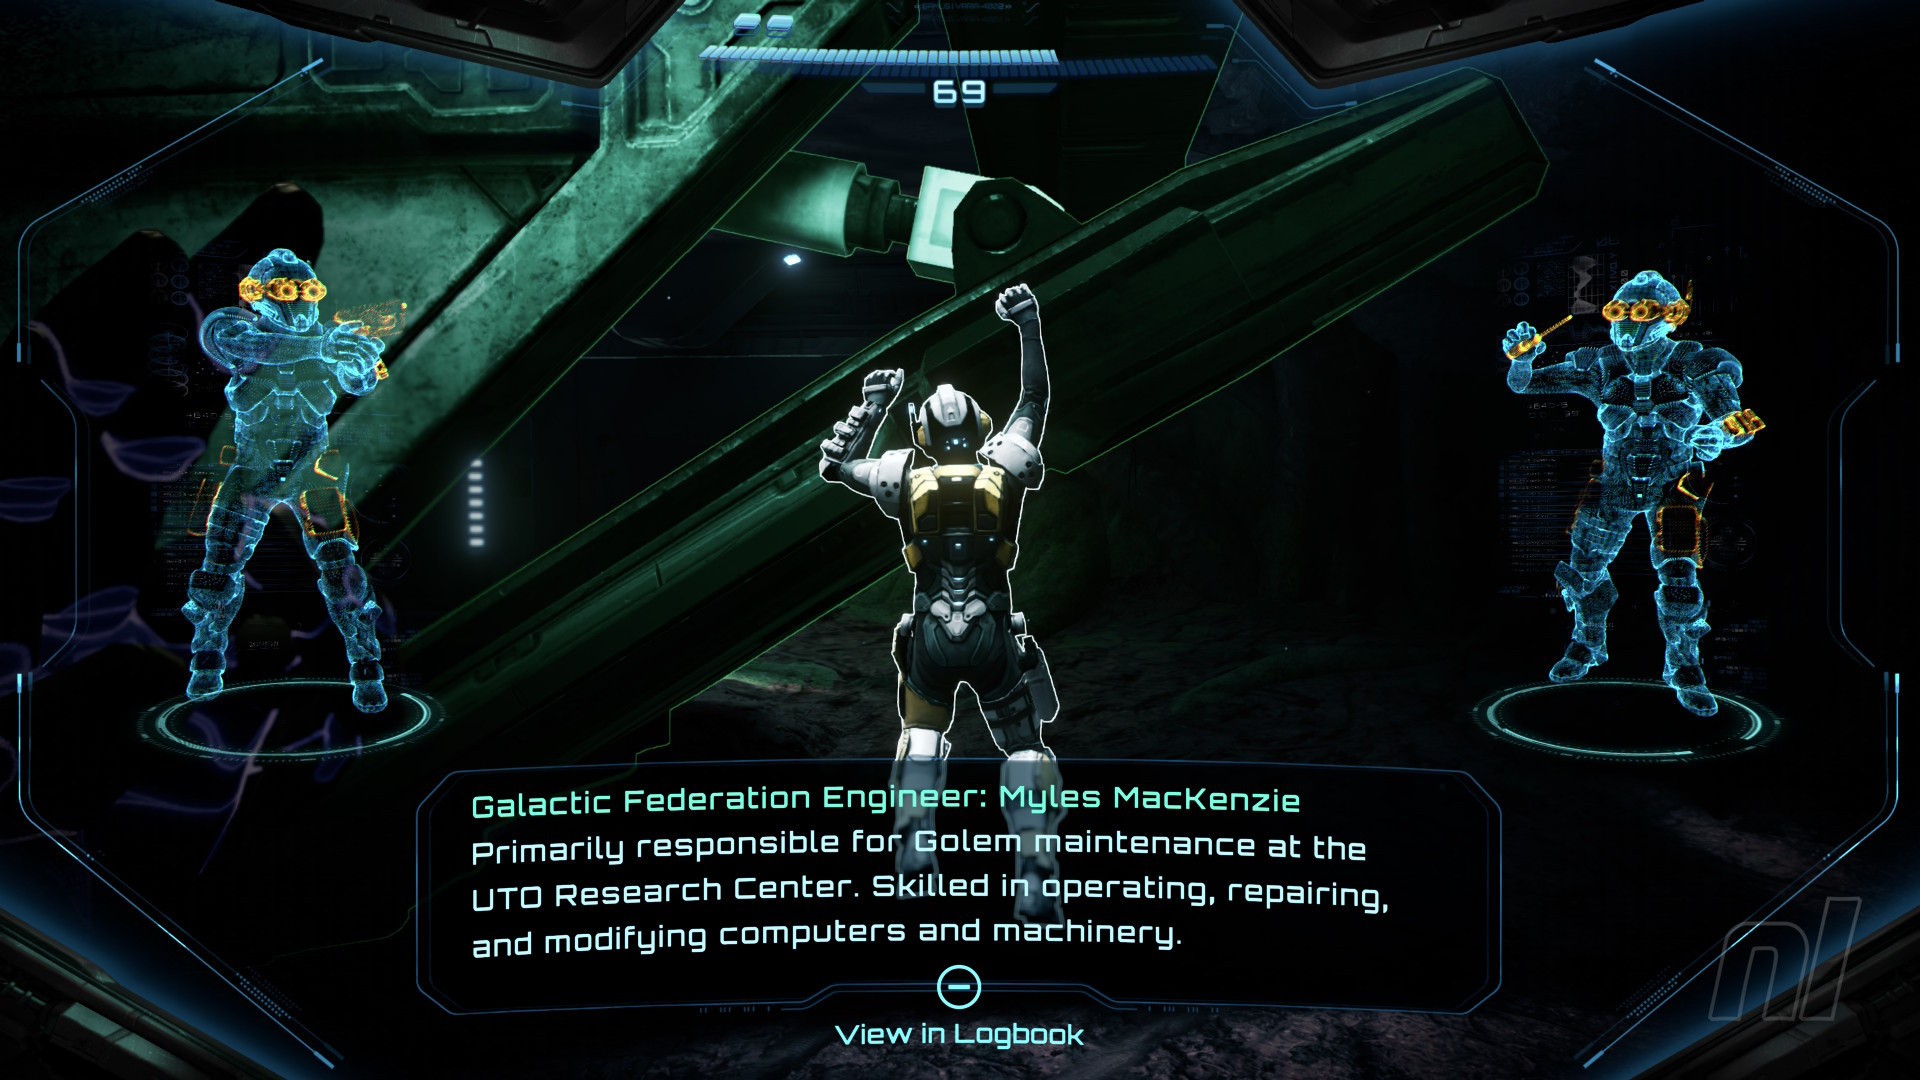
Image: Nintendo
Now help him out by shooting the piston inside the door to release it (and cause Myles to crash down onto the floor – chortle!).
Power Suit Upgrade: Missile Launcher
Okay, now head into the transport unit and grab your next upgrade: the Missile Launcher. Nice.

Image: Nintendo
The way you came is inaccessible, so head in the other direction by jumping on top of the transport unit and onto the ledge. To your left is some fossilised tree resin, so use your missile launcher to destroy it. Proceed back into Resin Creek and destroy the next tree resin.
More Rootspurs will pop up, but your missile can take them out in one hit.
Use the Save Station again if you wish. Otherwise, head through the door and back into Grove of the Sacred Tree. Get rid of the Bristeworts in your way. Ahead, you'll see two tree resin barriers.
Missile Expansion #1
Destroy the barrier on the left to reveal your first Missile Expansion. Grab it!
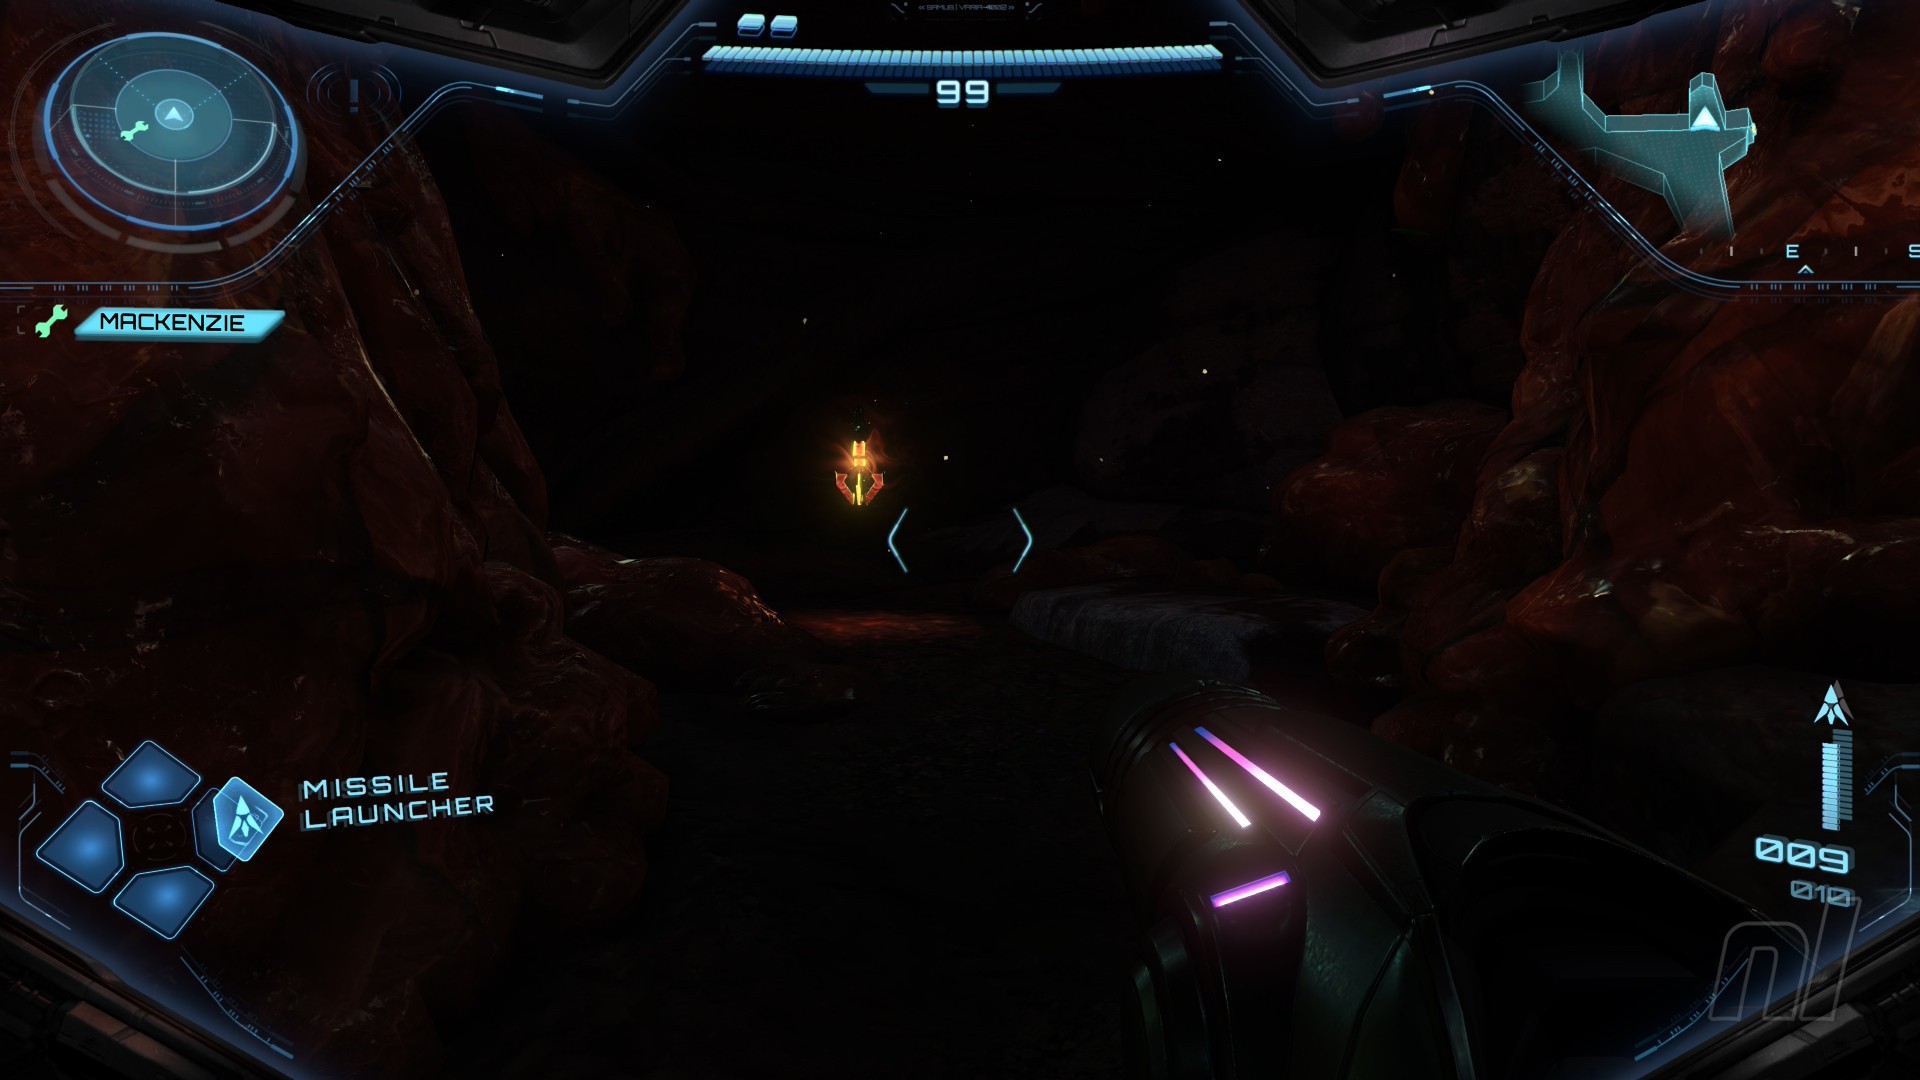
Image: Nintendo
Now launch a missile toward the barrier on the right. Head through the door and into Bridge Landing. Kill the Glottagroppers.
Scan Entry: Lamorn Lore - 'The Crossing'
Over to the left is your next Lamorn Lore scan, so make sure you don't miss it.
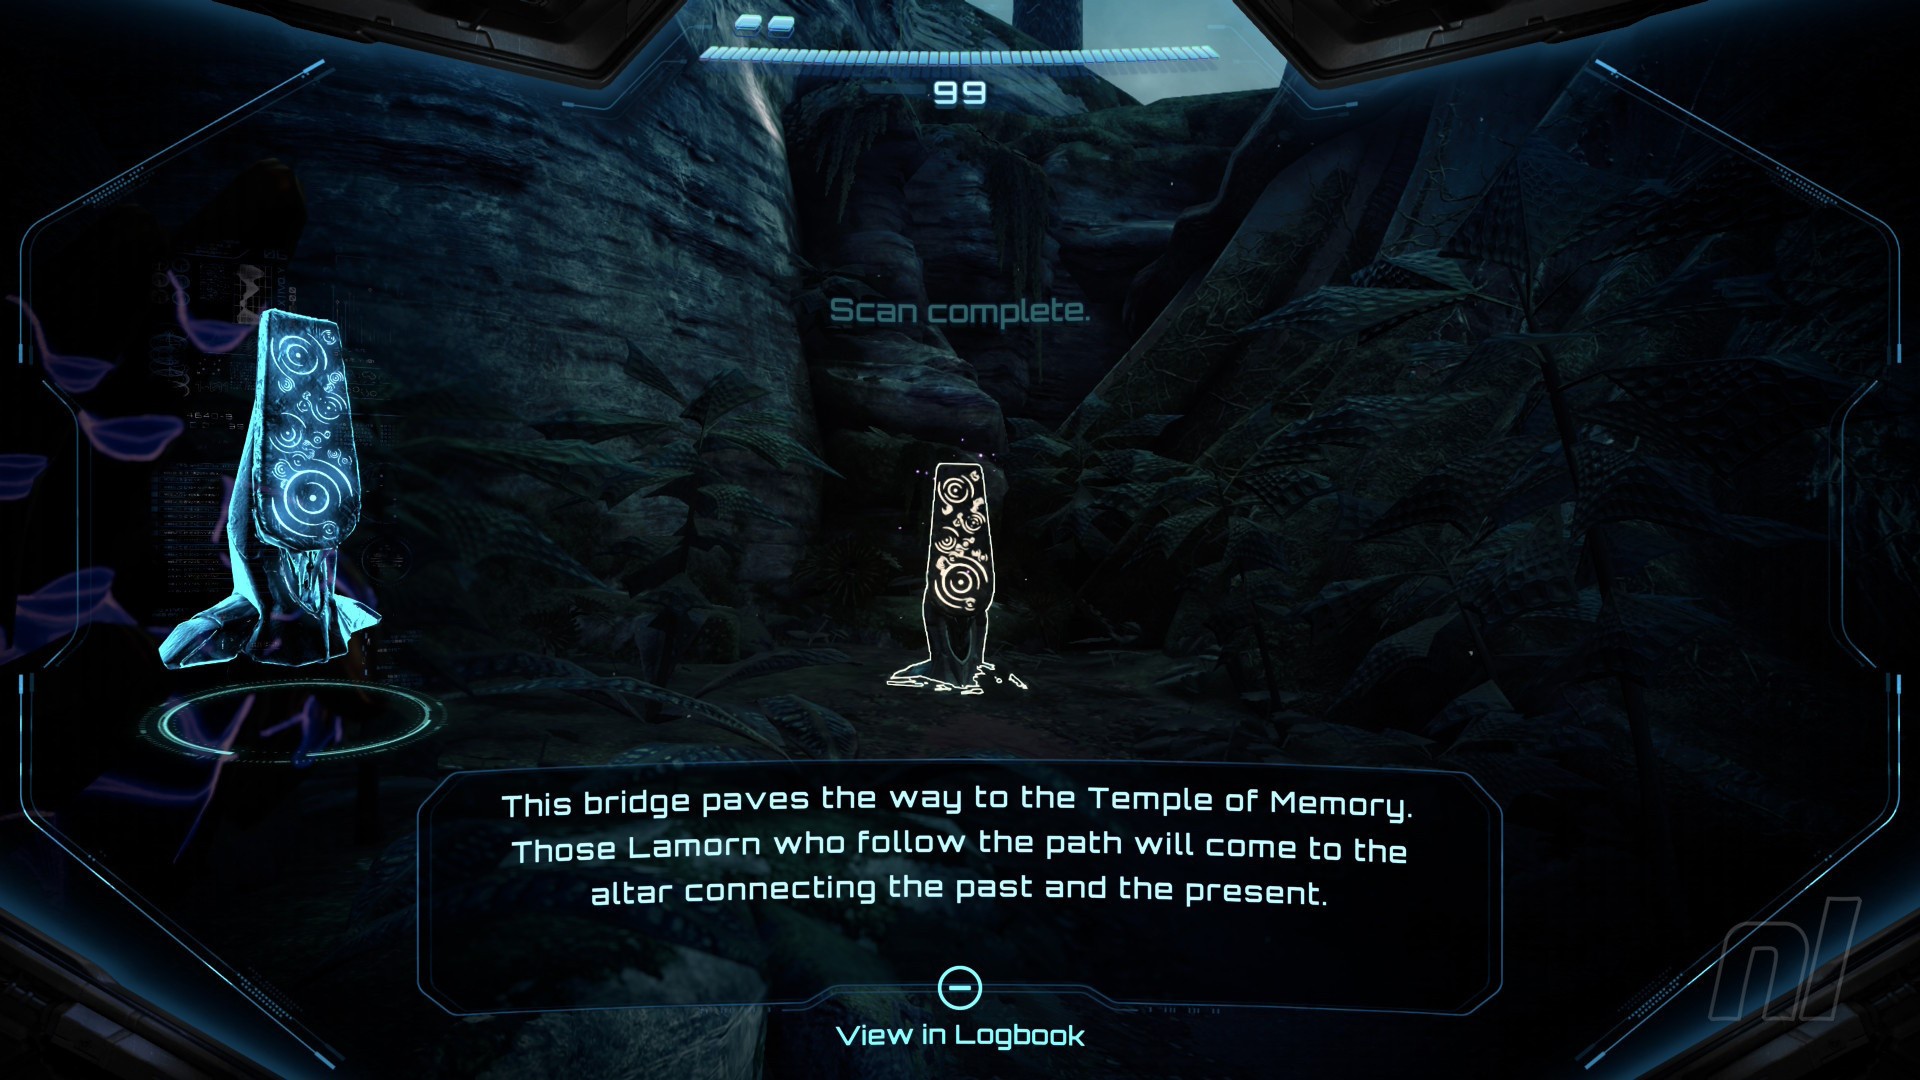
Image: Nintendo
Use your Psychic Glove to open the next door. Get ready for a spectacular view! Start making your way across the bridge, but get ready.
More Jungle Grievers will attack at various intervals. Myles will have his own health bar now, so watch it doesn't run out. Don't worry, keeping him safe is pretty easy.
Head on through to Ascension Stairway, then the Temple Entrance.
Here, scan the objects on the left and right to reveal psychic motes (use a missile to get rid of some debris on the right first). Then pop them into the structure in the middle.
Power Suit Upgrade: Control Beam
Once the structure is open, you can grab your next upgrade: the Control Beam.
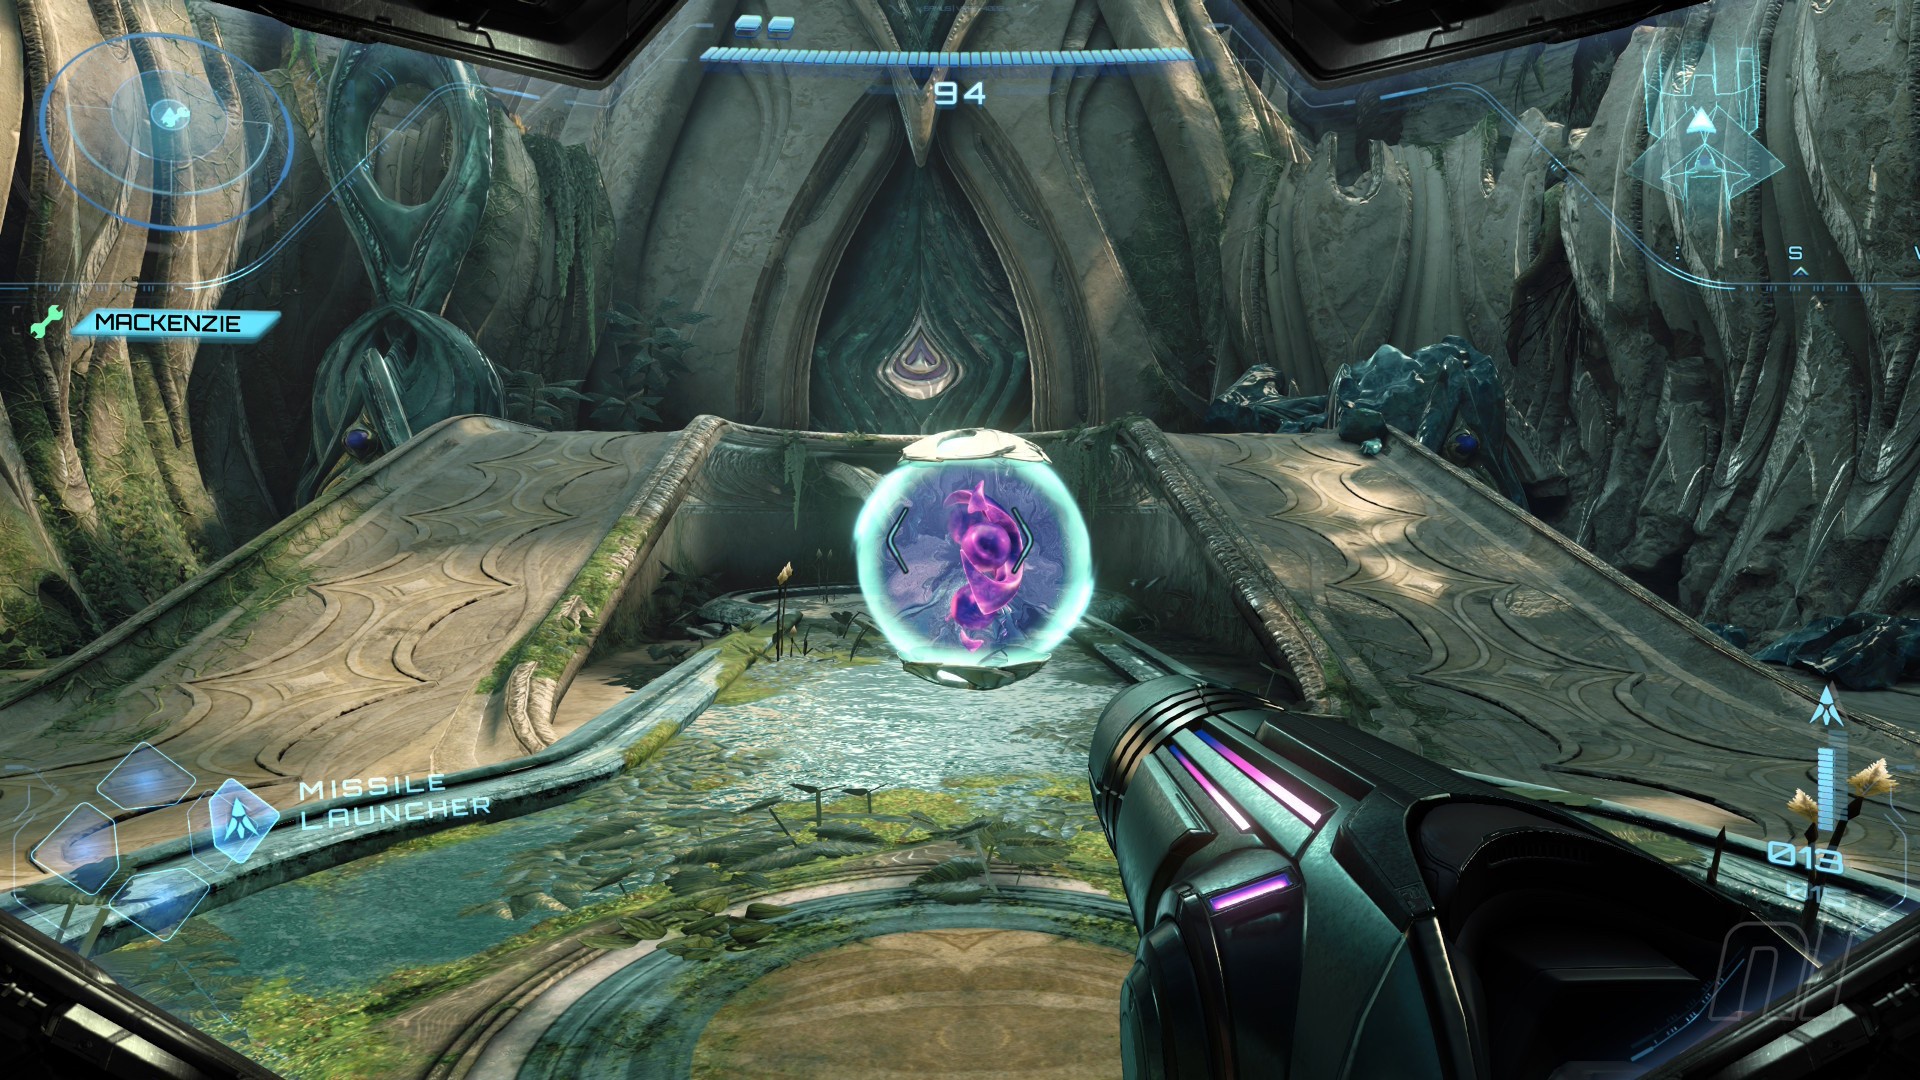
Image: Nintendo
This thing is really cool, and to demonstrate, you'll need to use it to activate a sensor hidden up high.
Hold 'L' to enter psychic mode, then hold 'ZR' to power up your beam. Let go, and then use the analogue stick (or gyro controls) to aim the beam and direct it toward the sensor.
When the door is open, head on through to Base Camp. You'll see a Bomb Slot on the left, which will eventually be added to your logbook, but for now, it's completely offline and useless. The door on the right, meanwhile, will lead to another Save Station.
To proceed, activate the machine next to Myles by pressing 'A' next to it. A cutscene will trigger during which Myles will power up the room.
It's only partially powered up, however, so you'll need to guide your Control Beam through the small circle on the far wall and hit the door on the other side. Now blast the amber barrier with a missile and move on through.
Morph ball through the tunnel and head through the next door. Scan the statue on the left to trigger a short cutscene.
Keep note of this room: the Altar of Legacy. You'll be coming back here to deposit Green Energy Crystals gathered on your journey.
Head on through to the Ceremonial Chamber and stand on the podium ahead. Three targets will appear, so use your Control Beam to hit all three. Quick tip: once each is in your general field of view, you'll be able to lock on, ensuring you don't miss any of them.
Head through the next door and into Path of Reflection. There are four statues here, each of which adds another entry to your logbook, so let's go through them all...
Scan Entry: Lekhash

Image: Nintendo
Scan Entry: Vahkuun
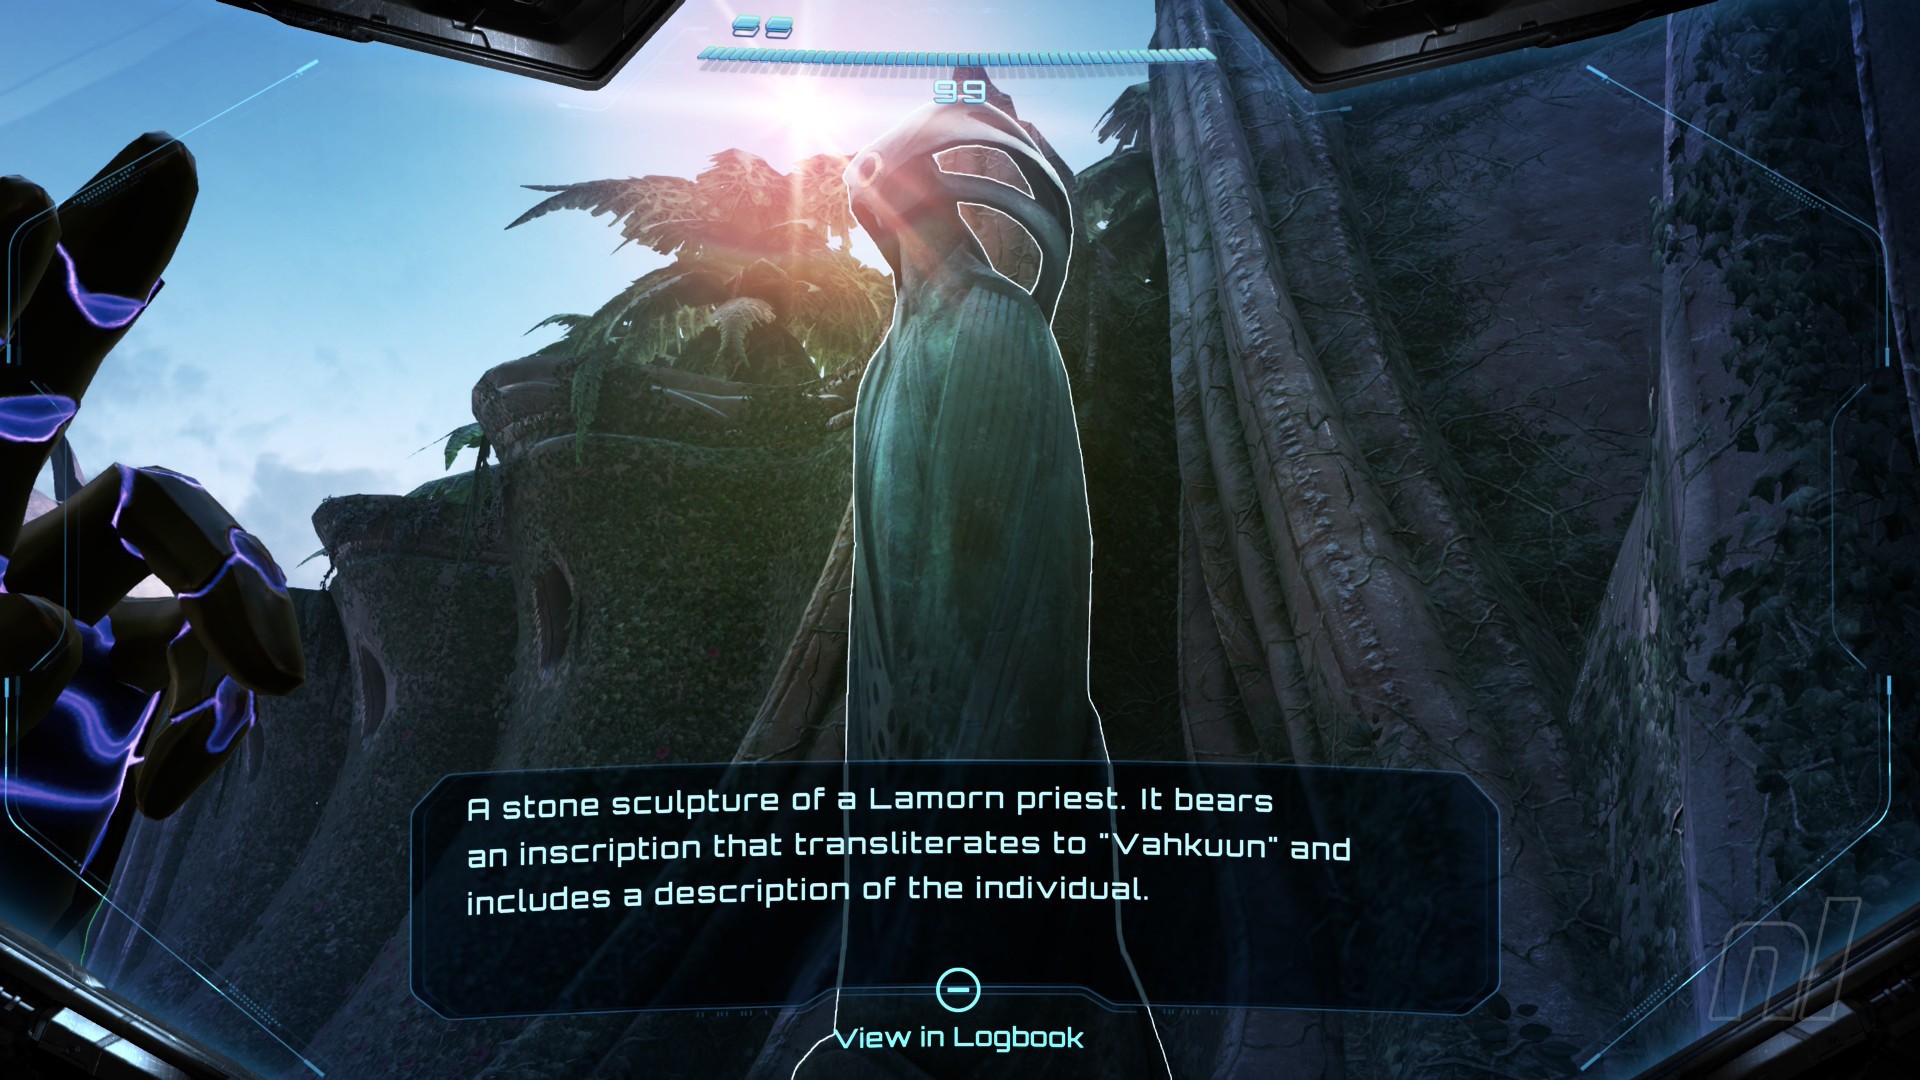
Image: Nintendo
Scan Entry: Shei
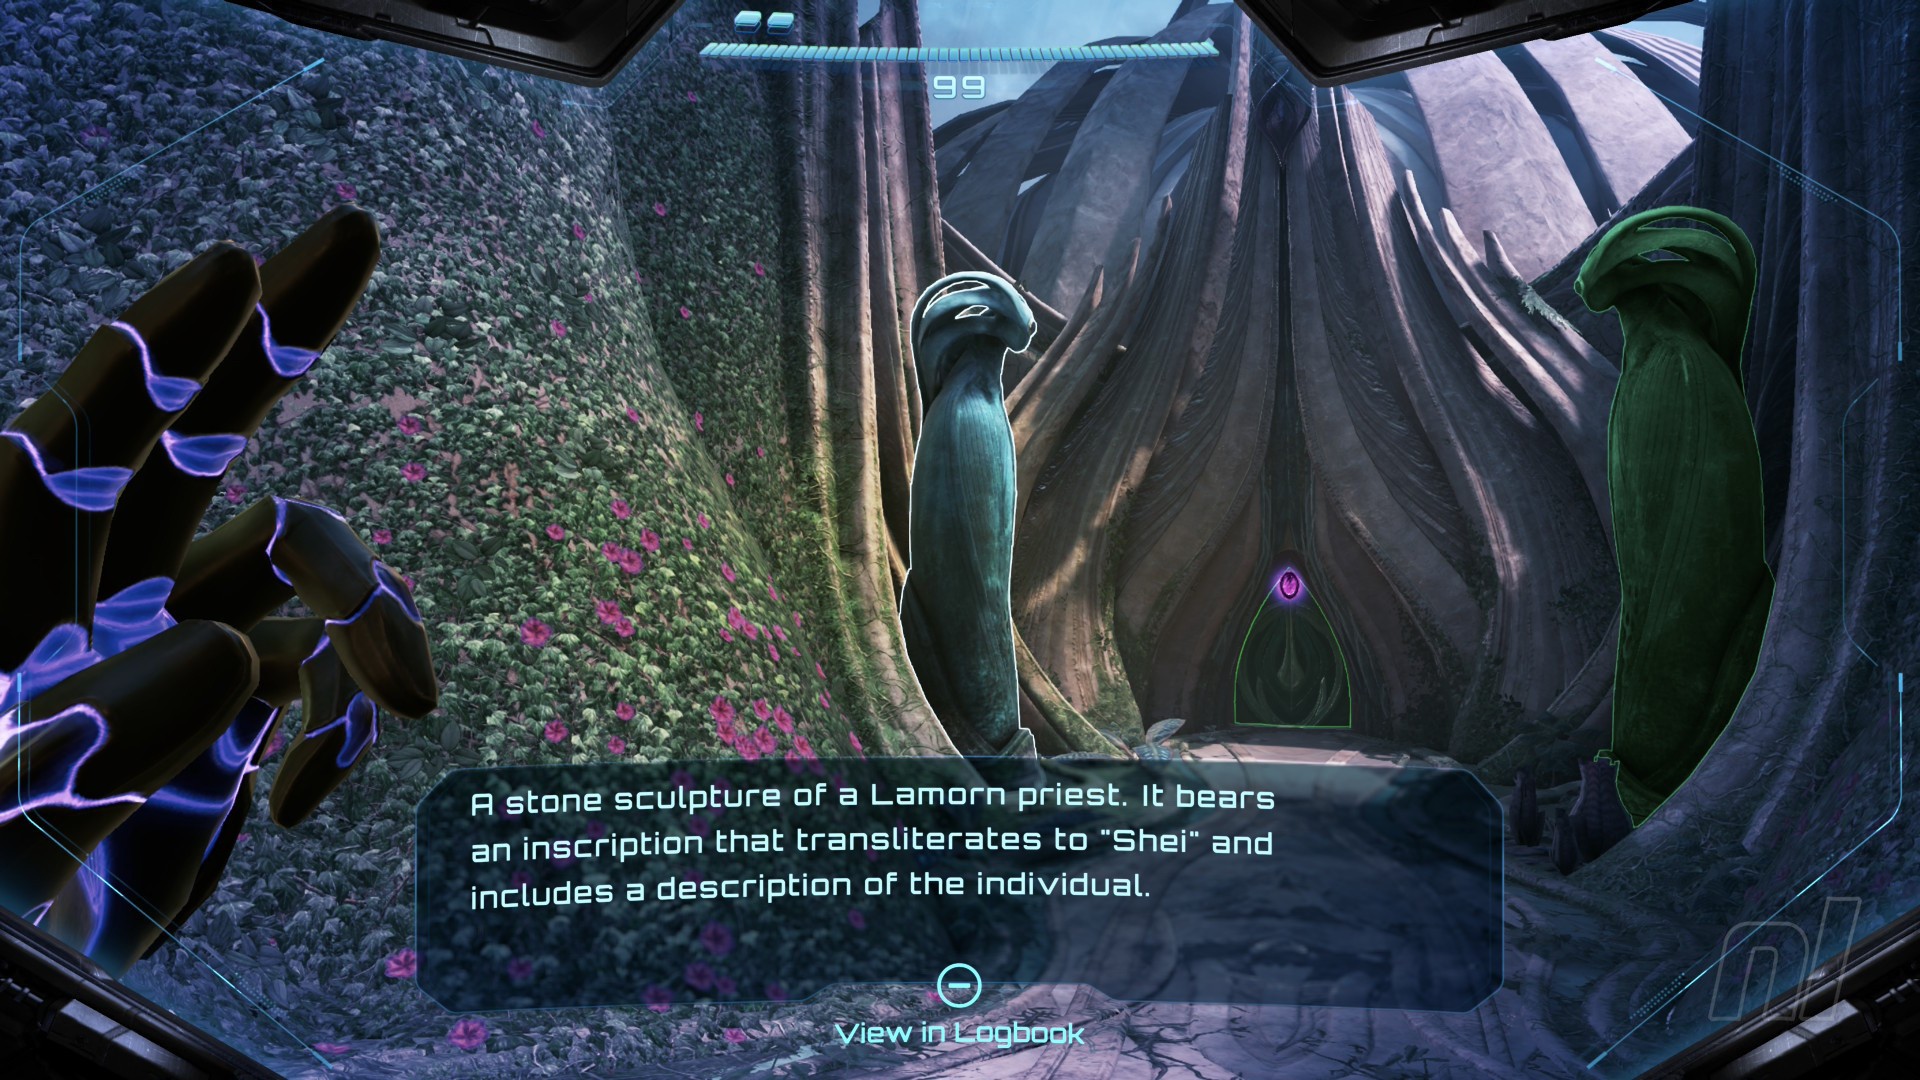
Image: Nintendo
Scan Entry: Thesarh

Image: Nintendo
Now use the Psychic Glove to enter the next door.
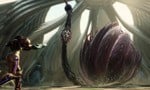
In what will no doubt bring back memories of Flaahgra from the original Prime, you'll come across a giant vine-like creature, and this is your next boss battle.
There are three things to scan here, so be careful and make sure you grab them all.
Scan Entry: Carvex

Image: Nintendo
Scan Entry: Carvex Vine

Image: Nintendo
Scan Entry: Carvex's Pollen Sac
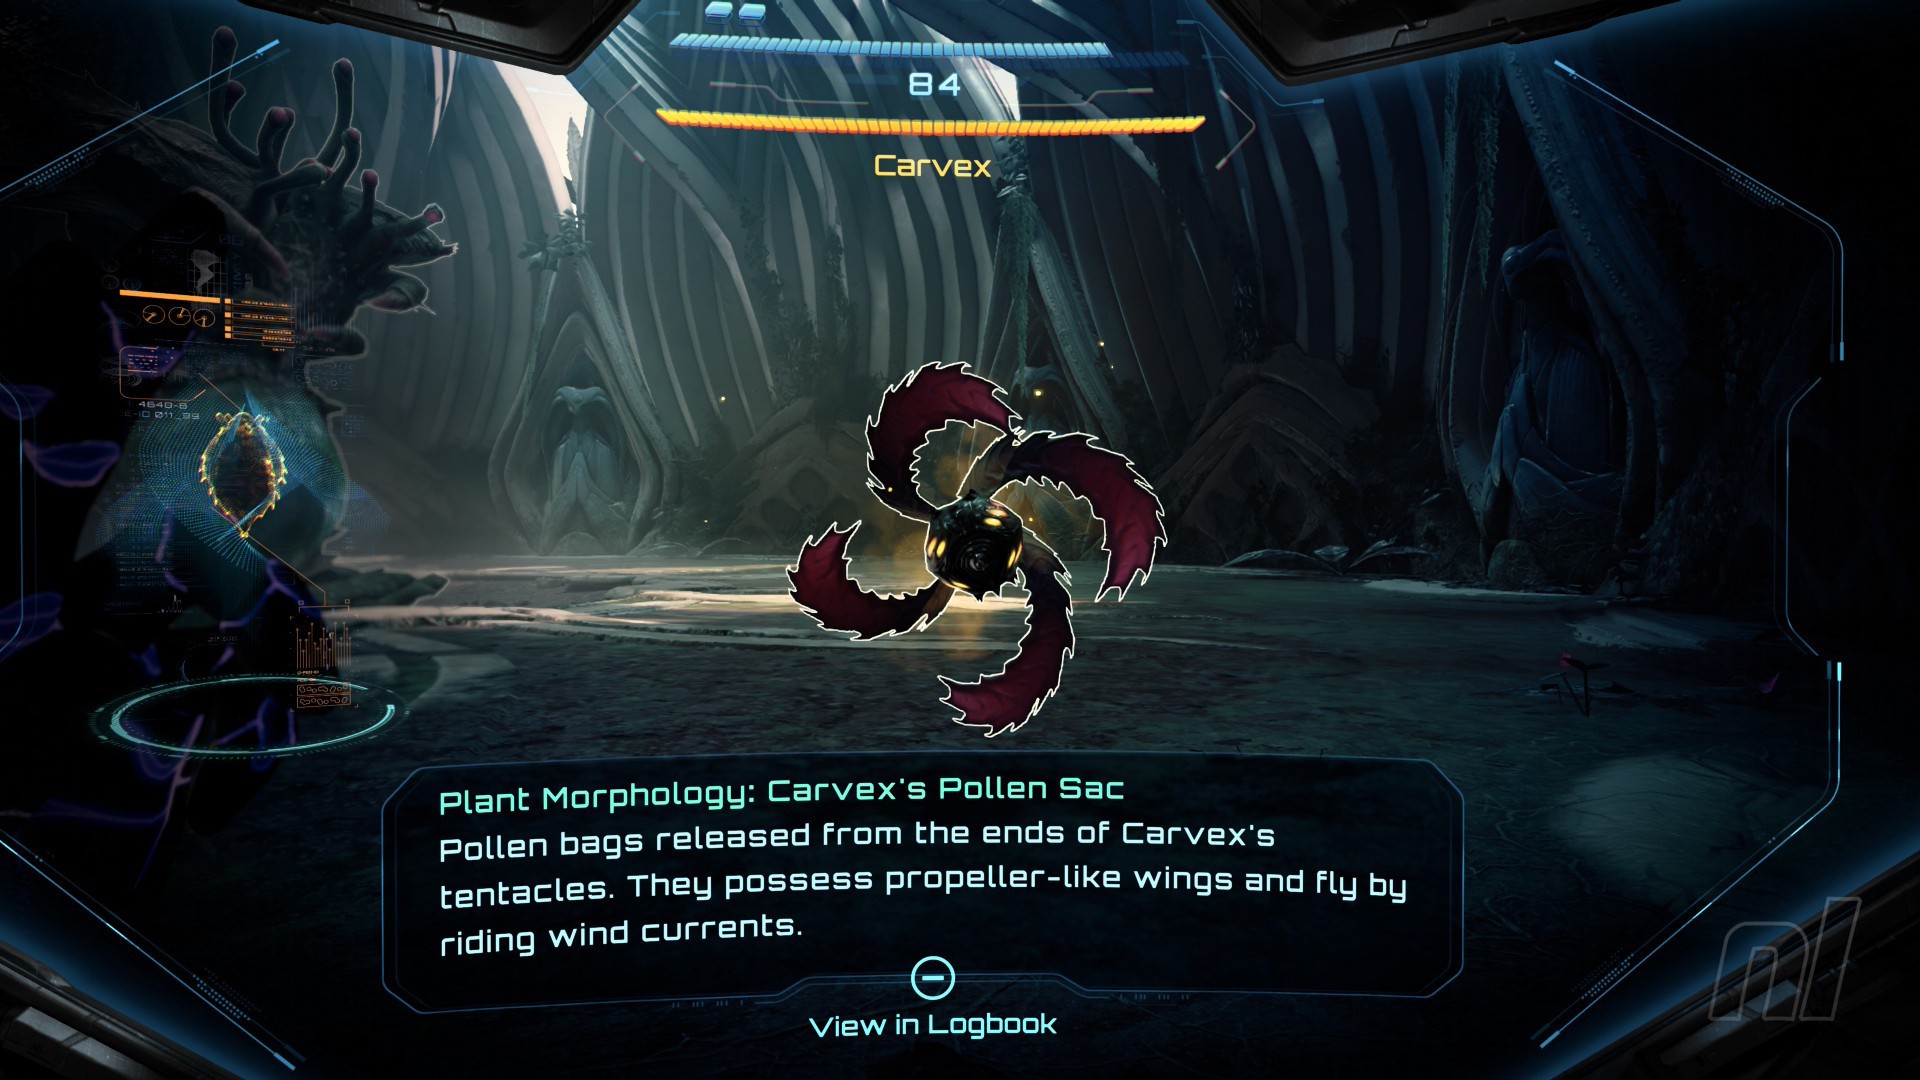
Image: Nintendo
If you're struggling with this boss, consult our guide on How to Beat Carvex.
Related Articles
Guide Metroid Prime 4: Beyond: How To Beat Carvex
Ready, aim...
Power Suit Upgrade: Psychic Bomb
Defeating Carvex will nab you your next upgrade: the Psychic Power Bomb. Just go down into morph ball mode and press 'A' to drop a bomb.

Image: Nintendo
A mysterious platform will appear. Scan it.
Scan Entry: Sacred Shrine
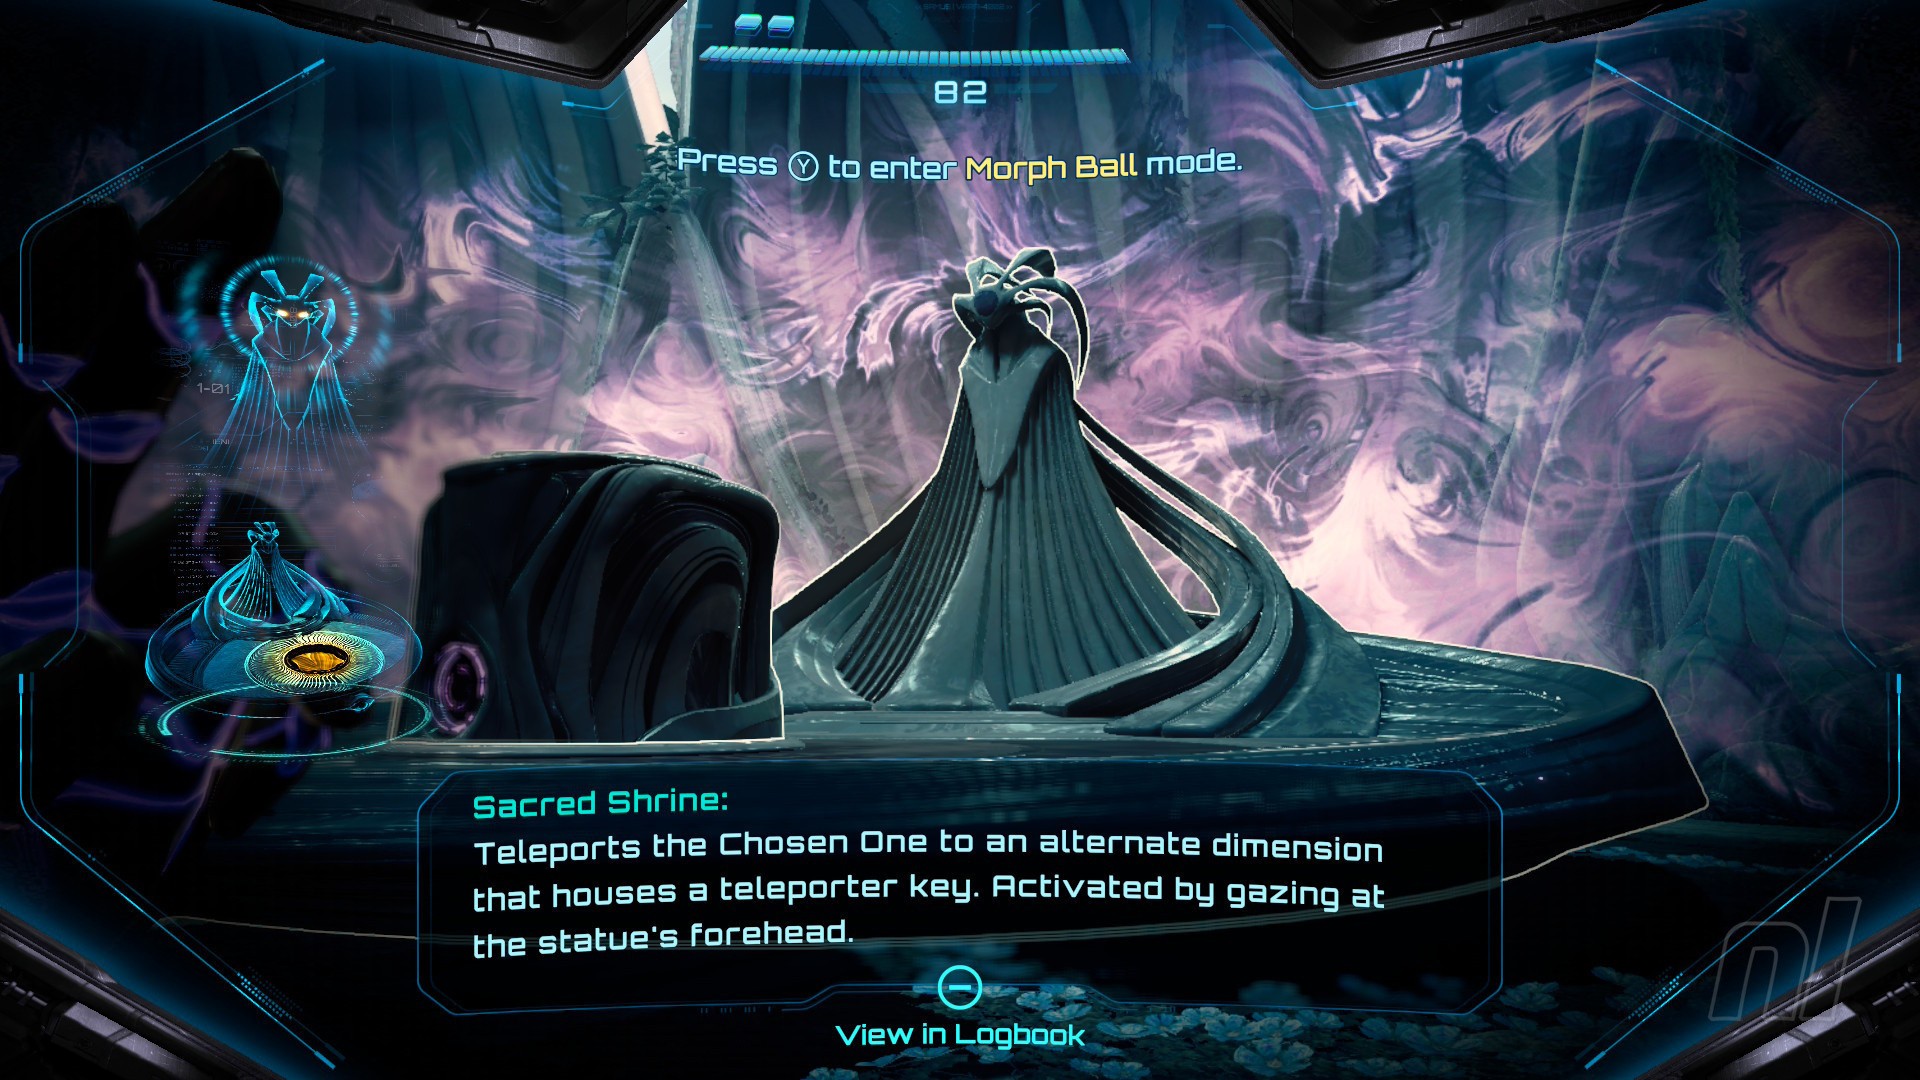
Image: Nintendo
Move into the centre and drop a bomb into the slot to activate it. Now walk onto the platform and look up to the light. You'll be transported to another dream-like realm. Move forward to automatically grab the Master Teleporter Key.
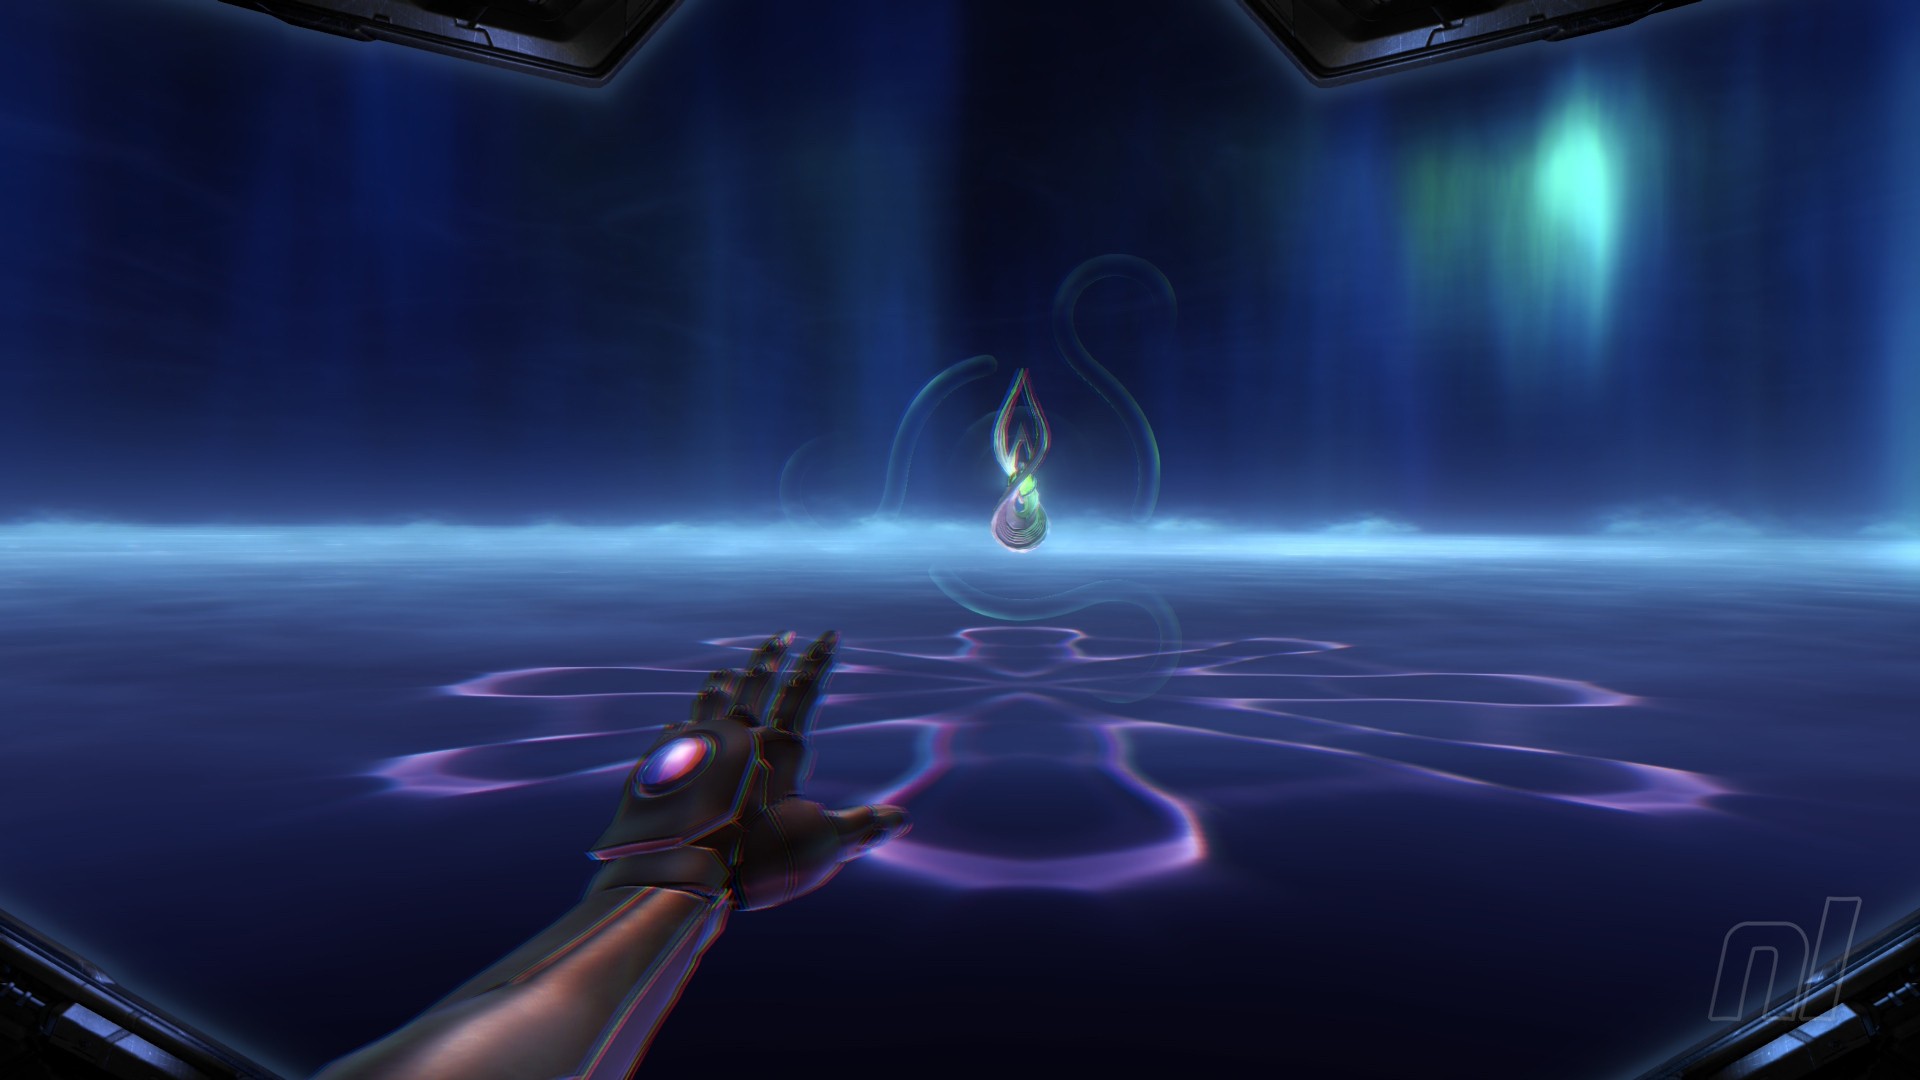
Image: Nintendo
When you're back in the real world, Myles will summon you back to the Base Camp. Head to the left and bomb the Ononalt Palm blocking the tunnel. Head through, bombing more blockages along the way.
You'll exit in Jungle Path, where you'll find some material that will become quite important on your journey.
Scan Entry: Green Energy Crystals
Yes, your first lot of Green Energy Crystals are right here. When you've scanned it, destroy the lot with a few missiles or charge shots. The crystals will absorb into Samus as you move toward them.
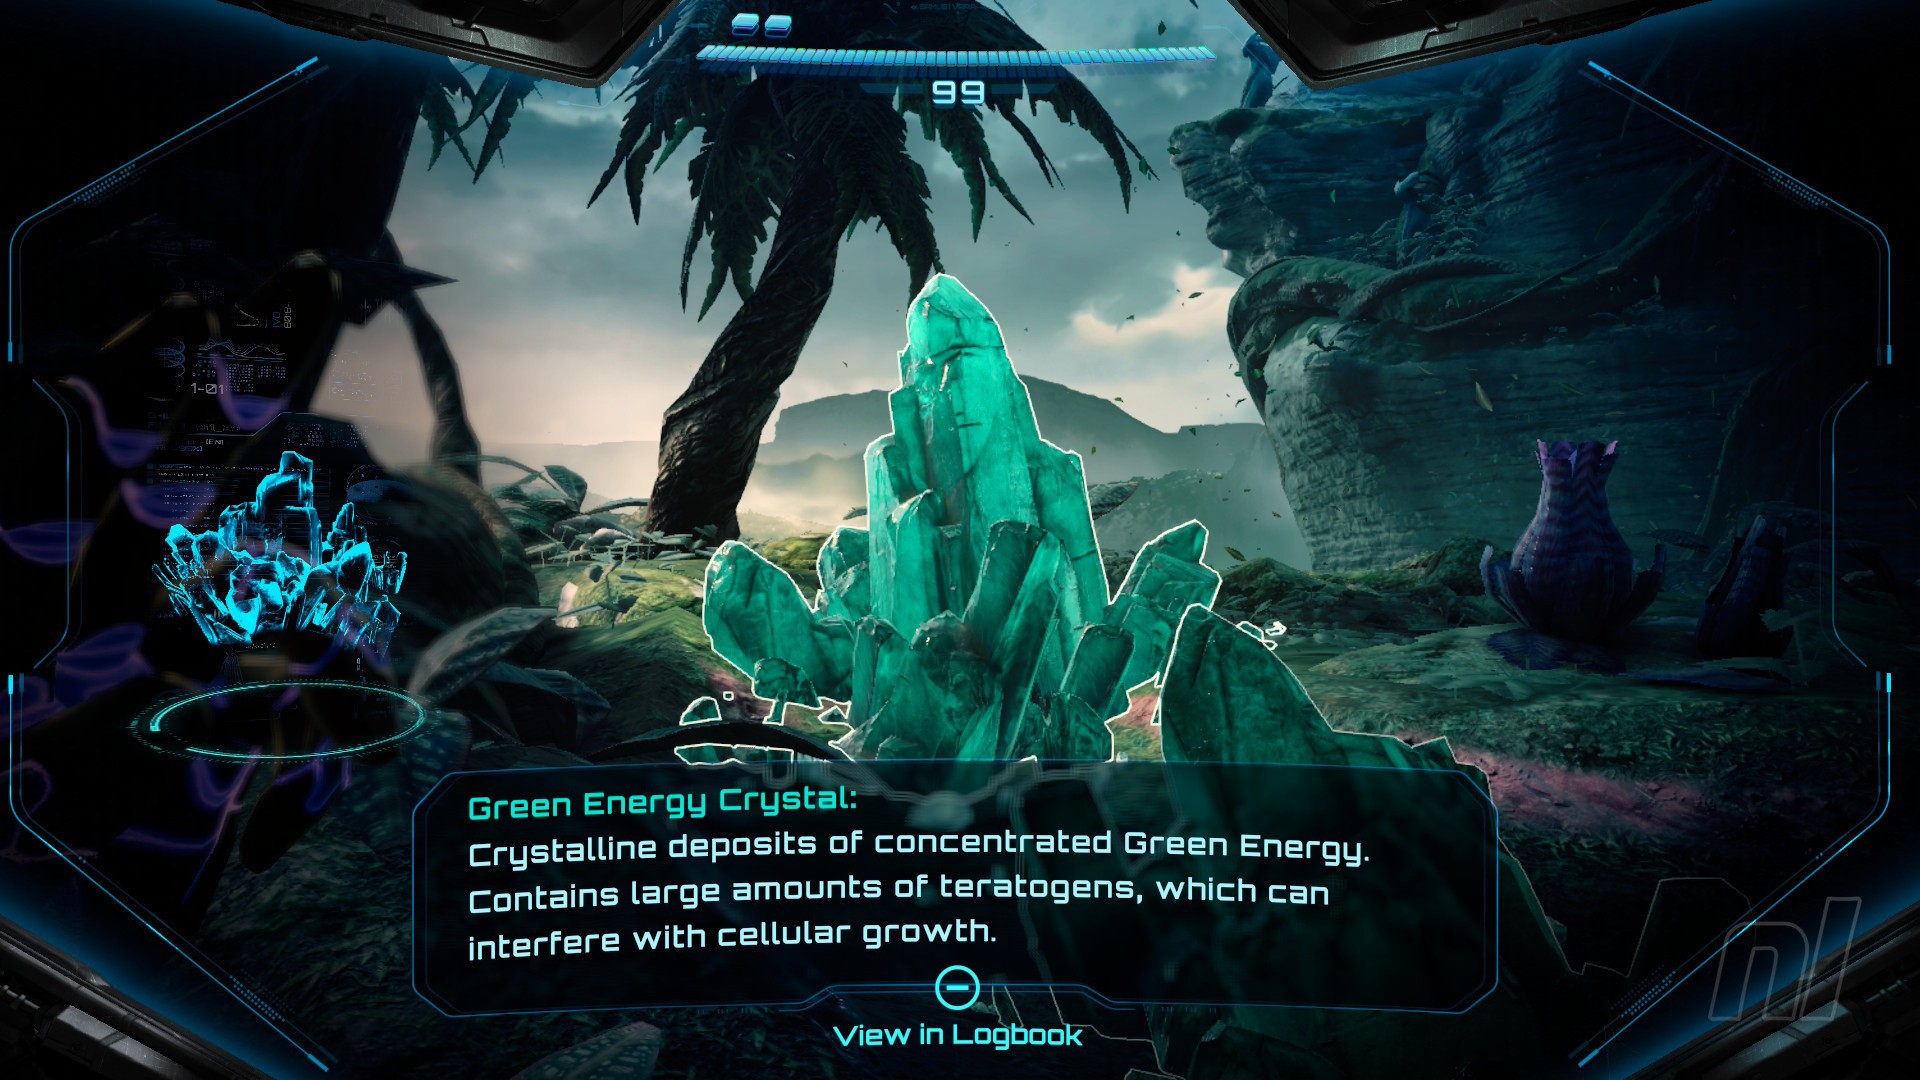
Image: Nintendo
Use your scan visor to check you've got them all. Anything remaining will be highlighted.
Head through to the Root Tunnel. Here, go into morph ball mode and move through the tunnel to the left, bombing obstructions along the way. You can either use the bomb to launch yourself up into the air to reach ledges, or press 'X' to simply jump up while in morph ball mode.
You'll emerge in the Ceremonial Chamber, so go left into Altar of Legacy. While you're here, you can deposit those few Crystals you found in Jungle Path.
Press 'A' next to the pedestal and watch the cutscene in which Samus releases the Crystals into the device. You won't get anything for it now, but you can come back later when you have a lot more.
Now head straight back into the Broken Hall.
Missile Expansion #2
As you roll back through the Broken Hall, you'll notice a Missile Expansion on your left.
Use the bomb to destroy the blockage and grab the expansion.
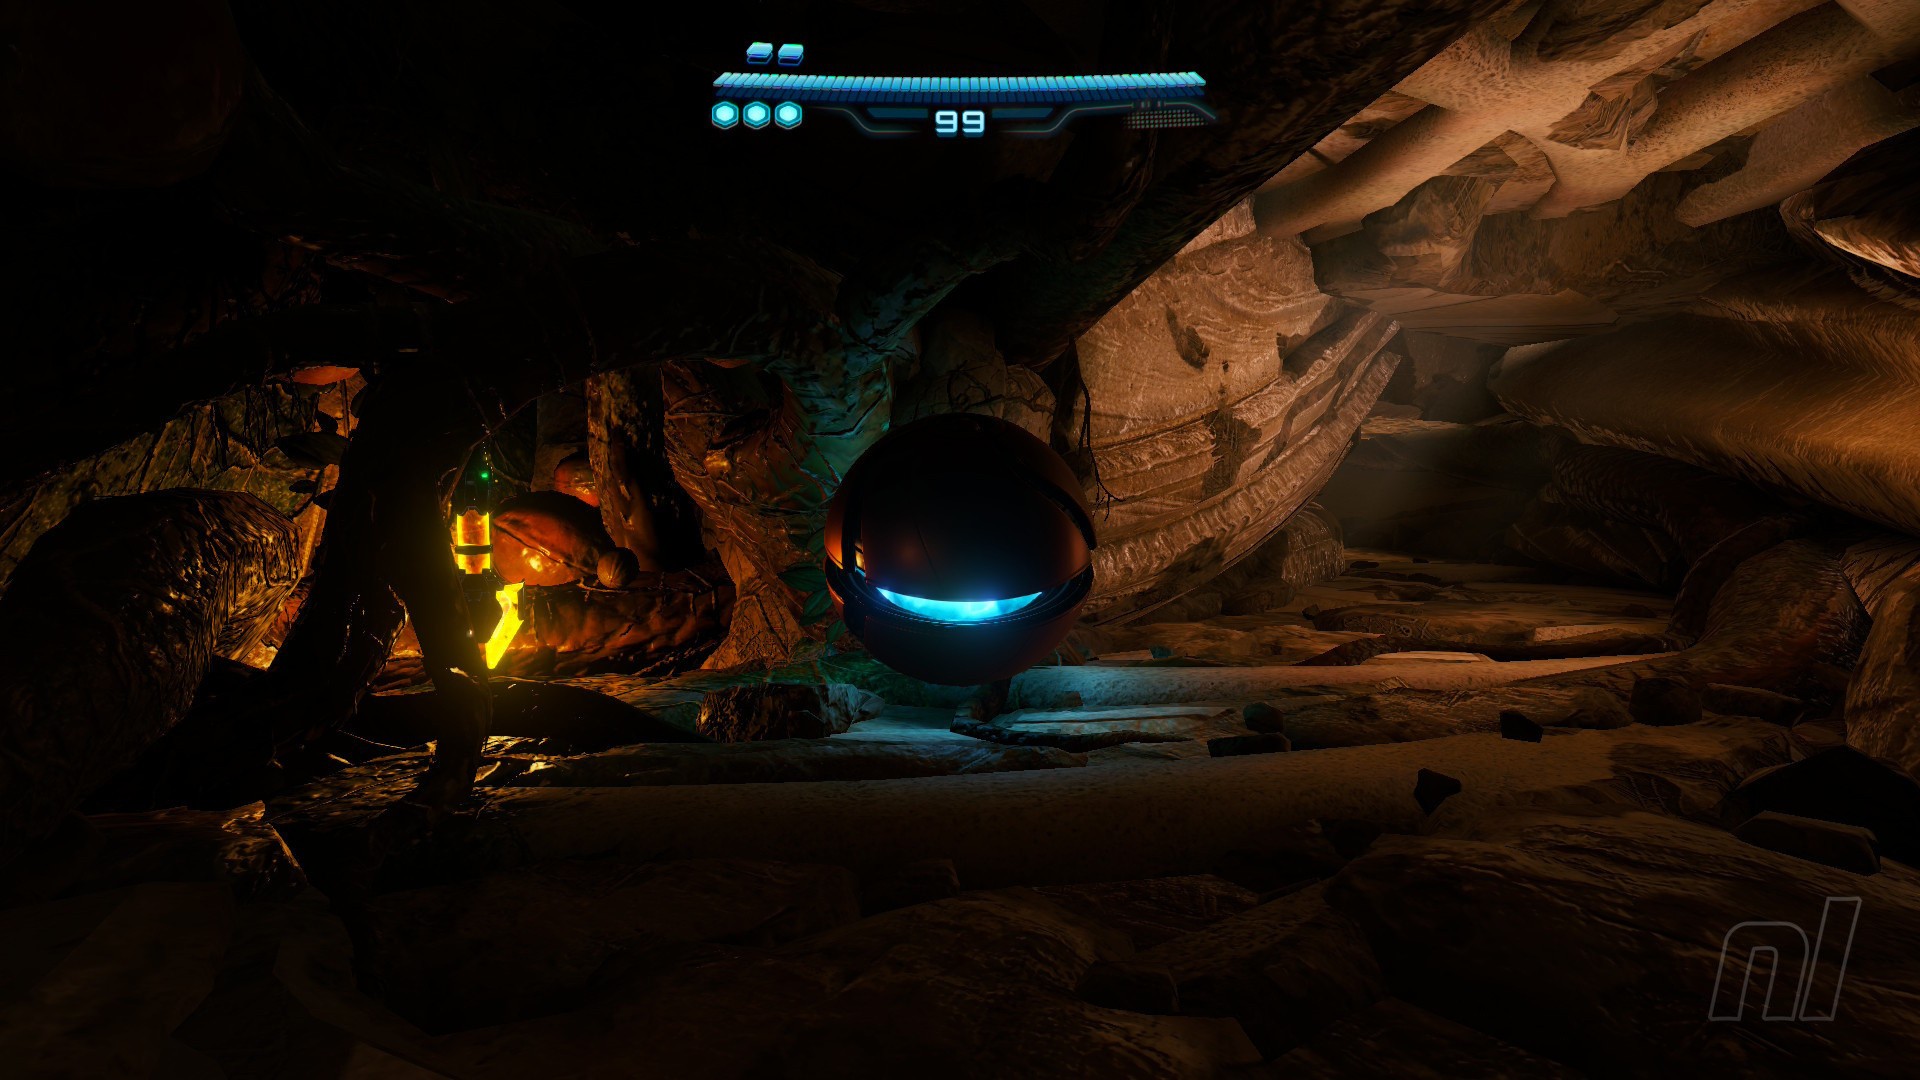
Image: Nintendo
Go back into Base Camp and watch the cutscene.
Scan Entry: Bomb Slot
Okay, now that you have the bomb ability, you can scan the Bomb Slot from earlier and add it to your logbook – neat!
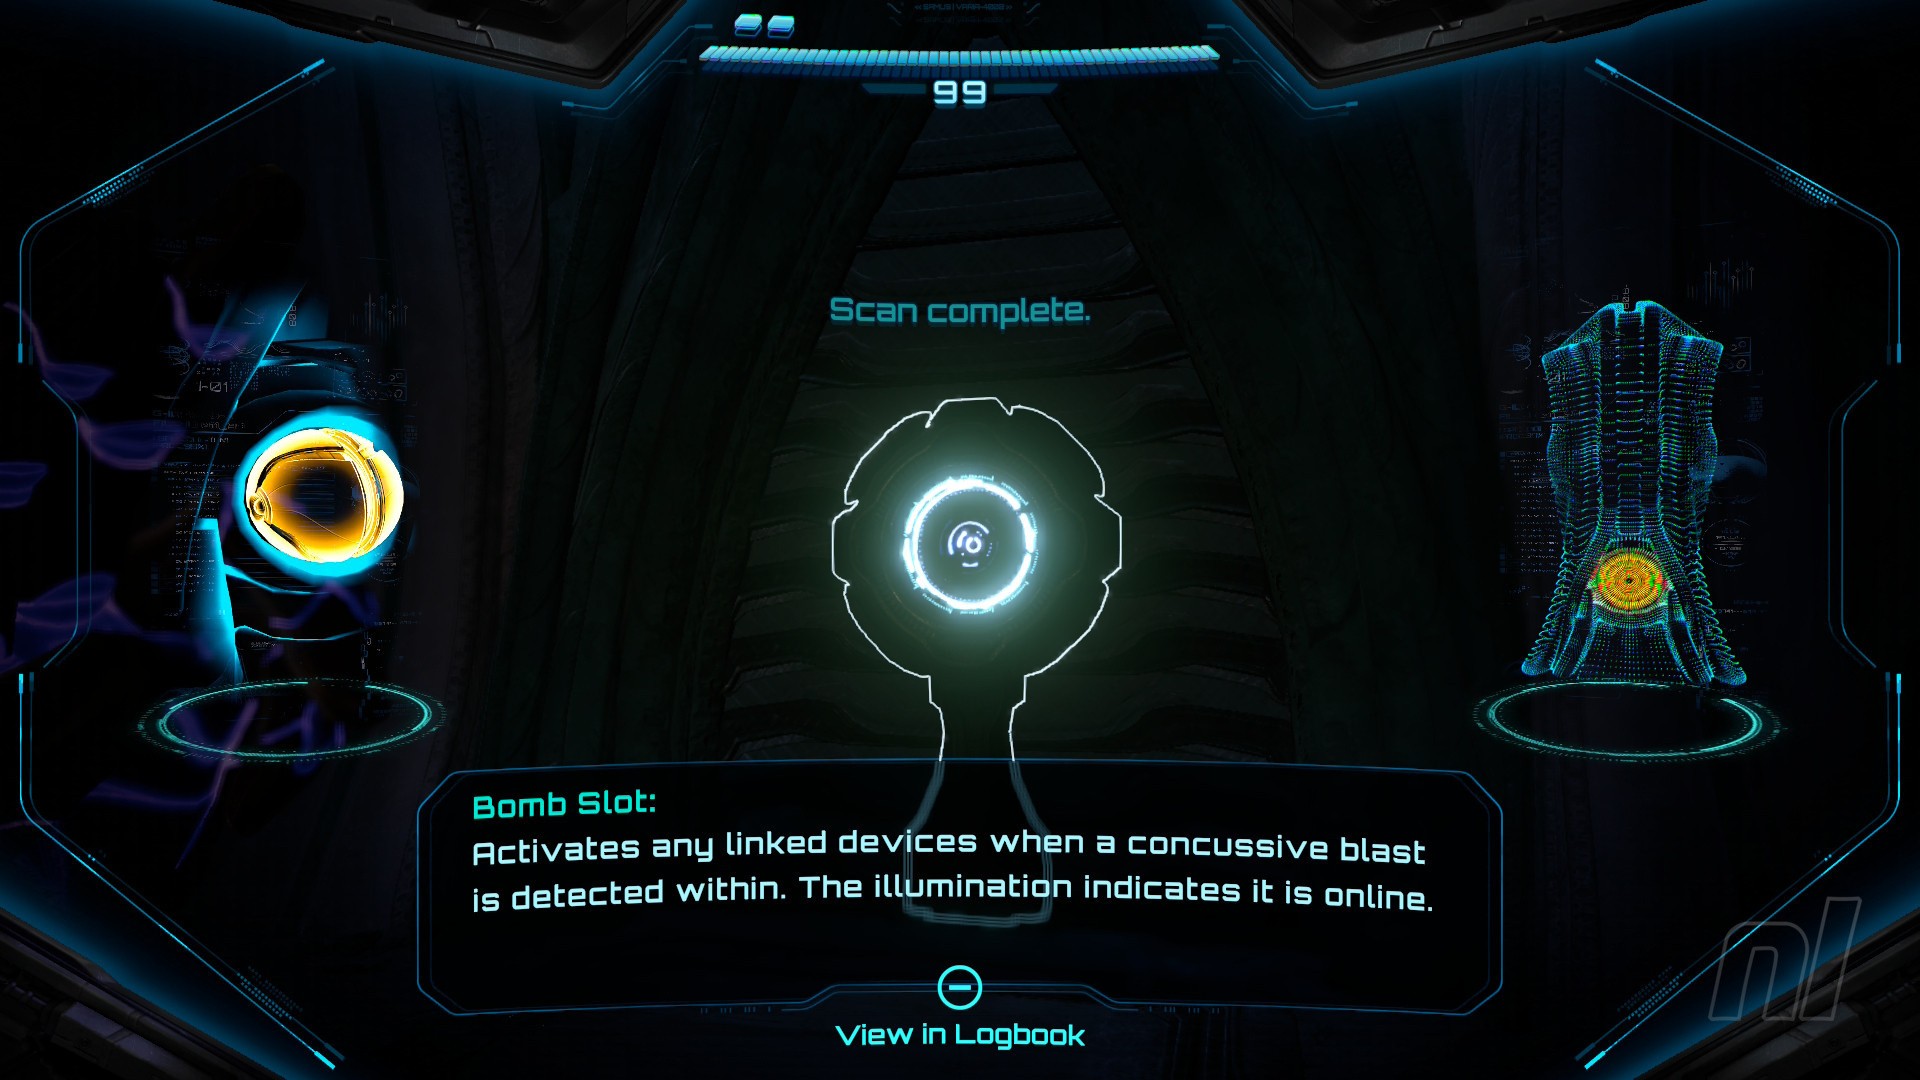
Image: Nintendo
Now activate the Bomb Slot by dropping a, uh... bomb. Myles will explain "eehhhh!" and you'll be able to proceed through to the Cargo Staging Area. You can also save here again, if you wish.
Head straight through this room to reach the Cleared Path. You can't open the door on the right yet, so head left and through to the Cargo Launcher.
There are no collectibles here yet, but take note of the Psychic Platforms on your right. Once you can step onto these, you can come back and grab another Missile Expansion.
For now, you'll need to send a mote into the socket high up. But there's none in sight.
Scan Entry: Cargo Launcher

Image: Nintendo
First, scan the Cargo Launcher itself.
Now, here's where the magic happens. Press 'A' in morph ball form, but hold it to make the bomb float in mid-air. Come out of morph ball mode and press 'L' to go into Psychic Mode. You can now grab the bomb remotely and throw it into the socket. Cool, huh?
This will power up the Launcher. Press 'A' to activate it, then watch the cutscene as it sends you soaring through the sky.
You'll emerge in Sol Valley, with a bizarre structure in front of you. You can destroy the Green Energy Crystals directly ahead if you like, but it's not essential. You can get them later.
To the left is a Lamorn statue. Scan it to trigger a cutscene in which a hologram introduces you to what will become a dear companion: Vi-O-La.
Take note of the Energy Tank locked away in the cylindrical structure next to you. We'll come back to that later.
For now, head down toward the large door. A cutscene will trigger showing remnants of a memory from Samus' past. Intriguing.
Scan Entry: Psy-Bot Soldier
At this point, three Psy-Bot Soldiers will descend from above. Scan them, then fight.
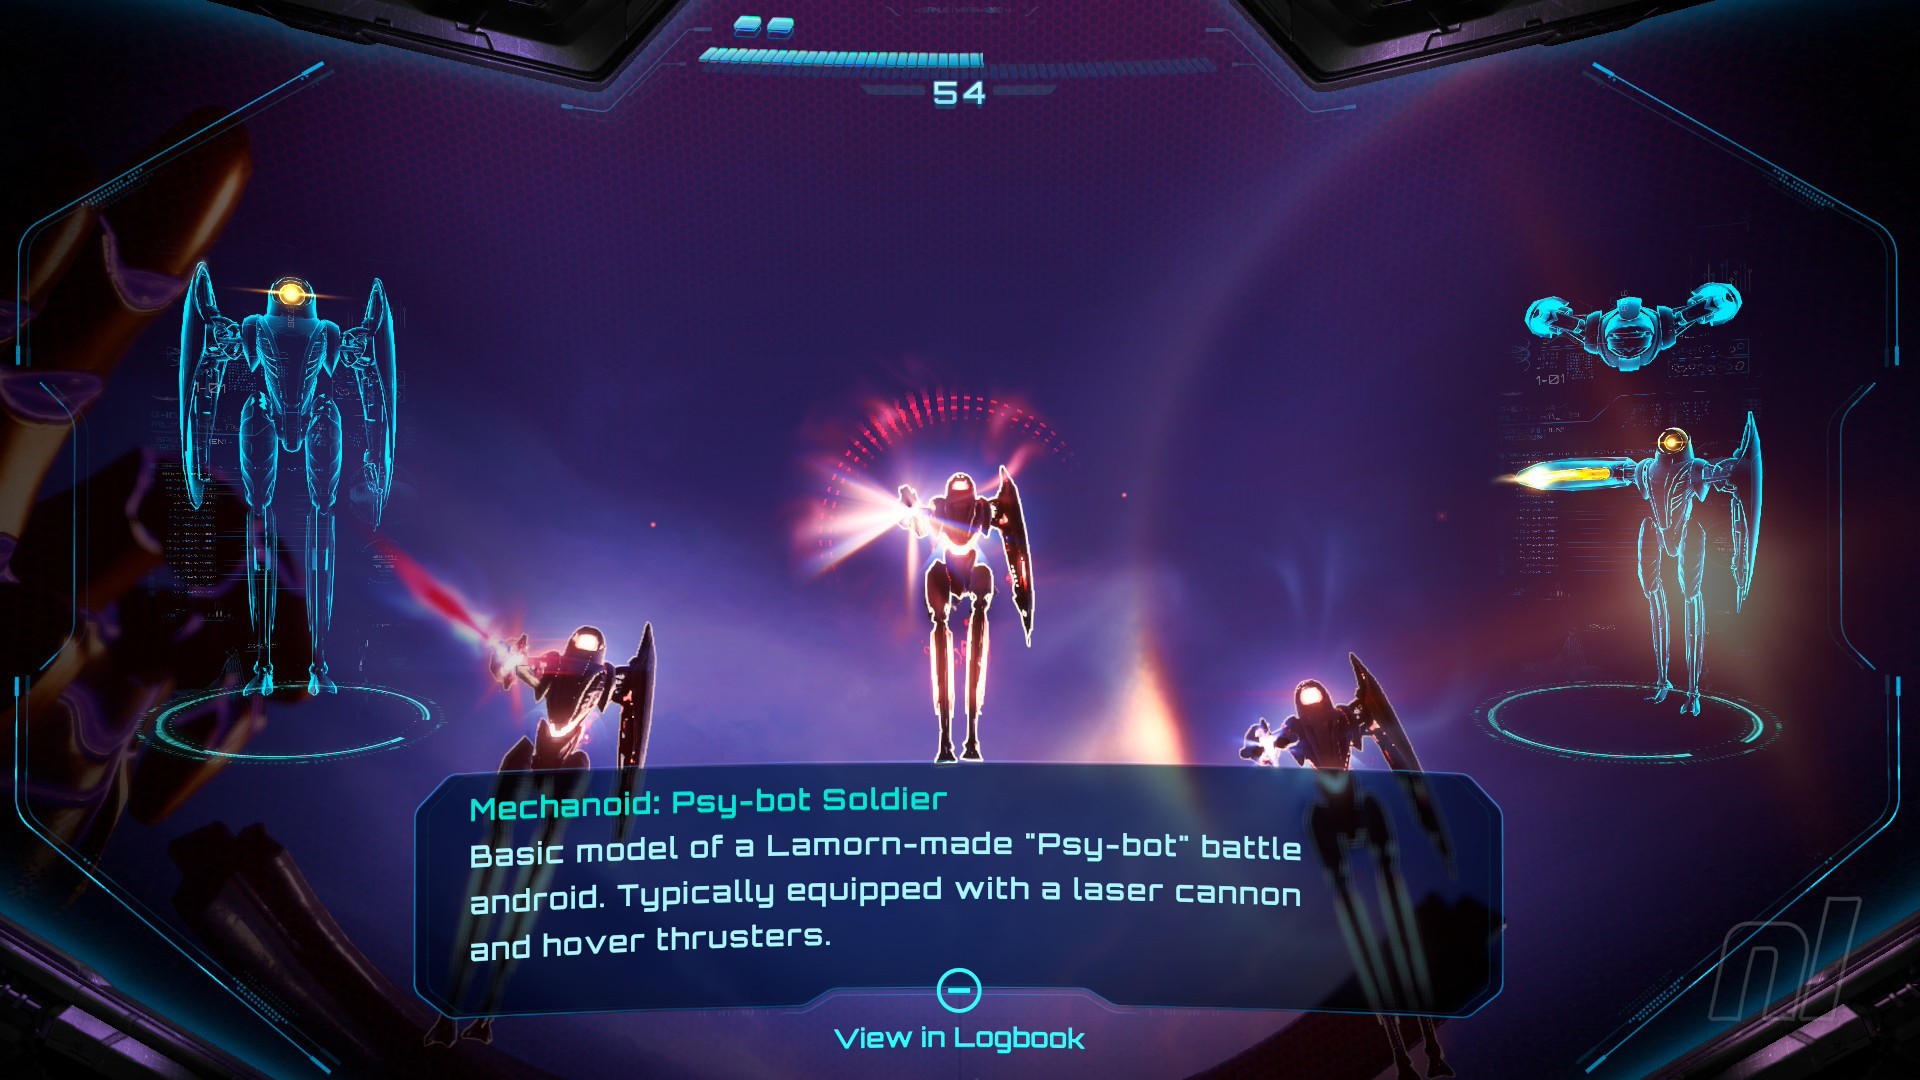
Image: Nintendo
Shoot with your beam and missiles, and dash to avoid the soldiers' laser attacks. They don't need a great deal of damage, so this shouldn't trouble you too much. A few more will enter the fight as you defeat them, however, so stay on your toes.
Scan Entry: Vi-O-La Spinner
Ahead of you is a large circular object embedded in the ground. This is the Vi-O-La Spinner. Obviously you can use it properly now, but you can still scan it.
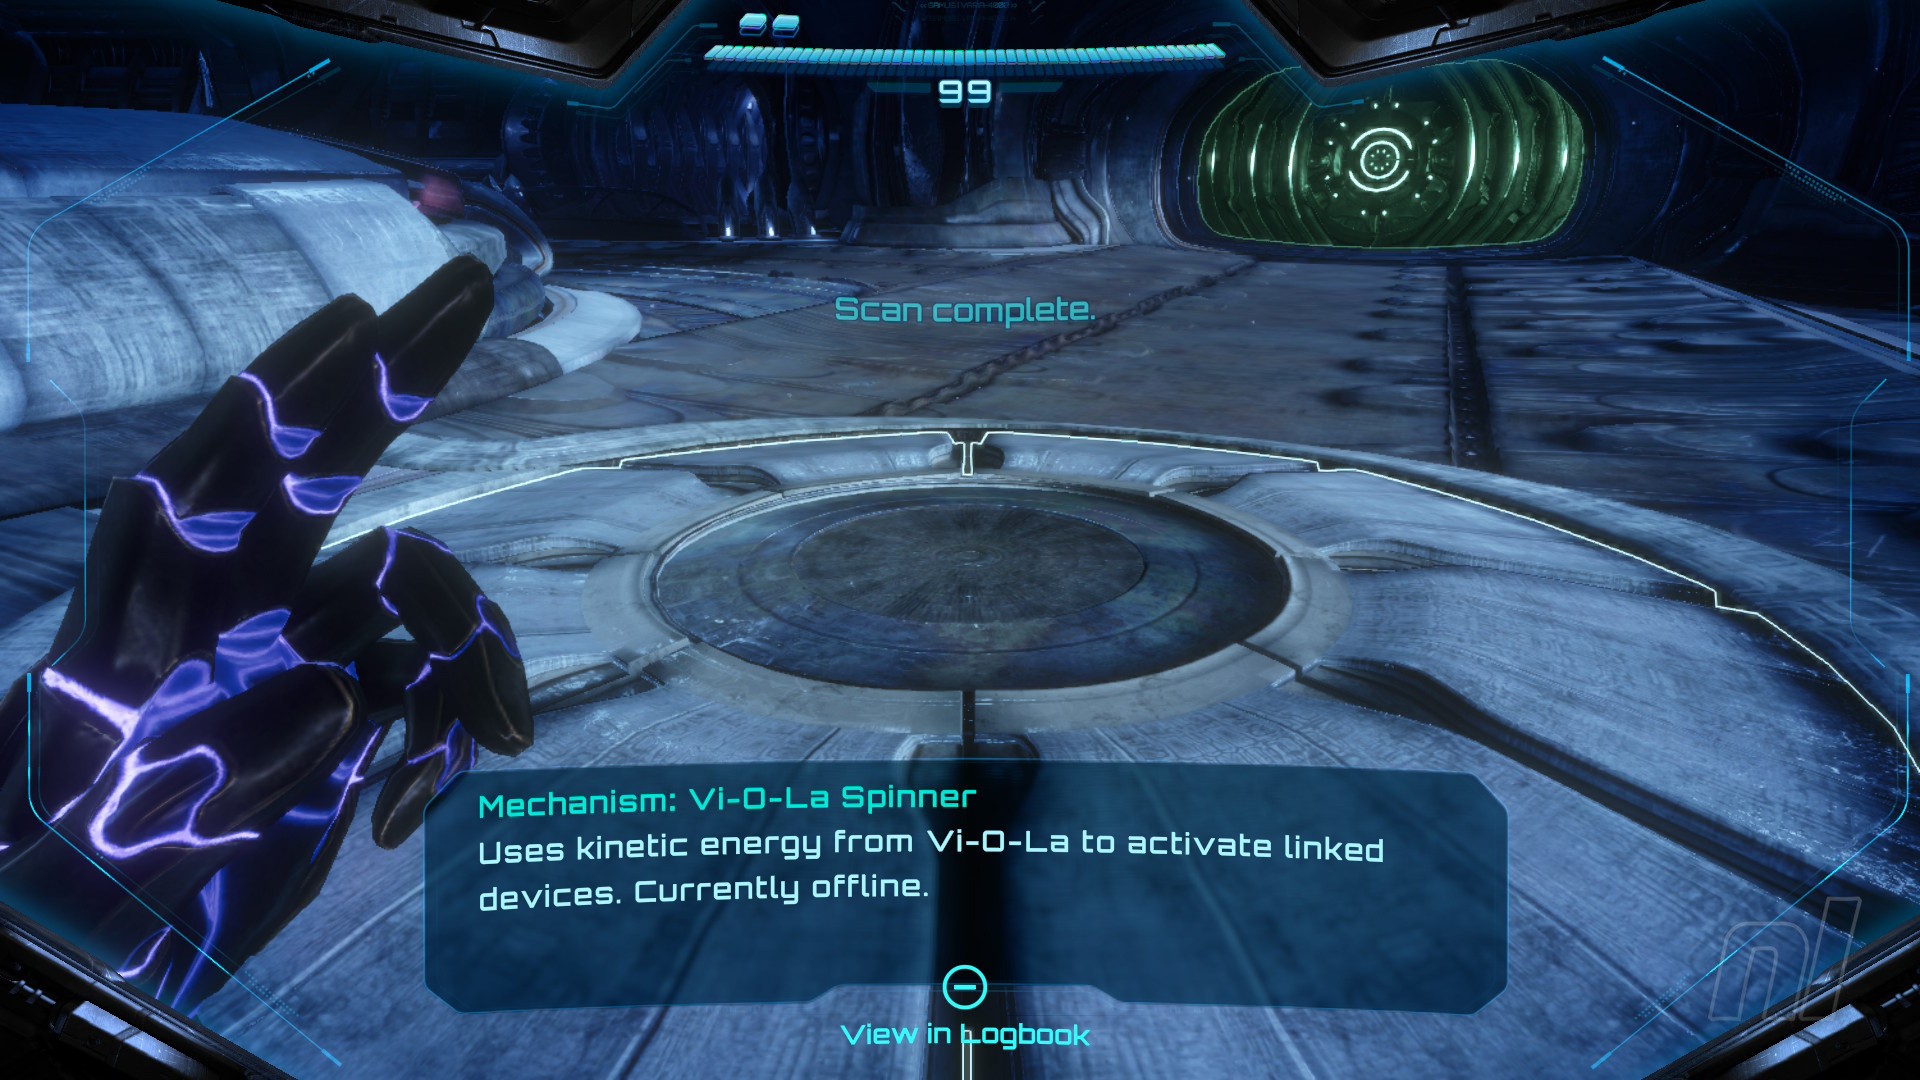
Image: Nintendo
To the right of the main entrance is a Maintenance Tank Tunnel Hatch, perfect for your morph ball. Drop into it and bomb to shoot up and into Volt Forge.
Here ends the section of our walkthrough covering Fury Green. We're just getting started.
Recommended Comments